List Basics
What you will learn in this guide
This guide will teach you how to create basic lists in Noodl using the Repeater node that is being fed through an Array. It will show how to create a simple list item and how to detect that the user clicks it.
Overview
The guide will walk you through the following steps.
- The Repeater node
- Creating a simple List Item component
- Connecting the data to the List Item
- Detecting when the user clicks an item
The Repeater Node
The main node for making lists is the Repeater node. The Repeater node takes an Array as an input (the Items property). It then and creates a copy of the provided List Item template as a component and connects the specific Object (or Record) in the Array with its respective List Item.
The Array could for example be coming from an Array node, from a database through a Query Records or a Static Array.
Let's get started by starting a new project using the "Hello World" template. Remove the Text node and add in a Repeater node instead.

The Repeater needs two things to work:
- Some Array data that can be represented as List Items
- A Template component that will be repeated per item in the Array
We will start with the Array. In this case we will use the Static Array might as well be some other node that outputs an Array for example a Query Records node that queries records from a database. There is a specific guide for working with Query Records here.
Providing Items
So create a Static Array node. Change its type to JSON and paste in the following data.
[
    {
        "name": "Peter Reid",
        "age": 29,
        "team": "Everton",
        "position": "Midfield"
    },
    {
        "name": "Chris Waddle",
        "age": 25,
        "team": "Tottenham",
        "position": "Midfield"
    },
    {
        "name": "Mark Hateley",
        "age": 24,
        "team": "Milan",
        "position": "Forward"
    },
    {
        "name": "Peter Beardsley",
        "age": 25,
        "team": "Newcastle",
        "position": "Forward"
    },
    {
        "name": "Kenneth Sansom",
        "age": 27,
        "team": "Arsenal",
        "position": "Defender"
    }
]

Connect the Items output of the Static Array to the Items input of the Repeater node.
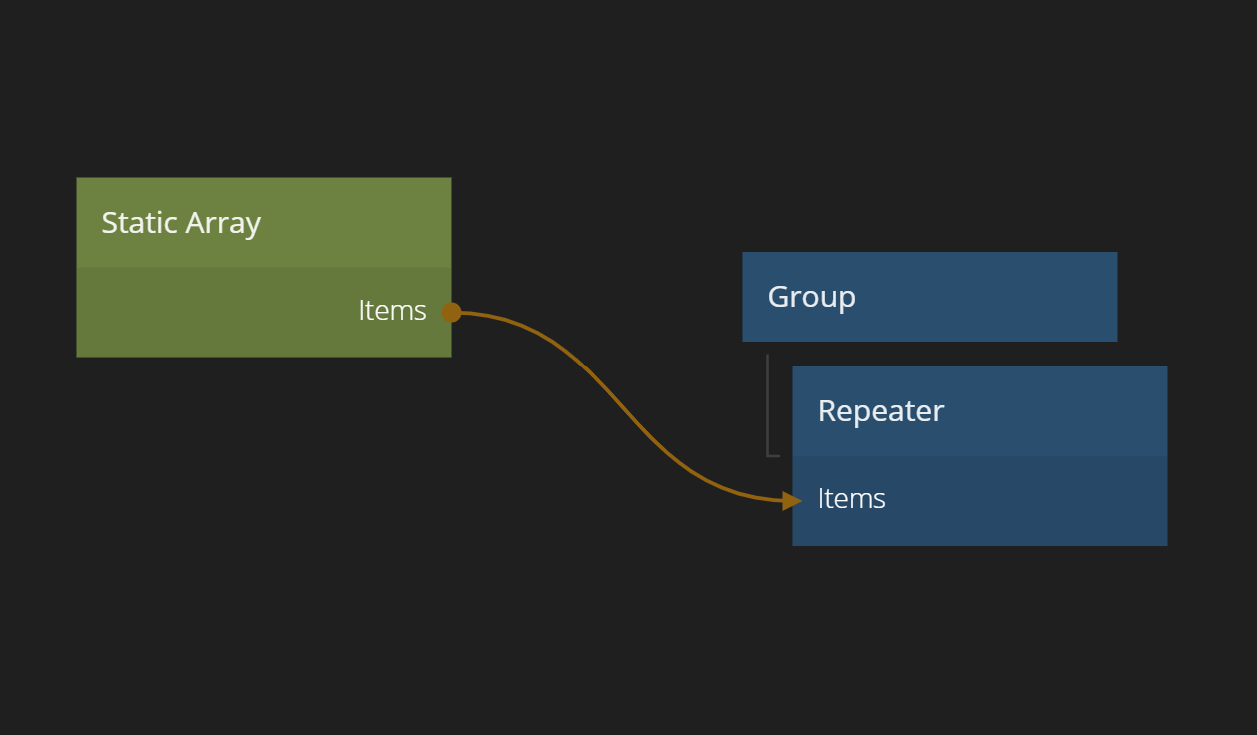
Now we have items flowing into the repeater.
Create a List Item Template
Next step is to create a component that can serve as a template for the Repeater. One component will be created per item in the Array that's feeding the Repeater.
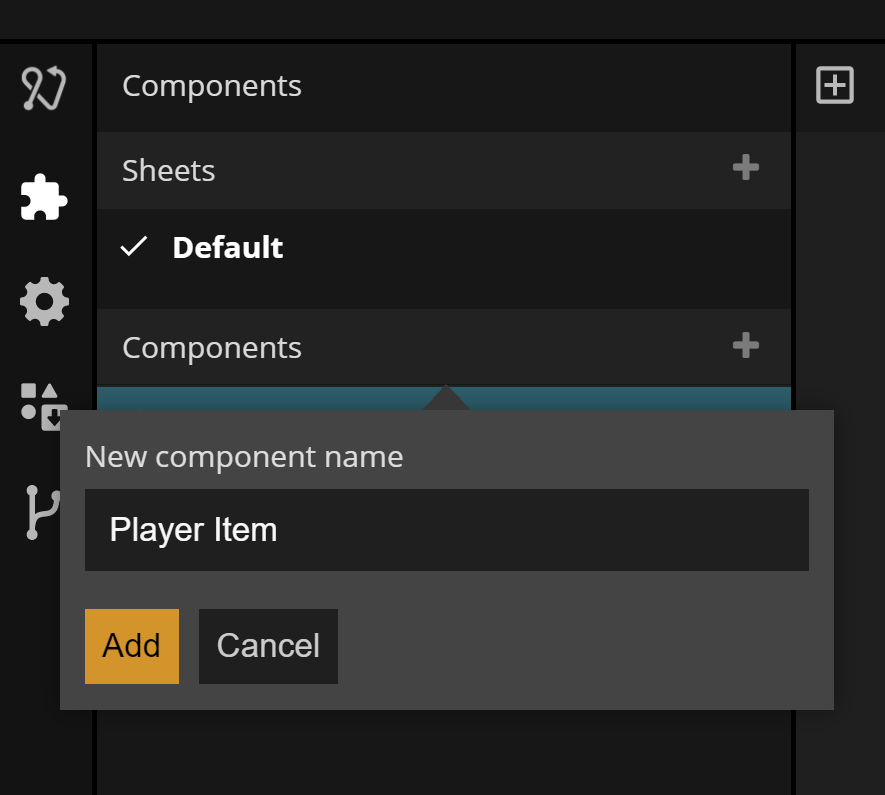
Create a new Visual Component. Call it "Player Item".

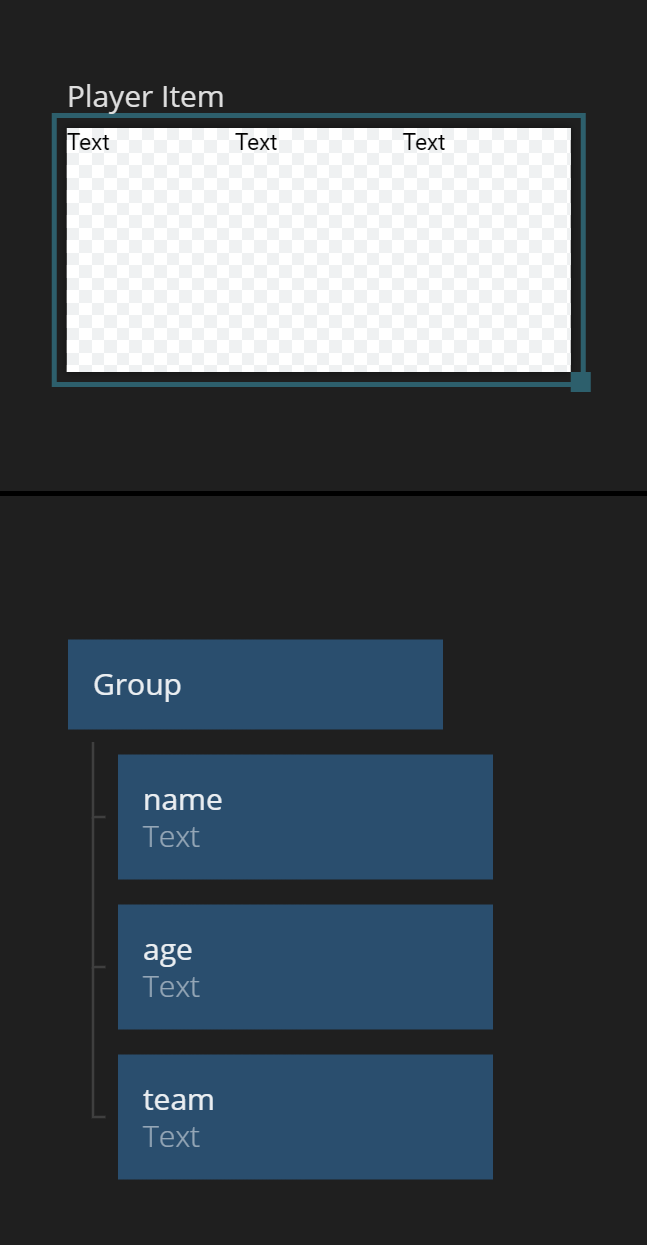
In the new component we will add in three Text nodes that will present the information about each player. Make sure to change the layout of the root node to Horizontal and add in the three Text nodes. Call the Text nodes, name, age, team so we can keep track of them. Note that you can use the Canvas view to get a first view of how your list item will look, even before using it in your Repeater.
Set the List Item Template
Go back to the main component. We now need select our newly created component as our template. Click the Repeater and set the template to "Player Item".
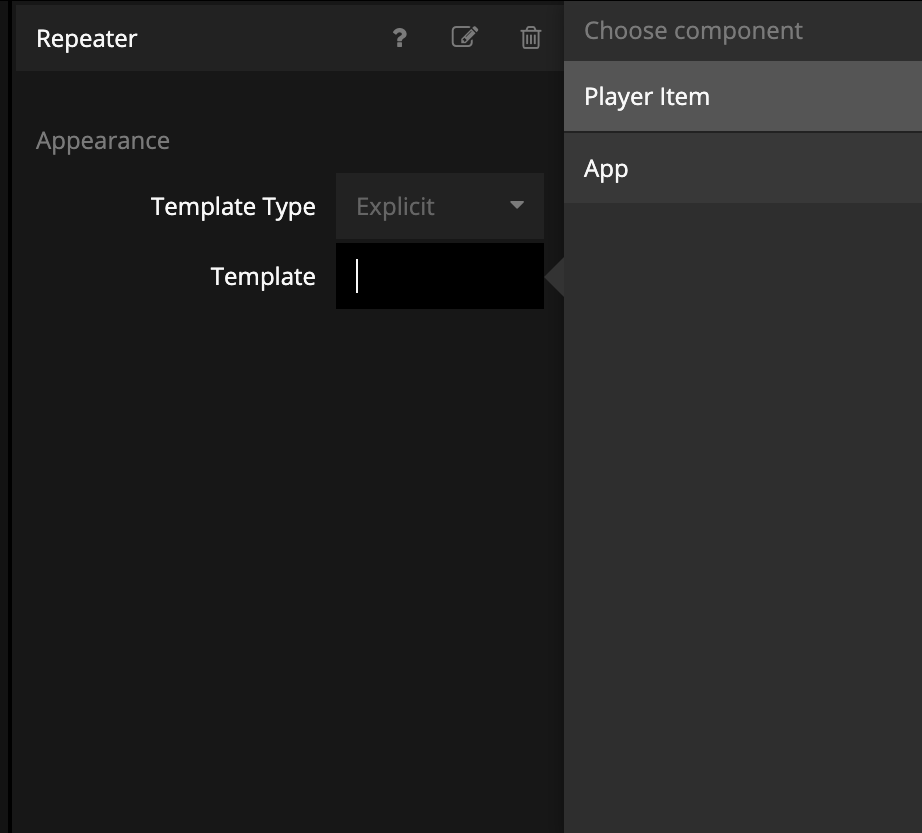
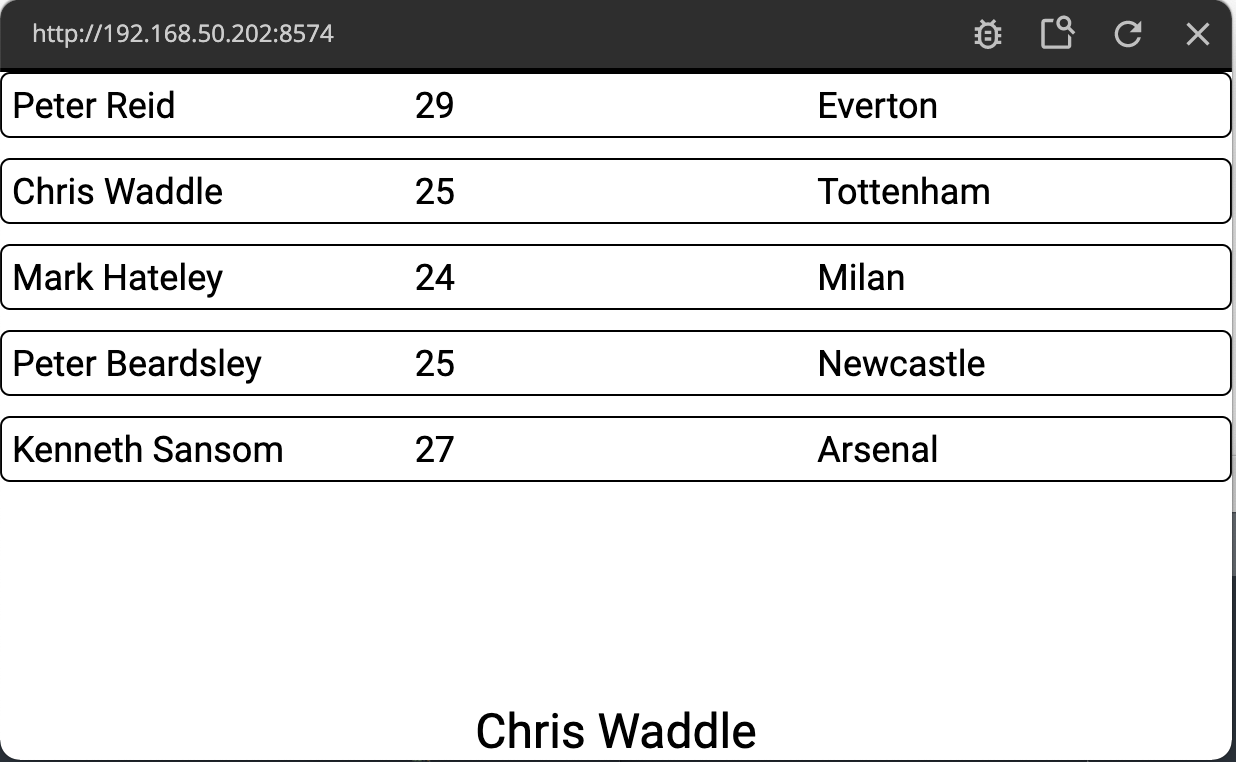
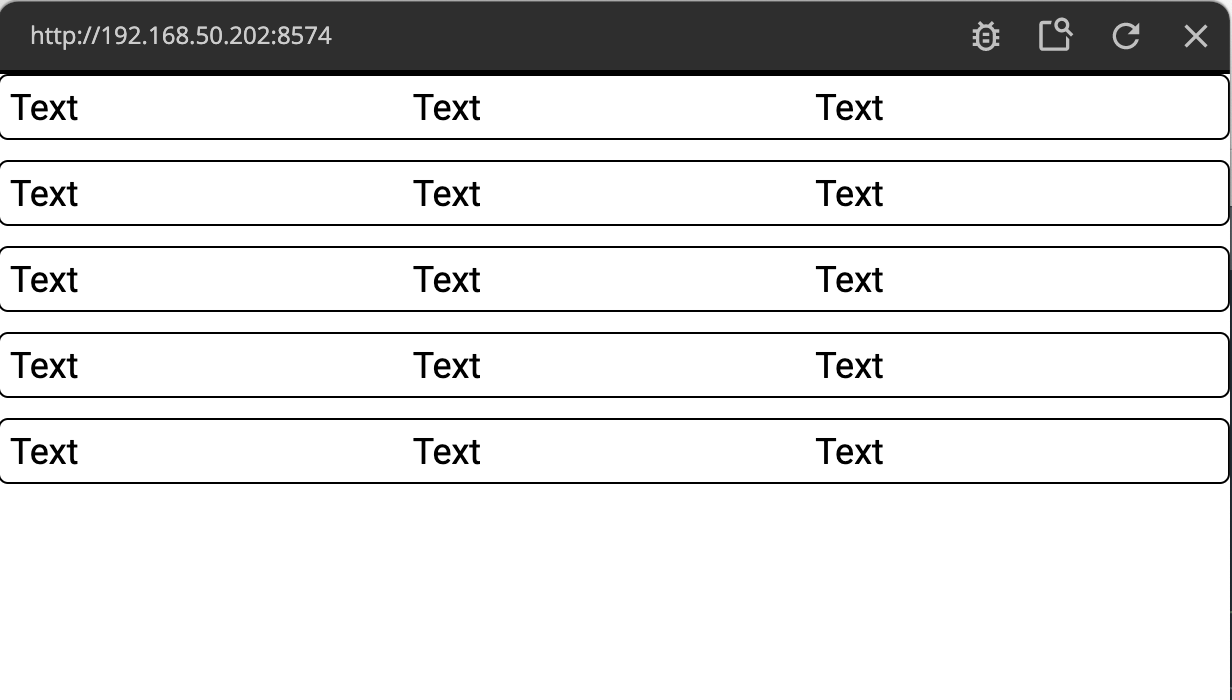
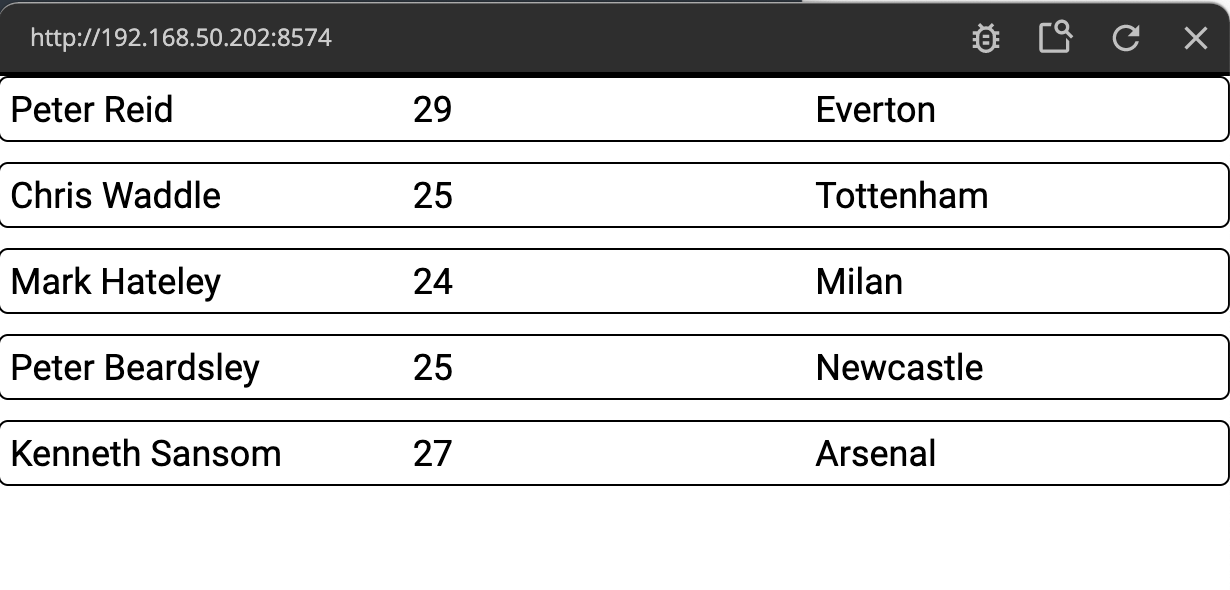
You should now see the first view of you data and list item, namely something like the screen below.
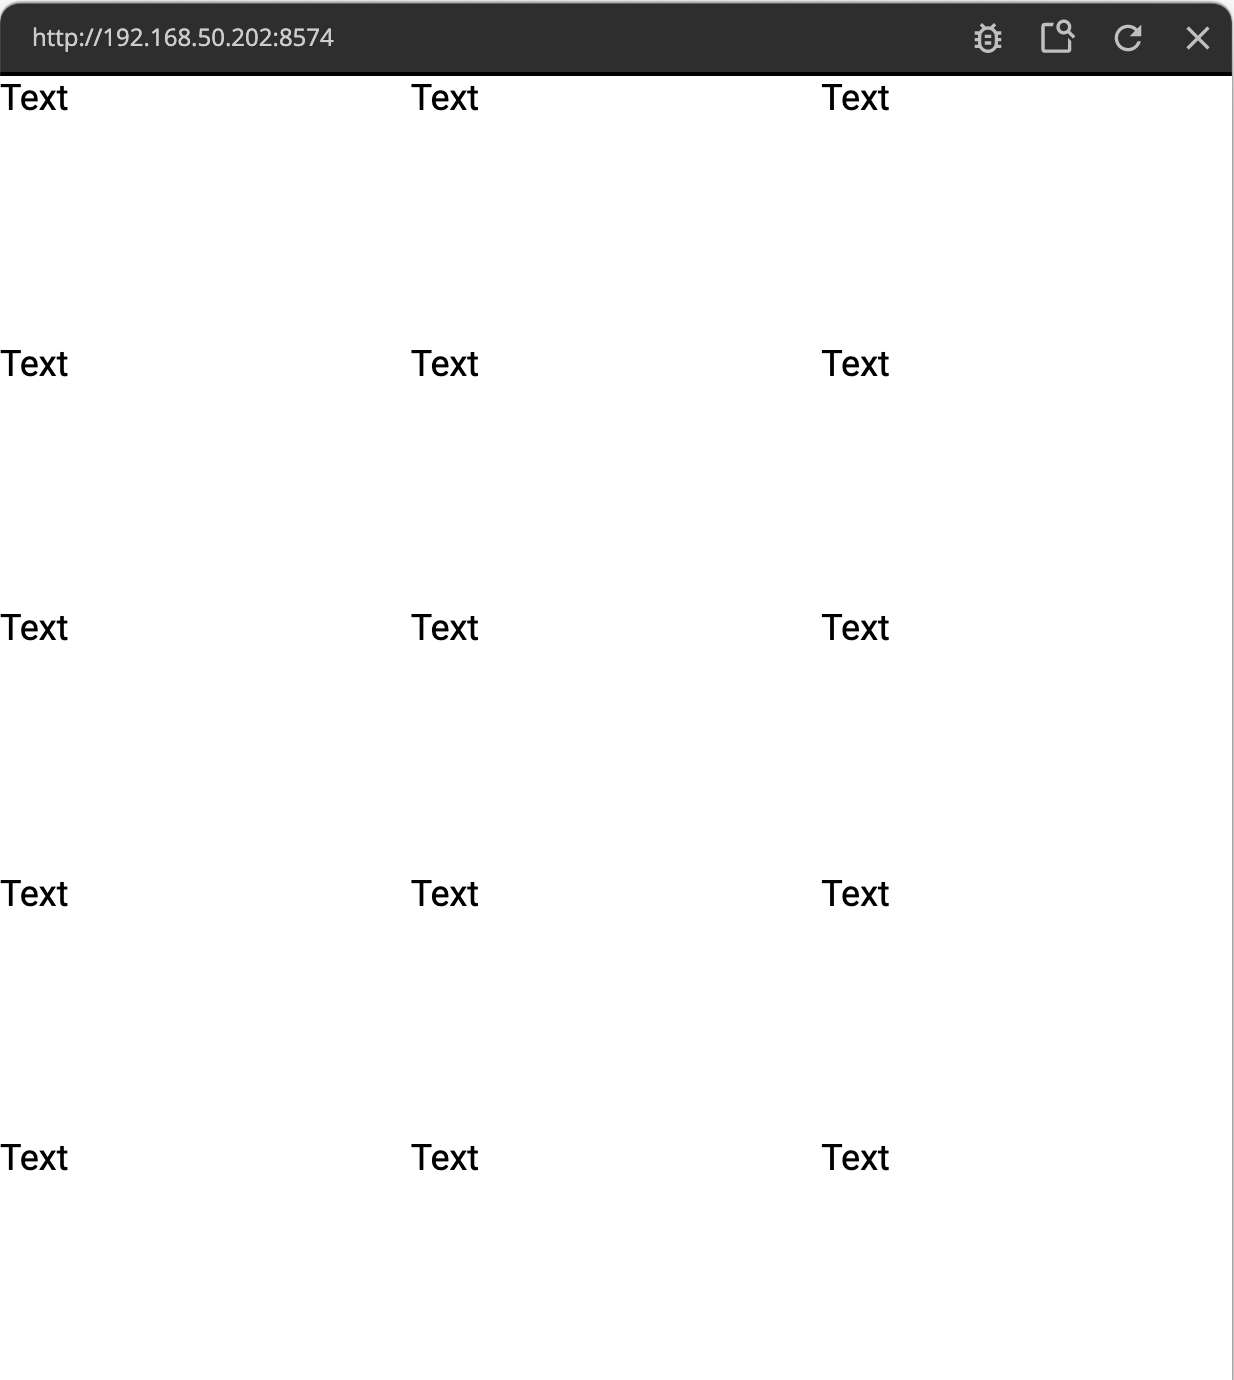
The repeater have created an instance of the "Player Item" component for each item in the incoming array. But we immediately see two things to fix:
- The layout is weird. The Repeater takes up the full screen. It then divides the space equally among each list item. We should probably fix the layouting of our listitem a bit.
- There is no data coming in from the list item. Our Text nodes are not connected to anything.
Fixing the layout of the List Item
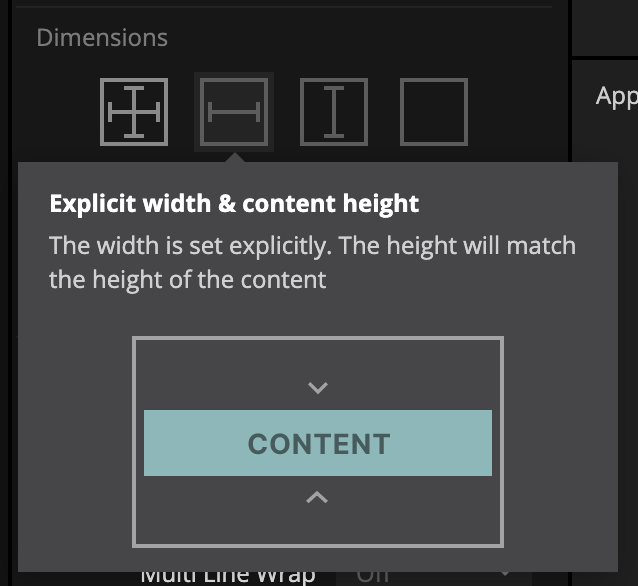
We deal with the layout first. In the "Player Item" component, click on the root Group and change the sizing to "Explicit width & content height". This will make the vertical size of the list item be as large as the Texts they contain, while still taking upp all horizontal space.
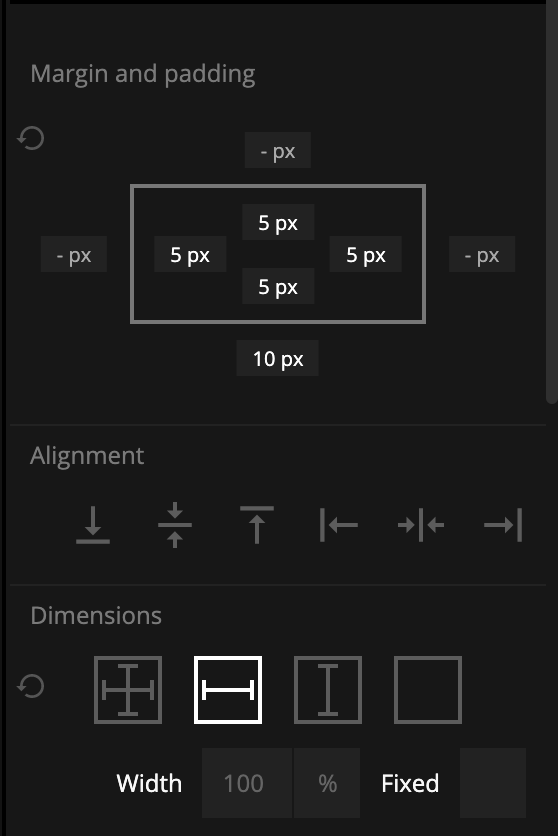
Lets also add a border around each item and some rounded corners. Change "Border Style" and "Border Radius" to your liking. Finally add in some padding in all four direction (to give some air within the list item) and a margin below the list item to get some air between items.
This looks better even if much more can be done. It will have to do for now.
Connecting List Items to Data
Now we want to get the data from each item into the List Item. In the "Player Item" component, add in an Object node. The Object node is one of the central data holding nodes in Noodl. Read more about them in a dedicated guide here.
Click the Object and set the "Get Id From" property to From Repeater.
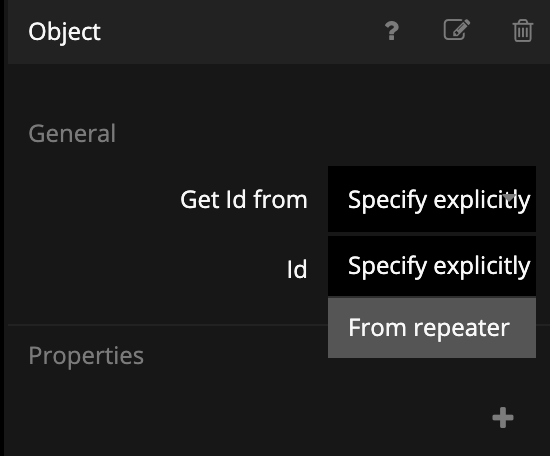
You have now told the Object that the Repeater will assign its Id, meaning each list item will have its Object node point to the respective Object in the Array that feeds the repeater.
If you hover over your newly created Object you will actually see that it contains the data of our last item in the Array.
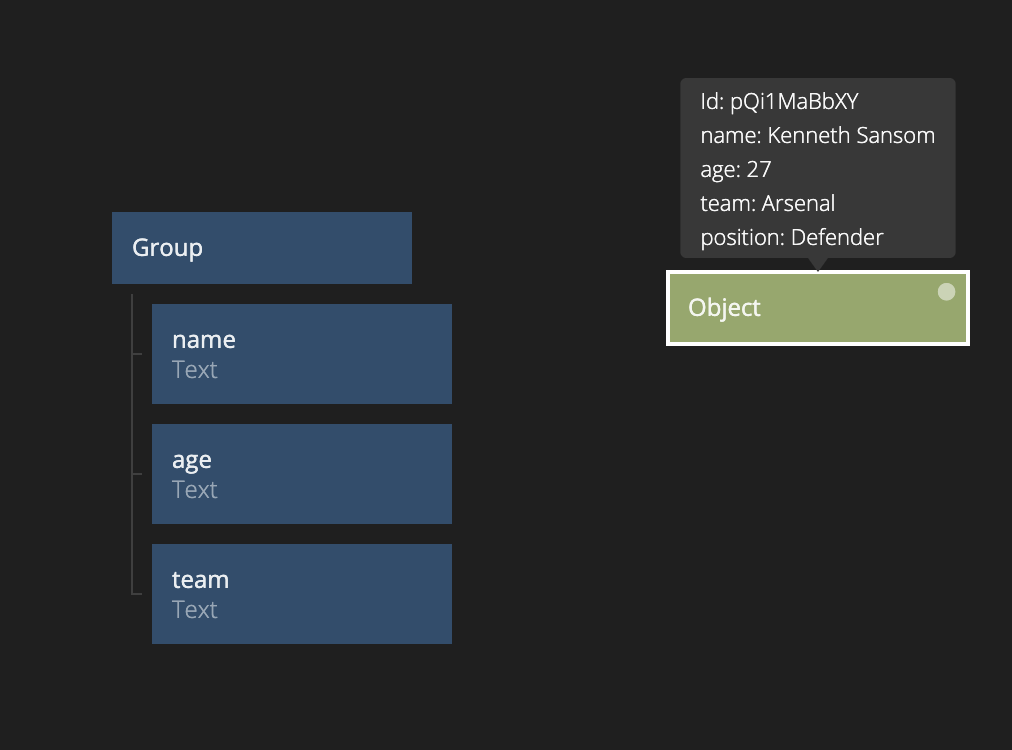
?> Note that since there are several instances of the same List Item in memory at the same time you have to be a bit careful when reading the debug output in the node graph. Generally the last value in a connection or component is going to be shown as debug data. In our case, the last list item data ("Kenneth Sansom") is shown even though all the other Objects in the Array is in memory as well.
Now we are ready to hook up the Text nodes to our data. Create three properties on the Object matching the ones we have in the static array, namely name, age and team.
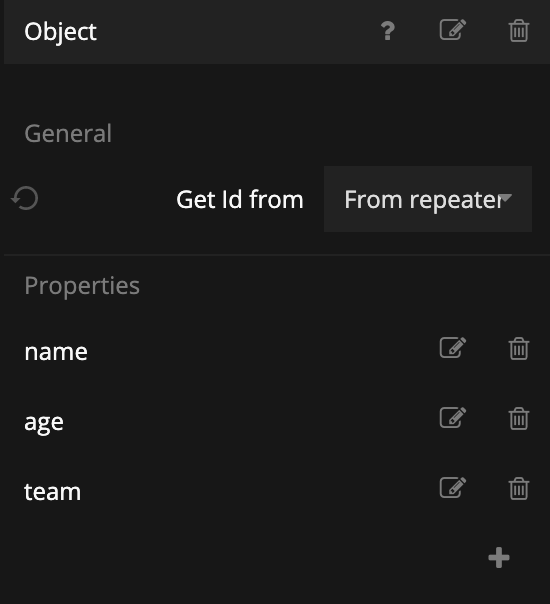
Connect the Object properties to the Text input on the respective Text nodes.
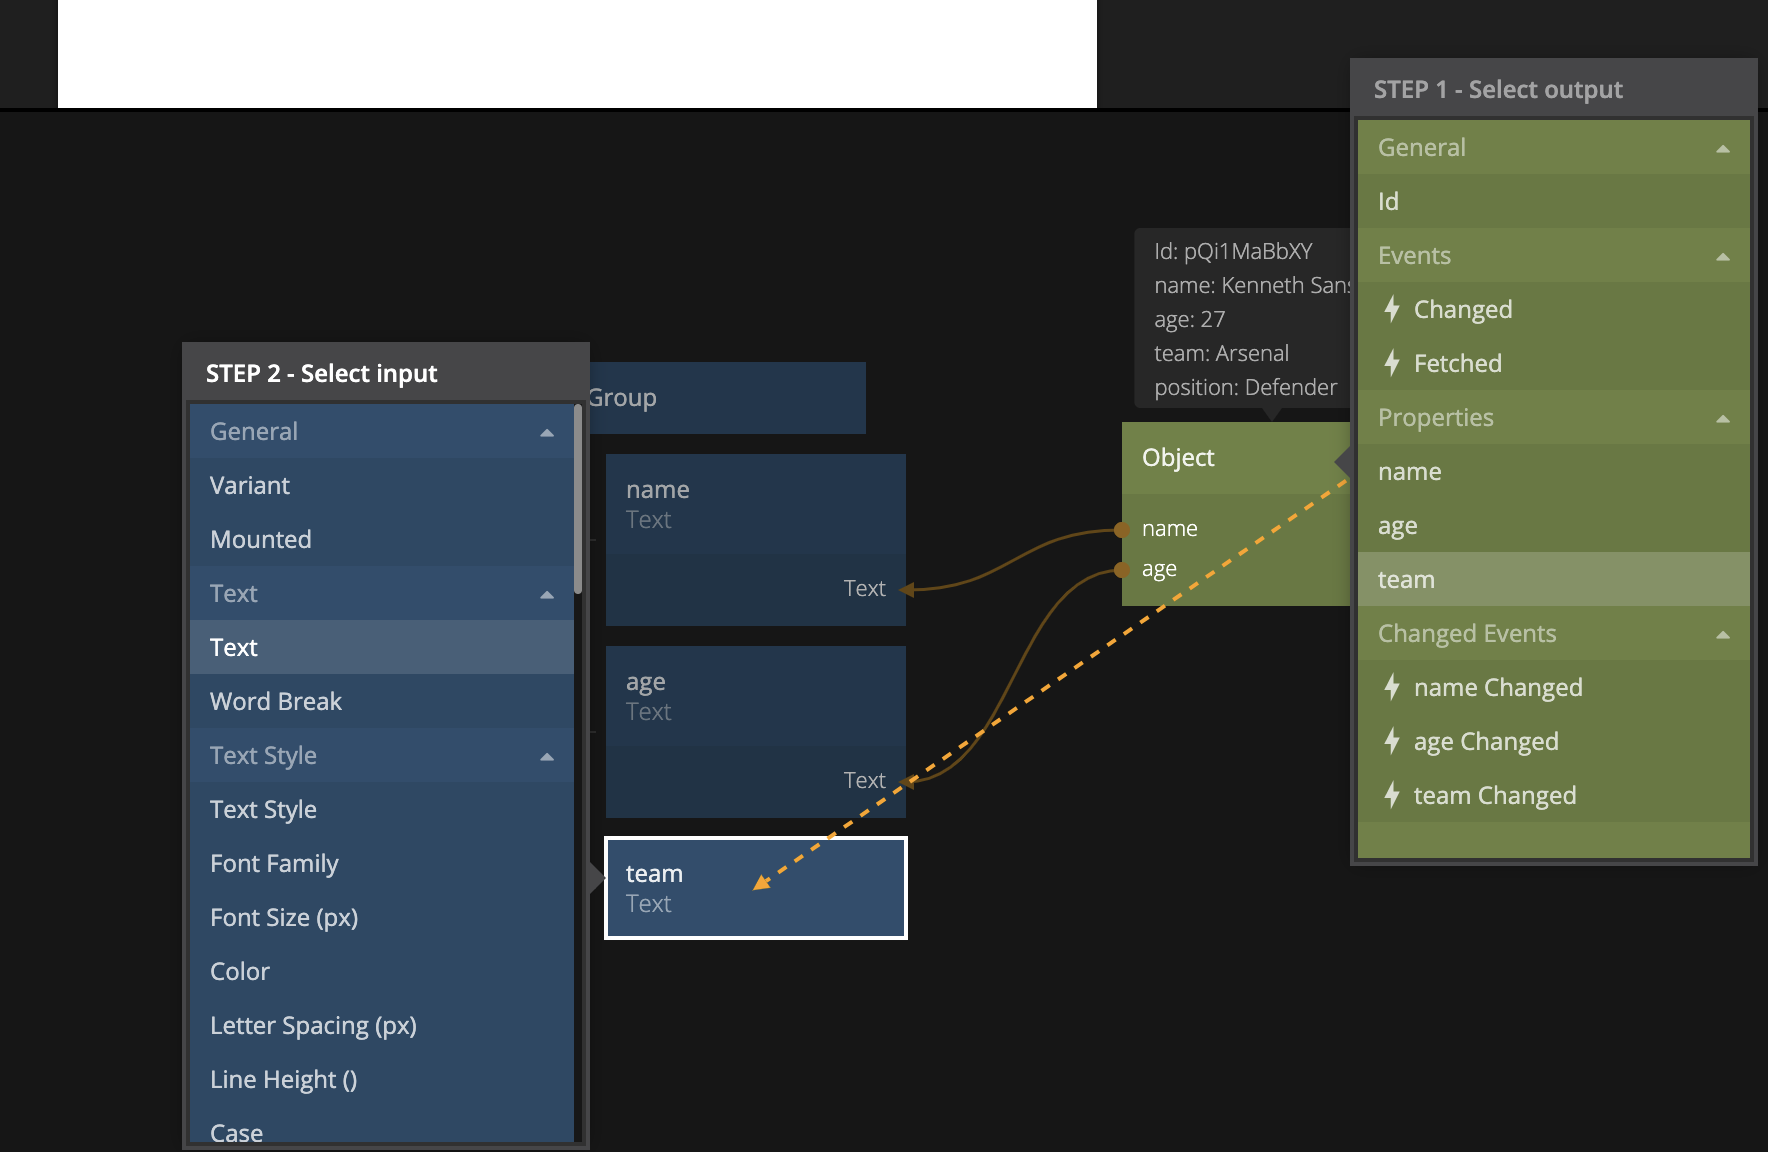
While you are connecting the data to the Text nodes you should see the List Items being populated.
Detecting which List Item that was clicked
Finally, we also want to know when the user clicks an item and of course which item it was. Of course we could handle all business logic related to a List Item within it, but it's often better to let the List Items be pretty simple and handle any complex logic outside the Repeater. In short, we want the Repeater to be able to report when an item was clicked and which item was clicked.
You do this by letting the List Item component having Component Outputs that are signals. You can have any number of signals coming out of your List Item. For example you may have a complex structure with buttons for changing and removing List Items and you want to know which one the user clicked. However in our simple case we only want to know if the List Item was clicked.
Go into the "Player Item" component. Add a Component Outputs node. In it, add a property "Click". Then connect the "Click" signal from the root Group to the newly created "Click" property on the Component Outputs.
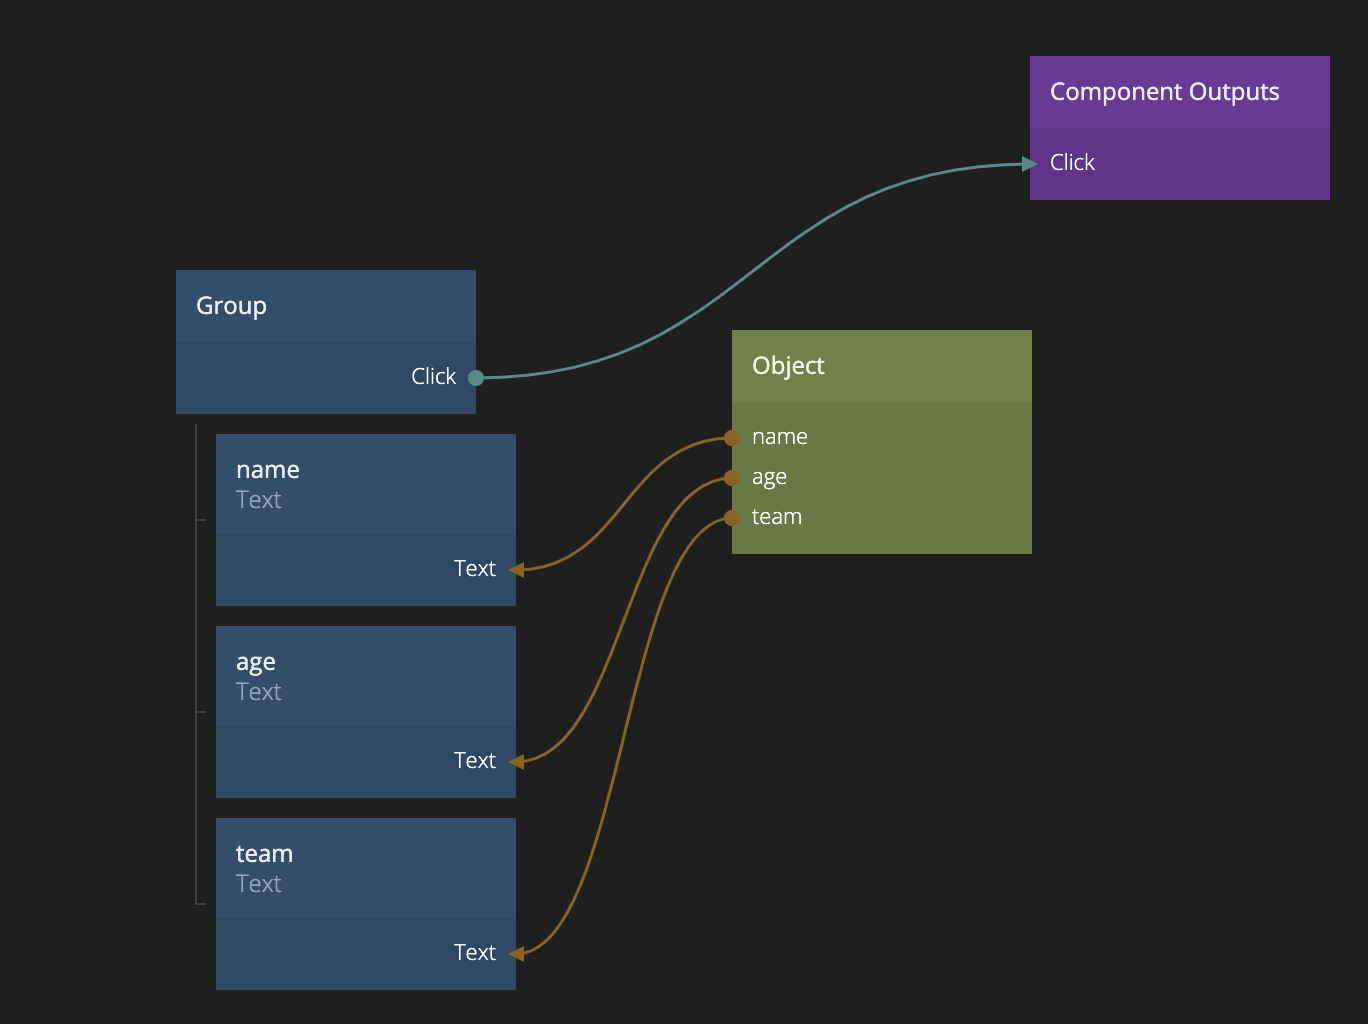
Now we are letting the Repeater know whenever a List Item is clicked.
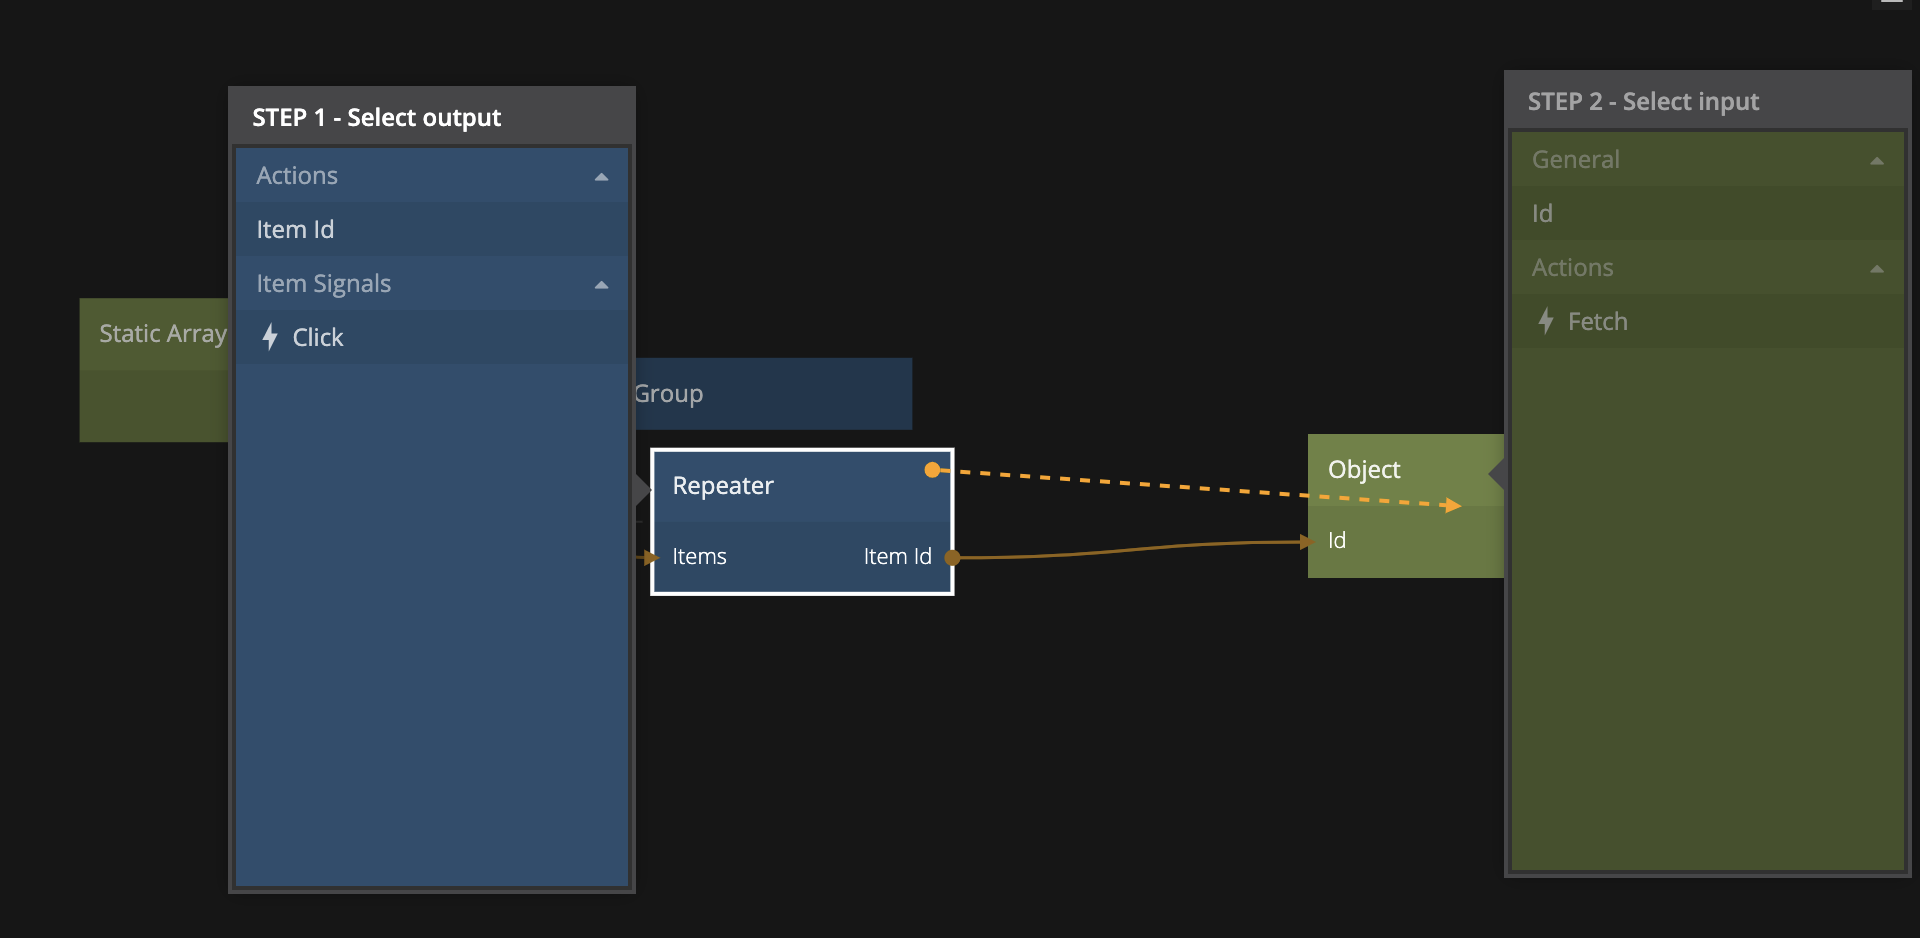
Go back to the main app. We want to capture the outgoing Click signal together with the Id of the Object associated with the List Item that was clicked.
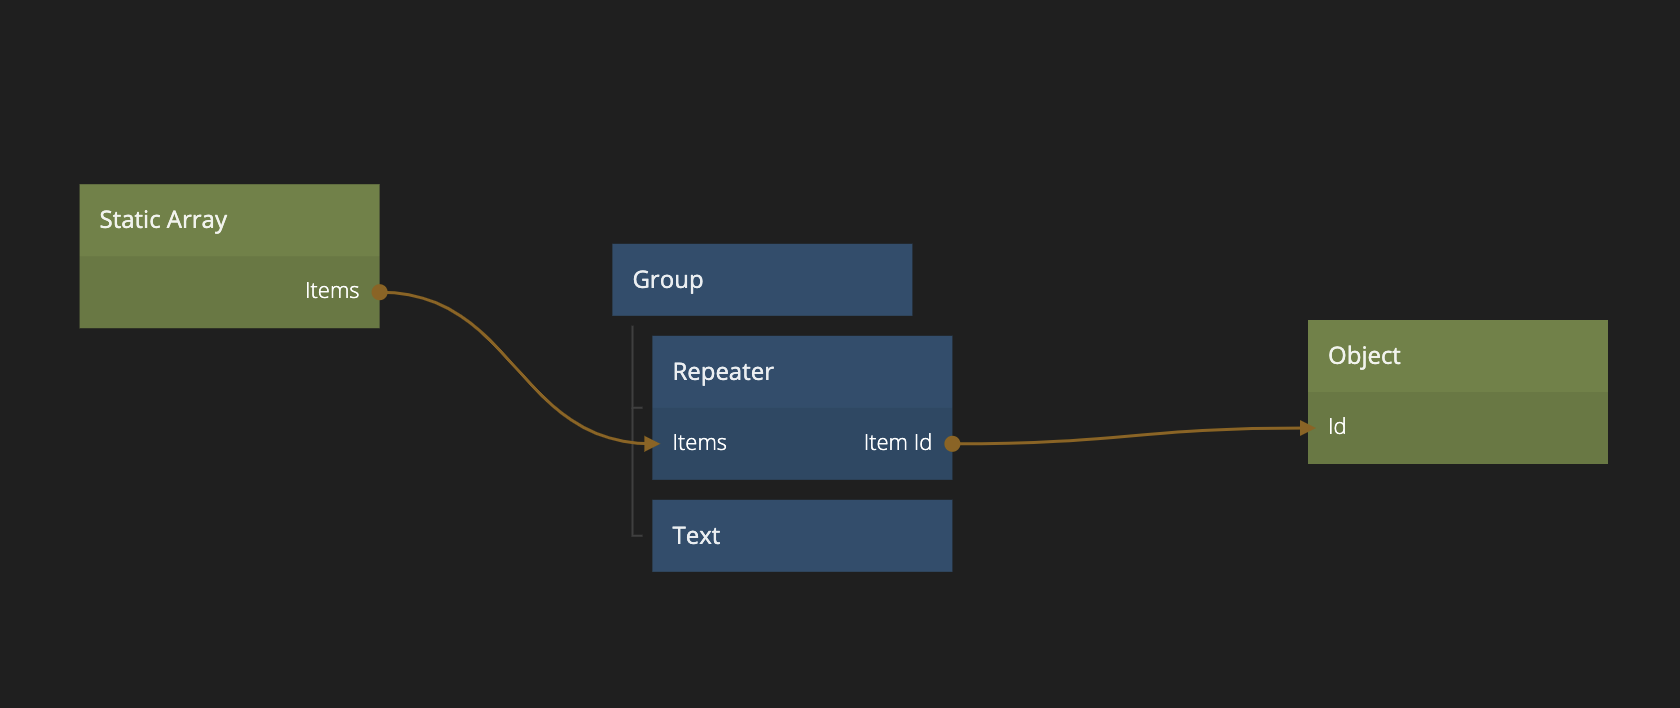
So create an Object node and connect the Item Id output that is now available on the Repeater to its Id.
This Object now will now point to the clicked item. To show that we can add a new Text node below the Repeater. Align it to the bottom and center and make sure its size is decided by its content, i.e. the Text node will only take up as much space as it needs, and it will end up in the center. Also make it larger, e.g. font size 24.
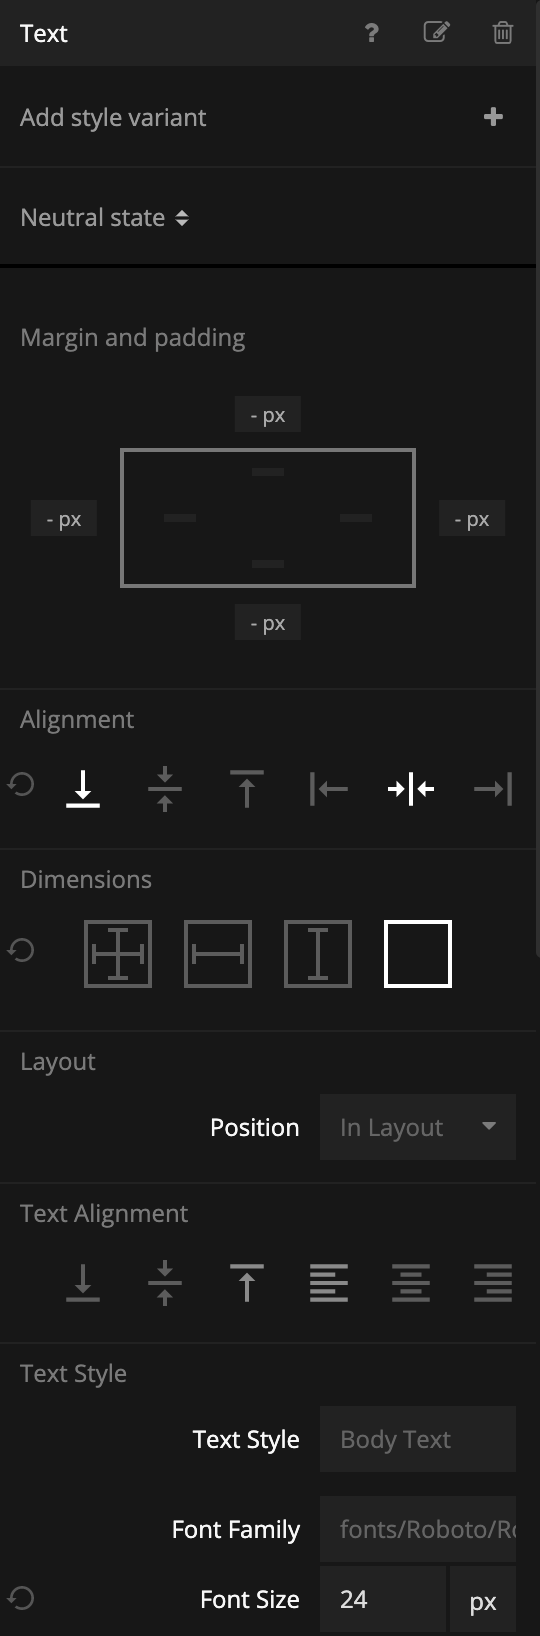
Add the property name on the Object and connect it to the Text node.
We are almost done, we actually need to capture the Click event from the Repeater for the Item Id to update when the user clicks. We anyway only want to show the text for a short while when the user clicks.
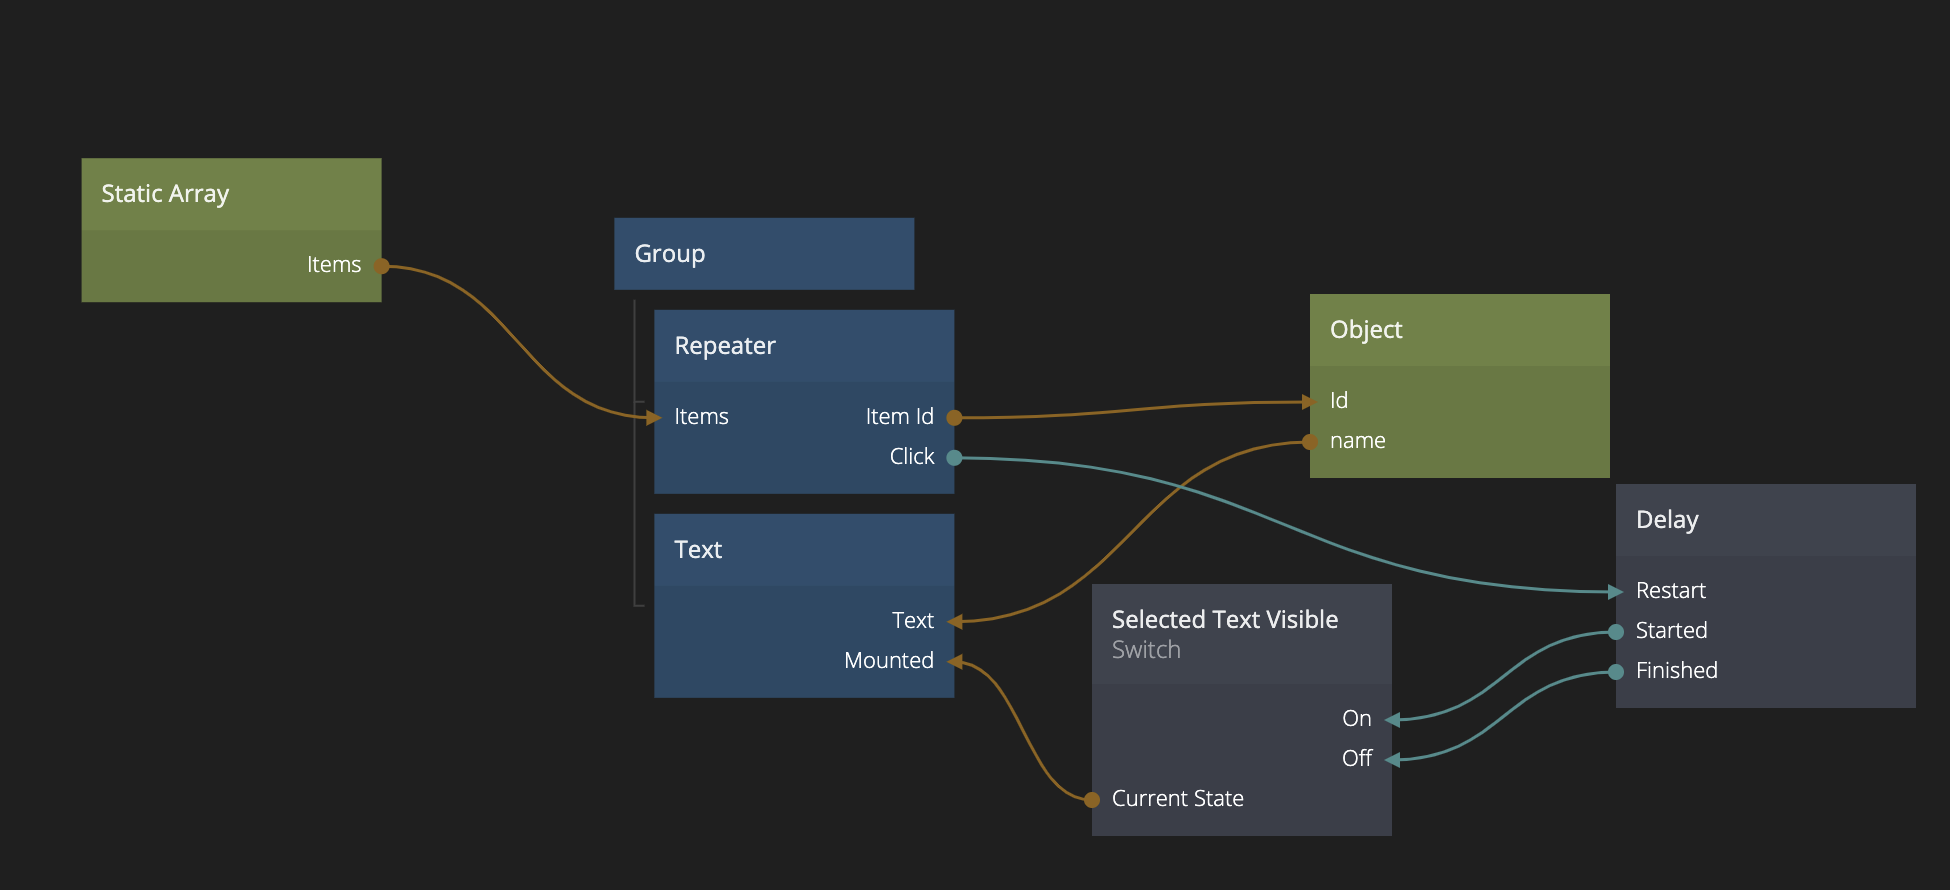
To achieve this we add in a Switch node. This will keep the state weather the Text is shown or not so call it "Selected Text Visible". Connect the Current State to the Mounted attribute of the Text. Then add a Delay node. Set the duration to 2000 milli seconds (2 seconds). Let the Clicked signal coming from the Repeater start the Delay by connecting it to Restart. As soon as the Delay is started we want to show the Text so connect Started to On on the Switch and the Finished signal to Off.
If everything works as expected you will now see the name of the player you click show up for two seconds at the bottom of the screen. To import the project from the guide click "Import" on the image below.