Creating users in Noodl
What you will learn in this guide
This guide will take you through the process of creating and managing user accounts in your Noodl apps. To support user accounts, make sure that you already have a Noodl cloud service enabled on your project or have your own backend attached.
Overview
We will go through the following topics in this guide:
- Overview of the User nodes
- Using the Sign Up / Login template
- Creating a simple sign up page
- Creating a simple log in page
- Display user data
- Log out a user
The User nodes
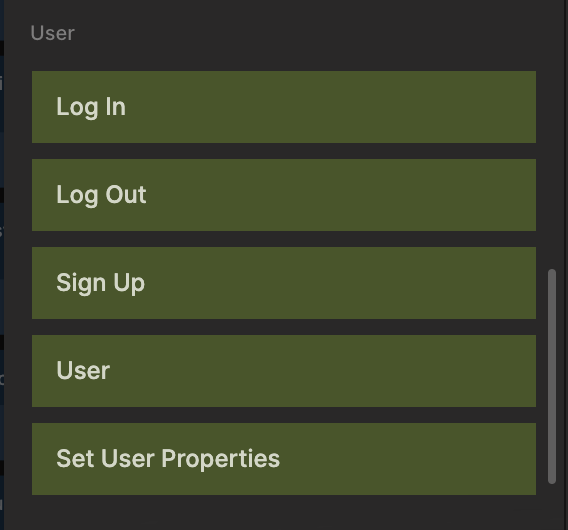
Noodl comes with several built-in nodes for managing users in your application. These nodes will take care of all the backend operations needed to manage users and can be integrated flexibly into the user experience you are building. With these nodes, you can log in existing users, log out a user, sign up new users, get user information, and update user properties. Read more about the nodes on the Node Reference page:
The Sign up & Login Template
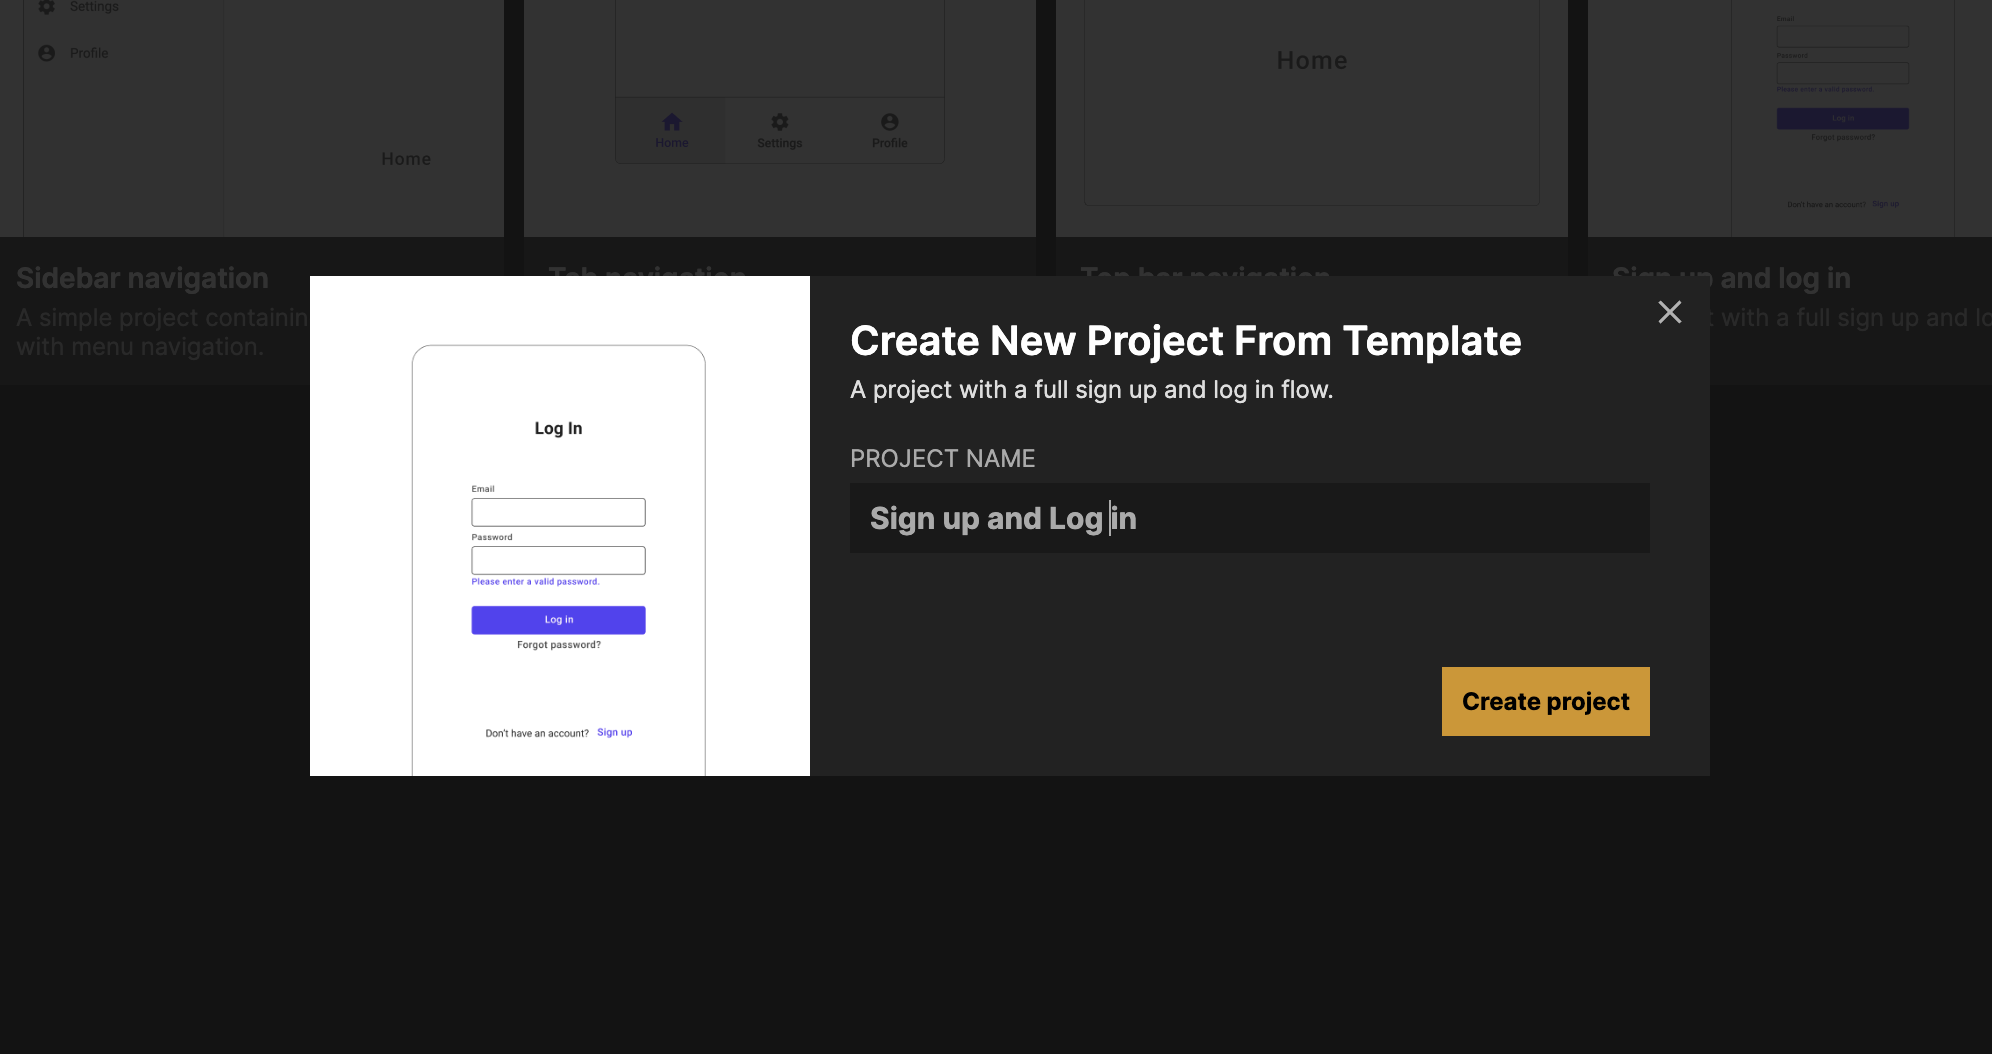
The easiest way to get what you need to create an app that supports user accounts is to start from the Signup & Login Template that you can find when you create a new project in Noodl. This template provides you with all the pages and logic needed in app that handles user accounts. This includes:
- Sign up and login users.
- Send verification emails using Noodl Cloud Functions and SendGrid,
- Resetting passwords, and other user data via an account page
Note that you will need a SendGrid API key to send emails to users in this template. If you prefer another email client you can provide your own.
In the rest of this guide we will take a closer look at the core patterns for creating a sign up and log in flow step-by-step.
Creating A Sign Up Page
Most apps that have user accounts have a sign-up flow, where users can go and sign up. To create this we need the following:
- A page in our page router that holds the sign-up interface
- An interface with a form to capture the user’s email, and password
- The Sign Up and Navigate node
Let's start by creating a new page called Sign Up Page and click on the page component to add elements to the page. First, let’s open the node picker and add a Group node to our Page Node, so we can better can control the layout of the page.
When we start adding visual elements to build our sign up form, we want to have it in the middle of the page, so lets style the Group node a bit:
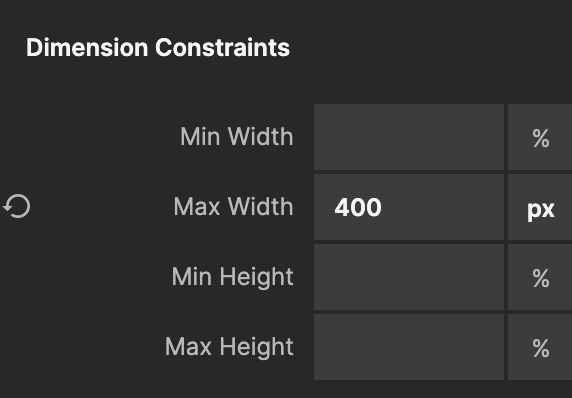
Let's select the Group node and set its max width to 400px.
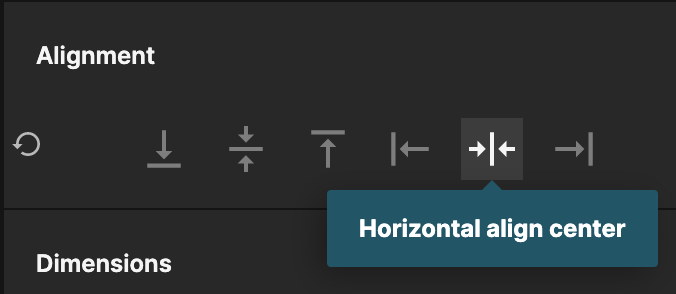
Then let's center the Group horizontally on the page by setting its alignment property to Horizontal Align Center.
Lastly let's center all content inside of the Group vertically.

Creating A Sign Up Form
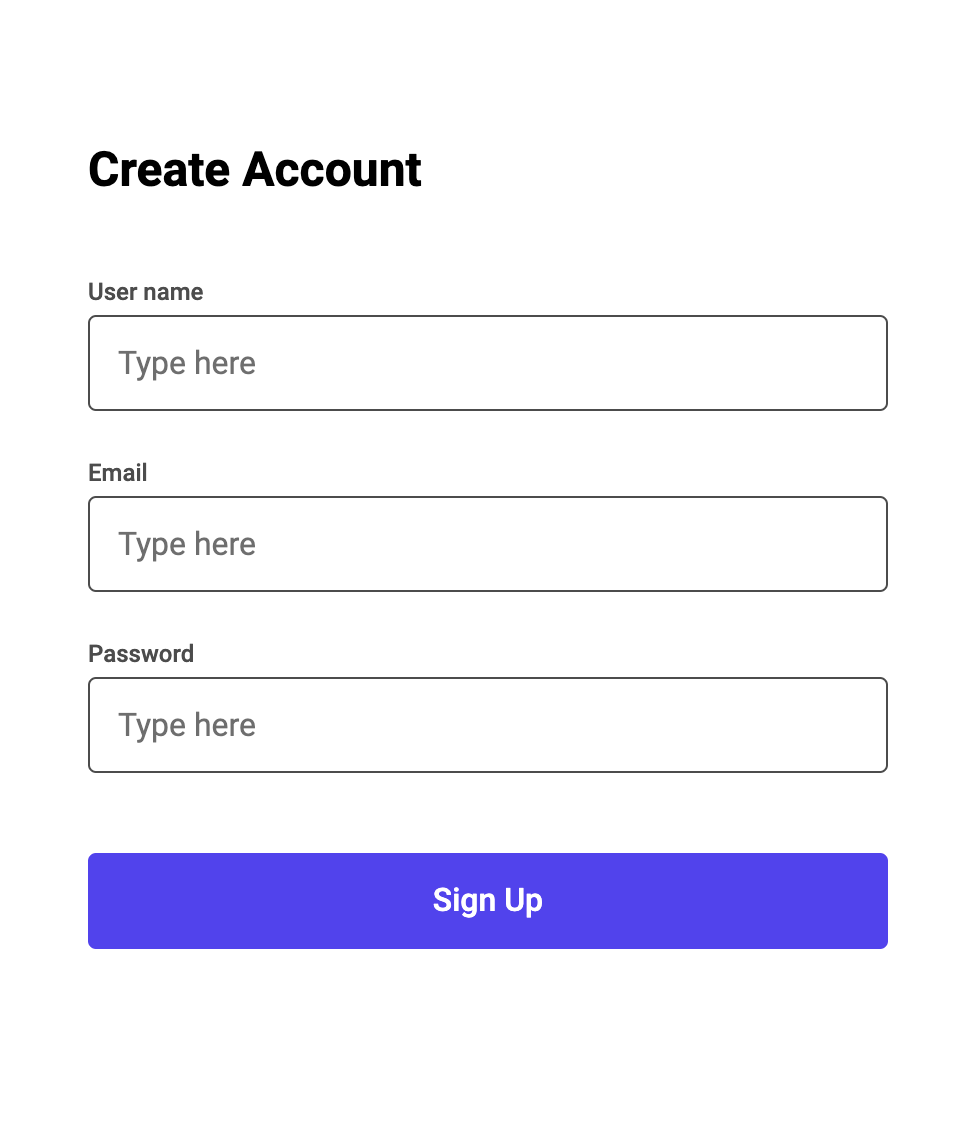
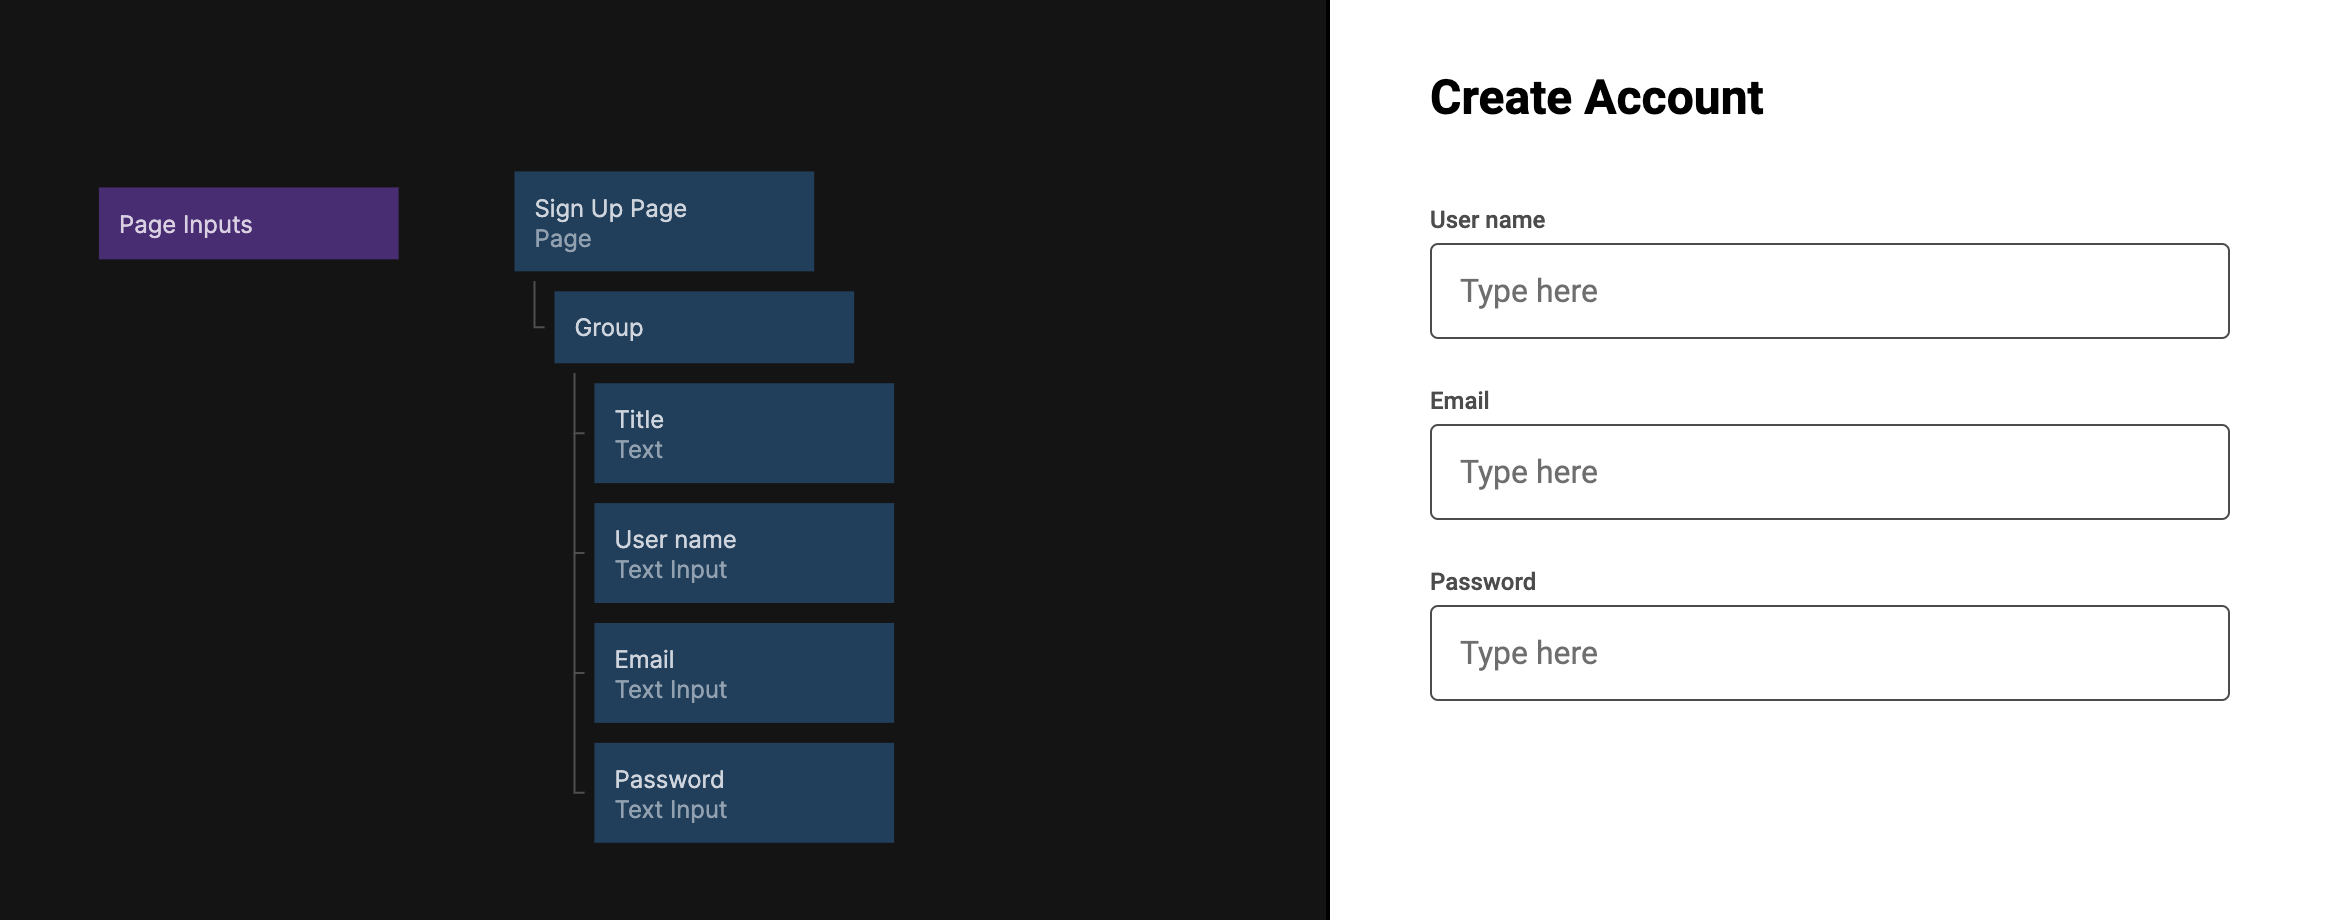
Now let's add some elements! Let's add a text Node to give a title to the page that says Create Account and give it a text style of Title Large. Next let’s add three Text Input nodes to capture username, email, and password. A username is optional, whereas email and password are required for the Sign Up node to succeed.
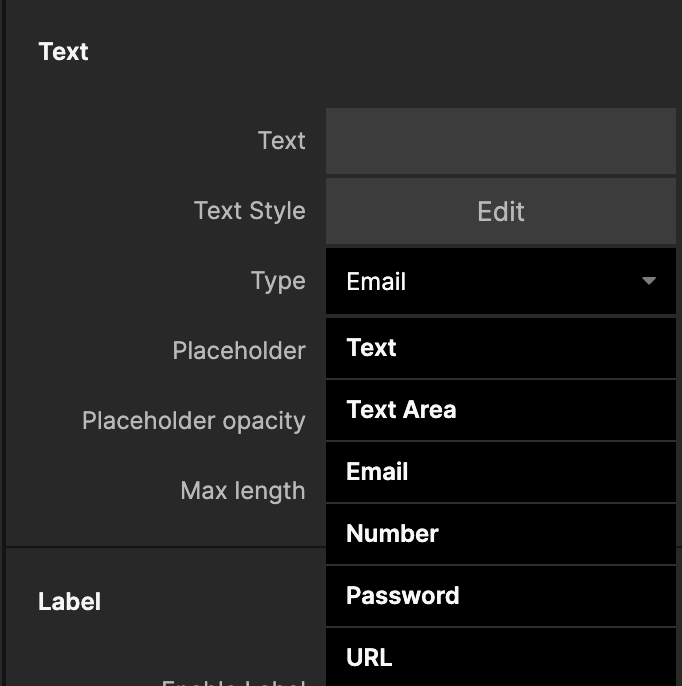
Let’s make the first Text Input for email be changing its Type to Email and its Label to Email. Next, let’s change the Type property of the last text inputs to Password, to make it hide the characters that a user writes.
Using the Sign Up node
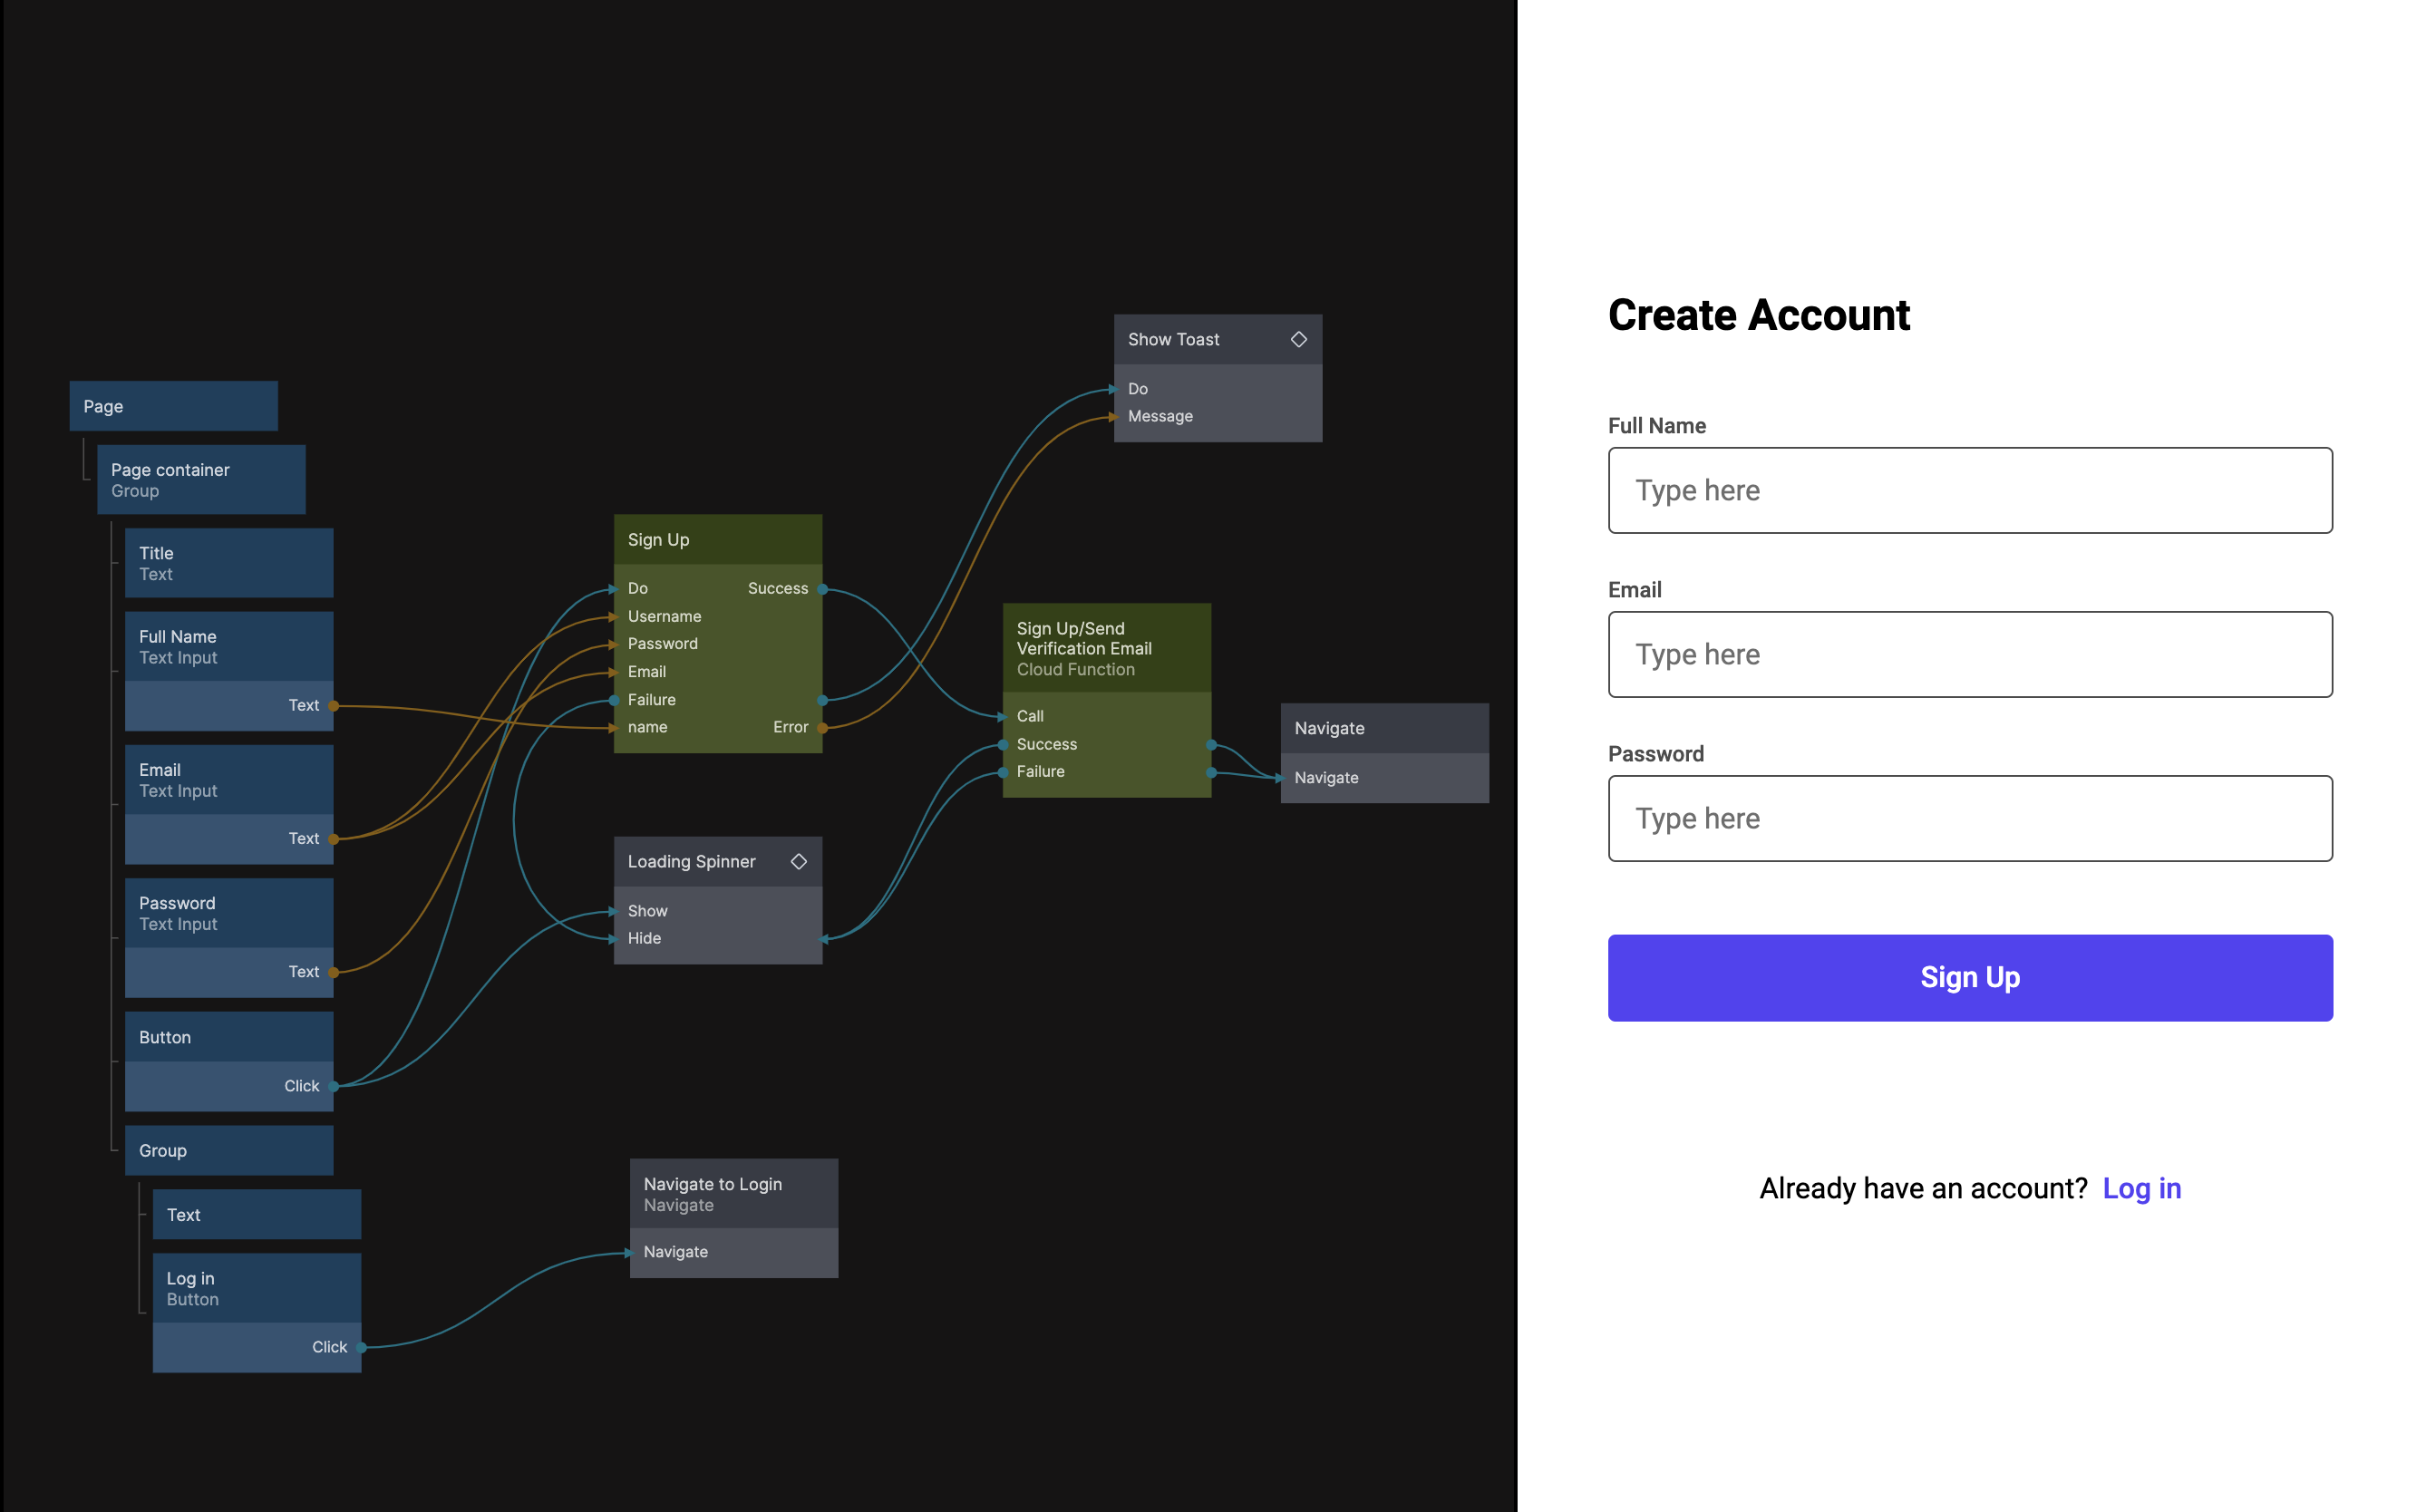
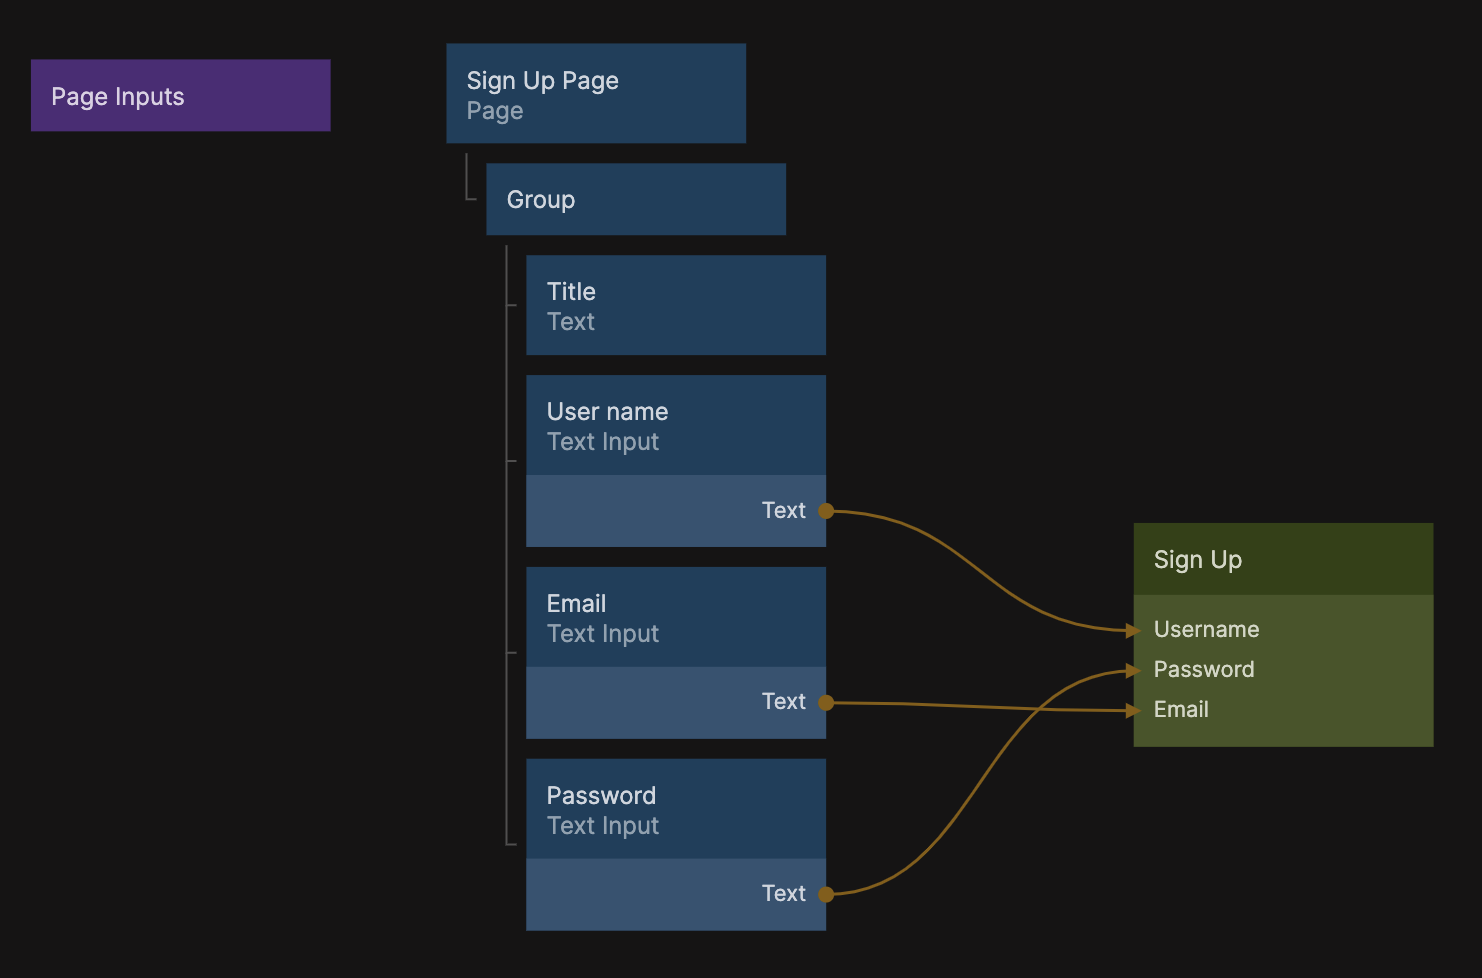
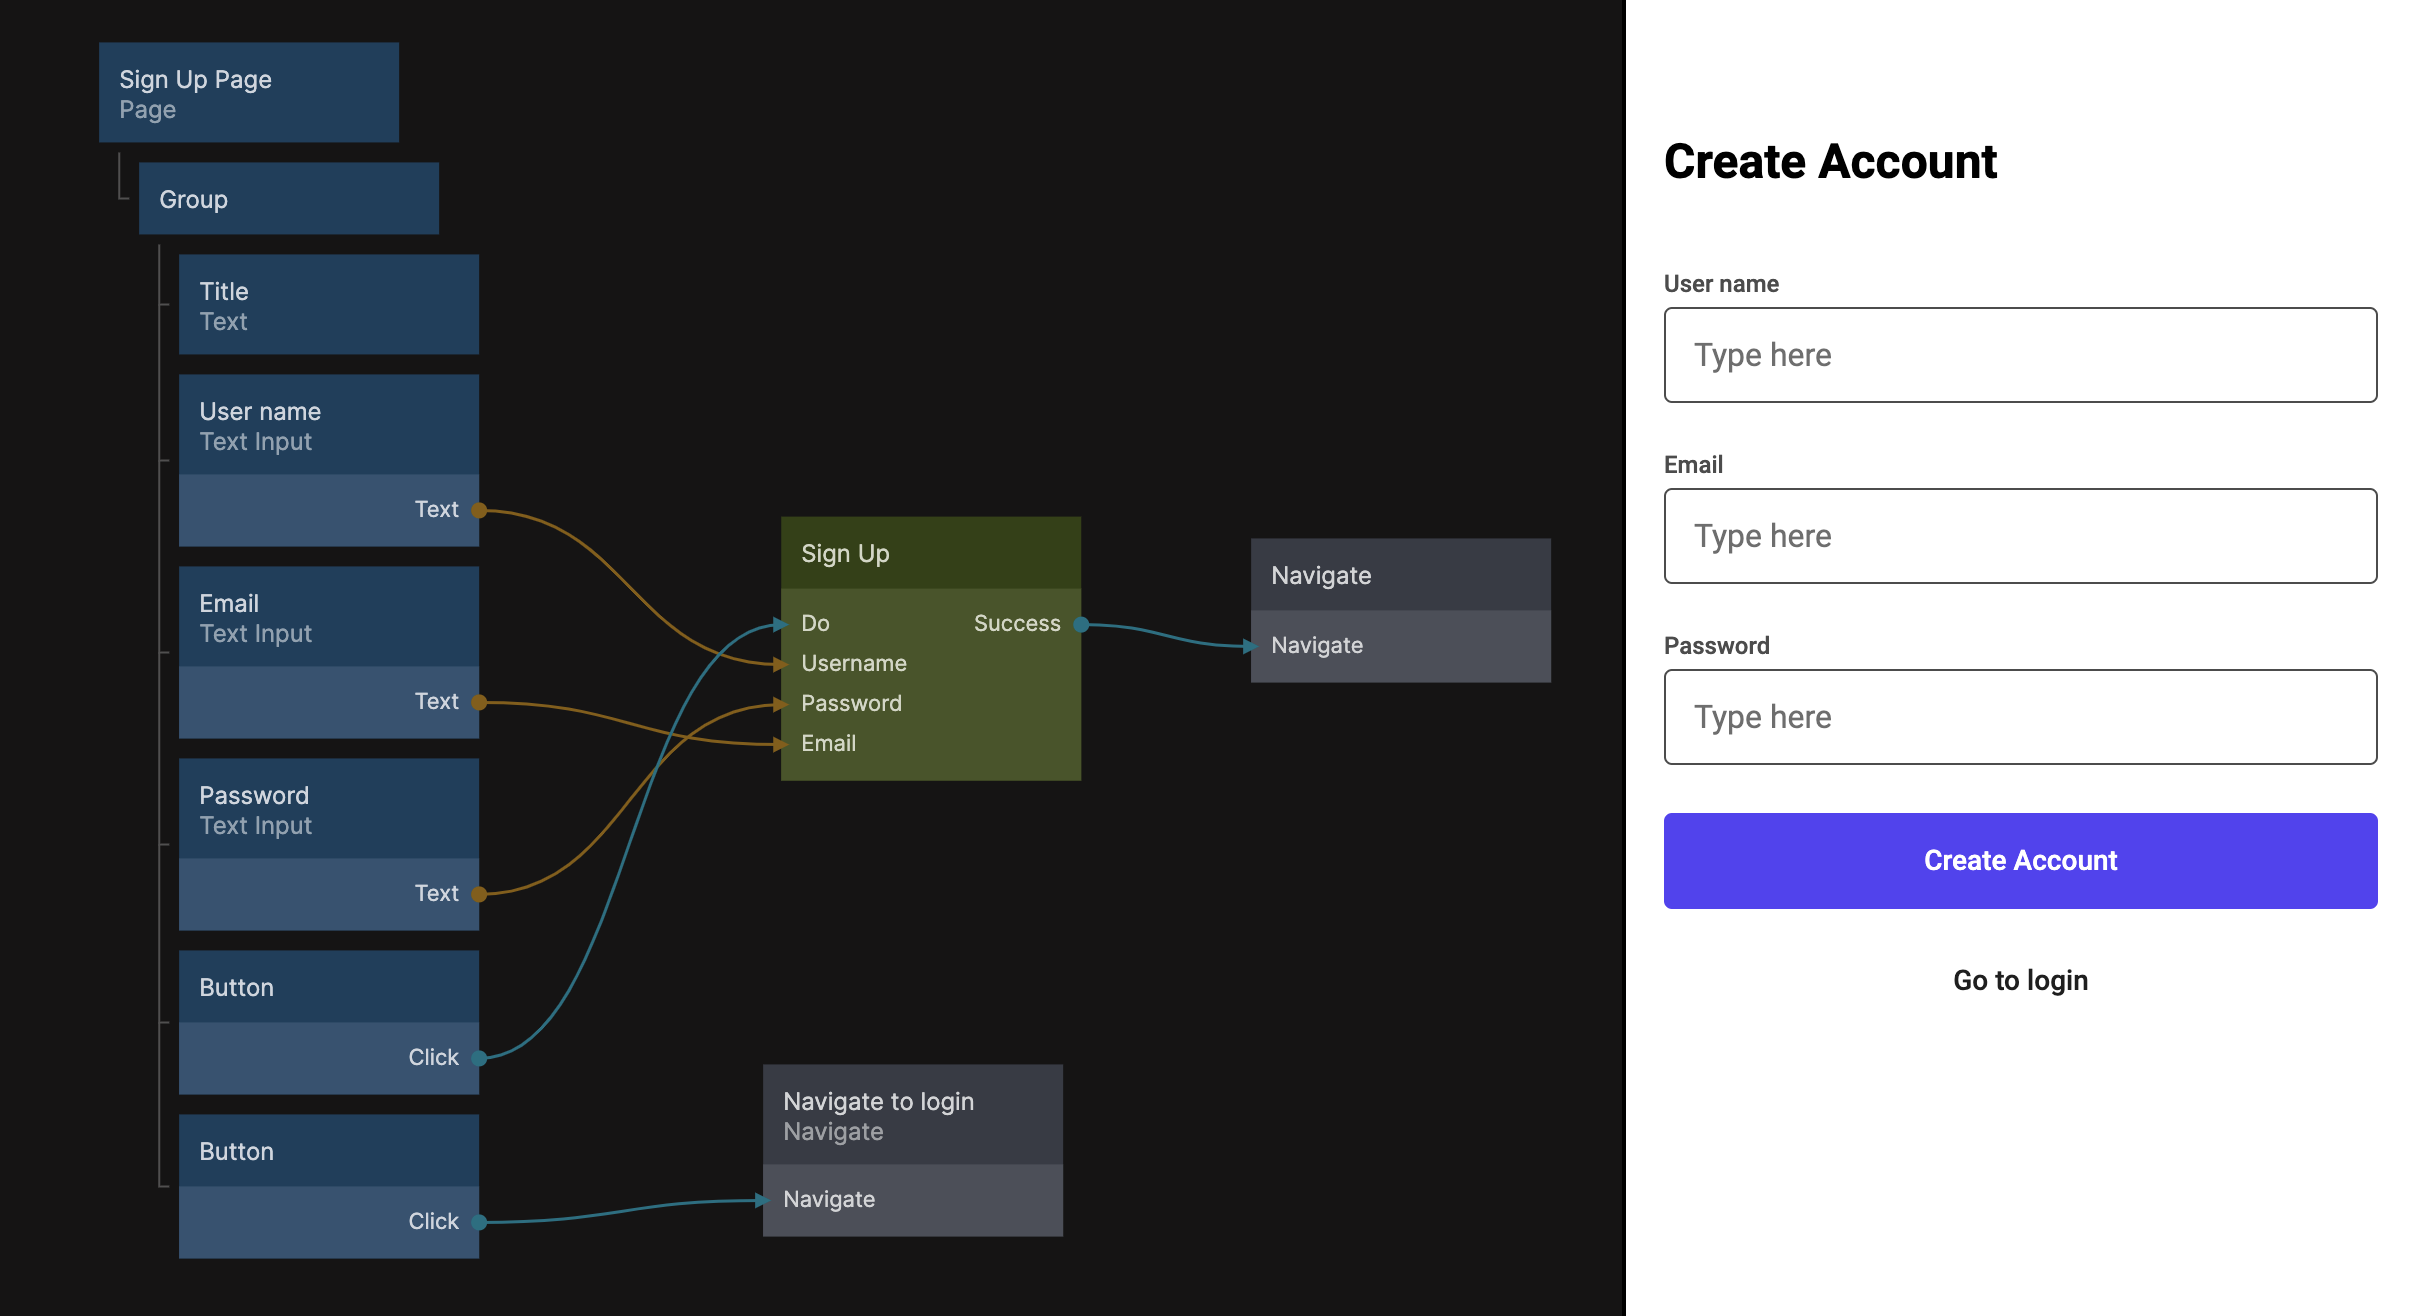
Now let’s add a Sign Up node to the node graph, and connect the three Text Input nodes to the corresponding inputs on the Sign-up node.
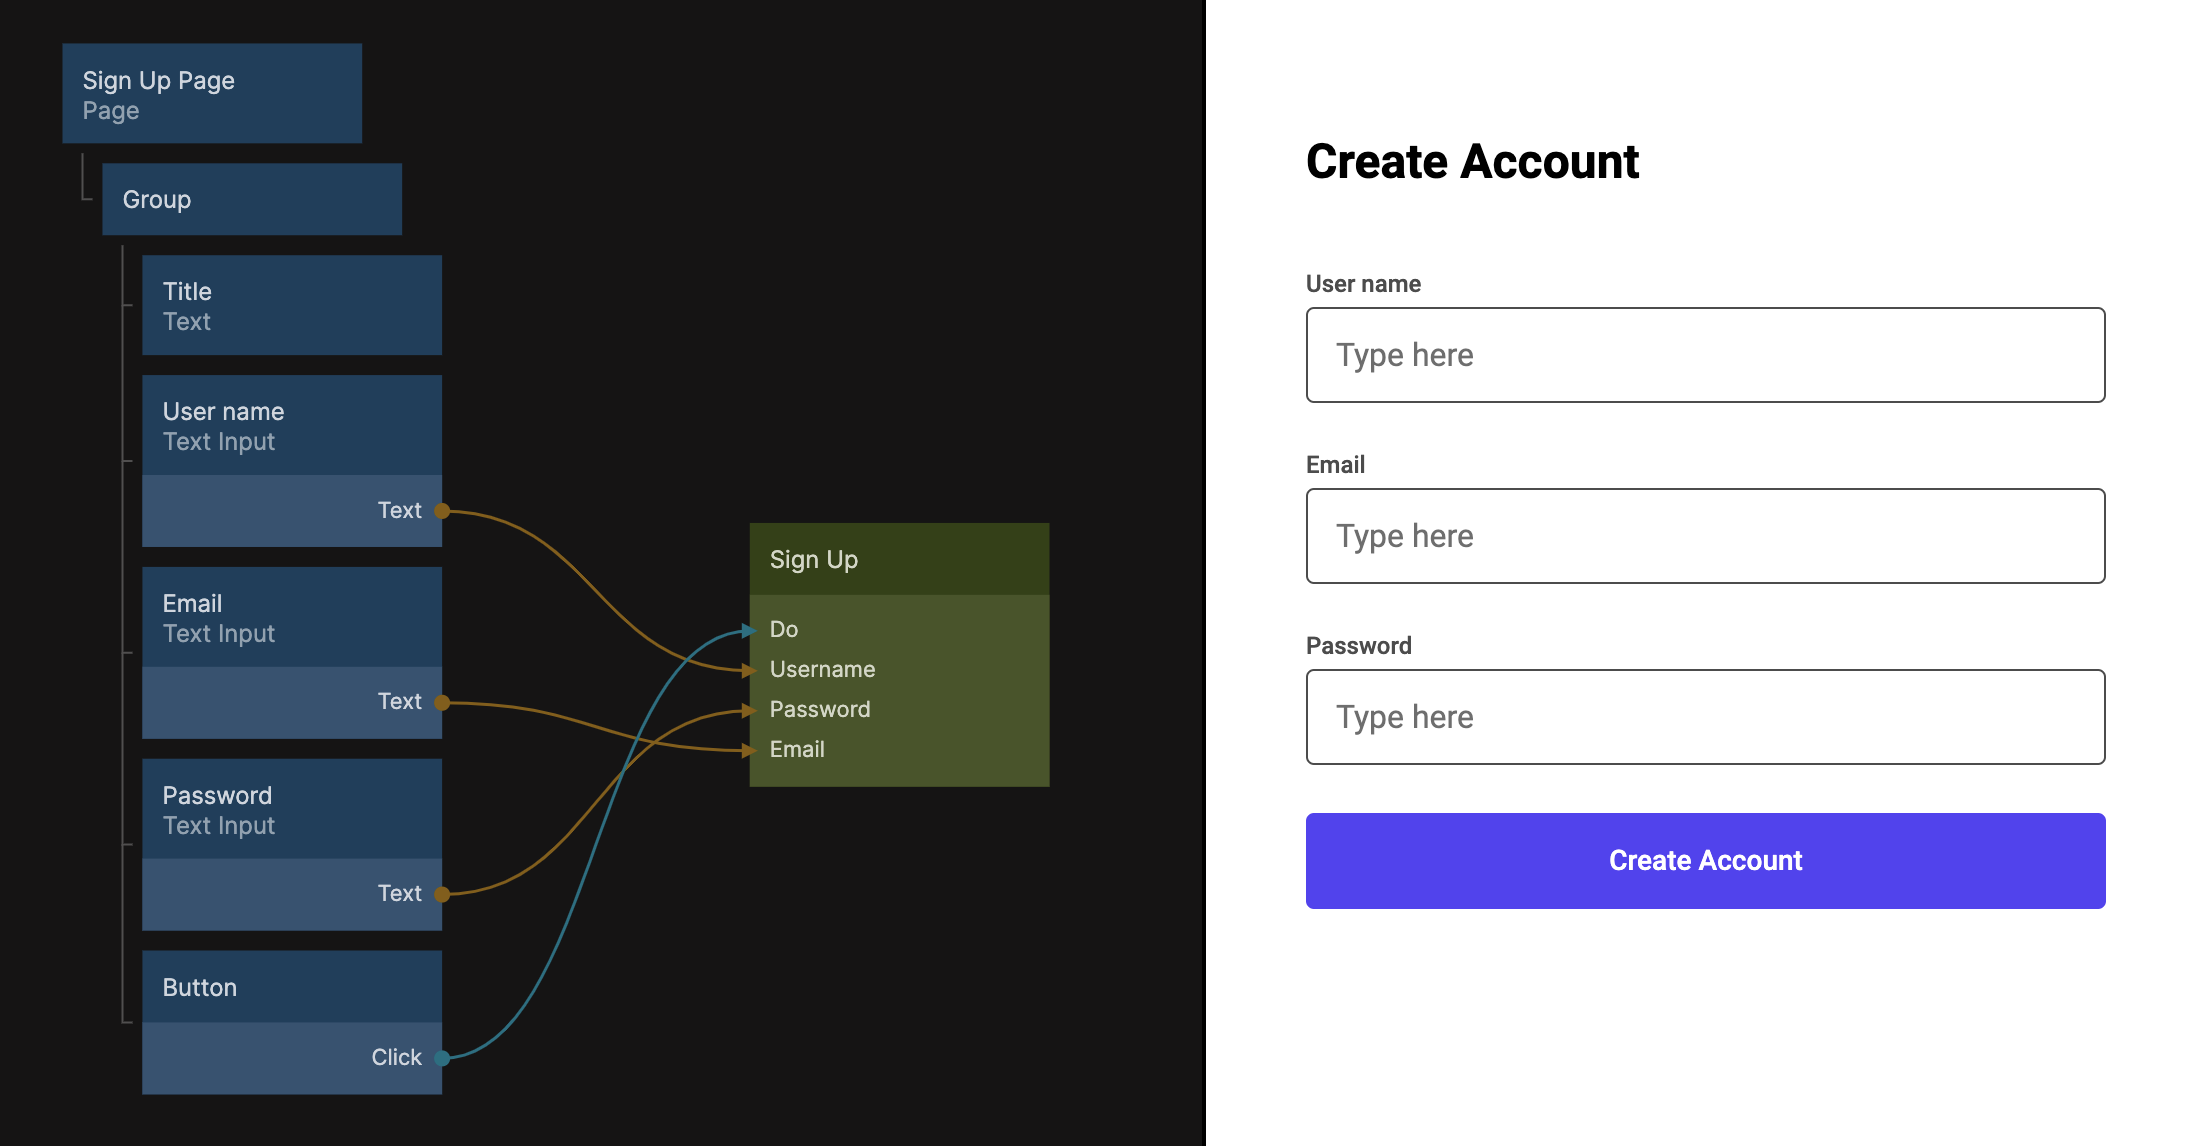
Lastly, we need a button to execute the user creation, so let's add a Button Node below our text inputs and connect its Click output to the Do input on the Sign Up node.
See users in the backend
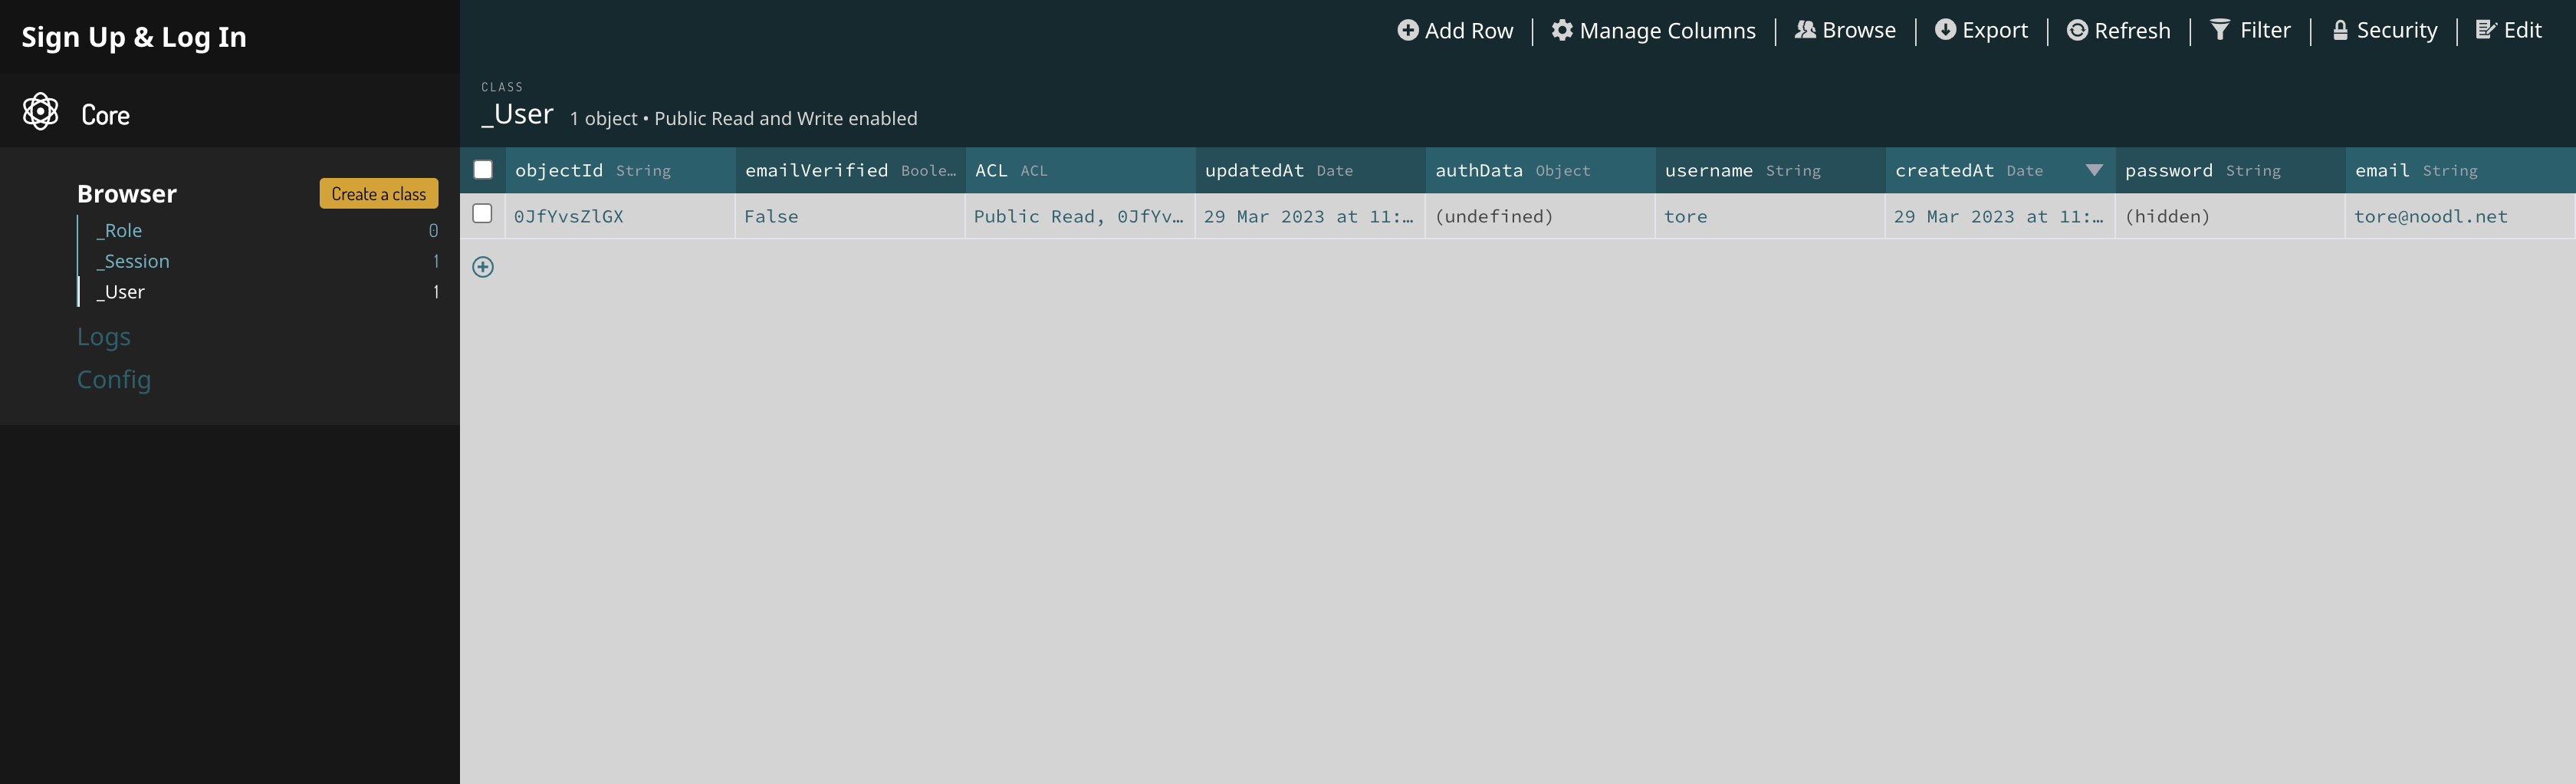
If we now fill in the form and click the button, the Sign Up node will execute and create a new user in the backend. If we open the Cloud Service dashboard for the the logged in user, we can see the created users in the User Class.
Navigate when a new user is created
When the Sign Up node creates a new user it also logs in that user, so when that happens, we want to navigate to a new page to show the user that they have signed up. But before we can this, we need a page to navigate to.
Let's create a new page called Home and then go back to our Sign Up Page component and add a Navigate node next to our Sign up node. The Sign Up node sends a signal if it succeeds, and we can use that signal to perform the do action on the Navigate node.

If we try to sign up a new user now, we can see that it navigates ot the Home page.
Let's now make a login page, so that existing users have a way to log in.
Creating a Log in Page
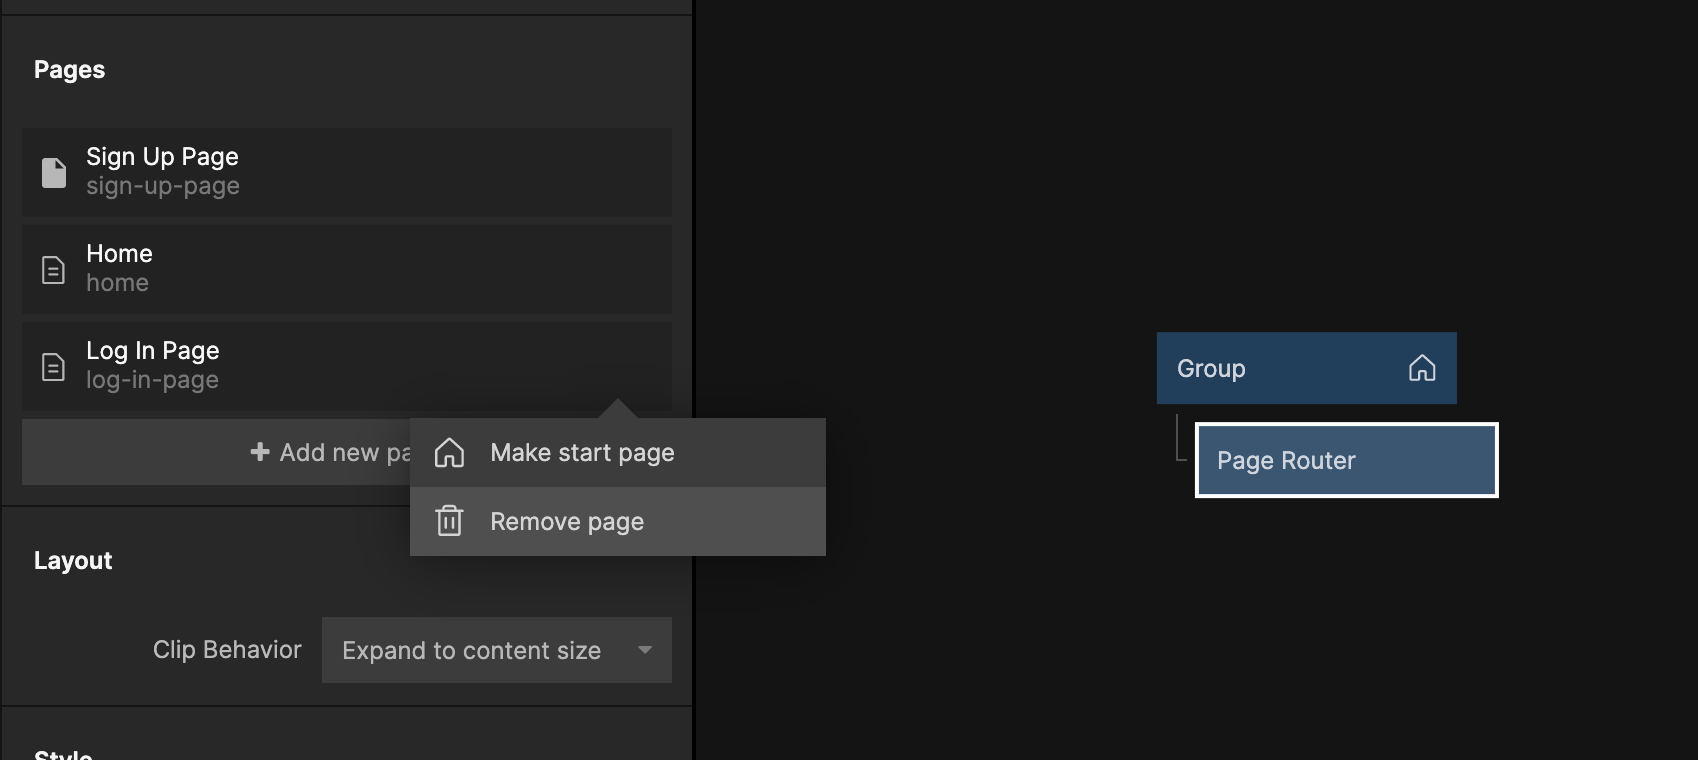
Let's start by creating a new page called Log In Page and set that to be the start page in the Page Router node in the App component.
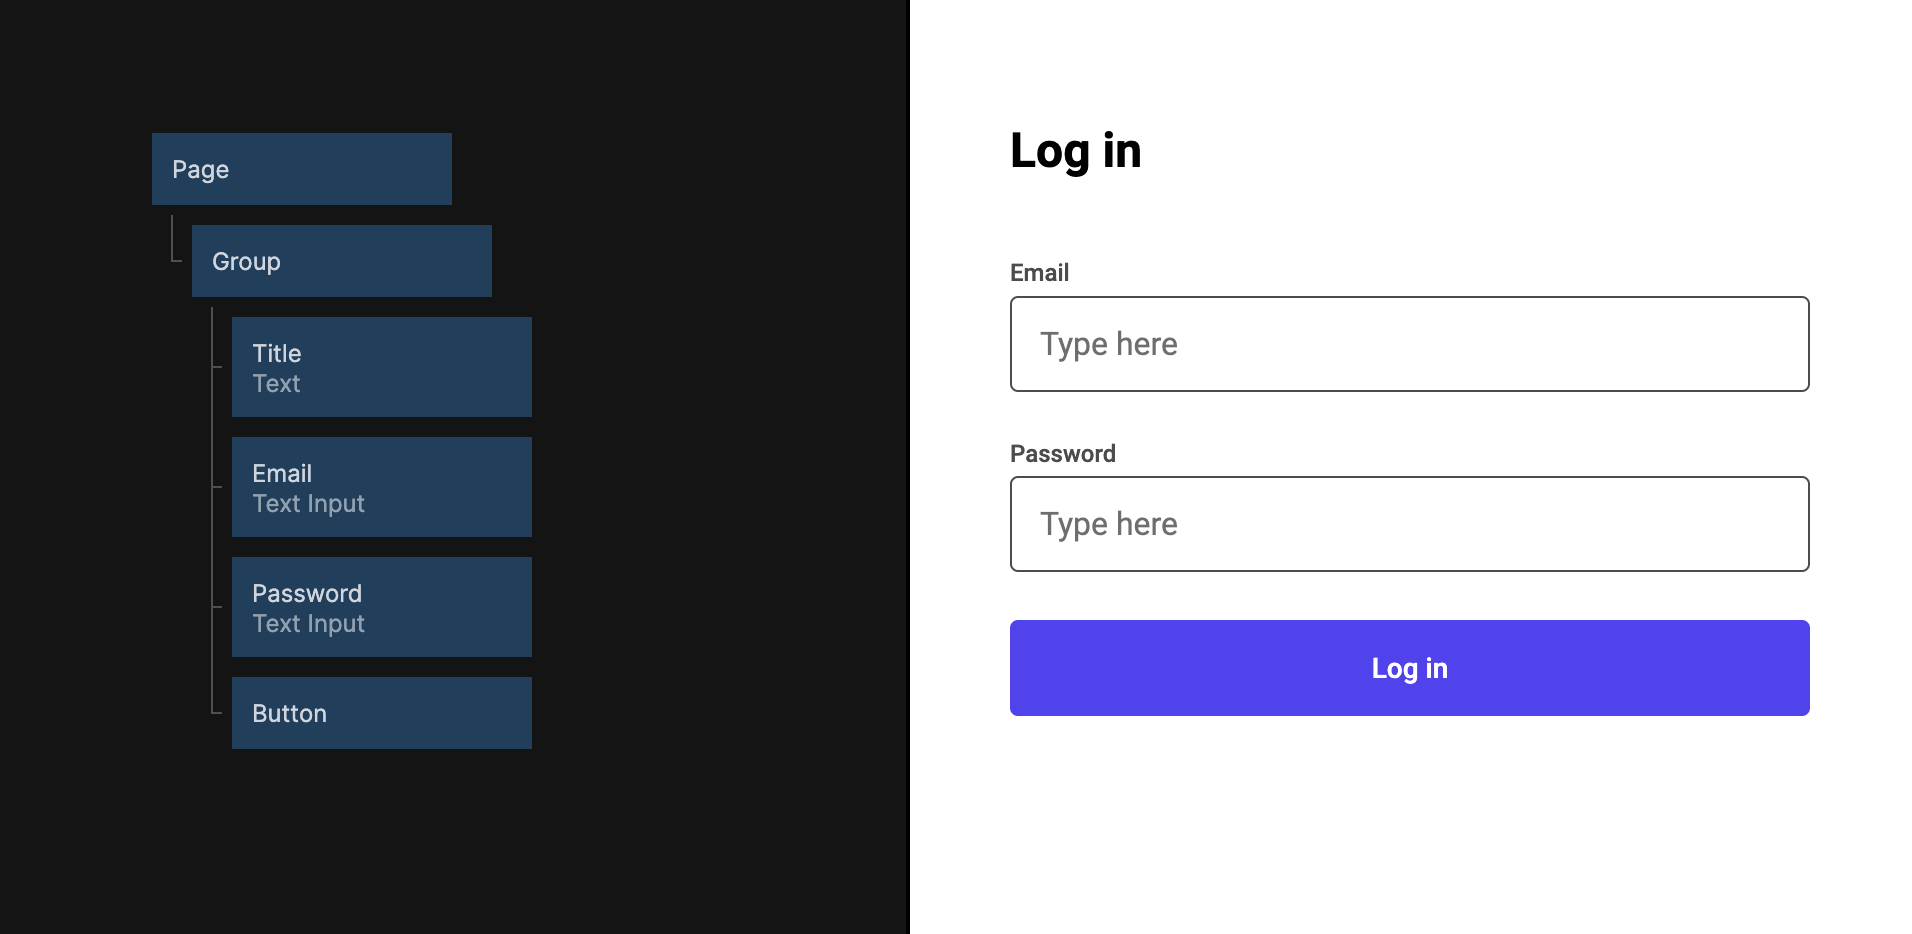
Now lets copy all the visual nodes from the Sign Up page and place them in the New Login Page, as we can reuse most of the layout and Input fields. Then Delete the Username Text Input, and change the title text node and the button to say "Log in".
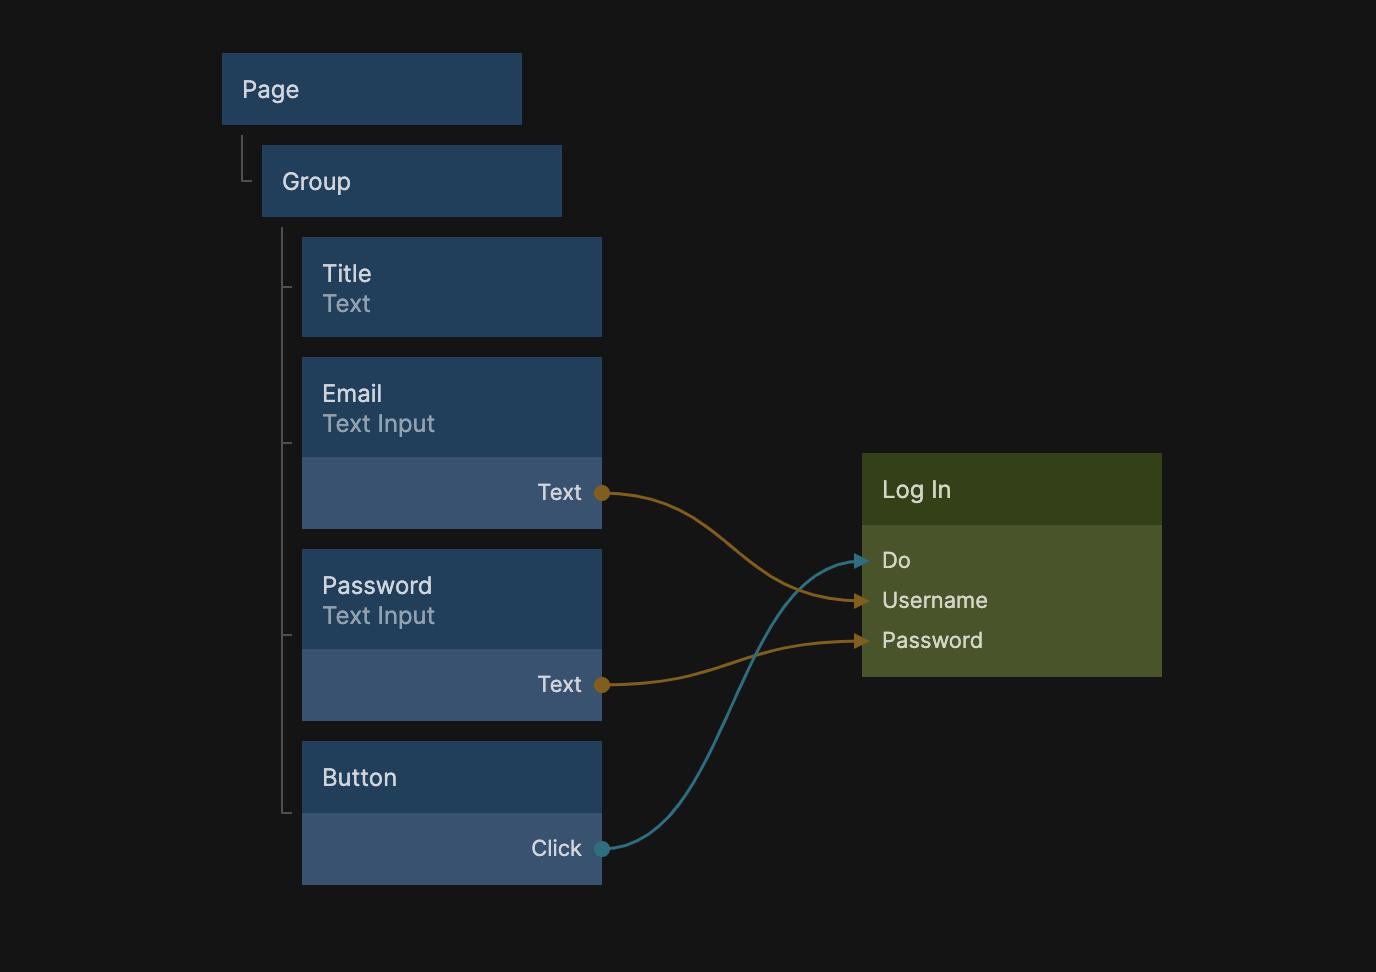
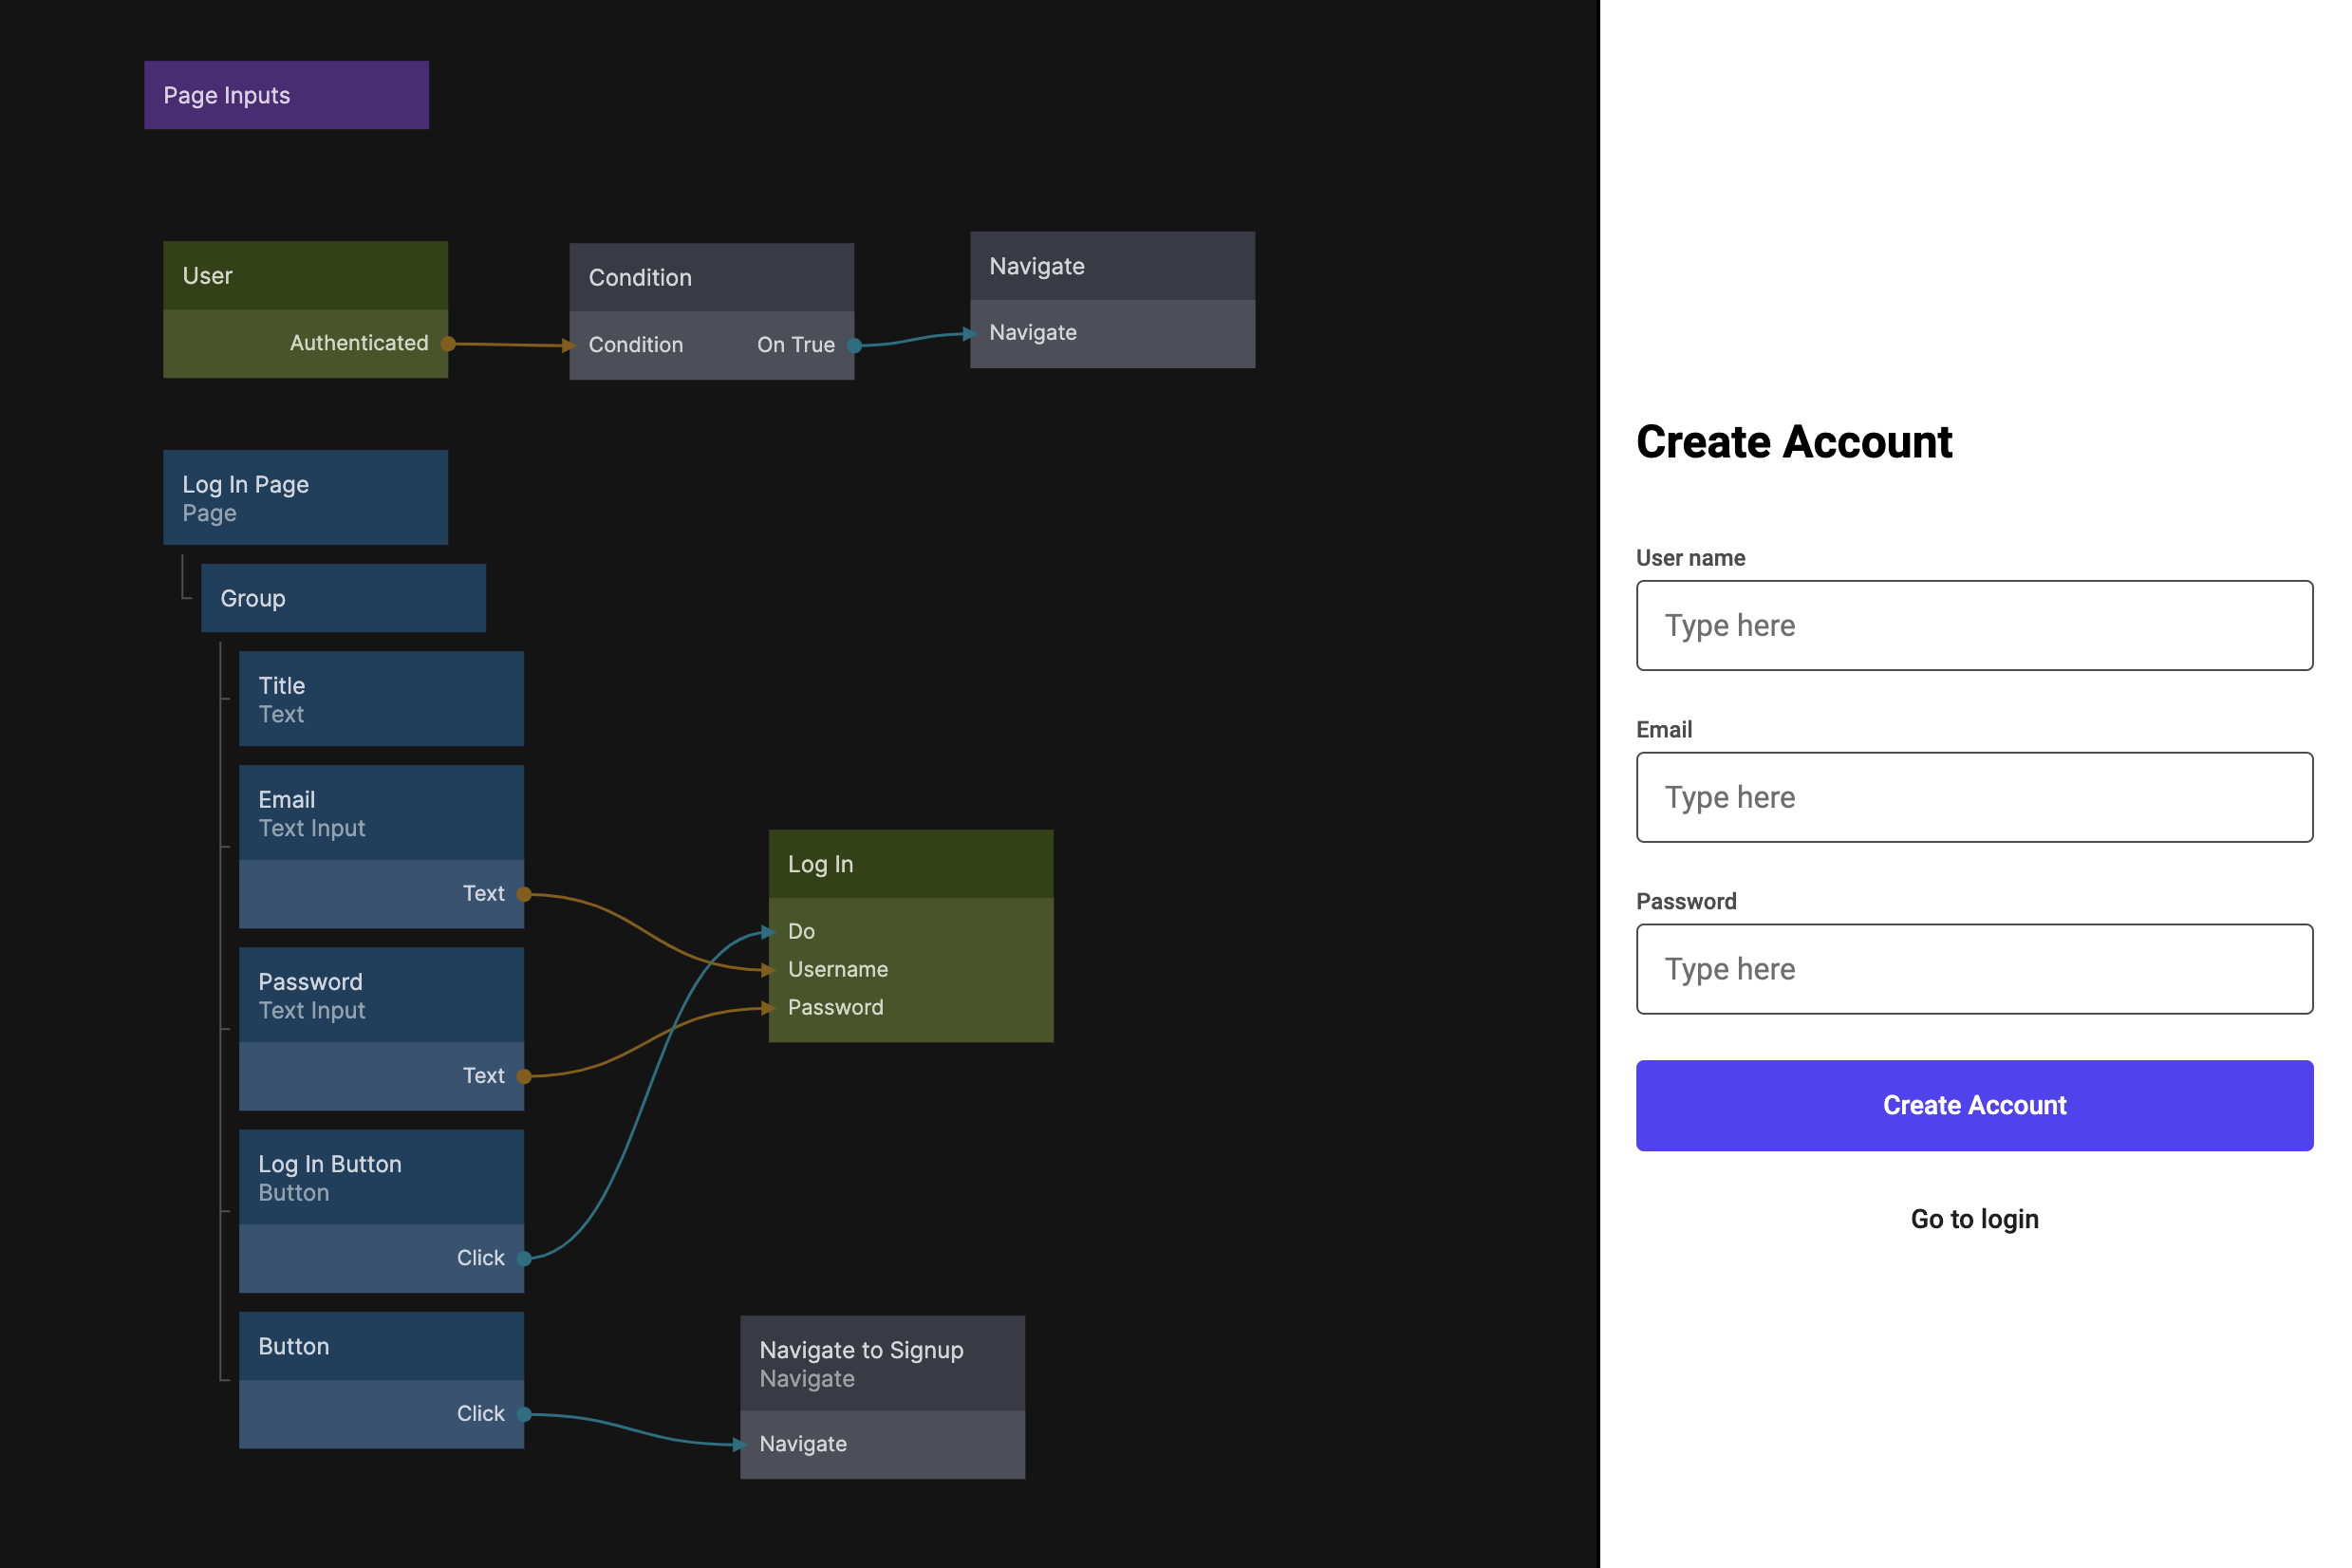
Next, Let's add a Log In node, and hook it up as shown on the image bellow.
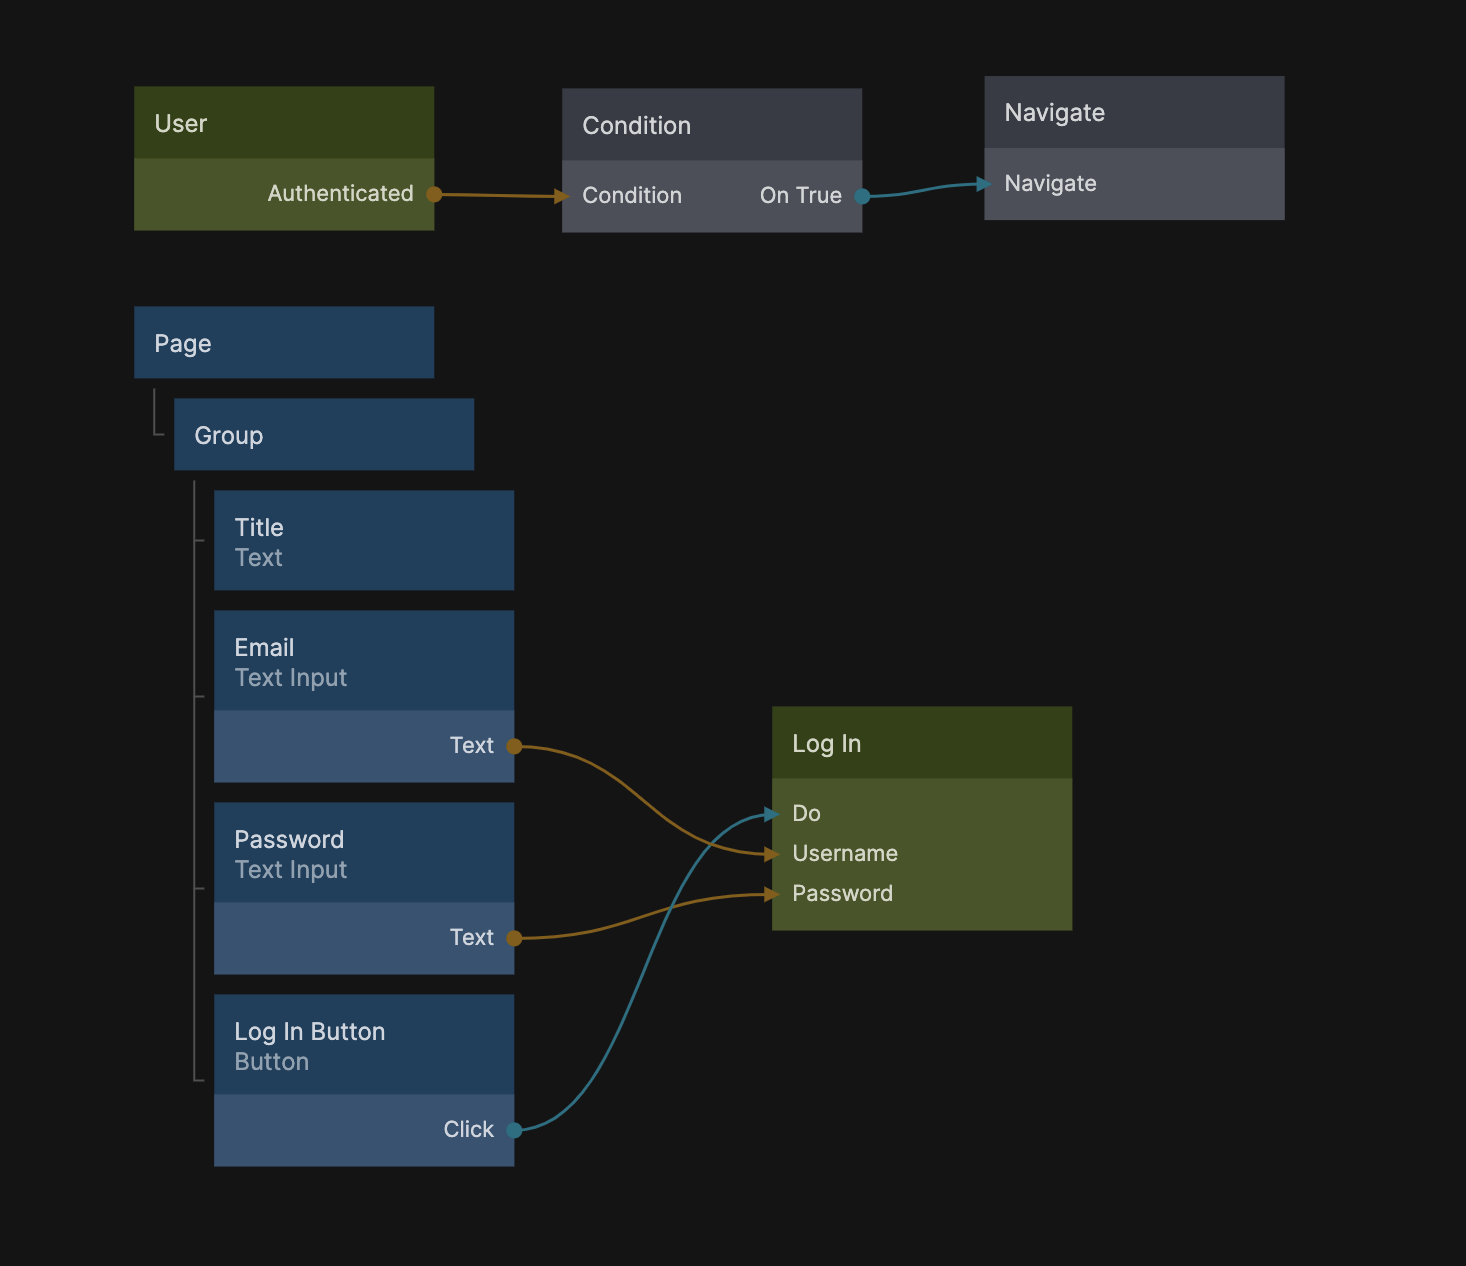
Similar to the Sign up flow, we want to navigate when the user logs in. But another trick we can do here is to use the User node to check if there is already a logged in user in memory. This is something the User node keeps track of for us, and we can use its Authorized output to perform the navigate if it's returning True.
As we have the Log In Page as our start page, we can use the User node here together with a Condition node to navigate if the user is already logged in from a previous session. Add a User node, Condition node, and a Navigate and connect it up as shown on the image bellow. The Navigate node should target the Home Page.
Show user data
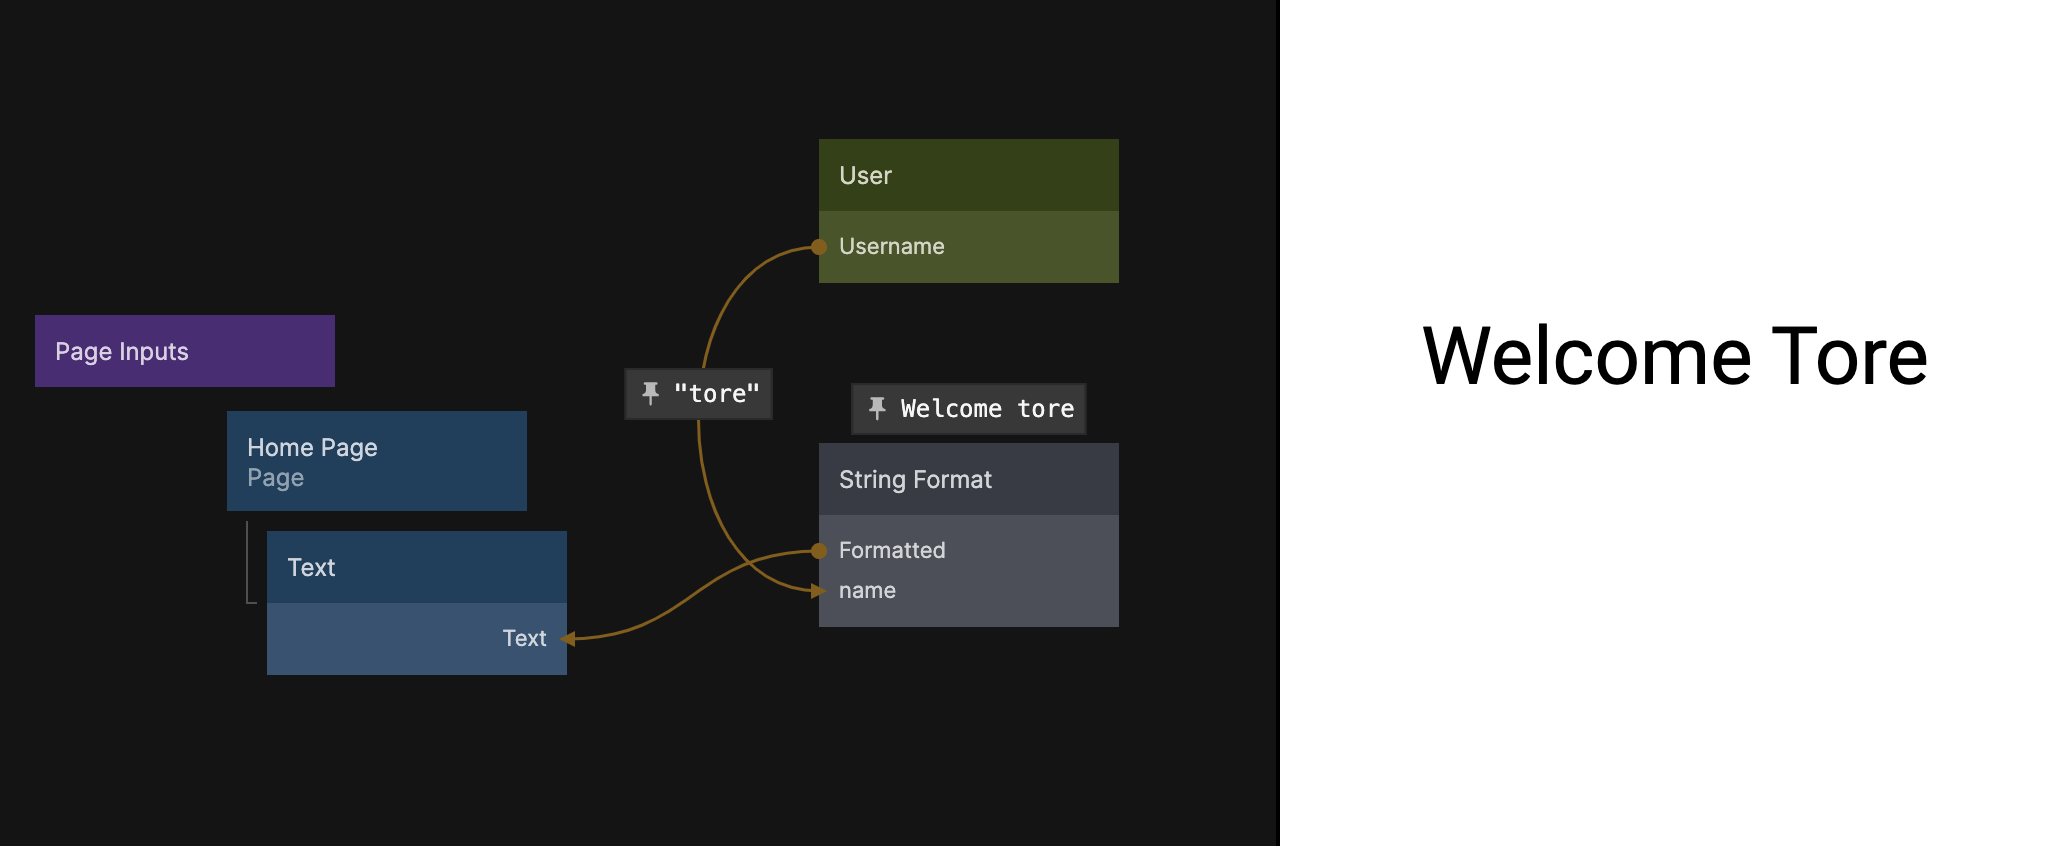
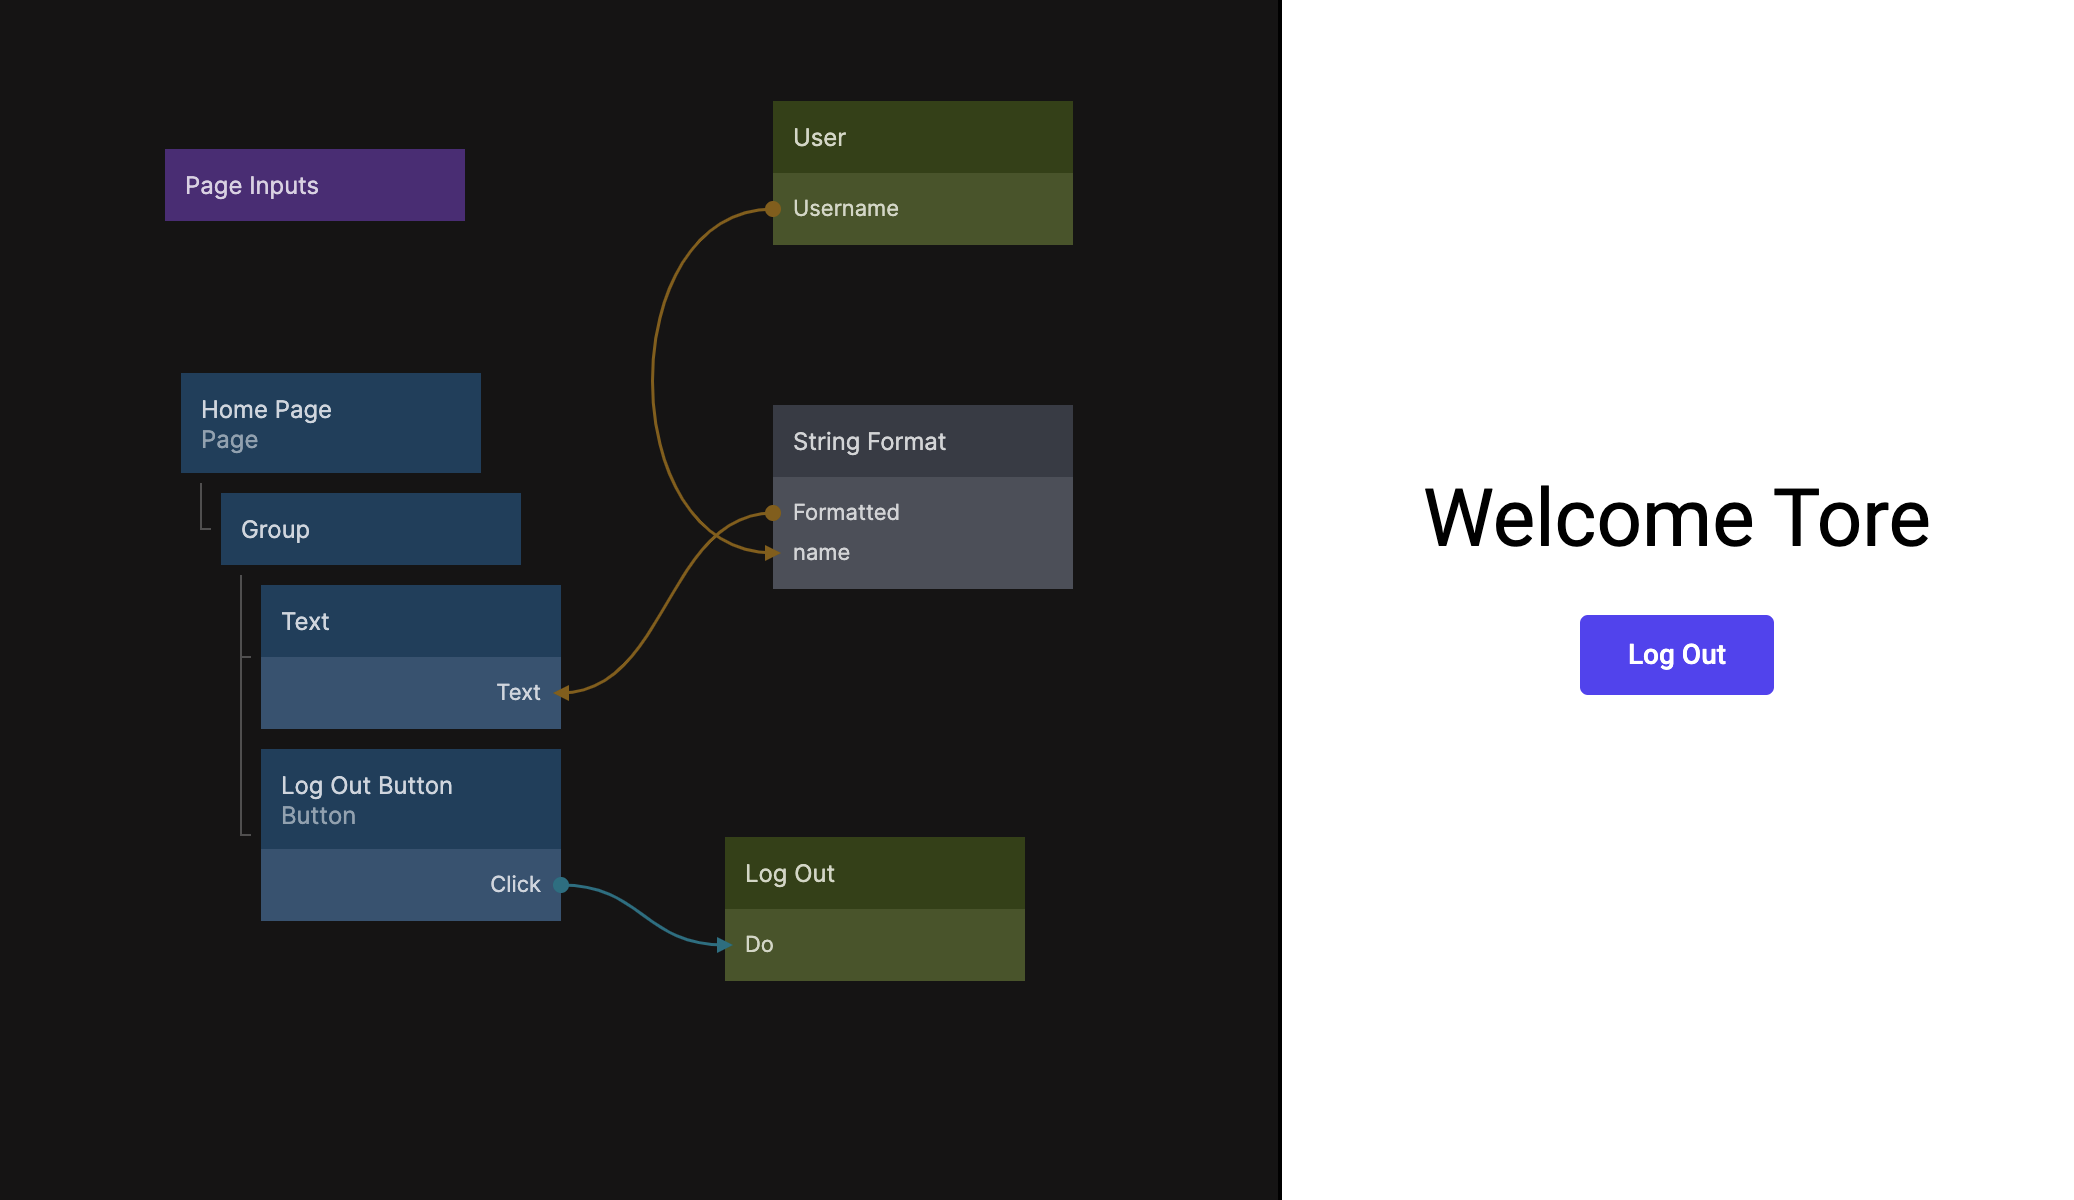
If we want to show user related data we can as well use the User node, to get the data once a user has logged in. Let's add a small greeting on the Home Page to show the logged in user's name. We can do that by using the User node together with a String Format node as shown bellow.
Log out a user
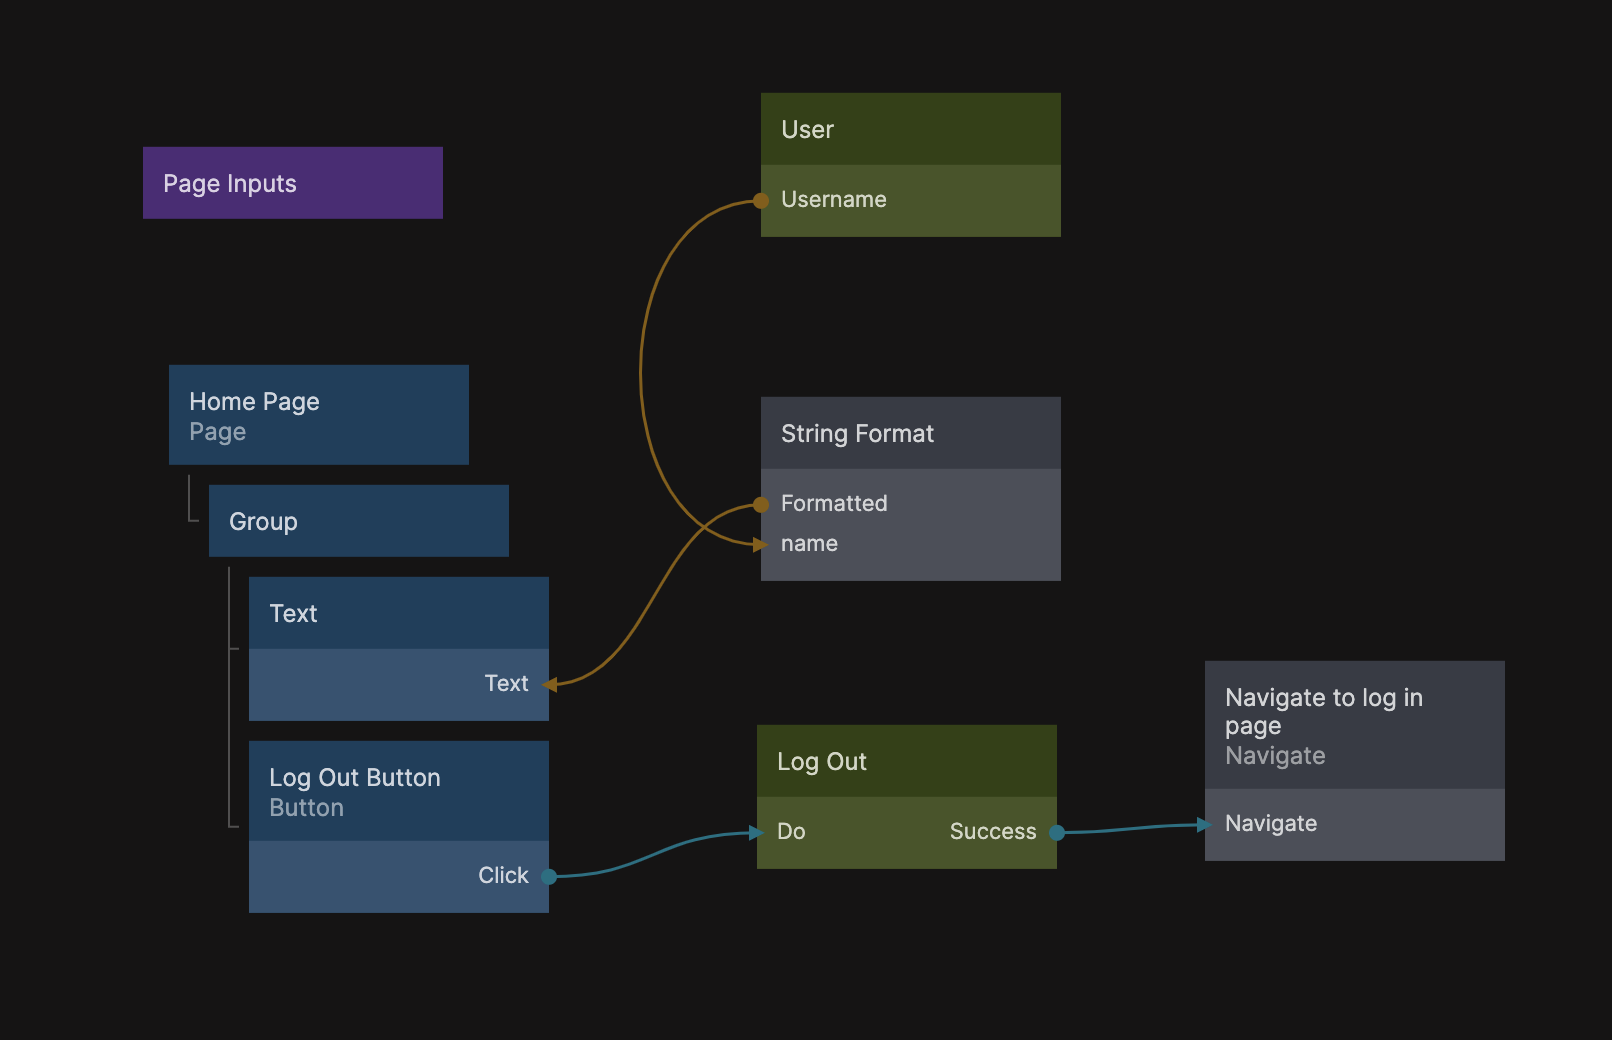
Lastly we can also log out a user by using the Log Out node. We need an event to trigger the log out so for this demonstration let's add a button and hook it's Click output to the Do input on the Sign Out node as the image shows bellow. Note that when login in users, it doesnt matter if we connect the email or username to the Username input on the Log In node. Both will work.
Again, we need to perform a navigation action once a user logs out, so lets add a Navigate node that takes the user to the log in page when they sign out. We can achieve this by connecting the success signal from the Log Out node to the Do input on the navigate node and have it targeting the Log In Page.
Let's end this guide by adding a few buttons to navigate between the sign up and login page. We can do that with another button that we style as a text button connected to a navigate node.
So on the Log In page we want a button that performs a navigate to the Signup page.
And on the Sign up page we want a button to navigate from Sign up Page to the Log In page.
And now we have a simple flow to sign up users and log them in. Next steps would be to add form validation to the text inputs, which can be done with the Form Validation module, and sending verification emails when a user signs up. From here we encourage you to create a new project using the Sign up and login template to inspect more patterns on how to do that.