Email Verification
Cloud functions play an important role when creating different log in and sign up flows. Using the nodes Sign Up, Log In and Log Out you can create the most basic flow that will have the user sign up with a username, optionally email, and password and log in with username and password.
note
It's common to use email for both username and email when signing up, so you only ask the user for email and password, one less thing to remeber right.
Once logged in you can use the Access Control functions of the cloud database to control what a user has access to and not. The built in role system will allow you to create features like teams/groups of users.
This is a great way to get started and focus on building your application. But once you start getting to the point where you want to expose it to more users often you need a more solid sign up and log in flow. The first addition is likely the need to verify the email of users and allow them to reset the password and this is what we will cover in this guide.
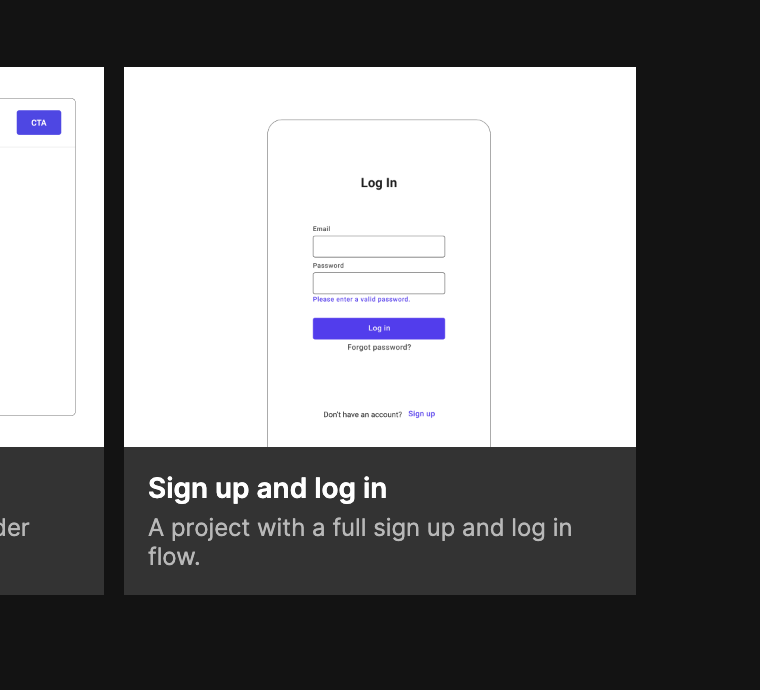
There is a project template that contains a more complete sign up and log in flow that also covers sending emails to users on sign up, editing the profile etc, and it uses cloud functions to do some of these things that cannot be performed from the frontend for security reasons (cloud functions always have full access to the database).
You can either start a new project from the template, or you can import the cloud functions into your existing project. We will review them here in this guide, case by case.
Settings
In order to make the email verification process work there are a few configuration parameters that need to be provided. This is done by opening up the dashboard for your Cloud Serivce and navigating to the Config tab using the sidebar. You can learn more about config parameters by looking at the Config node. The configuration parameters you need a are shown below:

EmailVerificationDomainHere you need to enter the domain where your application is deployed starting withhttps://. This is used for the links in the verification emails. When running locally this will automatically behttp://localhost:8574, this is where the local Noodl web server is running.EmailVerificationFromThis is where you put the email address that should be used as the "from" email when sending verification emails to users. It's important that this is a valid email with Send Grid (the email sending service we use for the application).SendGridAPIKeyThe project template and email verification prefabs use SendGrid as an email service, to use it you need to sign up and get an account (it's free to test). Then create an API Key and put it in the config. More info on how to use Send Grid with Noodl can be found here.
Signing up
Signing up is done with the Sign Up action node. After the user has successfully signed up the cloud function Send Verification Email is called. This function will send an email to the address provided by the user.

Let's take a closer look at the cloud function. There is no need to dive into the details but it's good to review the main flow and blocks. The cloud function is found in the cloud function tab, in the Sign Up folder, it's called Send Verification Email. The first this when the function is started is that a Request Email Verification action component is used.
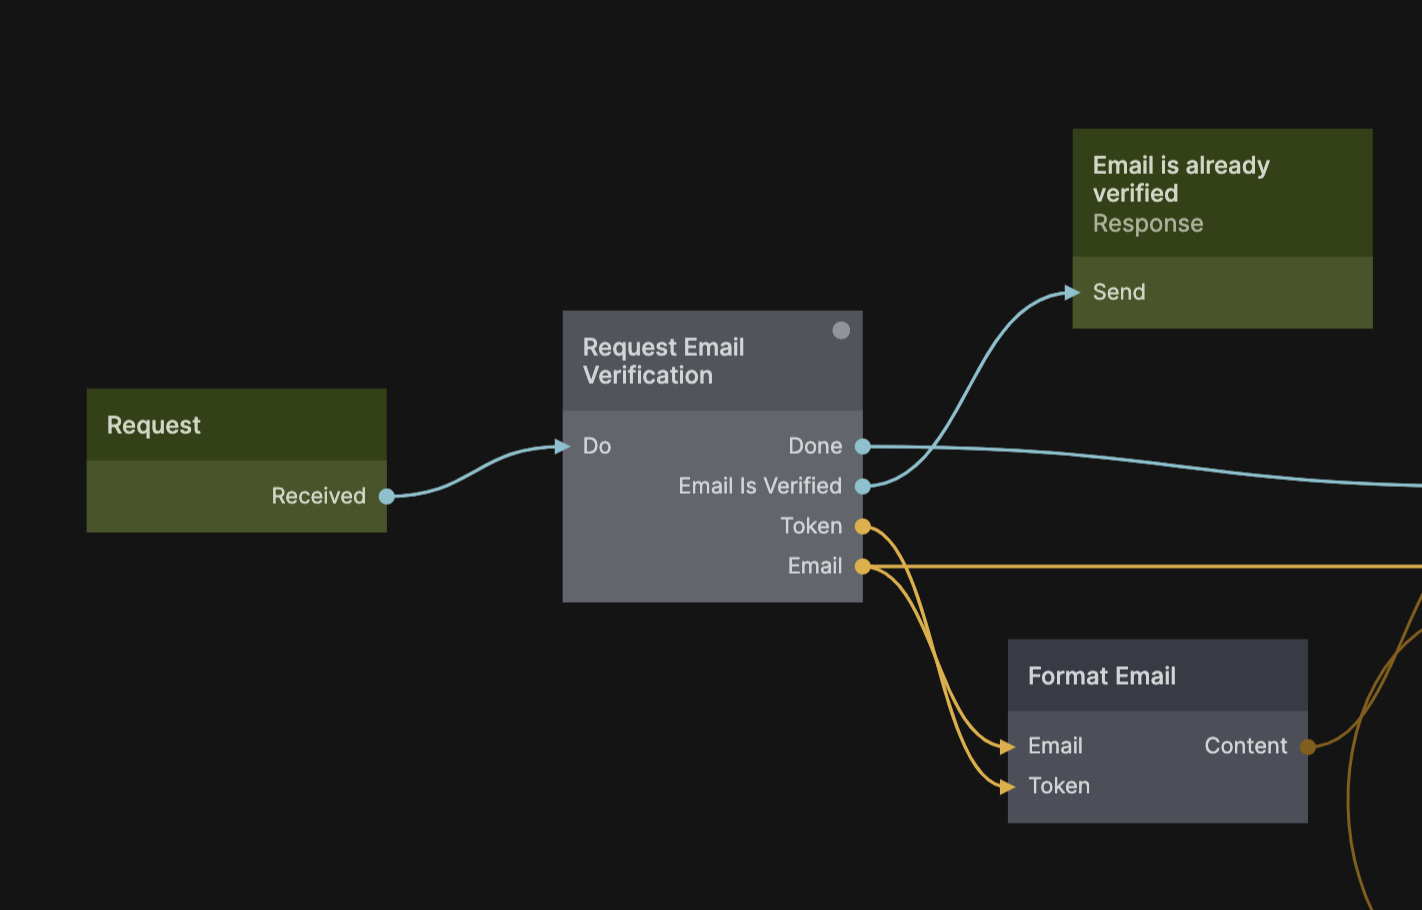
This action create a secret token (a random string of characters, sort of a temporary password) that it stores with the current user. This token will later be sent to the user as part of an email. If the email is already verified a signal will be emitted on Email Is Verified which we will return as an error result for the cloud function.
The next part is actually sending the email to the user. This is done in the function with the Format Email and Send Email action components.
The Format Email action takes as input the verification token and the email of the user and creates an email with a link. You can look at the properties of the Format Email node to see the content of the email.
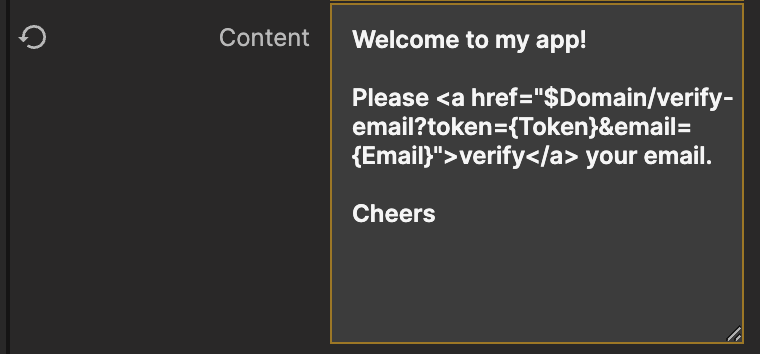
As you can see it creates an email containing an HTML link, this link uses some fancy template syntax.
- $Domain This will be replaced by the format email node to the domain where your application is deployed, so that the link will take you back to the app. More on this later.
- {Token} This is the generated token from before.
- {Email} This is the email for the user, it will be used to fetch the user and marked the email as verified in the next step.
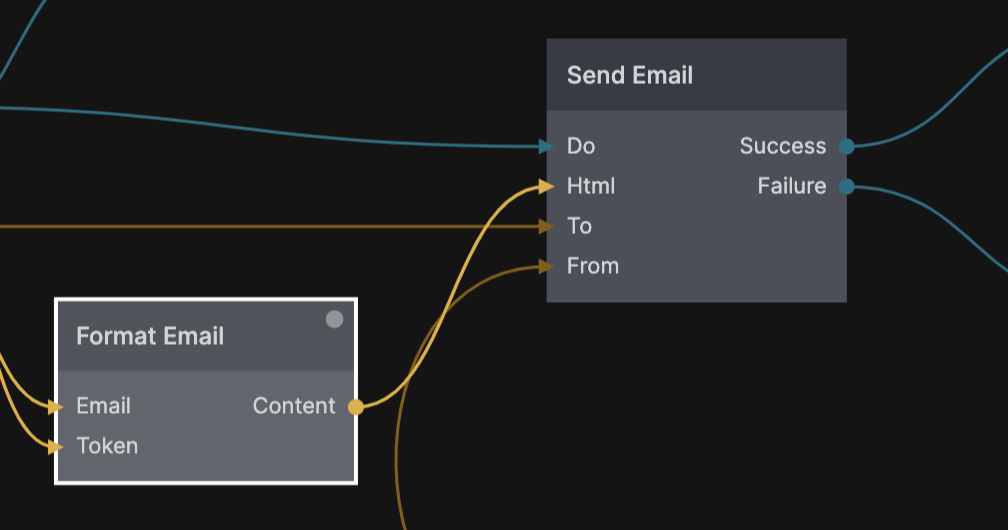
The Format Email node outputs the final email with the correct values for the above placeholders insterted. This email content is then sent to the Send Email node that actually sends the email to the user.
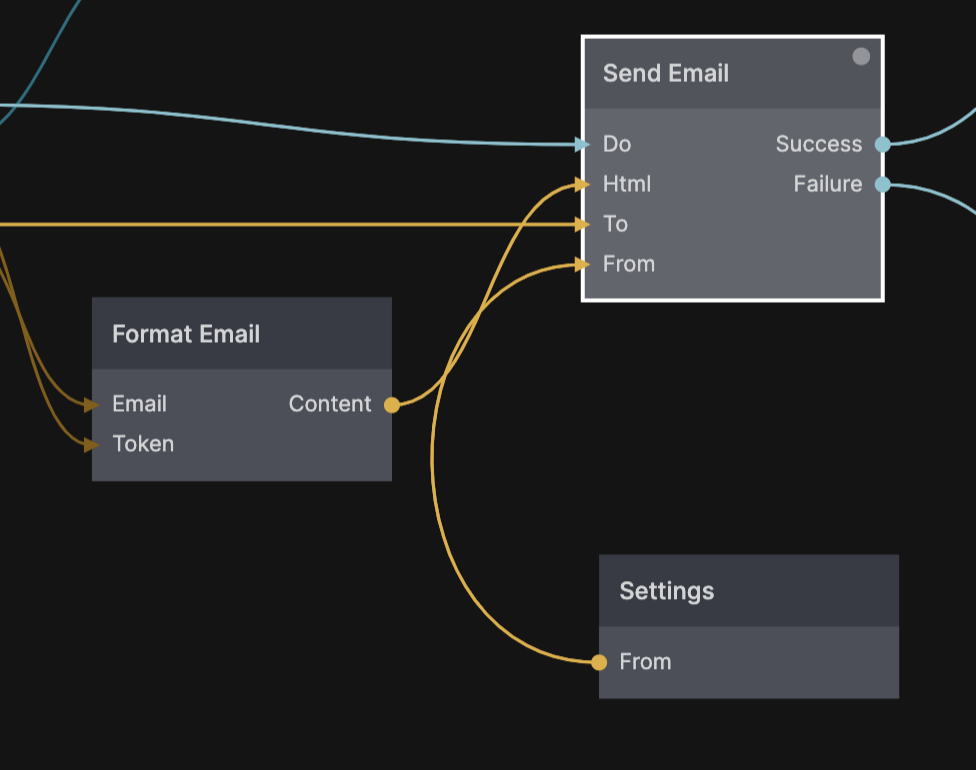
That's it. Now the user should have a fresh email with the subject Email Verification! in it's inbox. You can edit the Subject property of the Send Email action.
Verifyng the email
We need one more thing in place for the email verification flow to work. We need the page that the link in the verification email points to. After the Format Email action have formatted the email template and inserted the Token, Email and Domain the resulting link will look something like this.
<a href="https://your-app.sandbox.noodl.app/verify-email?token=abc&email=user@email.com">verify</a>
This little thing will send the user back to your app (remember you can use http://localhost:8574 as domain for testing, before your app is deployed) and specifically to the page /verify-email. So, let's take a look at the page in the project template.

There is a lot of stuff here but the important things is the Page Inputs where we get the Token and Email as part of the query parameters in the link (the stuff after the ? in the link), these are passed to the Sign Up / Verify Email cloud function that is called as soon as the page is loaded with the Did Mount signal.
If it succeeds, the email was verified and the user is sent to the log in page of the app with the Navigate node and a toast message is shown. If it fails, a message is displayed on the screen and a toast is shown using the Show Toast component (you can find this among the prefabs and install it into your project, same for the Loading Spinner).
Once logged in to your app you can inspect the user object by hovering over any User node. Here you can see some properties that have been set by the email verification cloud functions.

The most important is the emailVerified property of the user, this indicates if the user have verified their email of not. In the sign up project template the user is actually send to the home screen of the app even if the email address is not verfied and a banner is shown. You could for instance only enable certain parts of the application if the user have verified their email.
If the email was not received properly of if the user would like to have another verification email sent you can simply call the Sign Up / Send Verification Email cloud function again.
note
If you update the email with the Set User Properties action node, it will automatically switch the emailVerified property of the user to false.
Reset Password
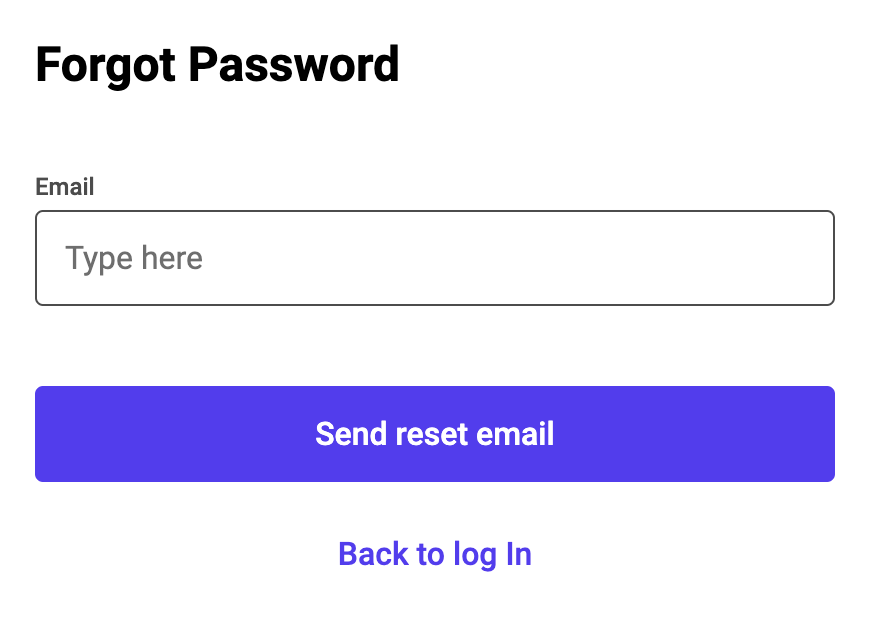
Resetting a user password when it's been lost follows the same pattern as sending an email for verification. First you need to present some sort of UI where the user can enter their email address to recover their password.
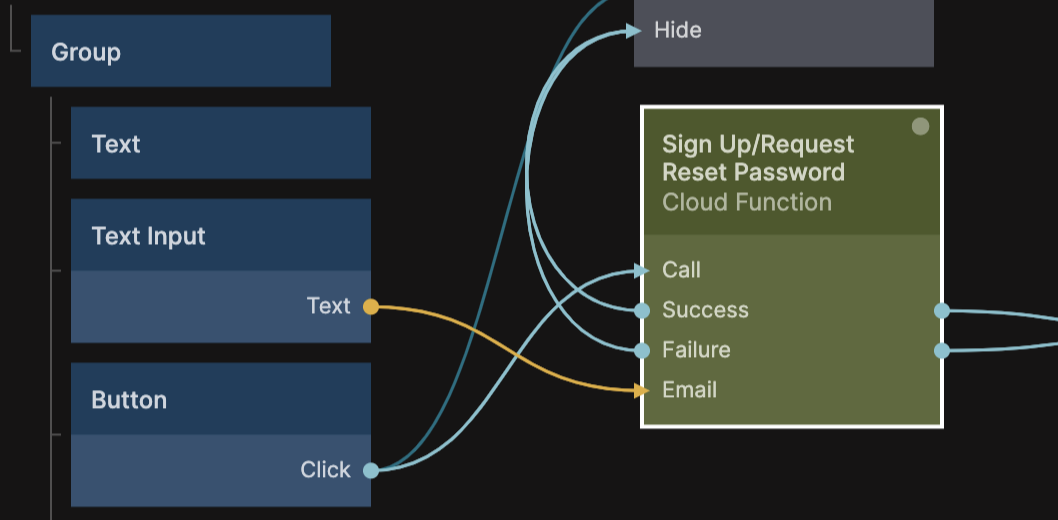
There is a function called Sign Up / Request Password Reset that simply accepts an Email and it can be called without the user being logged in.
The cloud function follow pretty much the same pattern as when sending email verifications. It will send an email to the user with a link containing a secret token just like when veryfing the email address.
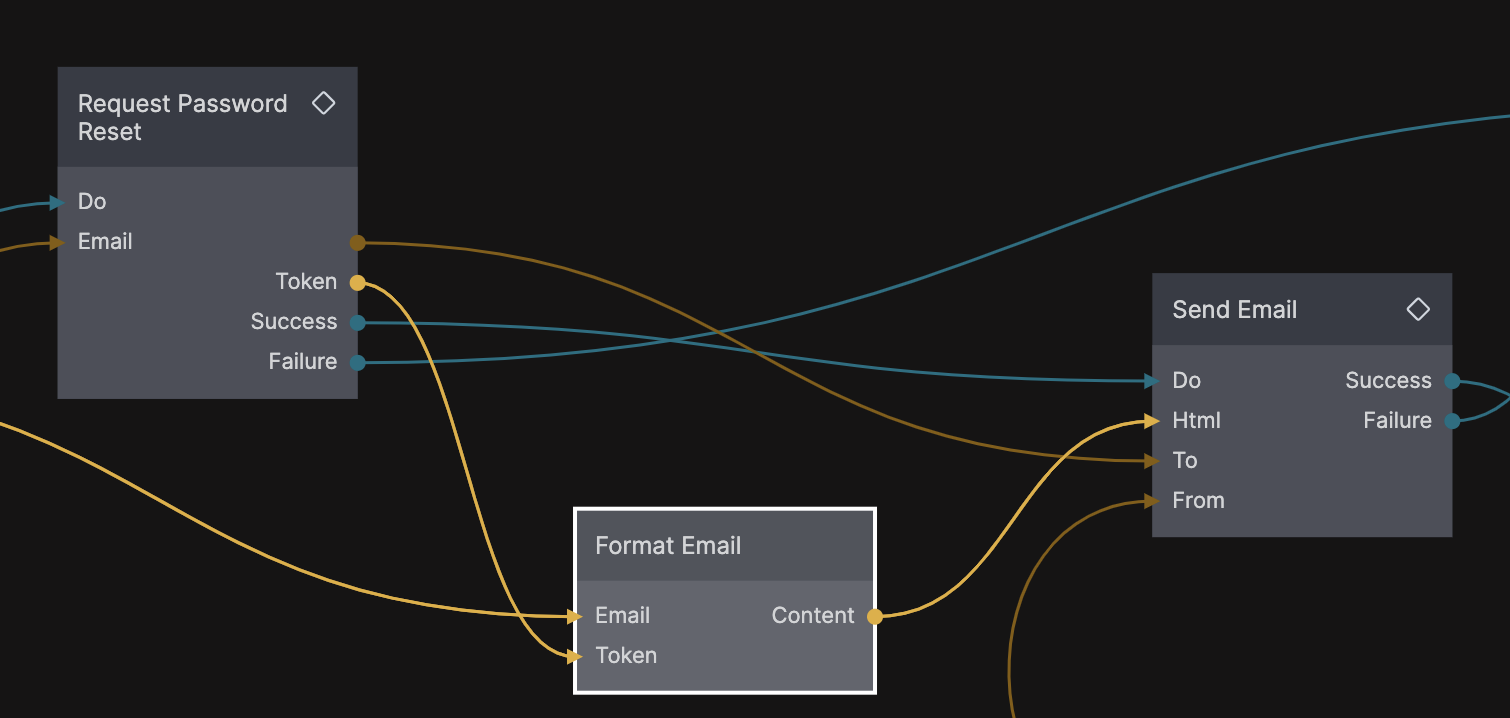
The Request Password Reset action will generate the secret token which is passed to the Format Email along with the users email. This time it will generate a link to a page called /reset-password. You can edit the content of the email in the Format Email node.
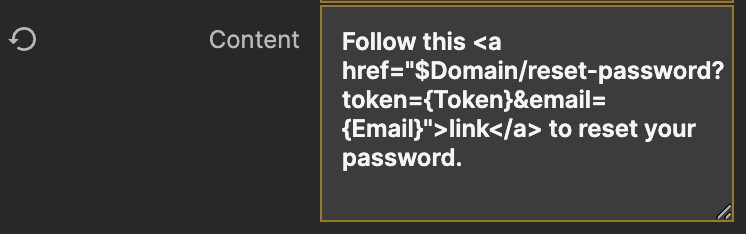
The resulting link will look something like this:
<a href="https://your-app.sandbox.noodl.app/reset-password?token=abc&email=user@email.com">link</a>
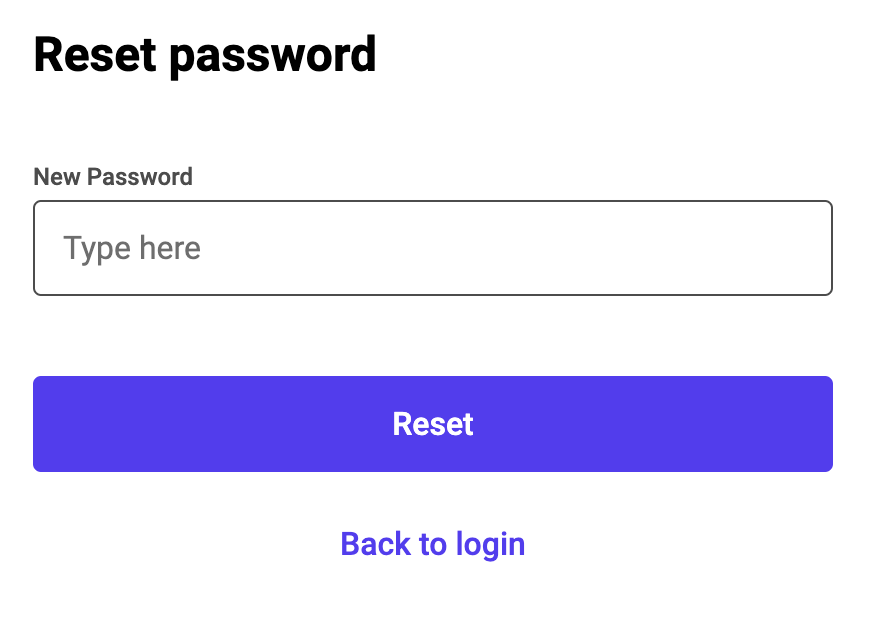
The link will take the user to the /reset-password page which can contain a Text Input where the user can provide the new password.
When the user hits the reset button we will call the Sign Up / Reset Password cloud function by supplying the secret token and user email that is received via the query parameters of the link and the Page Inputs node.
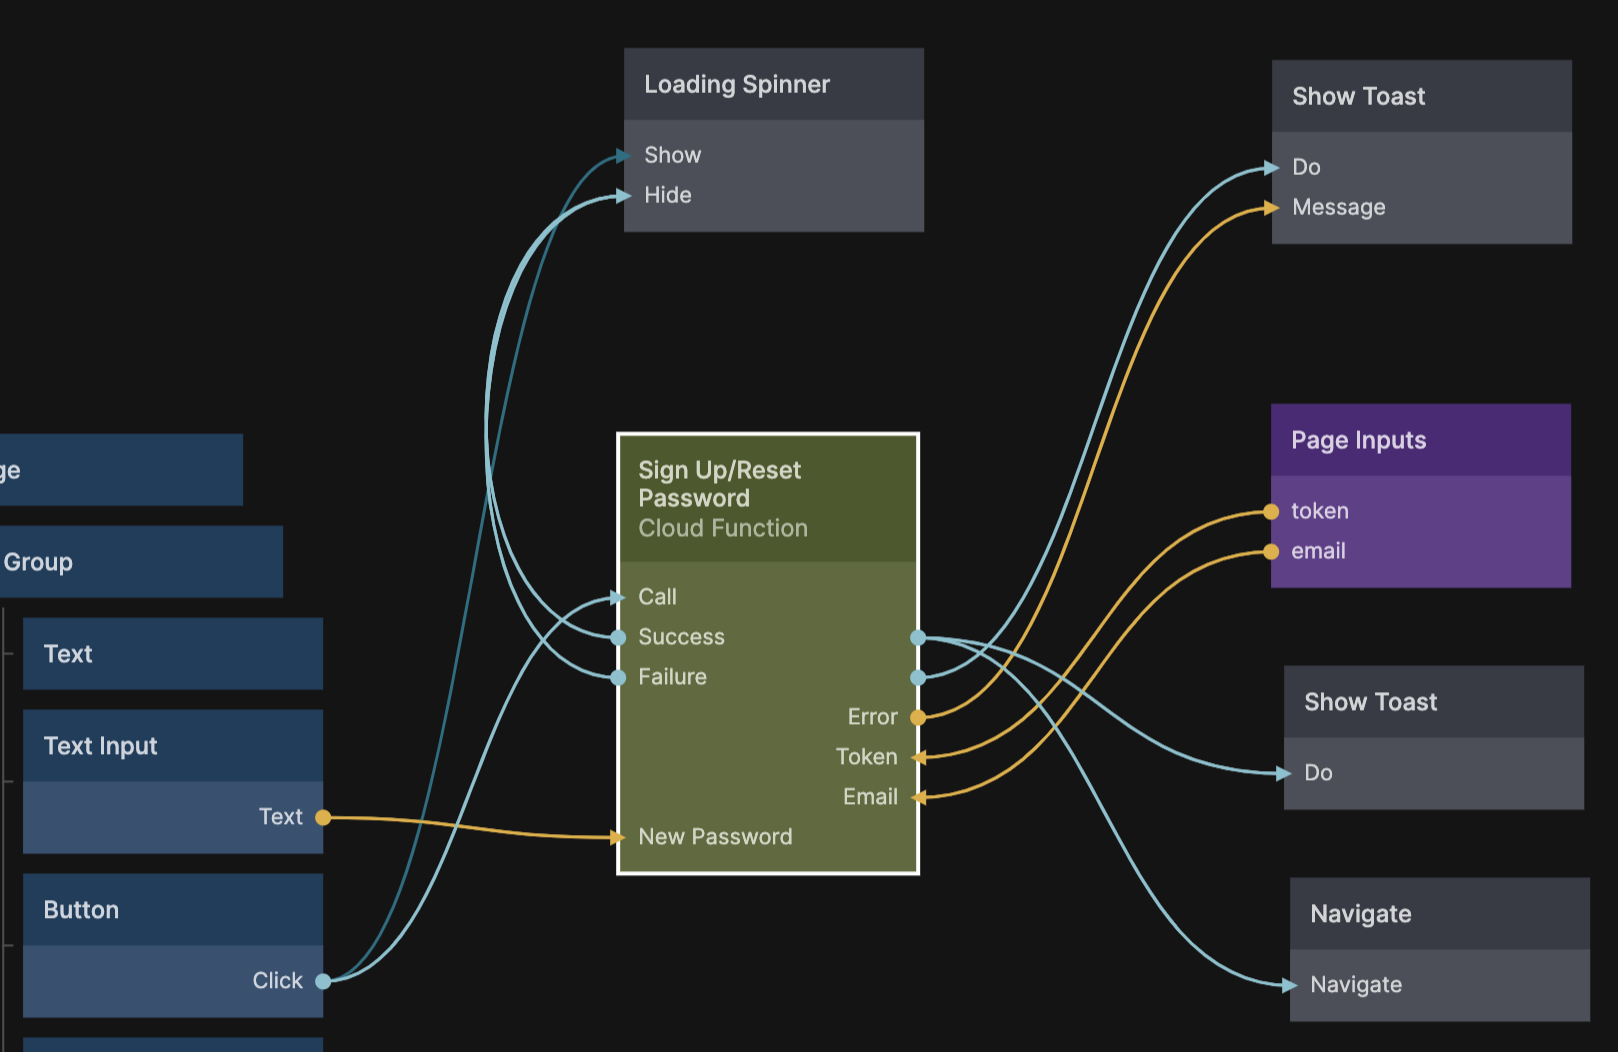
Provided that the secret token is correct and have not expired (tokens are valid for 24 hours) the password will be updated. You can then send the user back to the Log In page.
That's it, this is how you use cloud functions to create an email verification and password reset flow. You will use cloud functions for a lot of user management tasks that need to be performed on the backend with full database access.