Using a self hosted backend
What you will learn in this guide
This guide will let you create a self hosted backend with an external database. This is an alternative to using an Noodl Hosted Cloud Services. Some reasons why you might want to do this could be:
- You want to host your own database, maybe to ensure where data is stored or other privacy reasons.
- You want to host your own backend on a cloud service such as AWS or Google Cloud Platform.
note
Self Hosting
Note: To be able to follow this guide you must have "Self Host" feature enabled. This is not available in the free Noodl plan. But you can request a trial here.
Overview
We will go through the follwing steps
- Set up a Database cluster on MongoDB Atlas (any MongoDB or Postgres database is supported)
- Spin up a container with the Noodl backend docker image.
- Connect to the self hosted backend from your Noodl project.
The different parts of a Noodl App
As a background it's good to know that a Noodl App consists of three parts:
The database All Noodl applications must be backed by a database, you can use either a MongoDB or Postgres compatible database. This is where users and other records are stored. Nodes like Query Records access the database via the backend web service.
The backend service This is the Noodl backend service that is provided via a Docker image and an instance can be started on most cloud providers. The Noodl backend is based on and compatable with the Parse Platform which is a great choice for a backend service. A solid open source project with an active foundation supporting many of the critical functions needed.
Static frontend hosting Noodl applications are SPAs (Single Page Applications) and need a place that serves the application frontend created when you deploy your application from Noodl. You can use a Noodl hosted frontend, with a custom domain, together with a self hosted backend, or you can host the frontend yourself as well.
This guide will look at setting up your own self hosted Database and Backend.
The Database
You can choose any MongoDB or Postgres compatible database, for this guide we recommend using MongoDB Atlas as it provides a free tier and you can choose to host it on GCP, AWS or Azure. You should always try to host your database using the same cloud provider as the backend service and preferably in the same region.
It's also very easy to get stated. Follow the instructions to setup your account. Create a new database.

You can start by choosing the free plan (you can always upgrade later) and then the cloud providerand region where you would like host your database. Next you will be shown the security section of the setup. This controls who can access your database, you don't need to create a user as there is an admin user by default, you can choose to limit the IP-adresses that can access your database but don't worry about that now (you can always edit this later), just click Finish and close.
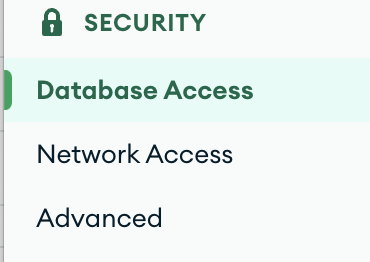
Once your database is up and running you need to get the connection details for the next step. First you need to obtain the password of the Admin user. You will find your database users under the Database Access section.
Find the Admin user and clicked edit. Under the Password tab click Edit Password, generate a new password and copy it. Store it somewhere safe, you will need it for the next step. Don't forget to click Update user before moving on.
Now you need to find the connection URI. In your cluster dashboard choose Connect.
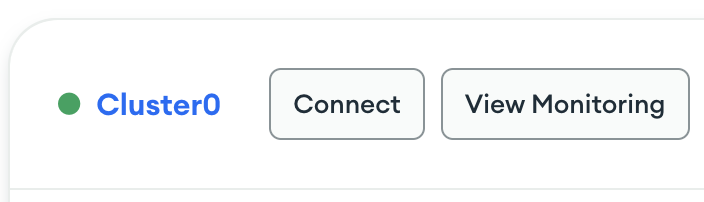
Followed by Connect to your application.

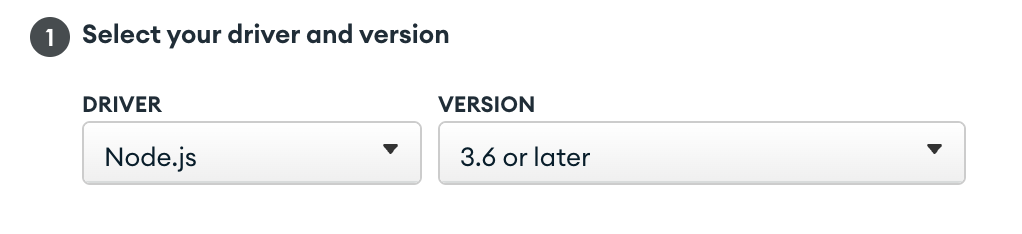
Make sure the version is 3.6 or later.
Now you need to copy and keep the connection URI shown below. It will look something like this:
mongodb+srv://Admin:<password>@cluster0.xxxxxxx.mongodb.net/?retryWrites=true&w=majority
You need to replace the <password> with the Admin password you generated before. Also, insert the name of your database in the url, you can pick any name, let's call it noodldb, your final URL should look something like this:
mongodb+srv://Admin:<password>@cluster0.xxxxxxx.mongodb.net/noodldb?retryWrites=true&w=majority
Keep this URI safe as it will have full access to your database.
The backend service
Next up we will deploy an instance of the Noodl backend service that we will point our application to. We provide guides for setting up Noodl on Amazon Web Services or Google Cloud Platform, follow the links below and set up the container. When you are ready you can proceed to the Connect your application to the self hosted backend below.
Setting up a backend on AWS Make sure you have an AWS account created and then follow this guide.
Setting up a backend on GCP Make sure you have account on Google Cloud Platform created and then follow this guide.
Connect your application to the self hosted backend
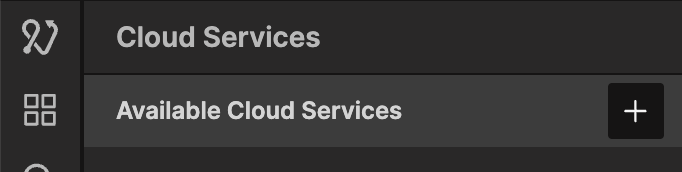
You can now connect to your new self hosted backend from your Noodl application. Open your project. Find the "Cloud Services" icon in the sidebar.
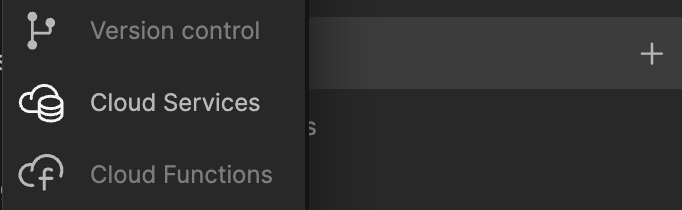
Find the plus icon at the top to create a new cloud service.
Create a new cloud service. Make sure the Self Hosted checkbox is checked:
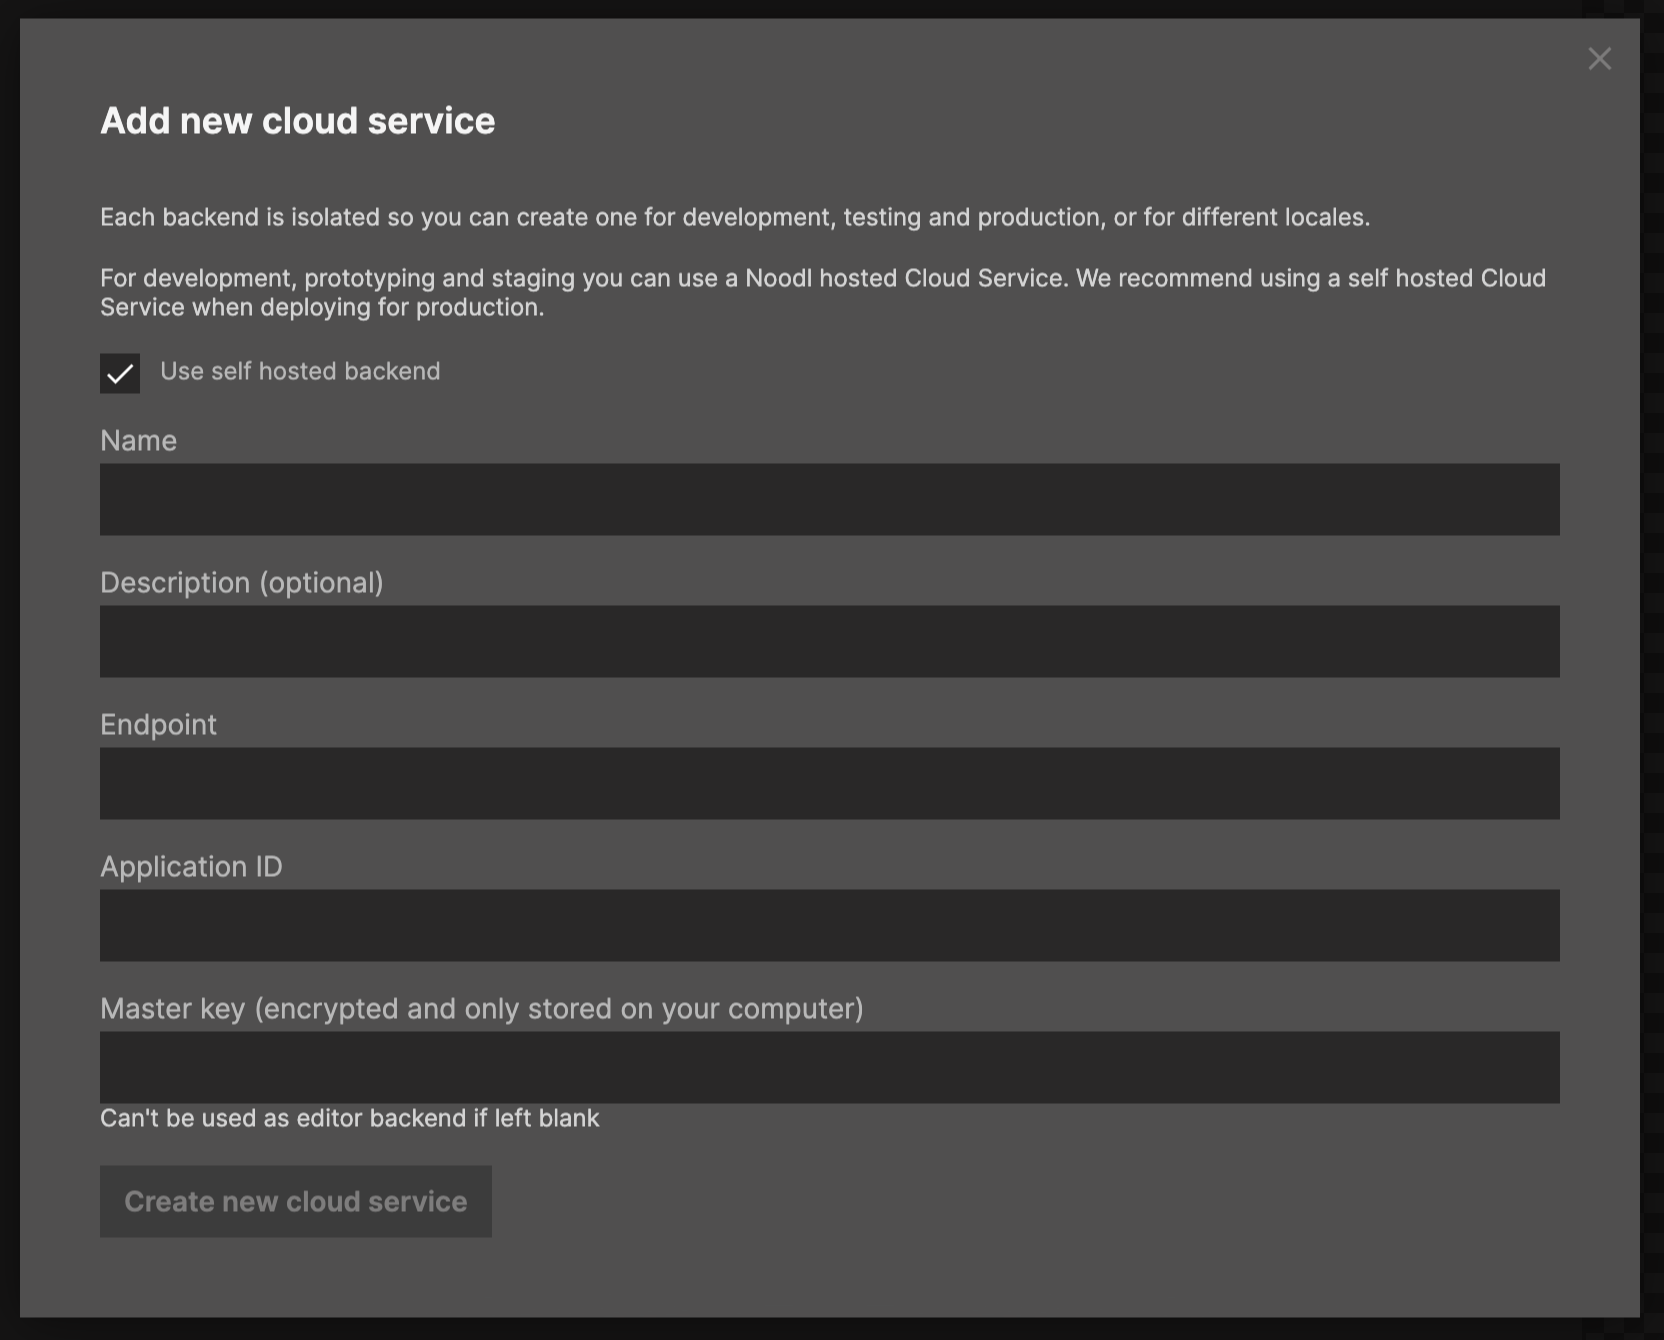
Fill out the information
- Name - Any name you want. This will be the name of the backend in the list of backends.
- Description - Some descriptive text of the backend.
- Endpoint - This is the url to the backend service you have created in the previous step.
- Application id - This is the application id that you provided when setting up the backend service in the previous step. It's simply and identifier of your own choosing.
- Masterkey - This is the master key to the backend service you created in the previous step. It is needed by the editor to access the database for the dashboard, query nodes etc. This is stored locally and encrypted. You need to keep this safe as with it you have full access to your backend and database.
You can make some quick tests, for example opening the Dashboard and create a Class to see that it works. That's it, now you have a self hosted Noodl cloud services up and running.
Migrating from a Noodl hosted cloud service
If you are migrating from a Noodl hosted cloud service we can provide you with a database dump that you can use to restore your new database to, email support to request. Once you have the backup file you need to install the MongoDB database tools, you can find instructions here.
Then you will use the following command to migrate your data:
$ mongorestore --gzip --archive="path-to-backup-file" --uri="the-uri-to-your-mongodb-from-above"