Filtering Database Queries
What you will learn in this guide
In this guide you will learn how to let your database make a filtered query of your Records. This is a very common task in apps. For example if you want to see all comments related only to one specific post, or all messages that are unread. This is achieved by querying the database and ask it to filter out only the selected results.
In Noodl you use the Query Records node to make a filtered query.
Overview
We will go through the following steps in this guide
- Query the Database for Records with a property equal to a specified value
- Make a dynamic filter, i.e. where the Qurey filter can change dynamically
To get most out of this guide, it's best that you are already familiar with how to set up a cloud backend, create Classes and Records and make basic queries. You can quickly learn that by going through the following guides:
Filtering Records in the Cloud vs Locally
This guide is focusing in on filtering Queries in the Cloud Database. This means that Records and filtered before they are sent to your app over the network. This is what the Query Records node does.
There is also another node, Filter Records, that filters data that is already in the app, i.e. it filters locally.
Both of these have their advantages and disadvantages and in a good app you often mix them.
Filtering in a Query in the Database (using Query Records) have the following advantages
You only send the filtered out Records over the network. This is incredibly important if you are working with large data sets. If you have thousands of products in a database, you only want to send the products that the user is searching for or your app will be slow.
You can make use of optimized indexes in the Database if you for example are sorting or filtering out only certain objects. Again, if you work with large data sets with thousands or millions of Records this is key to make your app fast.
Filtering a Query locally (using Filter Records) have these main advantages
Once the Records are in the app, you don't need to send Records over the network which makes your app much faster.
If you have many users of your app your Backend and Database may be congested. By avoiding Querying the Cloud Database too often, for example by handling data locally, you put less stress on it.
Often, the most optimal solution is to combine the two methods. Make a Filtered Query towards the database that filters down the amount of Records to be sent to the app to a reasonable number, then use Filter Records for additional filtering and sorting locally.
In this guide, we will specifically look at filtering using the Query Records node. The Filter Records node works in a very similar fashion but only works on Arrays of Records that are already in the App, typically coming from a Query Records node.
Using the Query Records node for filtering
This guide assumes that you already have a Backend up and running, with at least one Class containing a number of Records. You can follow the previous "Working With Cloud Data" guides if you need help with that. As an example we will use a simple Task app created in the previous guides. It has one Class called Task. It has two properties, task which is a description of the task, and isDone a boolean that keeps track of if the task is completed or not.
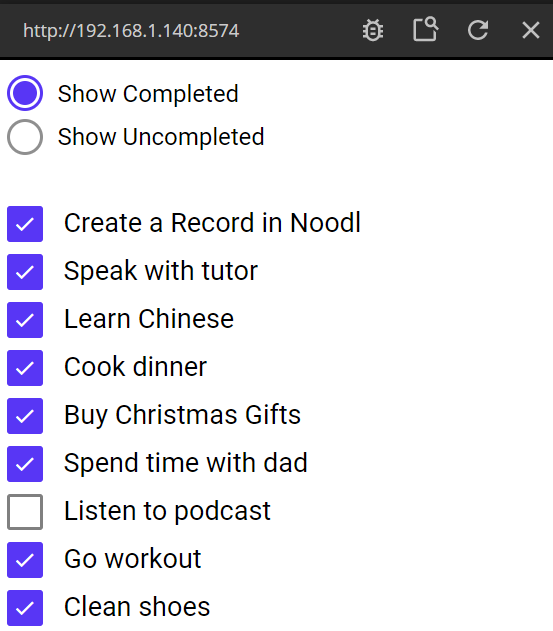
The App consists of a main screen as below:
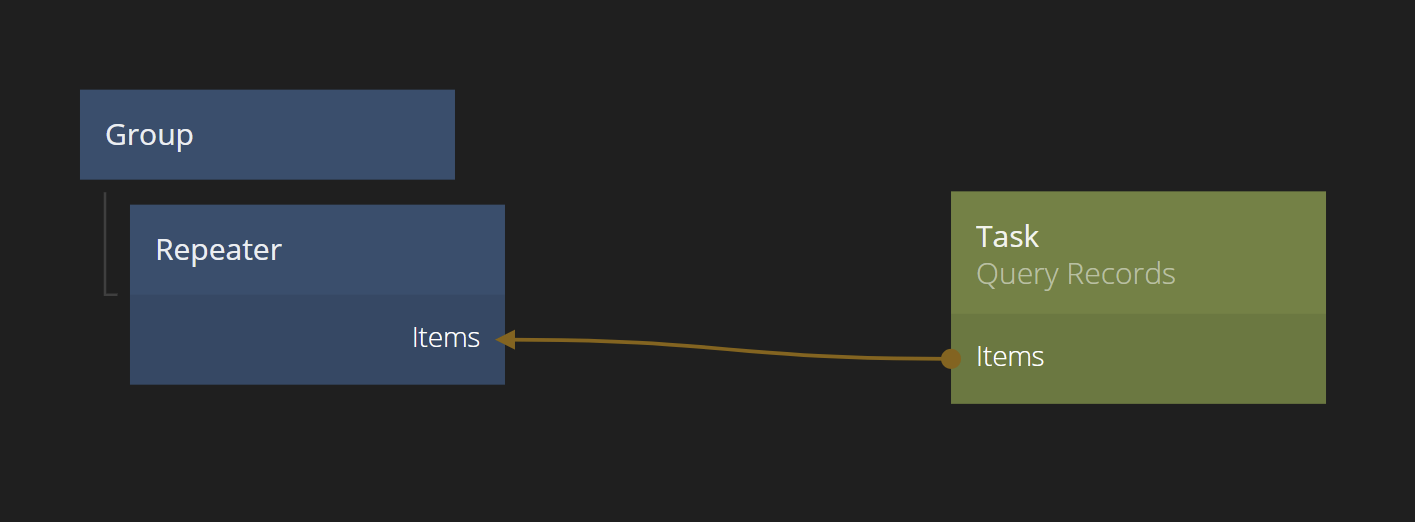
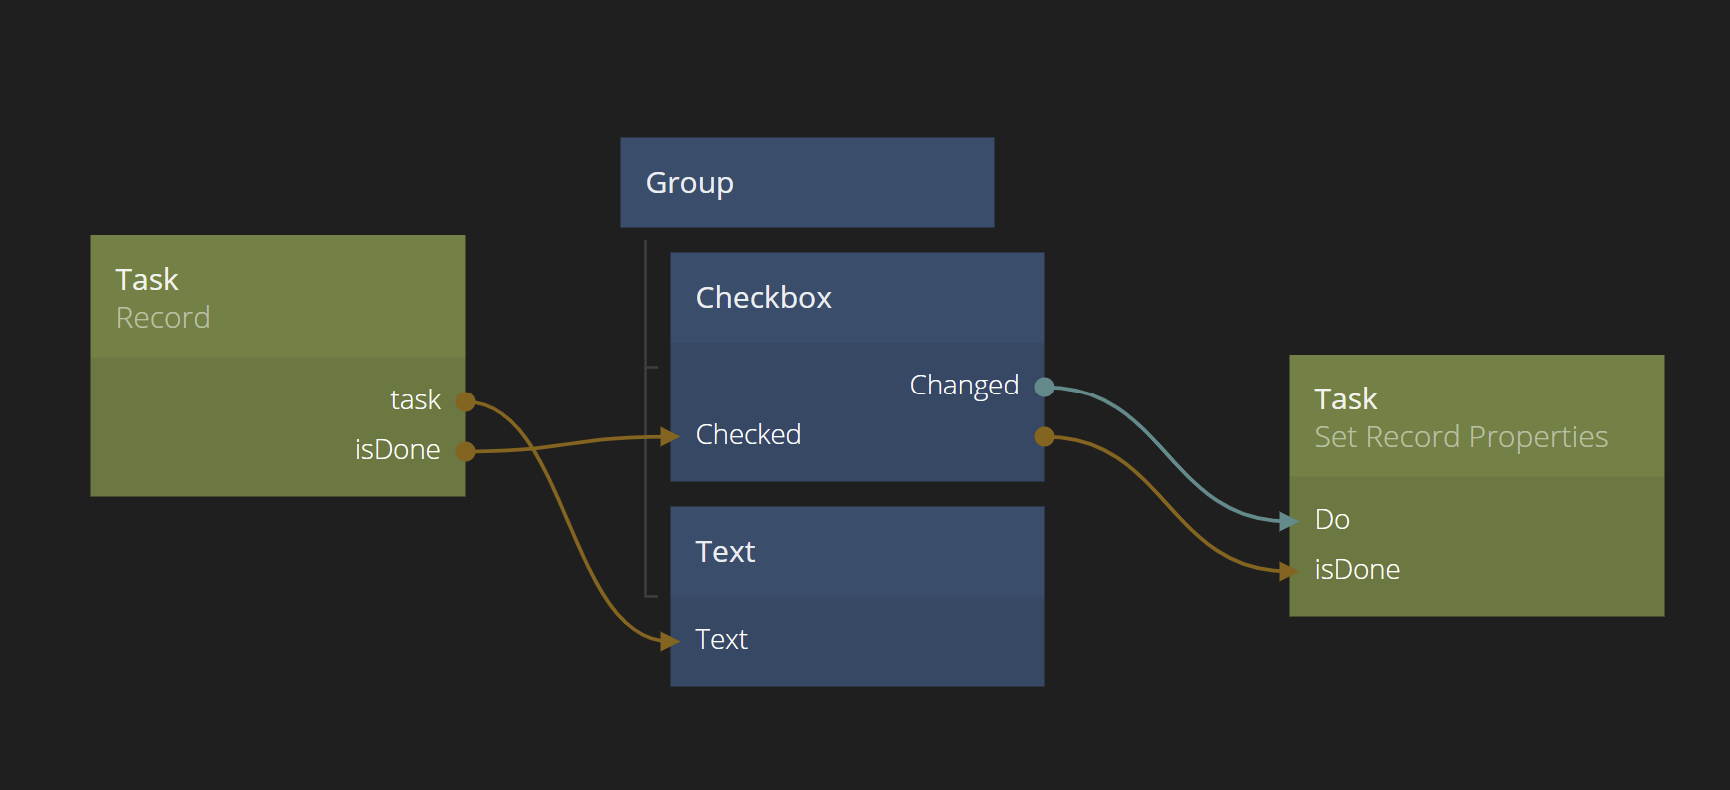
Each todo Record is represented by a list item constructed as below:
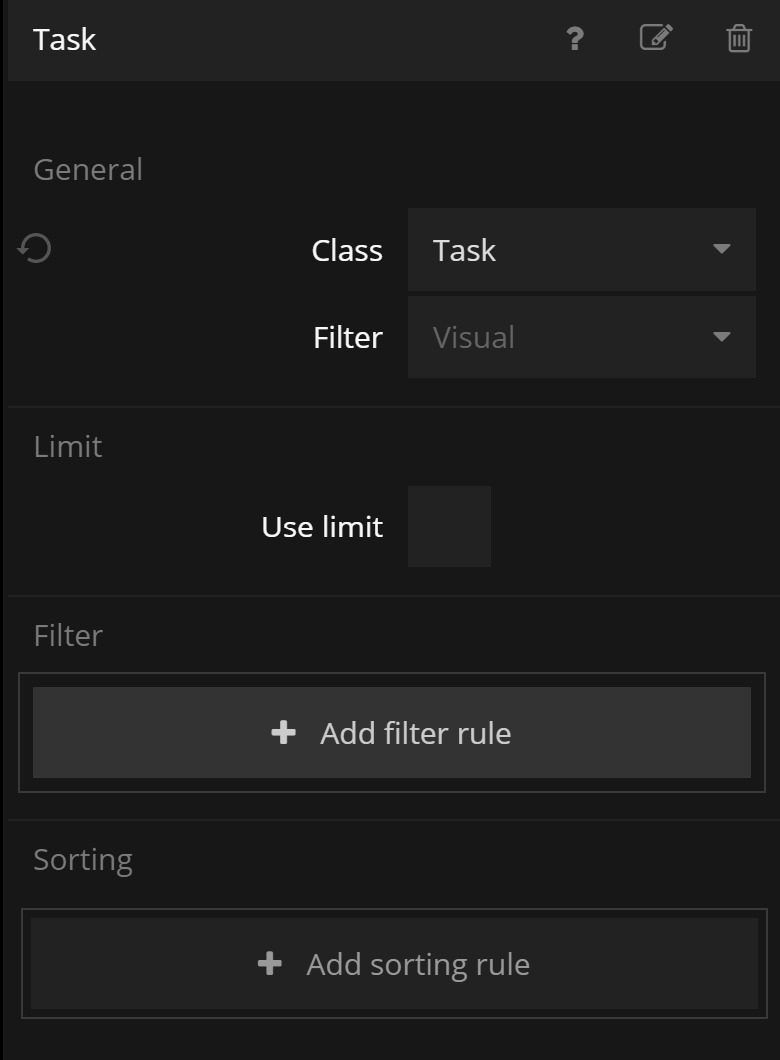
Now we want to add a filter to only see the uncompleted tasks. Click on the Query Records node in the main screen. Then click the Add Filter Rule button.
A new popup will appear where you can construct your filter. Feel free to play around a little with it.
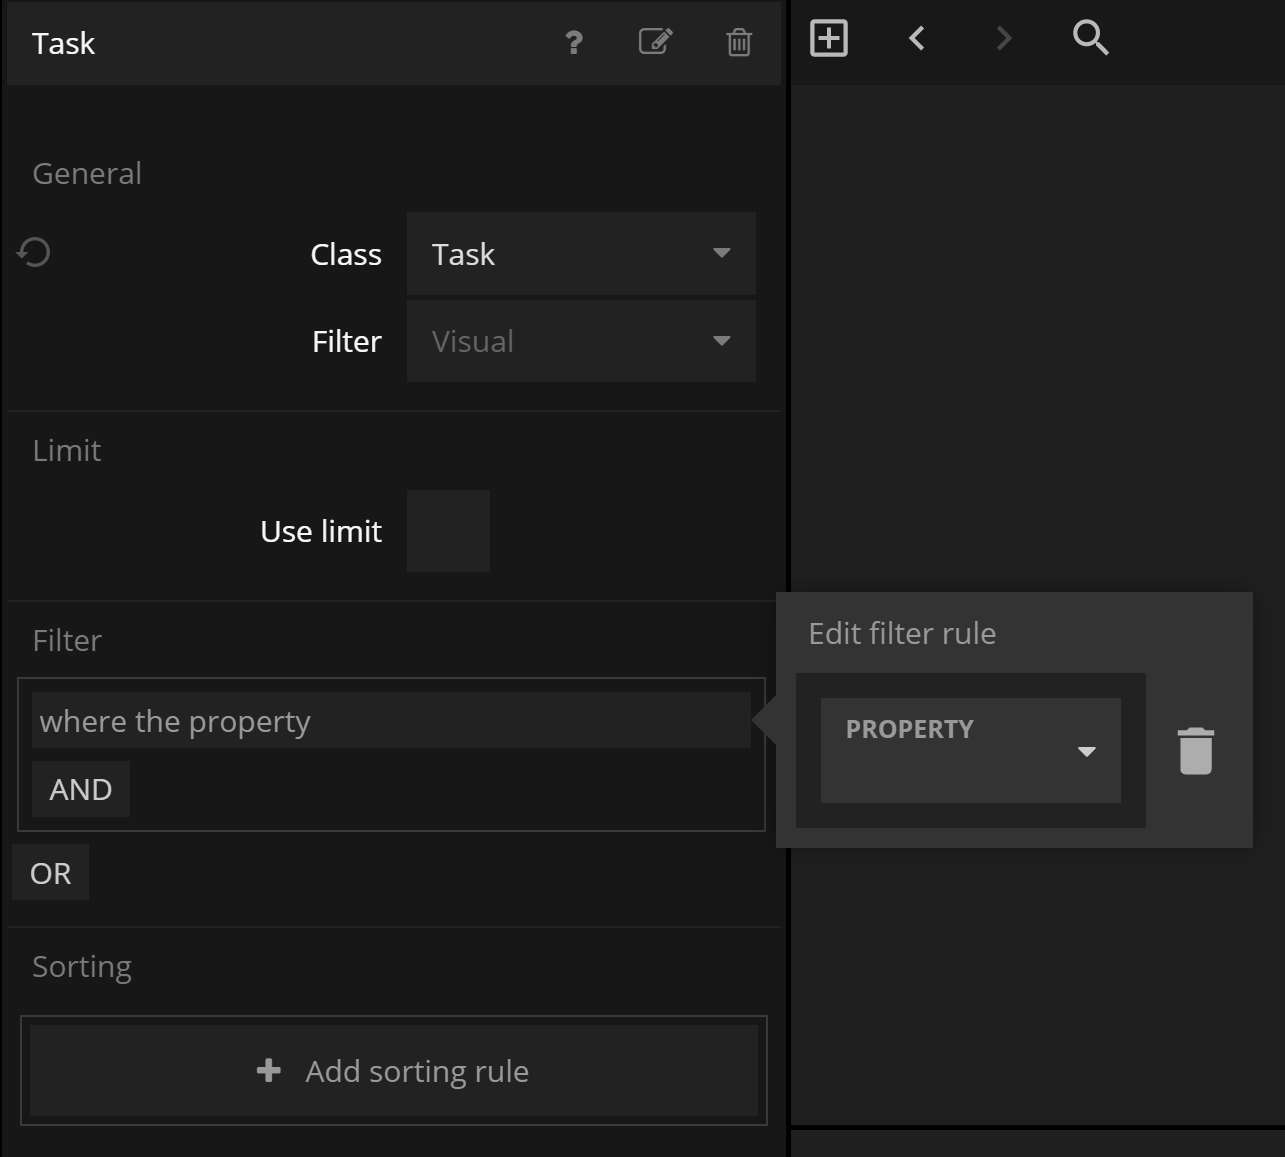
It basically has three parts:
<property> <operator> <value or input>
The <property> is a property of your Record, for example isDone in our Task example.
The <operator> is a logical operator for the condition. There are a number of different operators and not all operators are available for all types of properties.
For the case of isDone - a boolean there are for operators available: equal to, not equal to, exists and not exists. While the equal to / not equal to are pretty self explanatory, the exists / not exists operators work in the following way: They check whether there is a value set at all for the property, or if it's undefined.
Finally the <value or input> is the value that the operator should be applied to. The <input> option we will look at later, so let's use <value> for now.
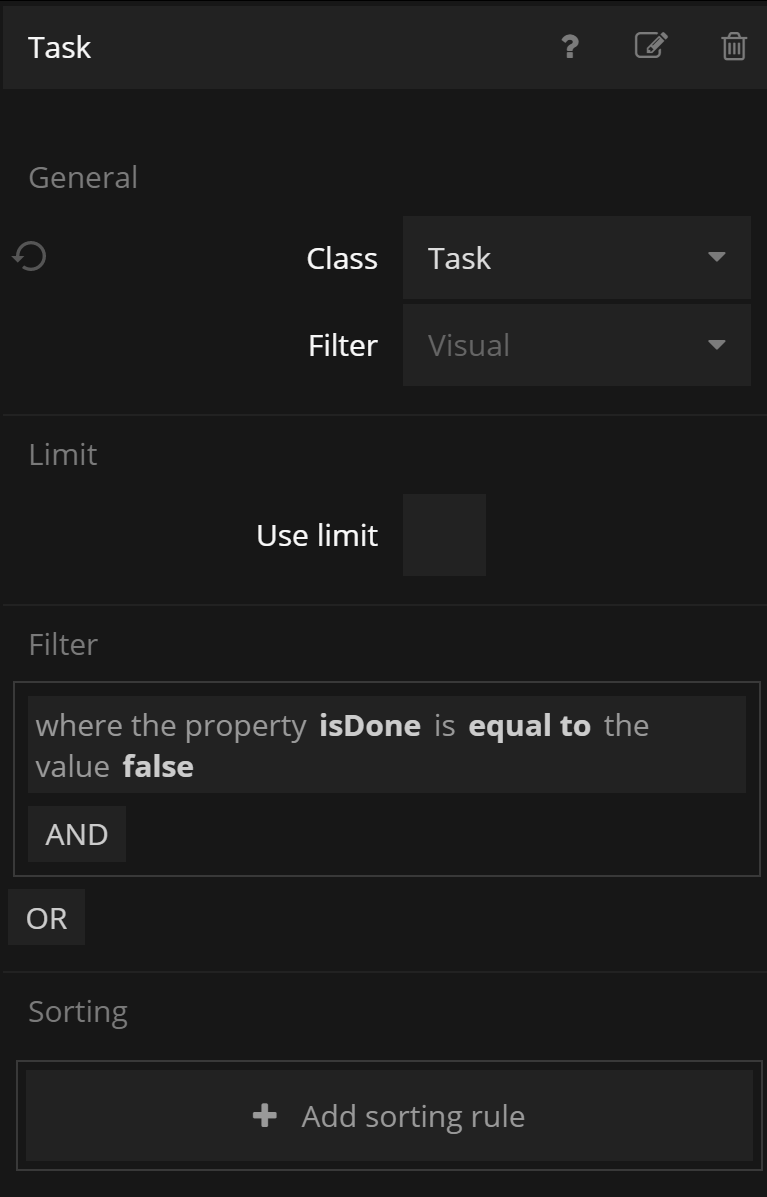
In our case we want to filter out only the tasks that are not yet completed, i.e with isDone = false. So our filter will be:
<isDone> <equal to> <false>
Let's select that. You can see that the somewhat cryptic format of the filter is spelled out in natural language below the filter.
You should already now see the list in your app changing to only show tasks that are uncompleted (if you have any). If you check the tasks they will start disappearing one by one as they are being filtered out. If you want them back, you will have to go into the Dashboard and change the isDone value to false again, and refresh your app.
Dynamic filtering
The current state of the app is obviously flawed - when you finish all your tasks you see nothing. We need to be able to switch views between the completed and the uncompleted tasks.
Lets add a Radio Button Group with two Radio Buttons. With this, we can control wether we want to show the uncomplete tasks or the completed tasks.
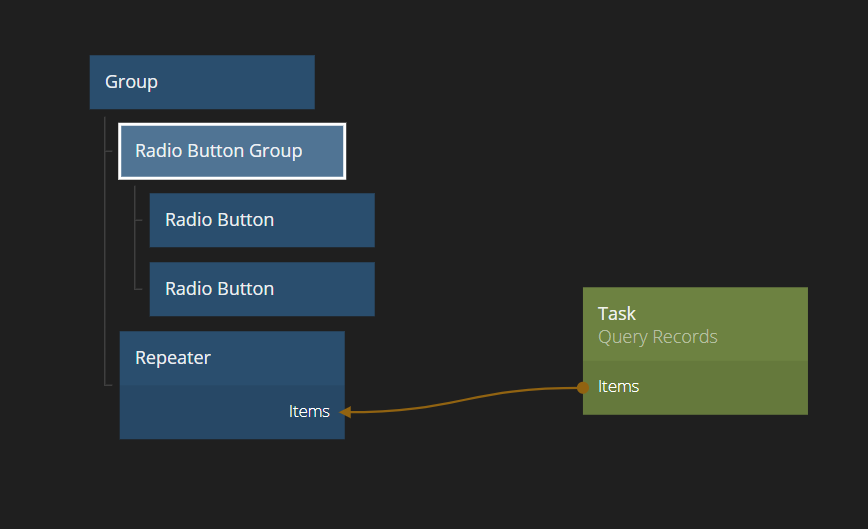
Make sure the label for the buttons are set correctly ("Show Uncompleted"/"Show Completed") and that their value is set to "Uncompleted"/"Completed" respectively. Also, the Value of the Radio Button Group should be "Uncompleted". That will be the default state. We will use the Value output of the Radio Button Group to control the filter settings of the Query Records.
Now lets update the Query Records node so we can control its filter using inputs. Click the Query Records node and change the last part of the filter to not take a value, but an input.
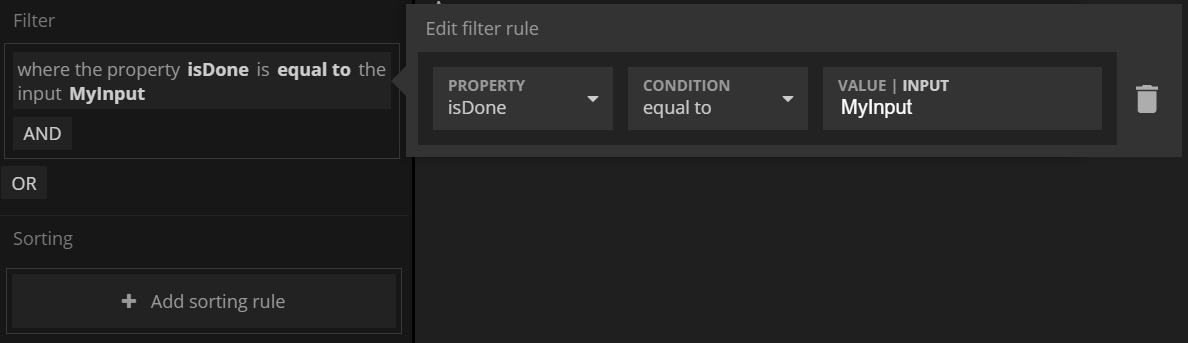
Name the input "isDoneFilter". Now the Query Records have a new input that we can use! If the input is set to true we will filter out all completed tasks (isDone = true) and vice versa for false.
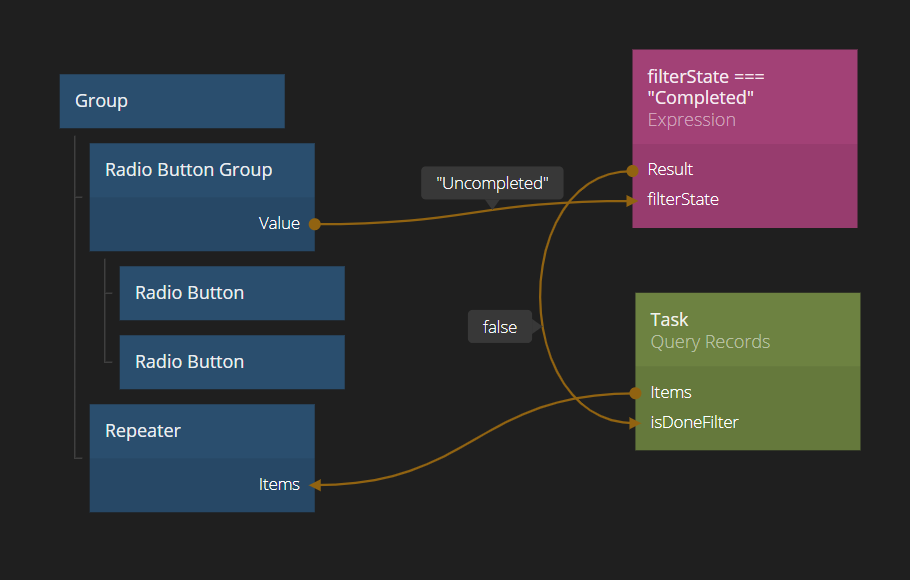
Finally we need to convert the two Radio Button values "Uncompleted" and "Completed" to true or false. We do that by creating an Expression node and setting the expression to
filterState === "Completed"
The Expression node will output true if the input is "Completed", otherwise false. Finally connect the output of the Expression to the Query Records and - voila! - our filtering will change when clicking the radio buttons.