Storing and fetching data in a database
What you will learn in this guide
In this guide you will learn how to create and insert new entries - Records in a cloud database using the Create New Record node.
Overview
We will go through the following steps in this guide:
- Create a Record in the database
- Retrieving the Id of the newly created Record
- Setting initial values of the Record
Before starting this guide, make sure you have Cloud Services enabled and have at least one Class in the database. You can learn how to do this in this and this guide.
Create a Record using the Create New Record Node
If you tried out the Dashboard you could see how you could create Records from there. Now we will learn how to create Records from within an app.
Start a new Noodl Project in your workspace. You can use any template, for example the Hello World template.
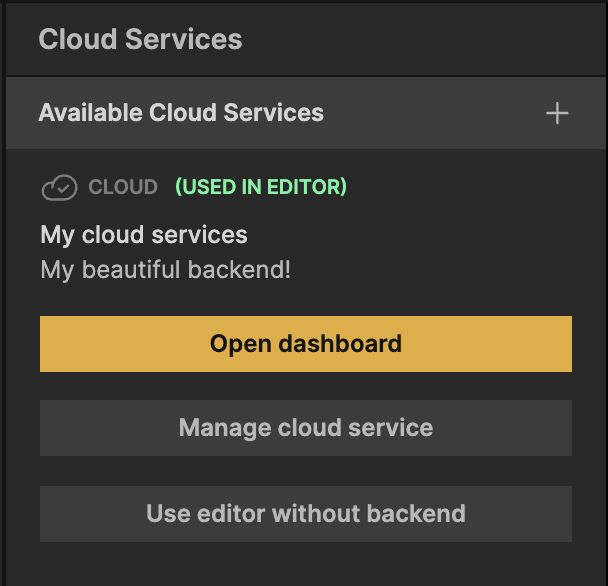
Again, make sure you have Cloud Services enabled and an active Cloud Service set up with at least one Class. When opening your Cloud Services sidebar it should look something like the image below, with a Used in editor cloud service selected.
Now open the Node Picker by right clicking in the node graph editor panel. Create a Create New Record node.
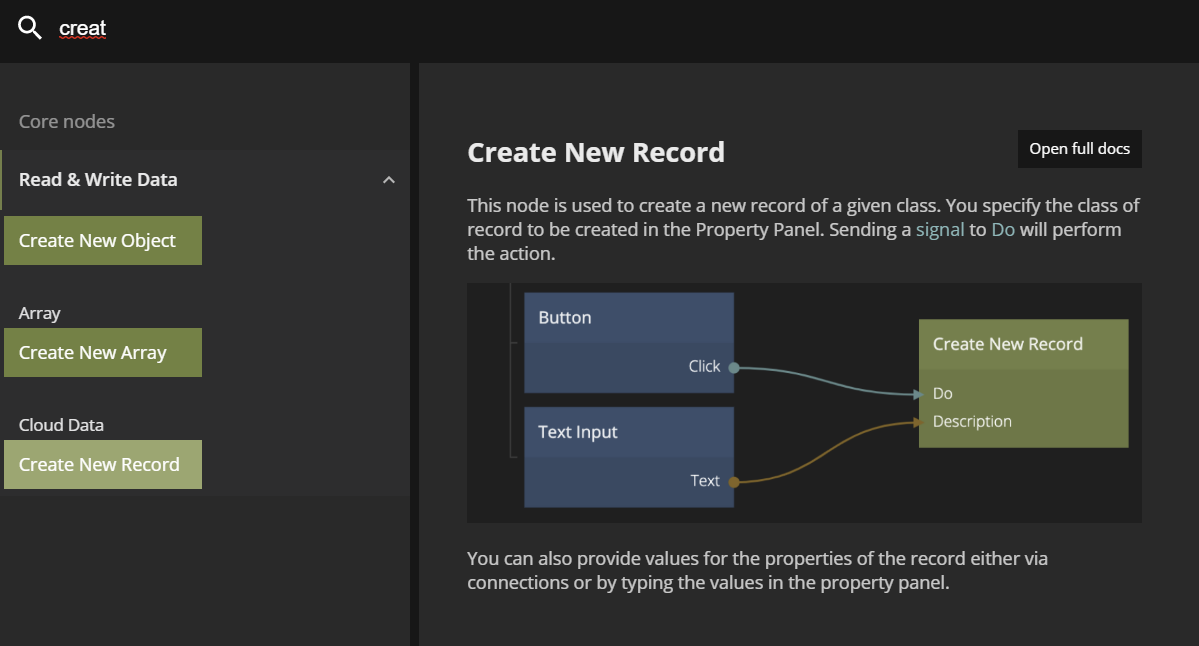
The Create New Record Node
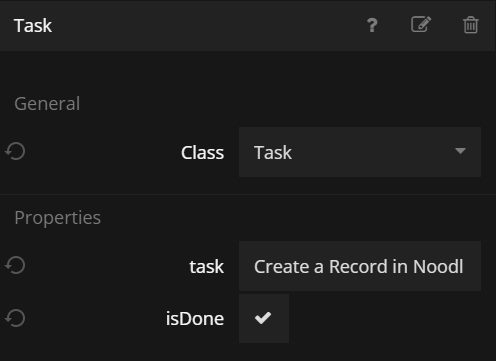
As it name states, this node is used to create and insert new Records in a Class in the Database. First we need to set up which Class it should insert Records into. Click the node and select one of you Classes that you set up in your Backend. In this example, we select the Class Task.
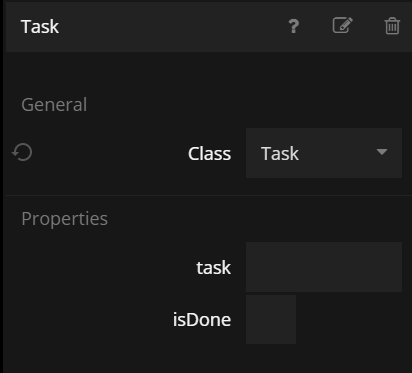
Initial Values
As you can see, when selecting a Class for your Create New Records node you immedieatly get new Properties on your node, namely the Columns you added to your Class when creating it. The Task class created in the previous guides have the task and the isComplete property.
You can add or remove Columns at any time in the Dashboard and all nodes that references to that Class will be updated accordingly. If you remove a Column that's used by your nodes, you will get warnings in Noodl.
As you probably already have figured out, by setting these properties on the node, you can control the initial values of the Record when creating it. So let's fill out the properties with some values, for example as below.
Creating The Record
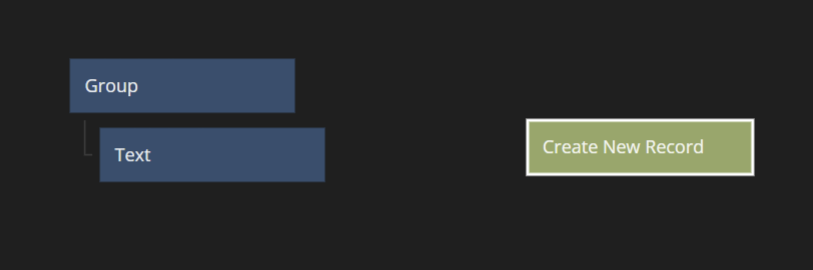
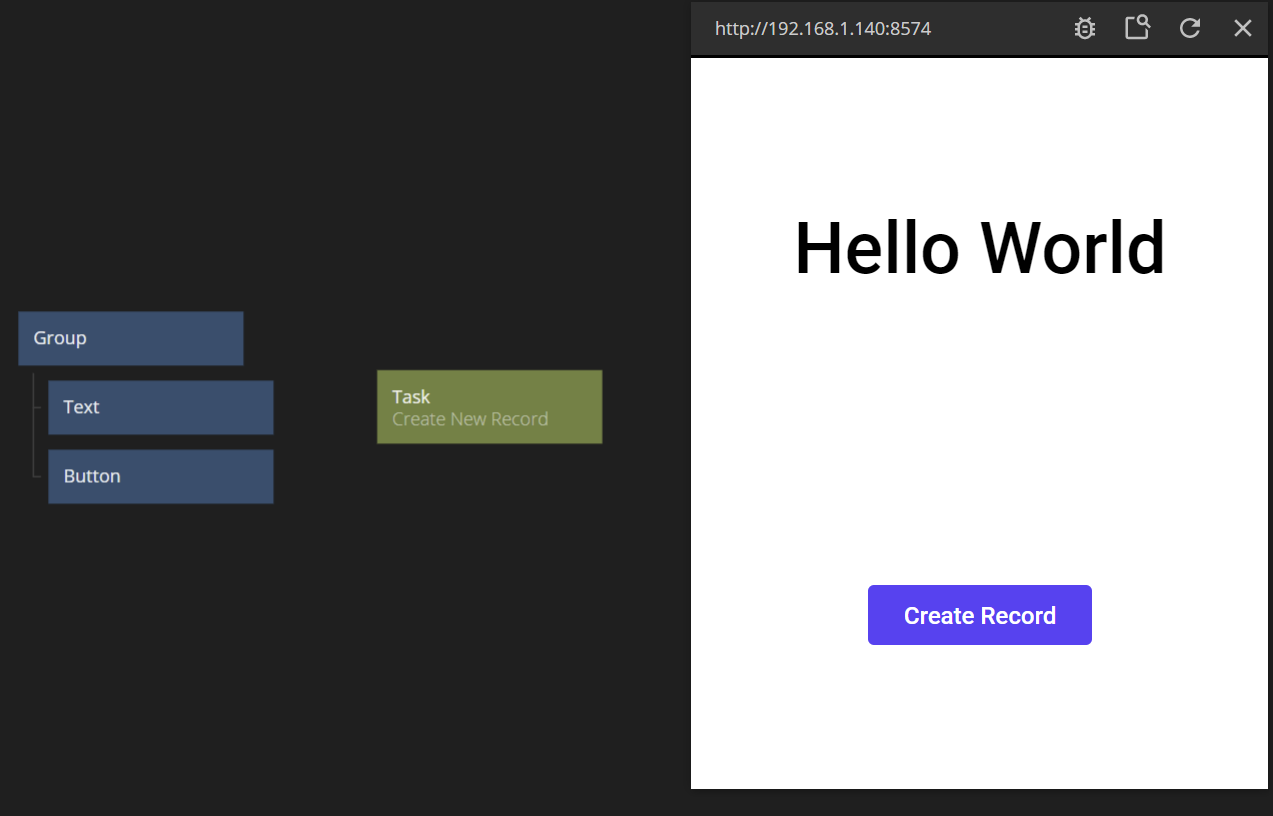
Actually creating the Record is easy. You need to trigger the Do input signal on the Create New Record node. So lets add a Button for that purpose. Add it somewhere on your screen. In this example we add it after the Text node and center it and change its label.
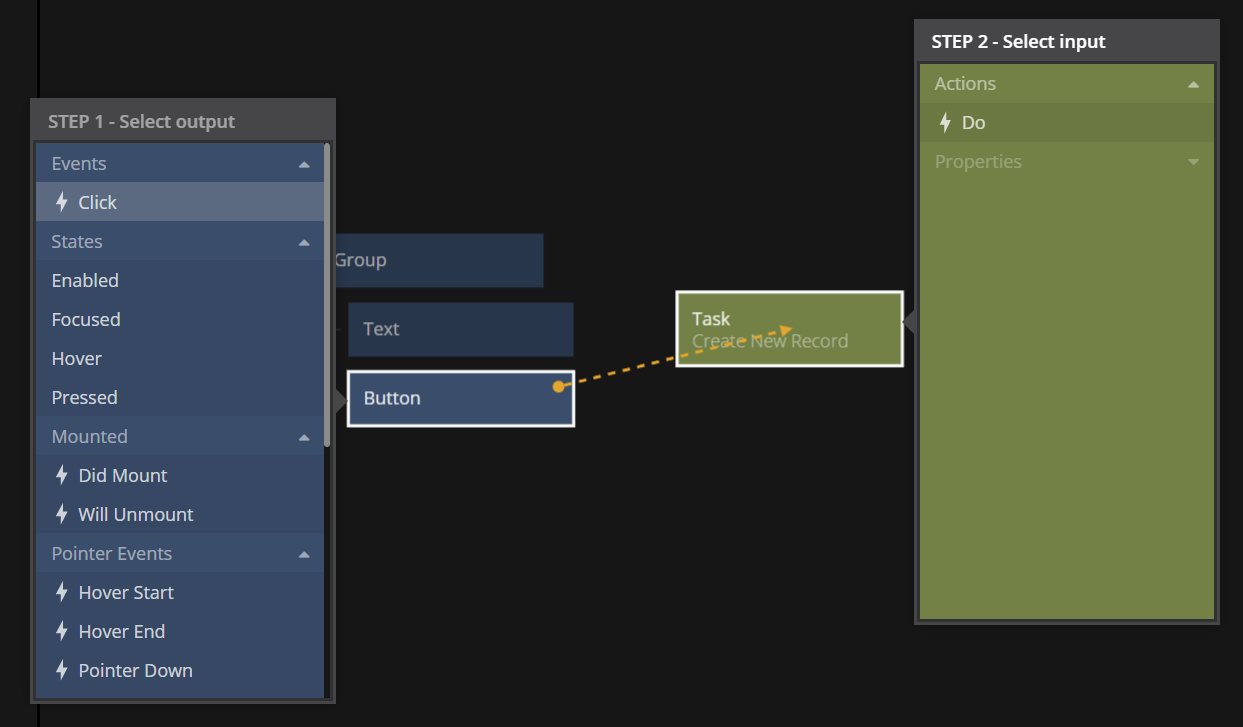
Now connect the Click output signal from the Button to the Do signal of the Create New Record by dragging from the Button to the Create New Record node.
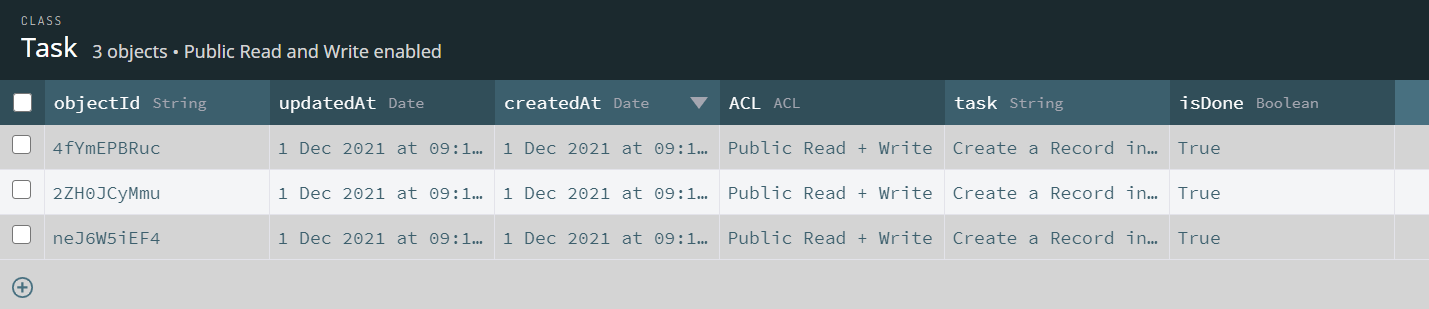
When the two nodes are connected you are ready to try your app. Click the button in the app a couple of times. You should see the Clicked to Do connection light up. If everything works as expected, a new Record should be created in the database each time you click. You can double check it by opening the Dashboard and look in your Class. Note: You may have to click the Refresh button in the Dashboard to see the items.
Retrieving the id of the newly created Record
As you can see, the Create New Record node is kind of a Record creating factory. Each time Do is triggered a new Record is created. So how do you keep track of them?
The node has an output Id, which will be the identifyer for the Record just created. As a side note, assuming the creation went well, the Success output signal is triggered as well when the Record has been created. If the creation failed, for example if one of the properties of the Record is required and wasn't provided (see the this guide), the Failure signal is triggered instead.
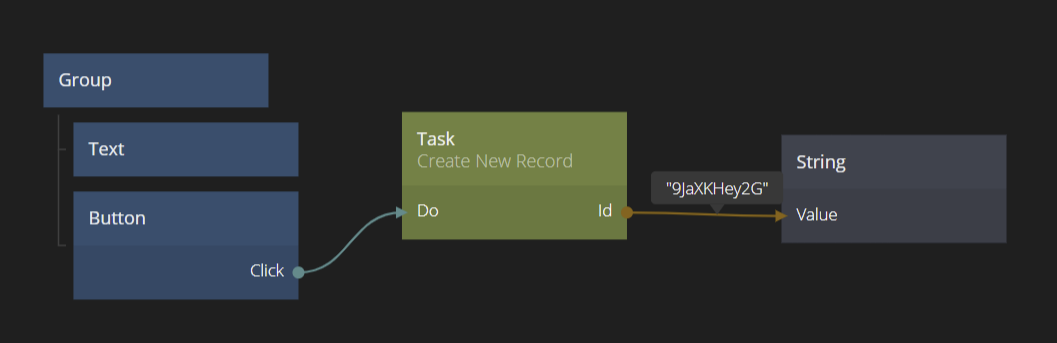
Lets connect the output Id of the Create New Record node to a String node to take a better look at it.
The Id is a special property of the Record. You will first notice that the Id of the newly created Record matches the objectId in the Dashboard.

The Id is used to refer to this specific Record. For example, if you want to change a property of a specific Record you use a Set Record Properties node and make sure it's Id is referring to the correct Record. Same goes for the Record node or the Delete Record. So keeping track of you Ids is important.
Setting initial values of a Record
Now lets add some UI so each new Task Record can have a different task text, and can have isDone set to true or false. Add a Text Input and a Checkbox and connect them to the Create New Record node. As you can see, the two properties coming from the Columns of the Class are available as inputs on the Create New Record node.
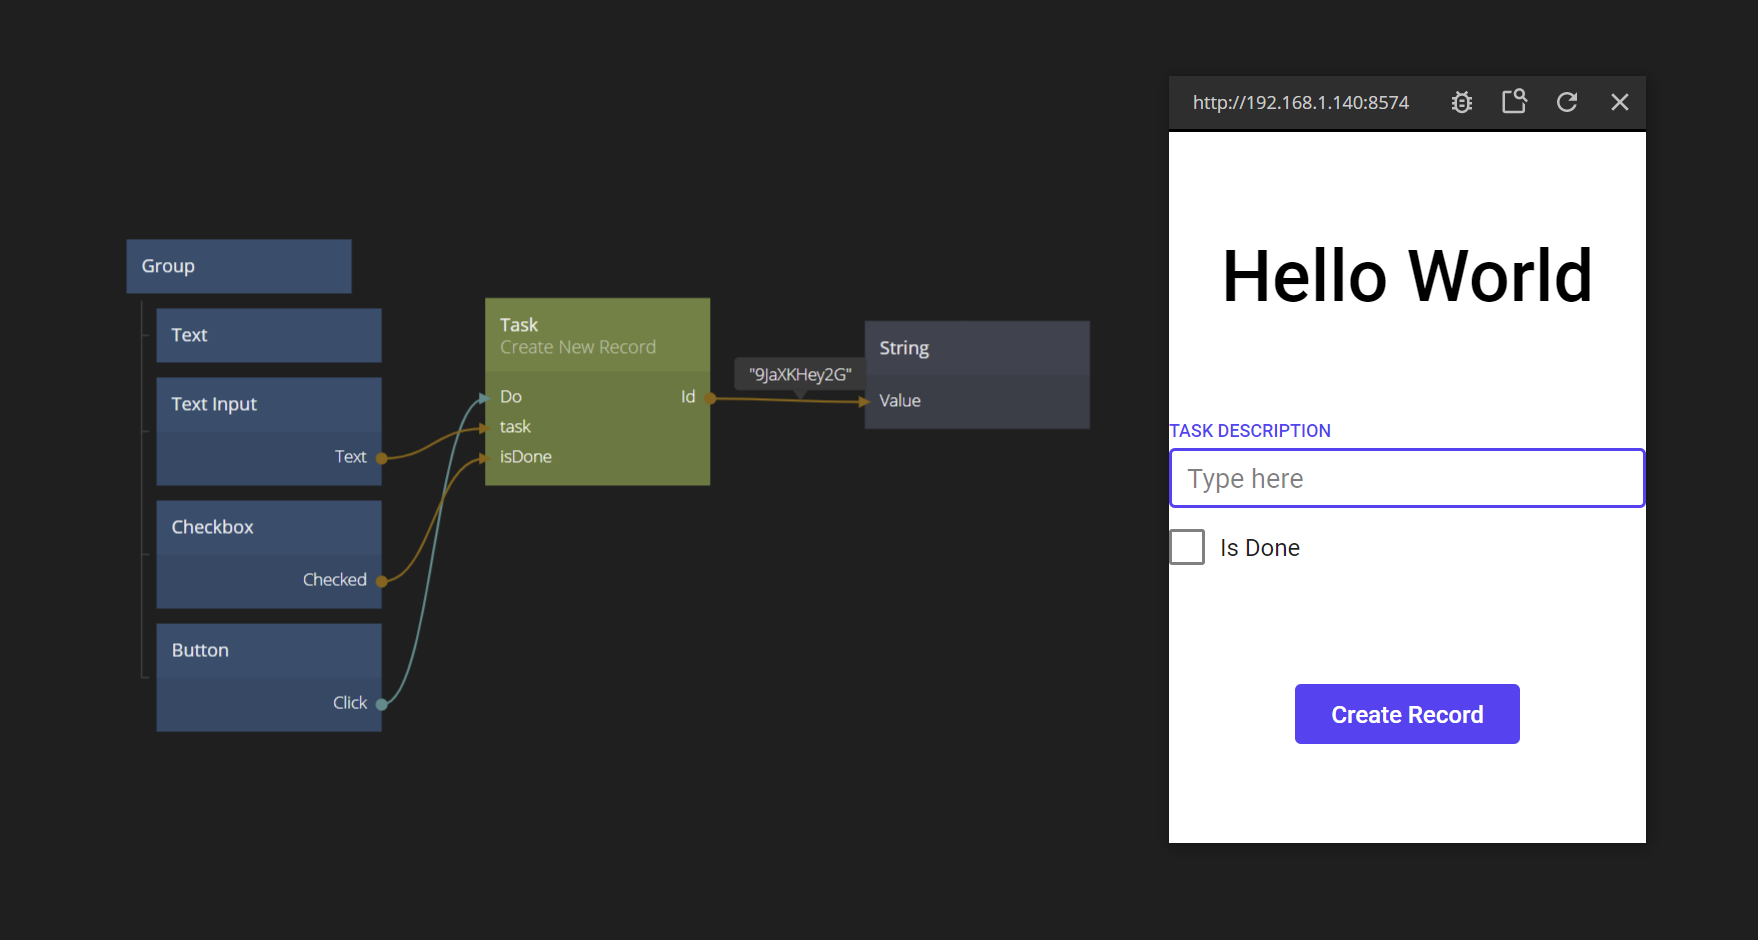
Try out your app, write some random task descriptions and check / uncheck. See that it works correctly by looking at the data in your Dashboard.