Access Control
What you will learn in this guide
By now you should have a good understanding of how to create, update and query records in the database. If you feel the need to freshen up your skills, check out there guides.
By default all records you create are completely public, so they can be read and written by any user, logged in or anonymous. This is ok while you are developing your application but as soon as it is getting ready to be released outside of your team you will need to think about access control. That is who should be able to read and write which records. Fortunately there is a pretty solid way of achieving this in Noodl.
In this guide you will learn how to limit access control to records you create to certain users.
Class Level Permissions
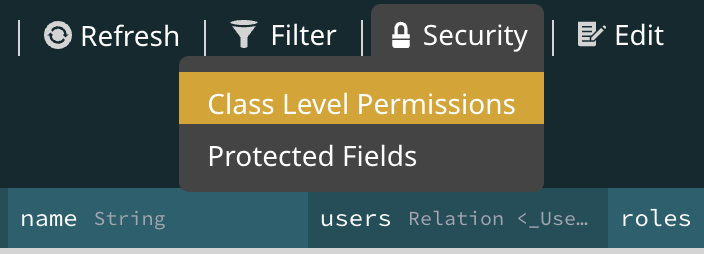
There are two levels you can specify access control to your cloud data, either Class Level Permissions that are the same for every record of a certain class, and the Access Control Rules which apply to a specific record only. Let's start with the former. You can access Class Level Permissions for a specific class via the cloud services dashboard.
This will bring up the following popup.
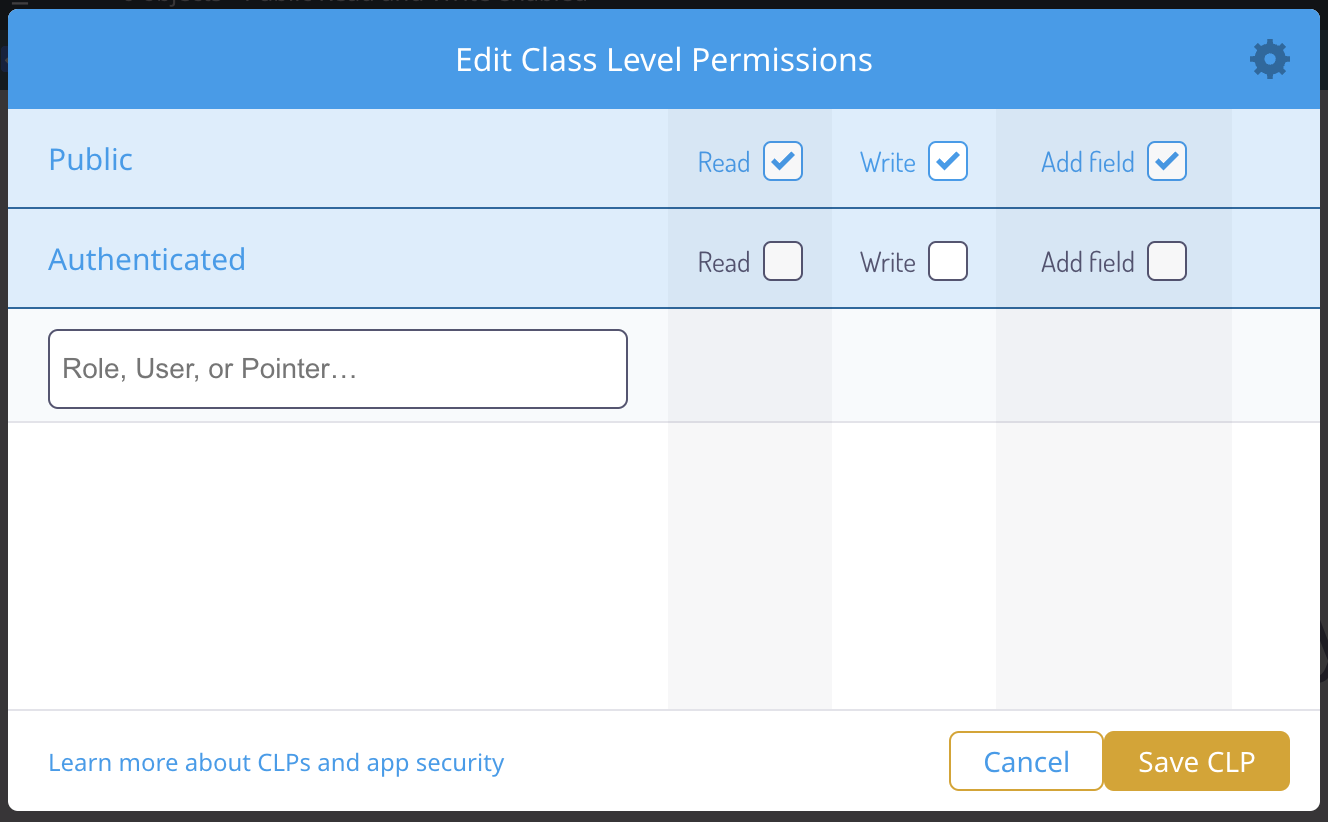
Here you can control the Read, Write and Add Field (the possibility to modify the properties for a class) permissions for a specific class. You can enable and disable them for:
Public These are user of your application that is not signed in. So this means anyone, public, can perform these actions on records in this class. By default all operations, reading, writing and modyfing the fields are completely public.
Authenticated This refers to users that have been signed up and logged in to your application. Again, this applies to all records of this class.
In the example below permissions are set so that everyone can read records in this class (this also include querying) but only logged in users can write (create new and modify) and no one (except when using the dashboard of course) can modify the properties of this class.

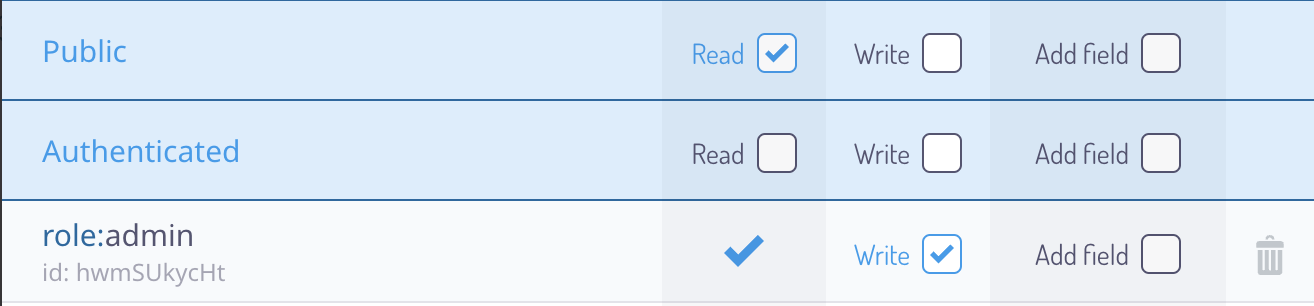
You can specify a little bit more detailed access control using Class Level Permissons with roles and pointers. First just as you specified access for public vs authenticated users you can specify access for users belonging to a certain role (more on roles below). For that you use the text input at the bottom of the list:

You simply type role:the-name-of-your-role and then provide the permissions for that role. With this approach you could for instance have a role named admin and you could have special permissions for any users having that role. In the example below records of this class have public read access, but only users belonging to the role admin can modify records.
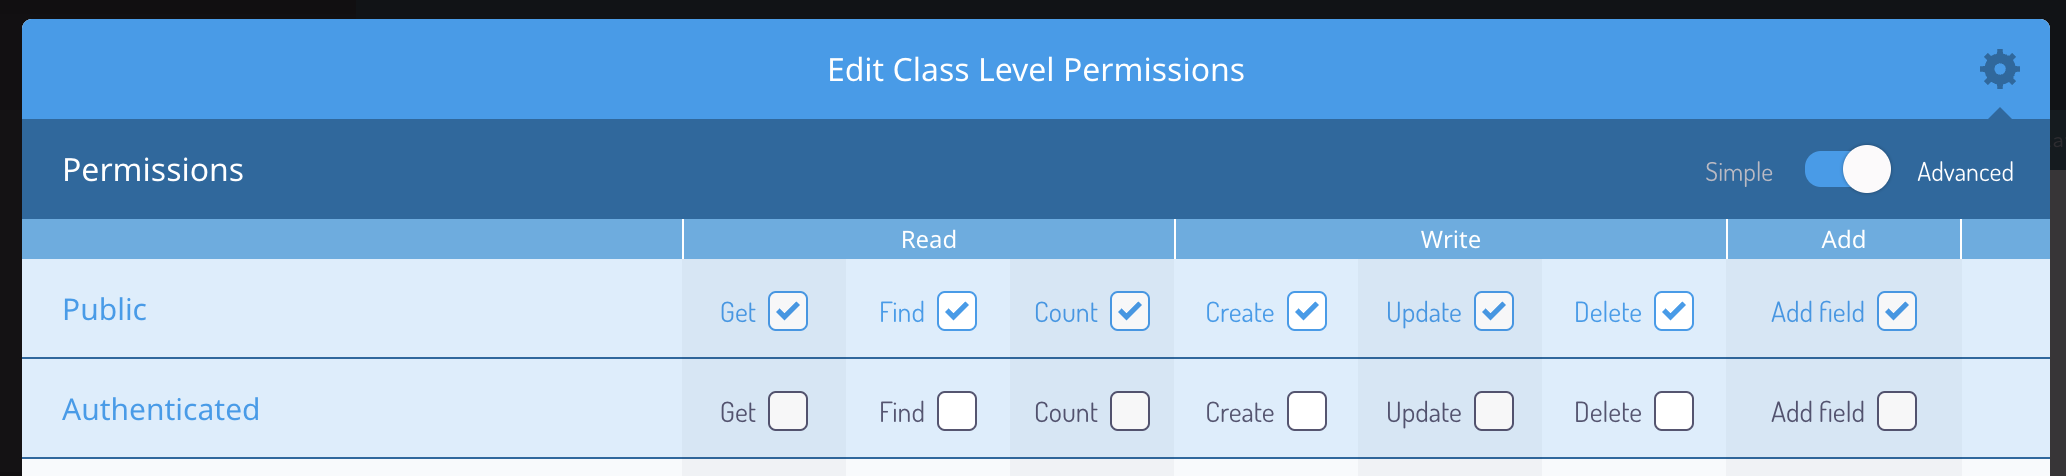
You can use the Simple / Advanced switch at the top right to enable even more fine grained control. This will be very useful for some use cases. Now permissions are split up into:
GetIf you have an Id of a record, this permission allows the user to get the properties of the record.FindRecords of this class will show up in a Query Records, this permission makes all records of this class readable.CountYou can perform a count on this class, but directly read all records.CreatePermission to create new records.UpdatePermission to update existing records.DeletePermission to delete existing records.Add FieldPermission to modify the properties of this class, remove/add entire properties.
Another way to specify more detailed access control is using pointers. So let's say you have a record class Post that contain blog posts. Now you want everyone to be able to read the records, but only the creator of the Post record should be able to modify it. If you add a pointer to a User record on your Post class (it must be a pointer to a User) you can specify permissions for the user that the pointer points to. Let's say you have a pointer on your class called Owner that you set to the current user when creating a post, you could then have an access control that looks like this.

With Class Level Permissions you can specify access control down to a certain level, but all permissons are still on a class level which means they apply equally to all records of the class. Using Access Control Rules you can provide even more detailed permissions, read more about it below.
Access Control Rules
You can set the access conrol of a record when it is created with the Create New Record node or, you can update it later usign the Set Record Properties node. This is done using the access control rules part in the property panel. Here is an example below.
But when you place a new Create New Record node and view the properties the rules will be empty. You can create a new rule by clicking the (+) icon.
![]()
You can have how every many access control rules you want and each rule has a specific Target that you need to pick:
- User (default) this indicates that this rule will target a specific user. You can provide the user by connection to the User Id input for the rule (this is only available if you have choosen the User target). Or if you don't explicitly provide a user id the current logged in user will be used.
- Everyone this implies that the rule will target all users, logged in or anonymous. This can be used to create public but read only records.
- Role this target should be used if you want this record to be accessible by a group of users. We will take a closer look at roles below.
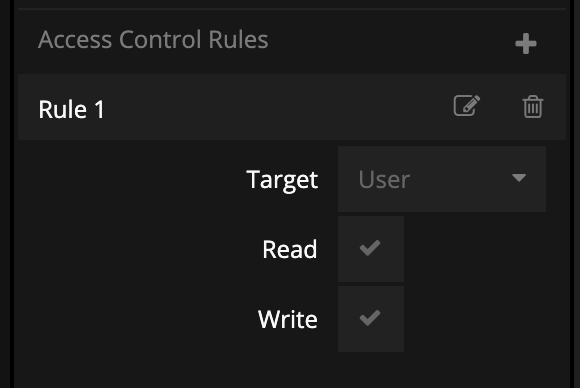
First let's take a look at a common rule where we make sure the user creating the record has access rights to reading and writing the record.
This is simply the default settings for the rule. It is recommended that you edit the label of the rule and give it a short descriptive name so that you know later what it is supposed to achieve. Ok so if we use this rule to create records only the current user will be able to access them. This requires that a user has been logged in.
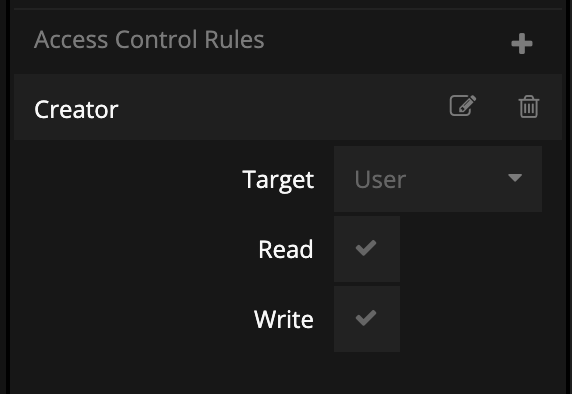
Now let's say that we also want everyone to be able to read the records but not change them. Then we would add a rule with the Everyone target.

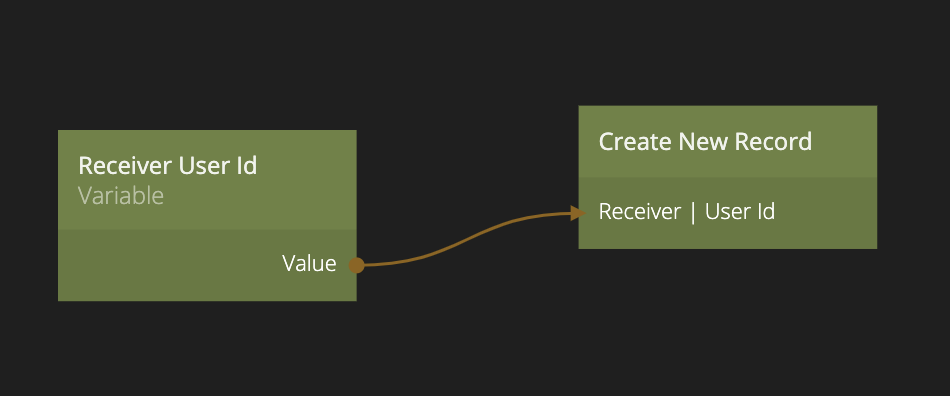
There are many ways you can use this pattern to control who can access your record. Let's say you are creating a Message record and you want the current users (the sender) to be able to read and write the message, and the receiver to be able to read it. You would use a very similar set of rules but with two User targets.
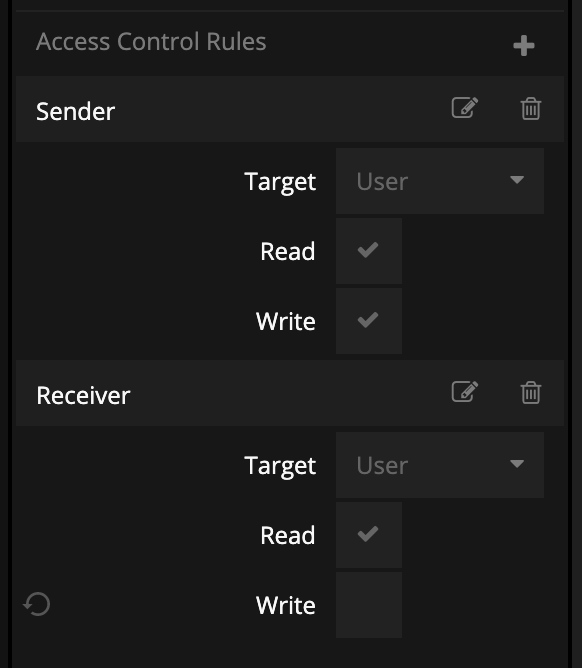
But you will also need to provide the User Id of the receiver (the sender will user the current logged in user). This is done via a connection to the User Id input that is created when you add a new User target rule.
Roles
This is great, but sometimes you want to have a record accessible by many users and if these users change over time it's a hazzle to update all records accordingly. This is where roles come in. A role is in it's essence simply a list of users (this is esstablished via a relation property called users on the role). You can add and remove users from the role using the Add Record Relation and Remove Record Relation nodes. You can add a role via the cloud services dashboard.


You need to provide a Name for your role (this needs to be unique among all roles), you also need to specify the ACL (the access control) and you should generally limit it to Master Key Only for roles that you create in the dashboard. Once the role is created you can add users to it via the User relation directly in the dashboard.
Once you have a role in place with users assiged to it you can simply create a Role access rule:
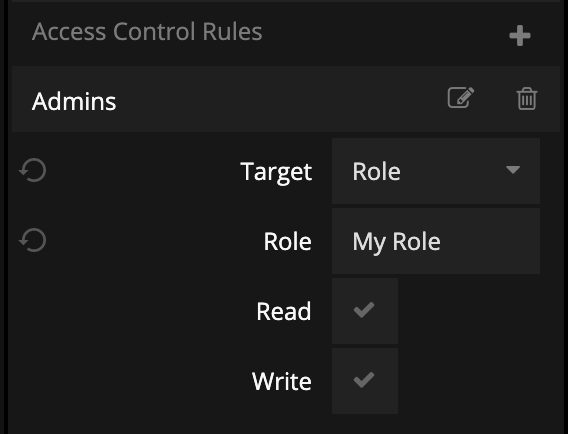
You choose the Role target, give it a descriptive label and choose the access rights. Then you need to specify the Role Name, that is the unique name you gave the role when creating it. This is case sensitive.
Most cases you want to create and manage your roles dynamically, for instance if you want to create a team of users that should have access to certain records. Then you would create a role for that team and add relations to all team members.
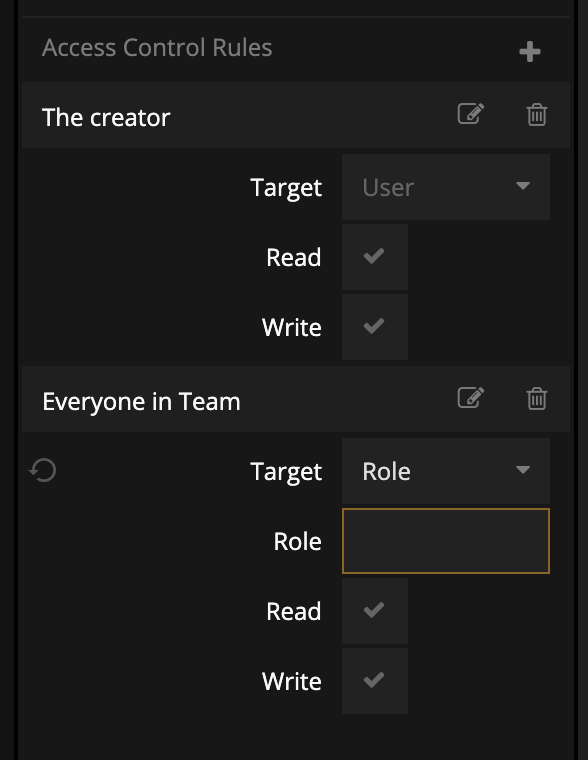
This is achieved by creating a new role, which is done as any other record with the Create New Record node, picking the Role class. You need to limit the access control of the Role otherwise it will not succeed to create. Here we let the creater, i.e. the current user have full access and also we grant access to "everyone in the team". This is done via the role name, that is the same name as we give the role when creating it (we provide that via a connection as shown below).
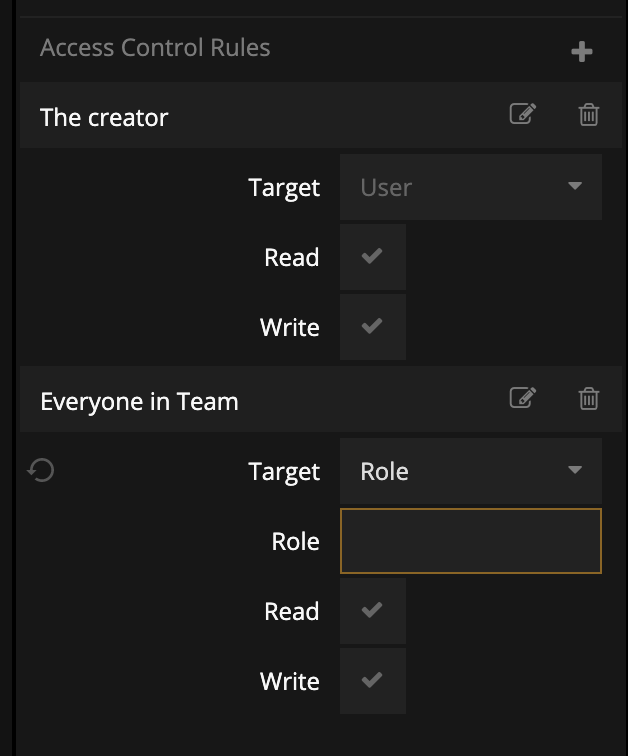
You need to provide a unique name for your new role, in the example below this is simply done with the Unique Id node. This is provided both to the name input for the role and also to the Everyoone in Team access rule as described above.
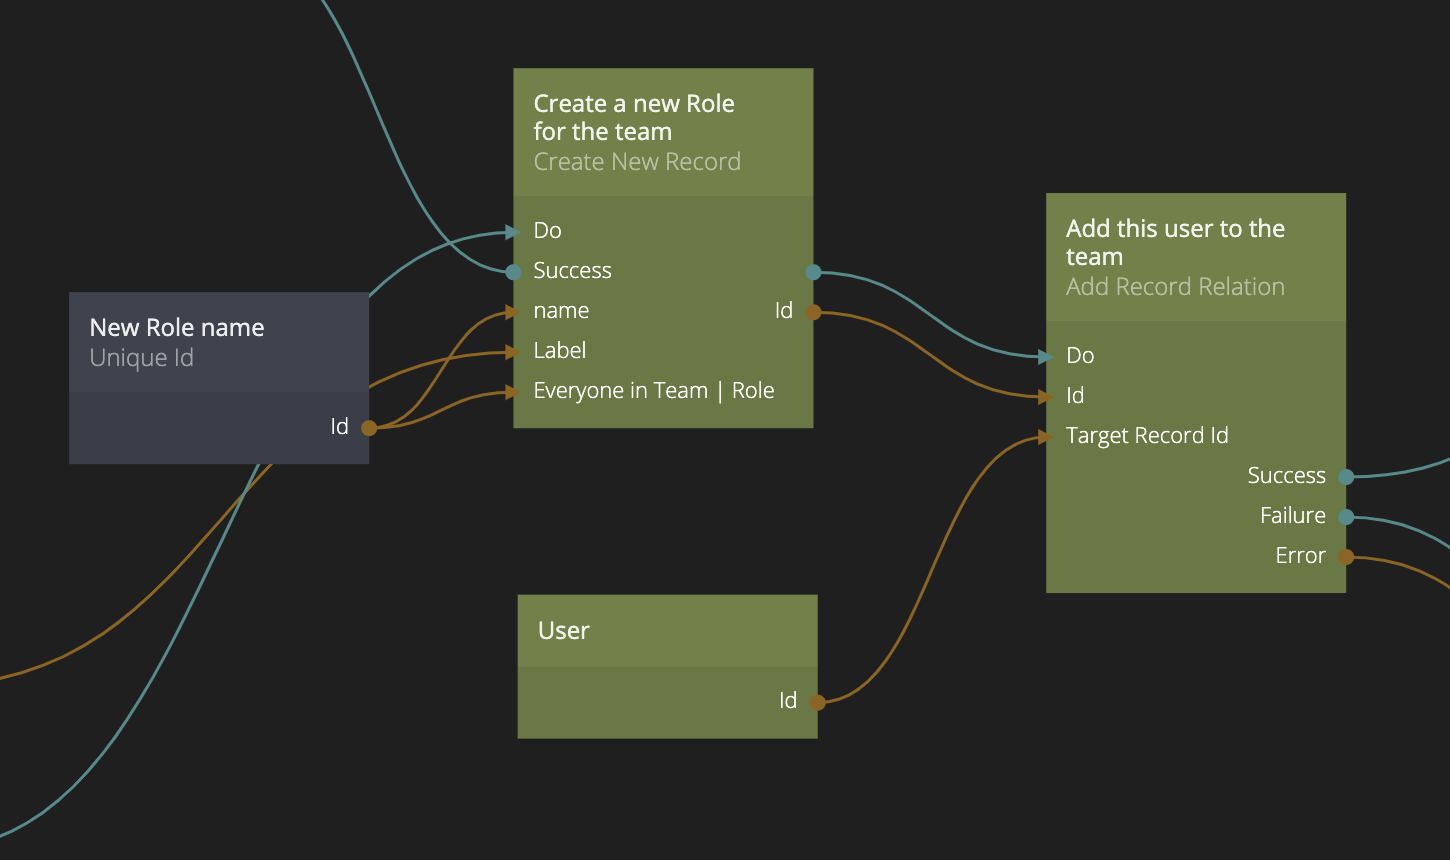
Once the new Role is created we add the current logged in user to the role by adding a relation usign the Add Record Relation node. The current user already has read and write access to the role via The creator rule above, but we still add the user to the role as it should be listed as a team member. This is how we set up the Add Record Relation node.

The Id is coming from the newly created role (that is the record where we want to add a relation), the class needs to be set to Role and the relation we want to add to is users.
Finally the Target Record Id is the user we want to add to the role and as you an see in the node graph above we get the from the User node that contains information on the currently logged in user.