Using Markers in the Mapbox Module
What you will learn in this guide
This guide will teach you how to add and remove markers to your Mapboc Map in Noodl.
Overview
This guide will walk you through the following steps
- Adding markers to the map
- Capturing when the user clicks a marker
- Removing markers from the map
The guide will build on the two previous Mapbox guides, Setting up Mapbox module and Interacting with the Mapbox Module. It's recommended that you read those guides first, if you haven't already.
The guide will build upon the example from the previous guides. You can import the result from the previous guide by clicking the import button below. Don't forget to set the correct Access Token that you got from your Mapbox account.
There is also a video walking through the guide.
Markers
Markers are used to mark points in the map. They can be anywhere on the map.
A marker can either be represented by the default icon, or you can use a custom image instead. In this guide we will go with the default icon. The default icon can also have a color of your choice.
Markers are fed to the Mapbox module through an Array. Each Object in the Array should be of the format:
{
    "Lat":<the latitude>,
    "Lon":<the longitude>,
    "Color":<the color, e.g, "White" or as hex-string "#ffffff". Only used with the default icon.>
}
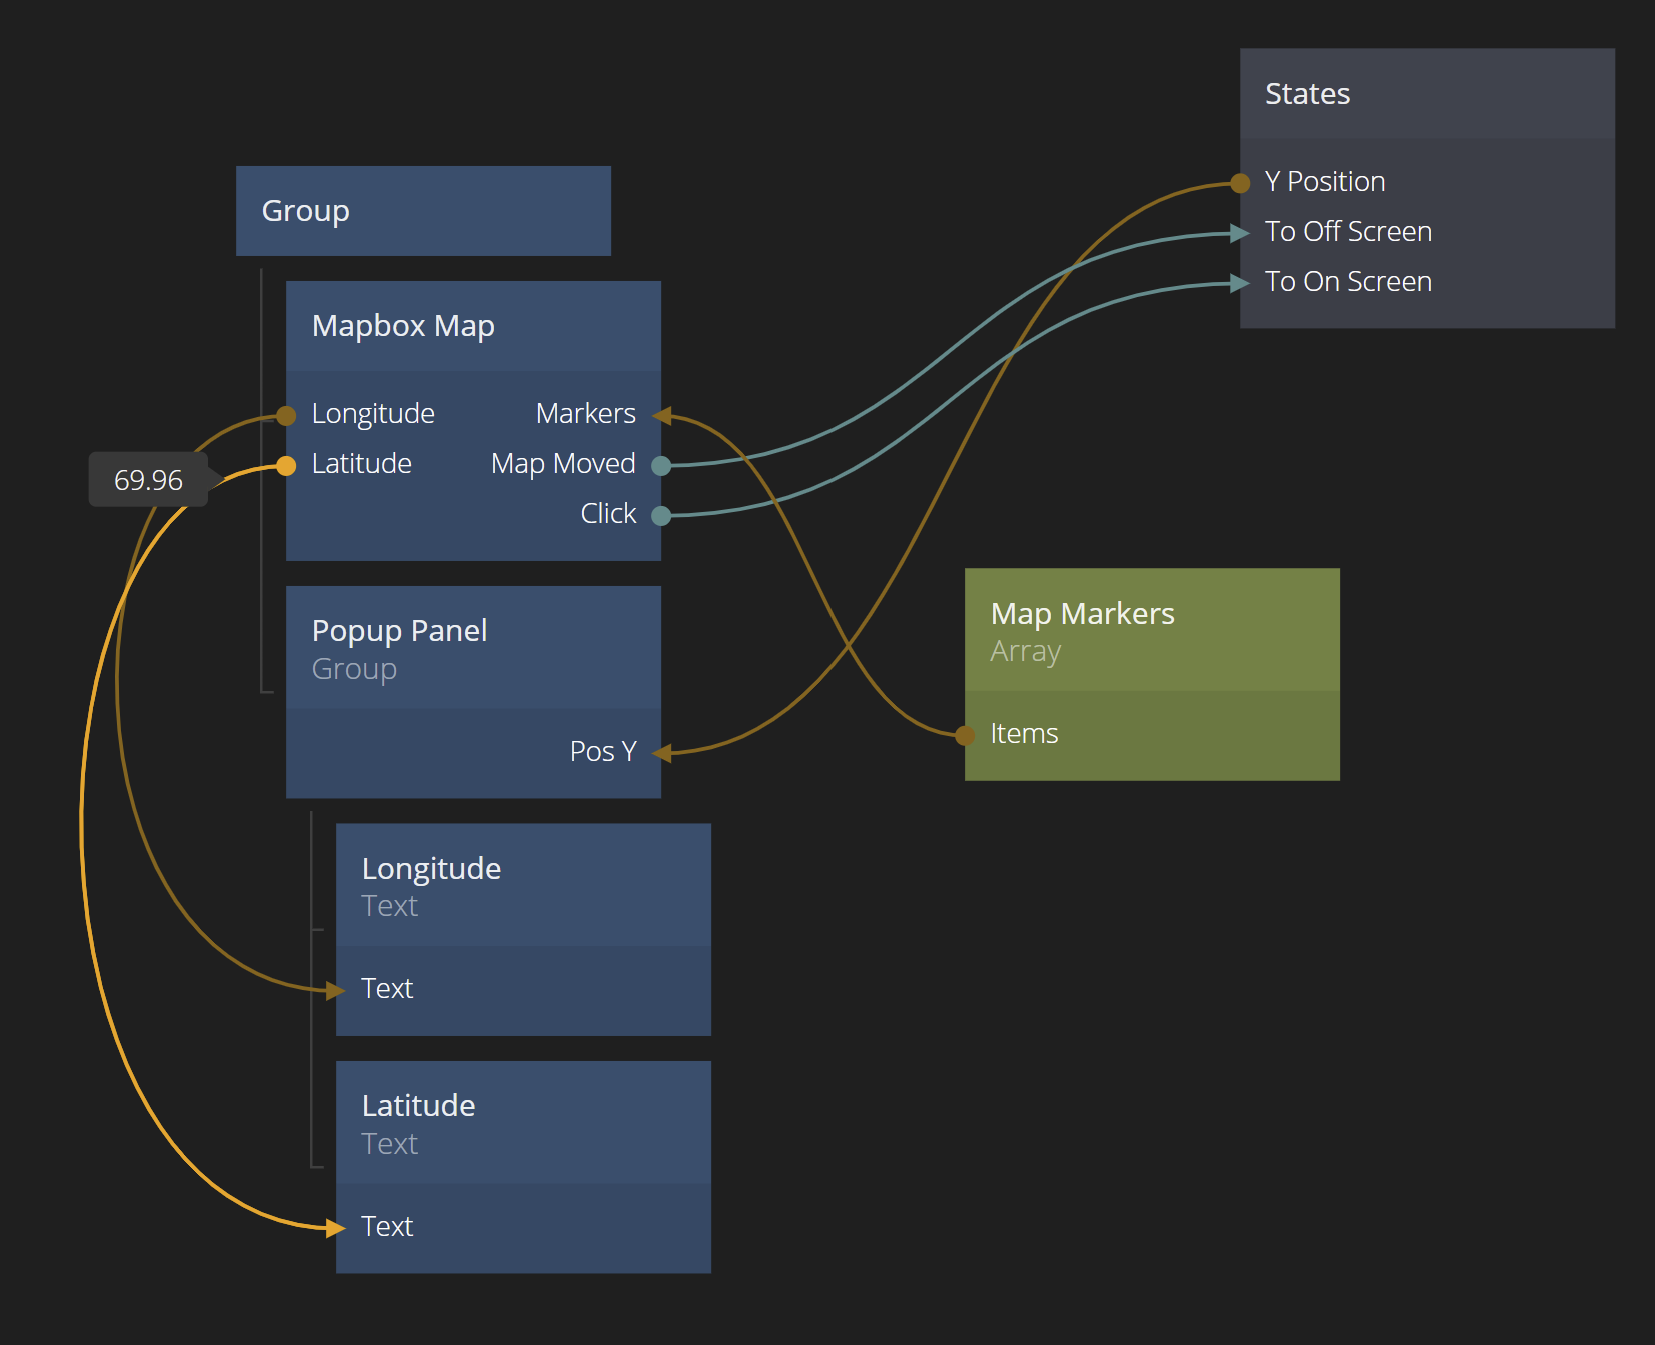
Let's change our App so you add a marker whenever you click on the map.
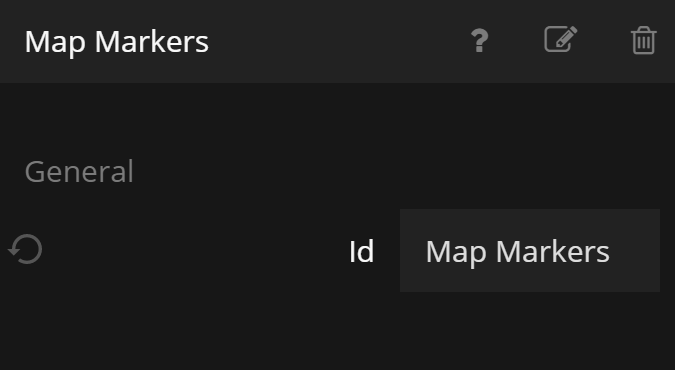
First we add an Array node. Give it the id Map Markers.
This will feed the markers to the Mapbox node, so connect its output Items to the Markers input on the Mapbox node.
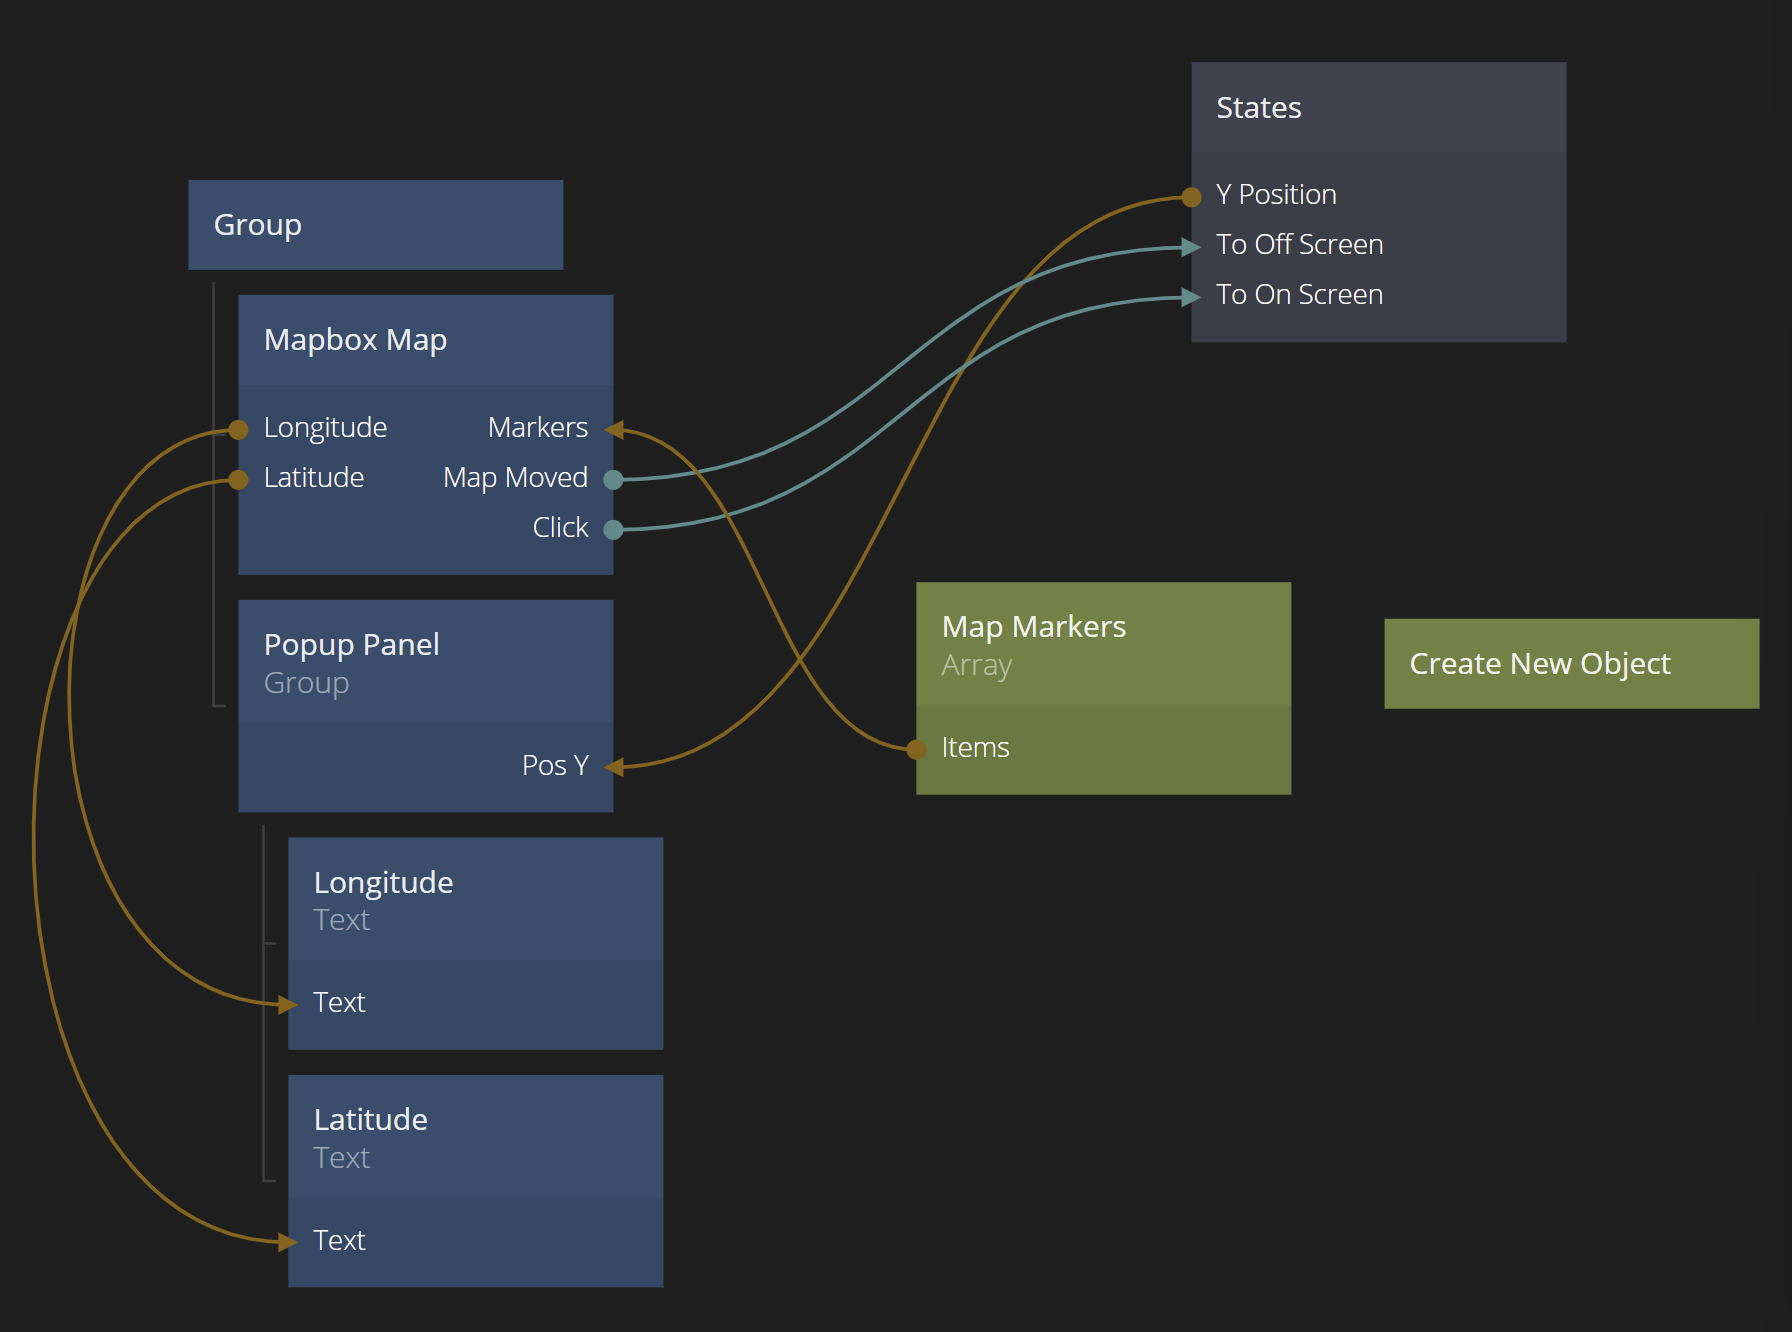
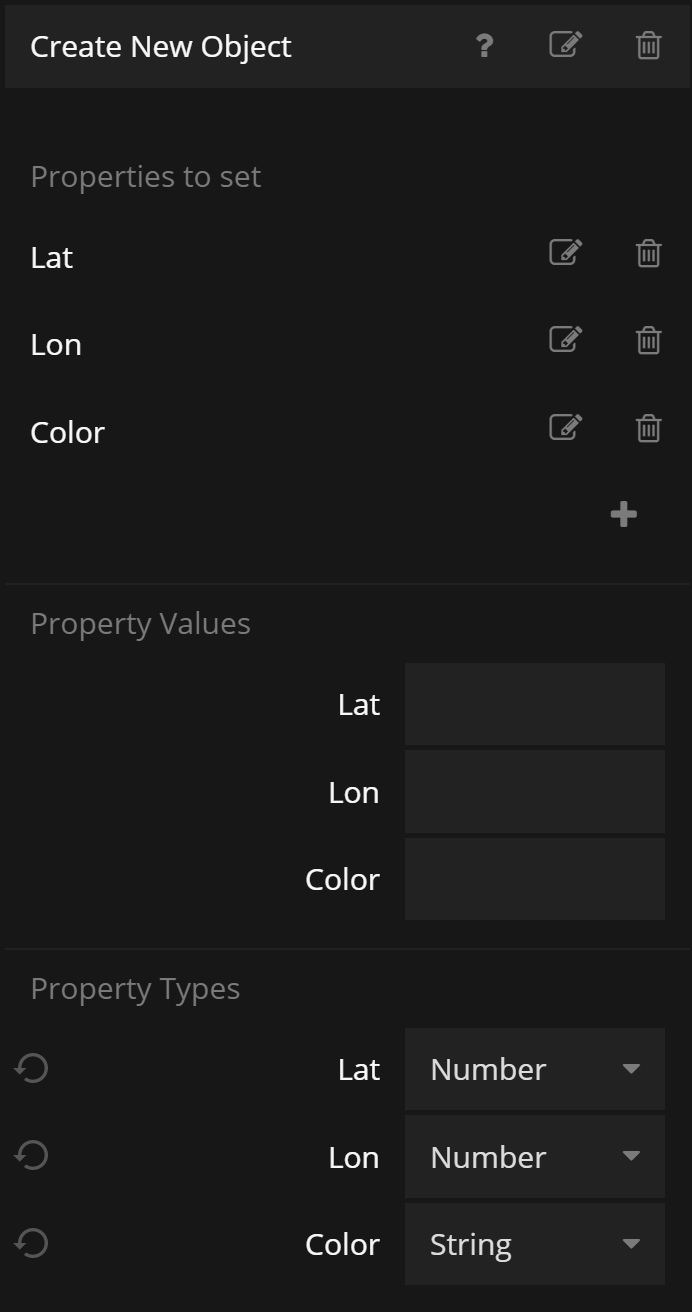
Now we need to add new Objects to the Array whenever the user clicks on the map. Add a Create New Object node and make sure you can set the three properties Lon (Number), Lat (Number) and Color (String) when you create it.
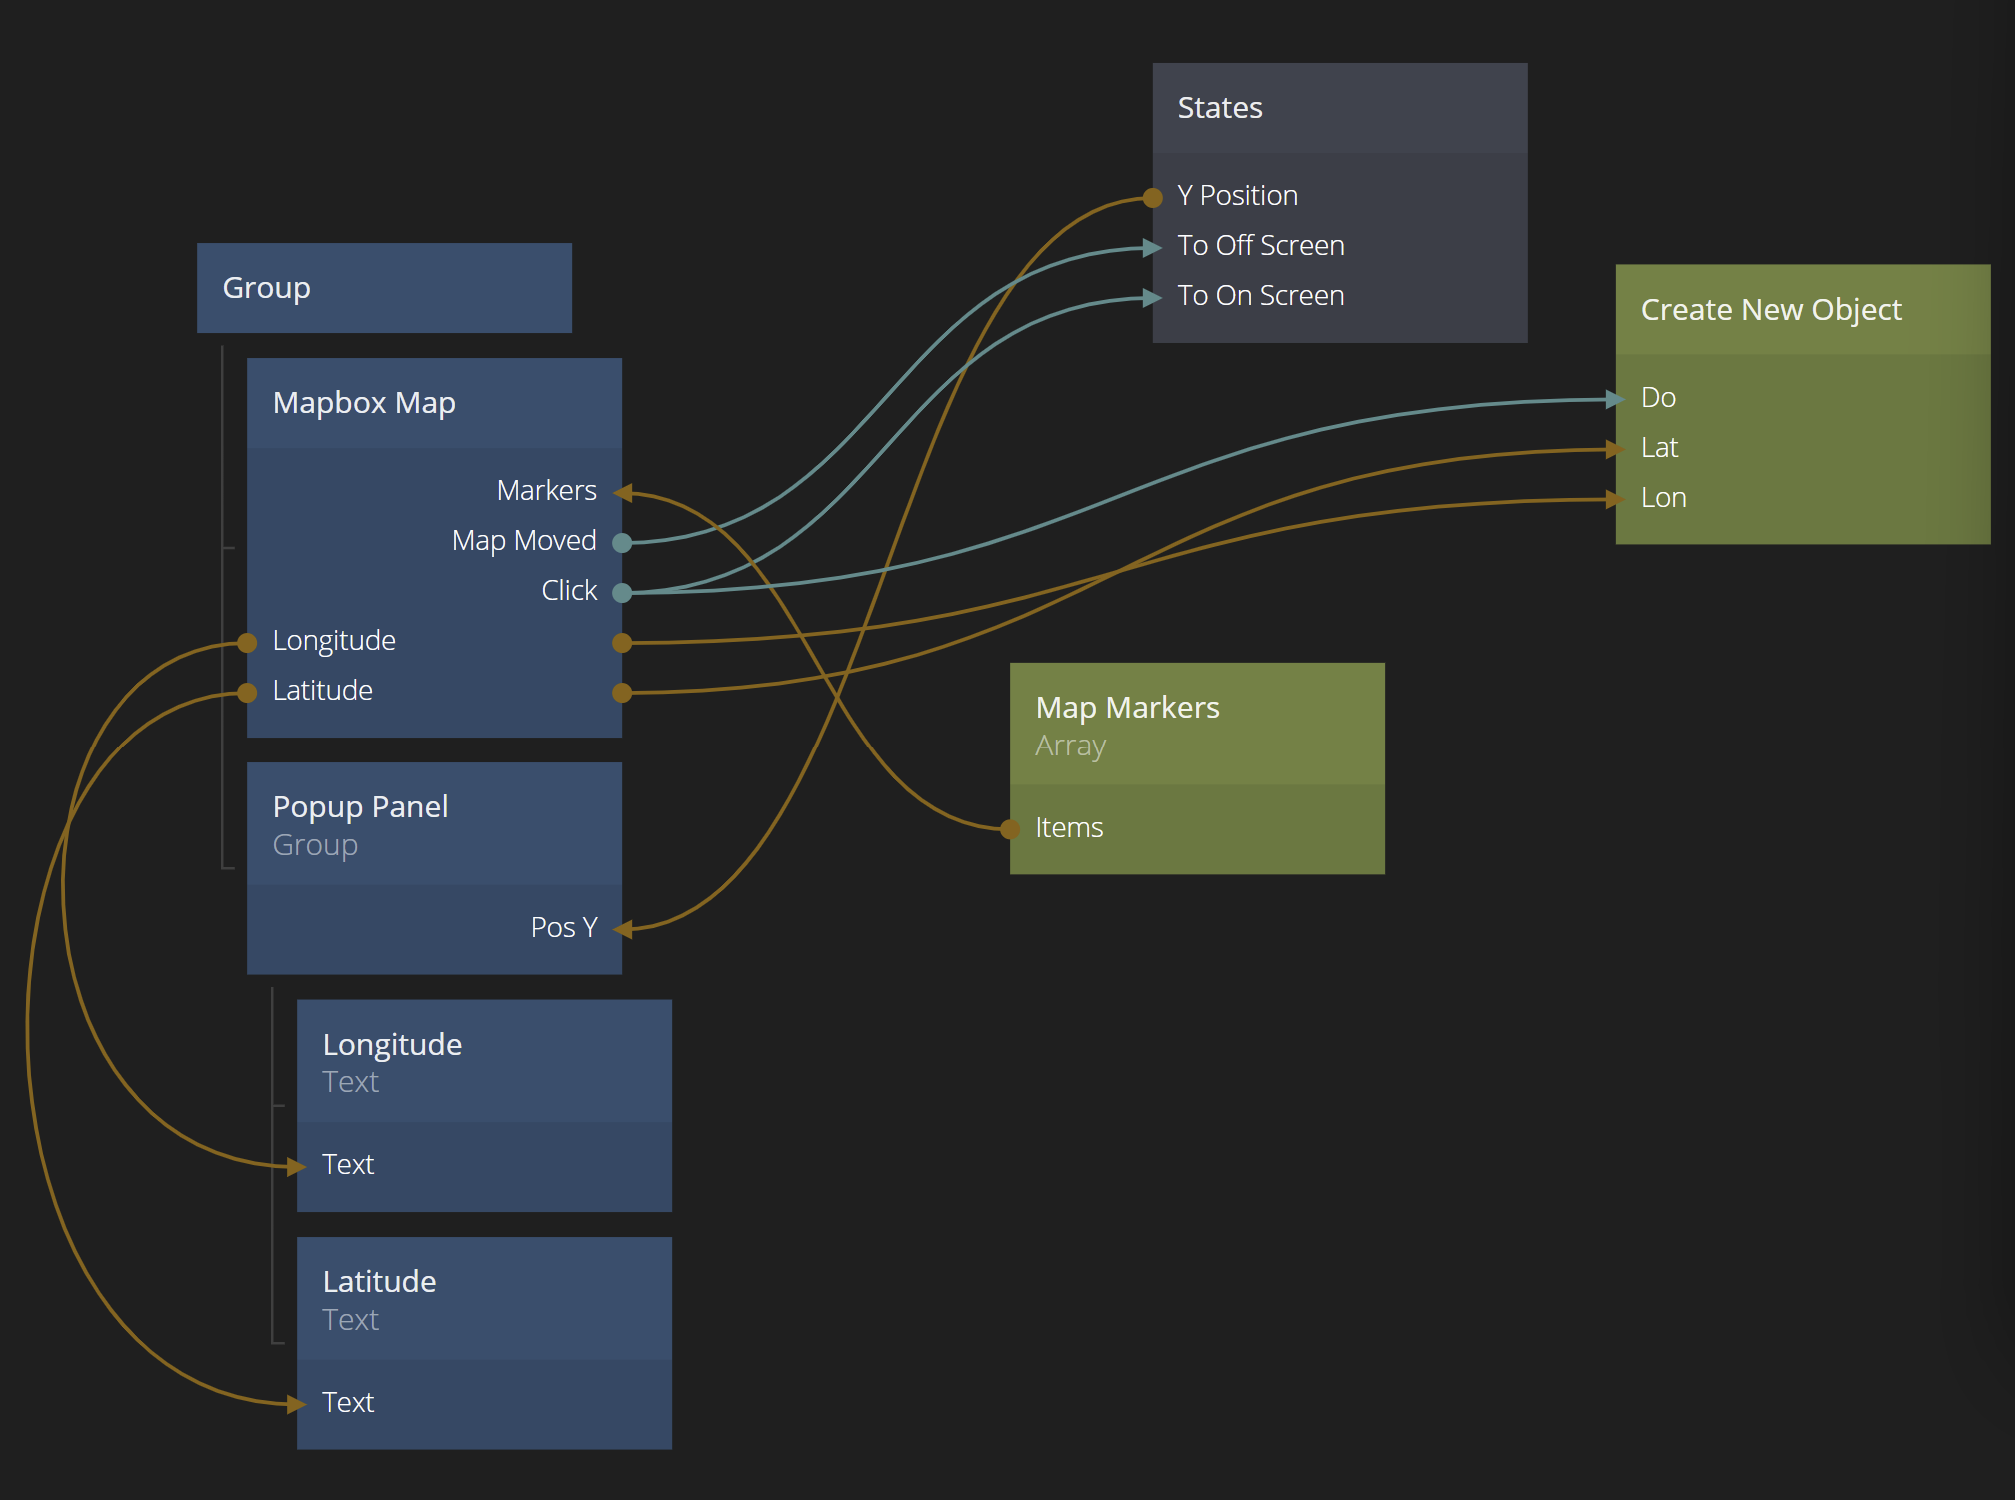
We want to set the Lat and Lon to the position the user clicks, so connect the Latitude and Longitude outputs from the Mapbox to the them. We can hard code the color to Black for now, so just enter Black directly in the properties panel of the Create New Object node. Then we connect the Click event from the Mapbox Map node to the Do signal of the Create New Object node.
The newly created Object need to be added to the Array that holds the markers. So by adding a Insert Object Into Array node, connecting the Done signal from the Create new Object Node to Do and also connecting the Id to Object Id we are almost done. We just need to make sure the insert happens in the correct Array. So either hardcode the Array Id to Map Markers, or connect the Id of the Array to the Array Id of the Insert Object Into Array node.
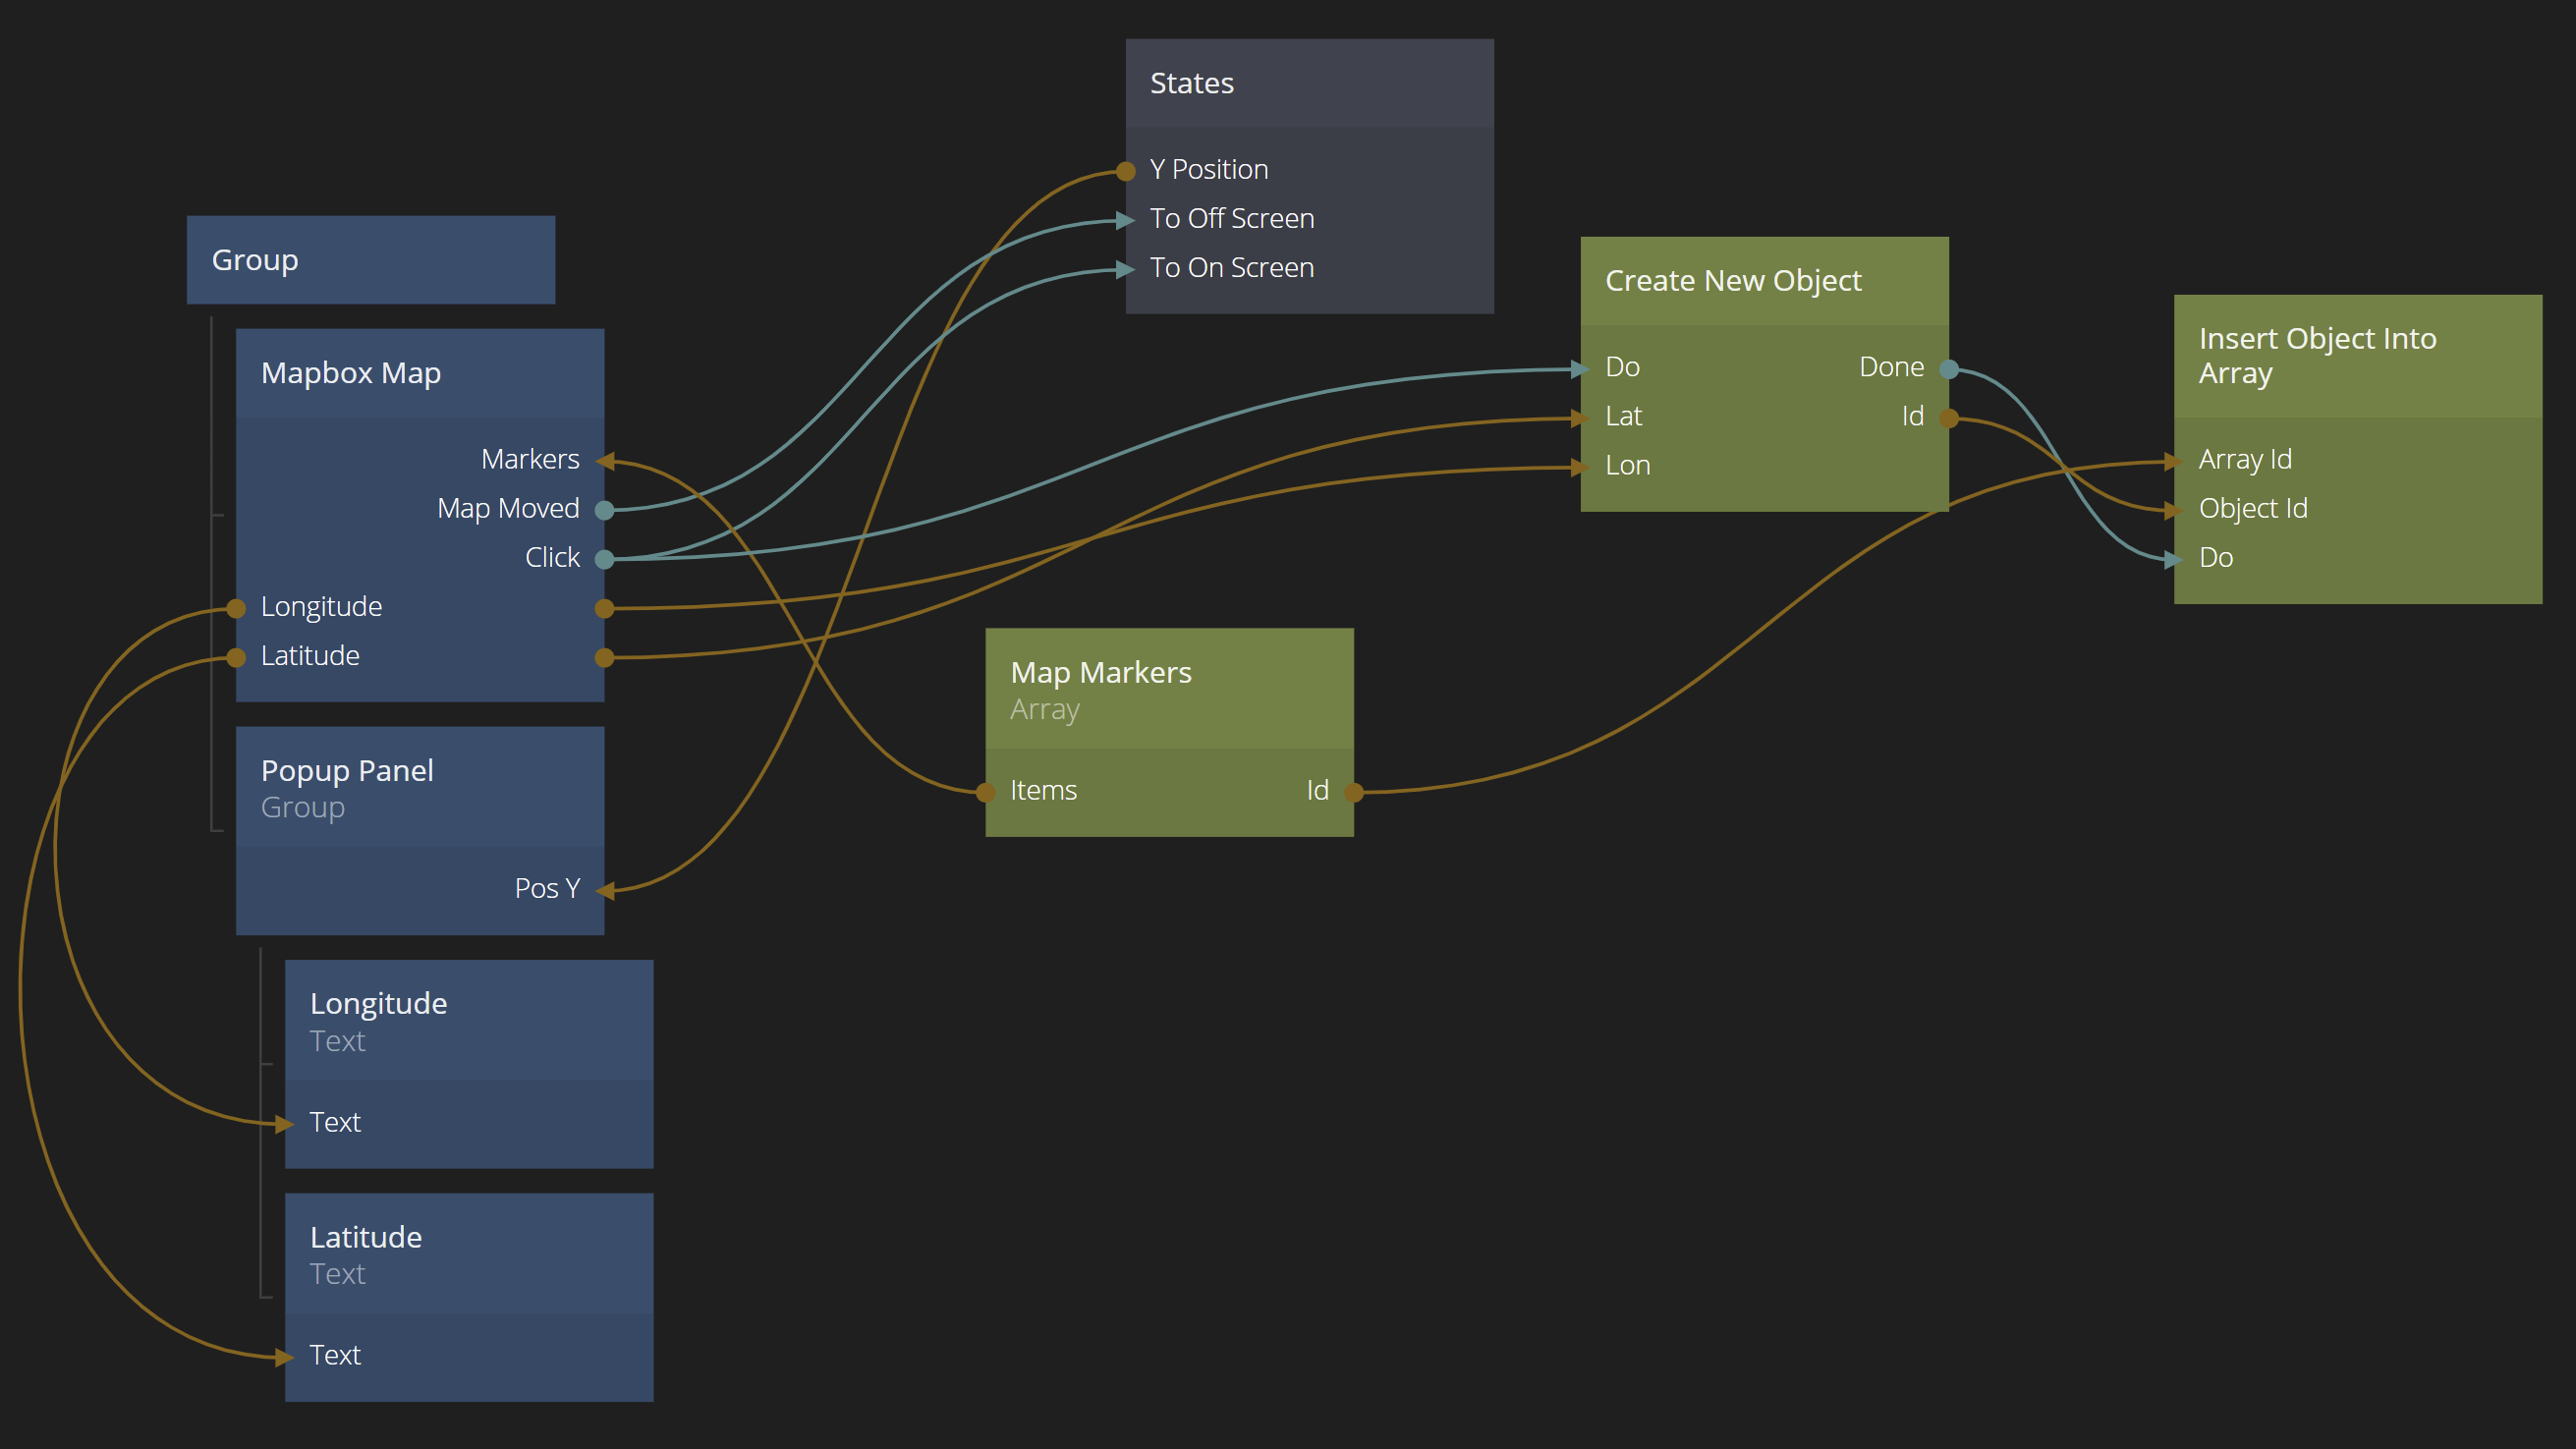
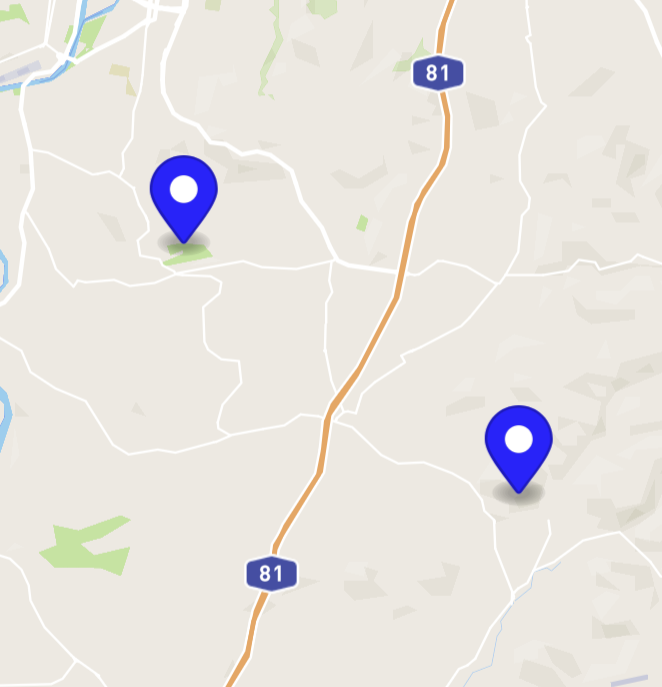
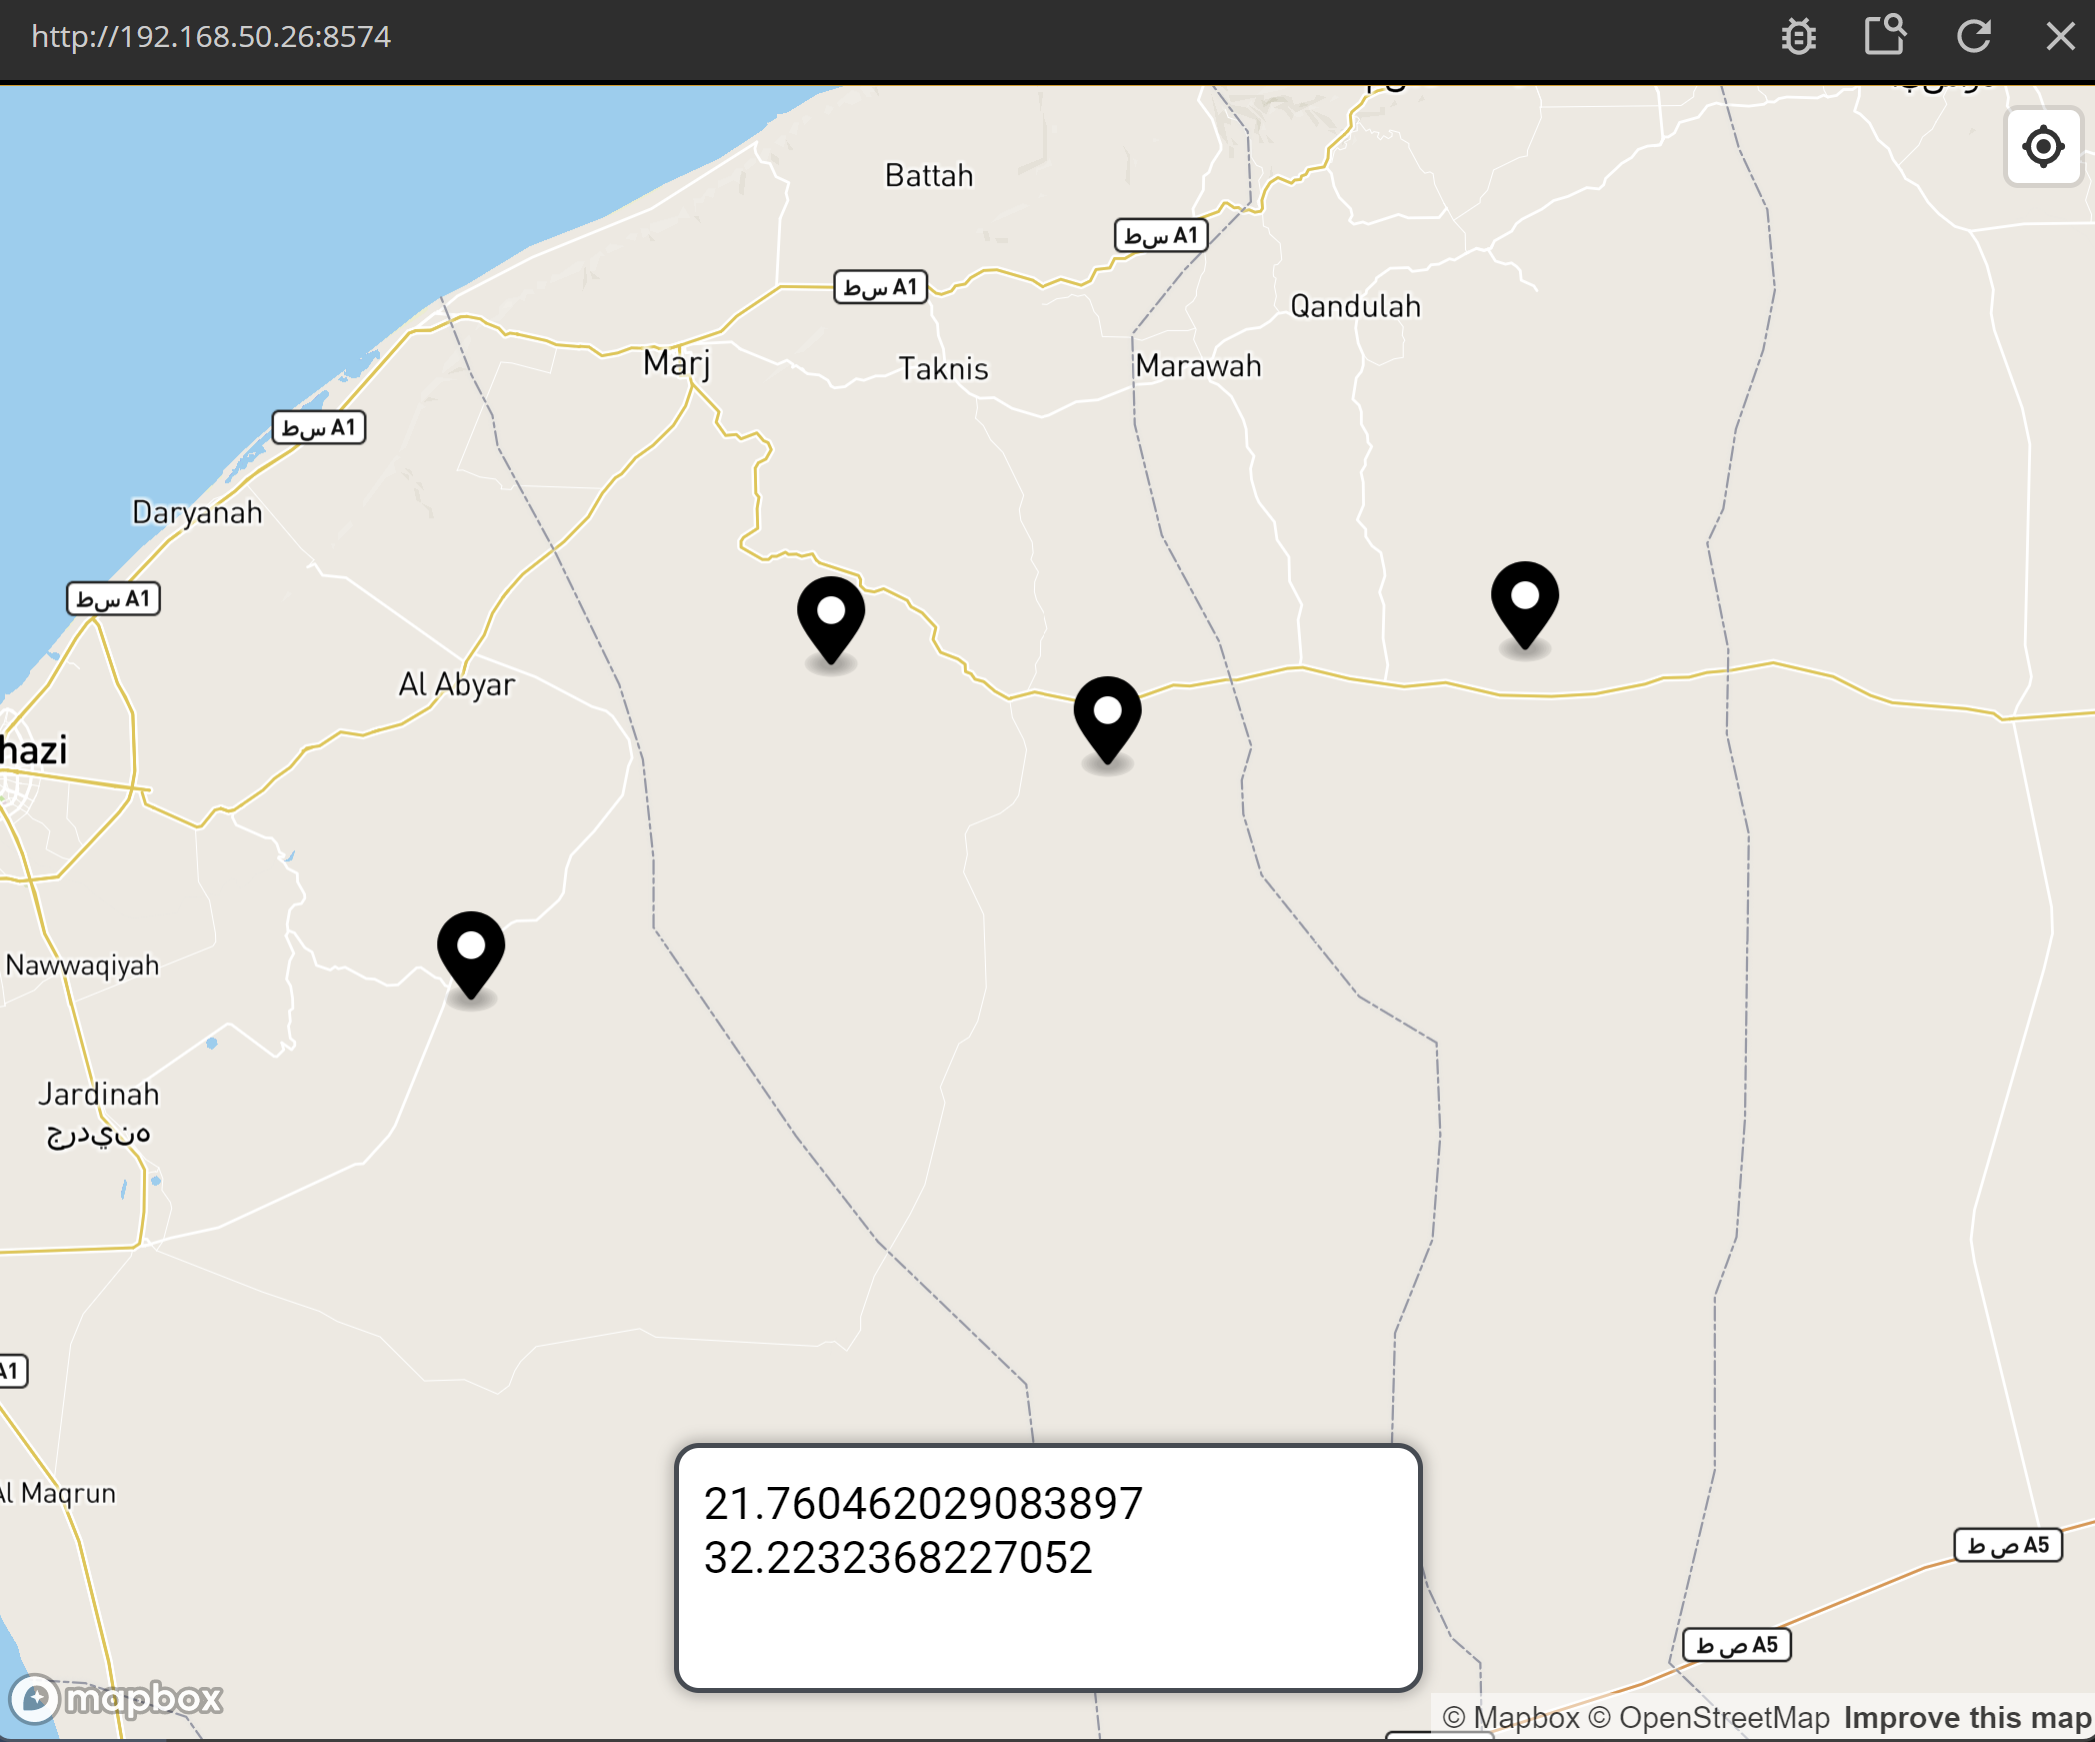
If everything was done correctly, you should now be able to place black markers on the map.
Capturing when the user clicks a marker
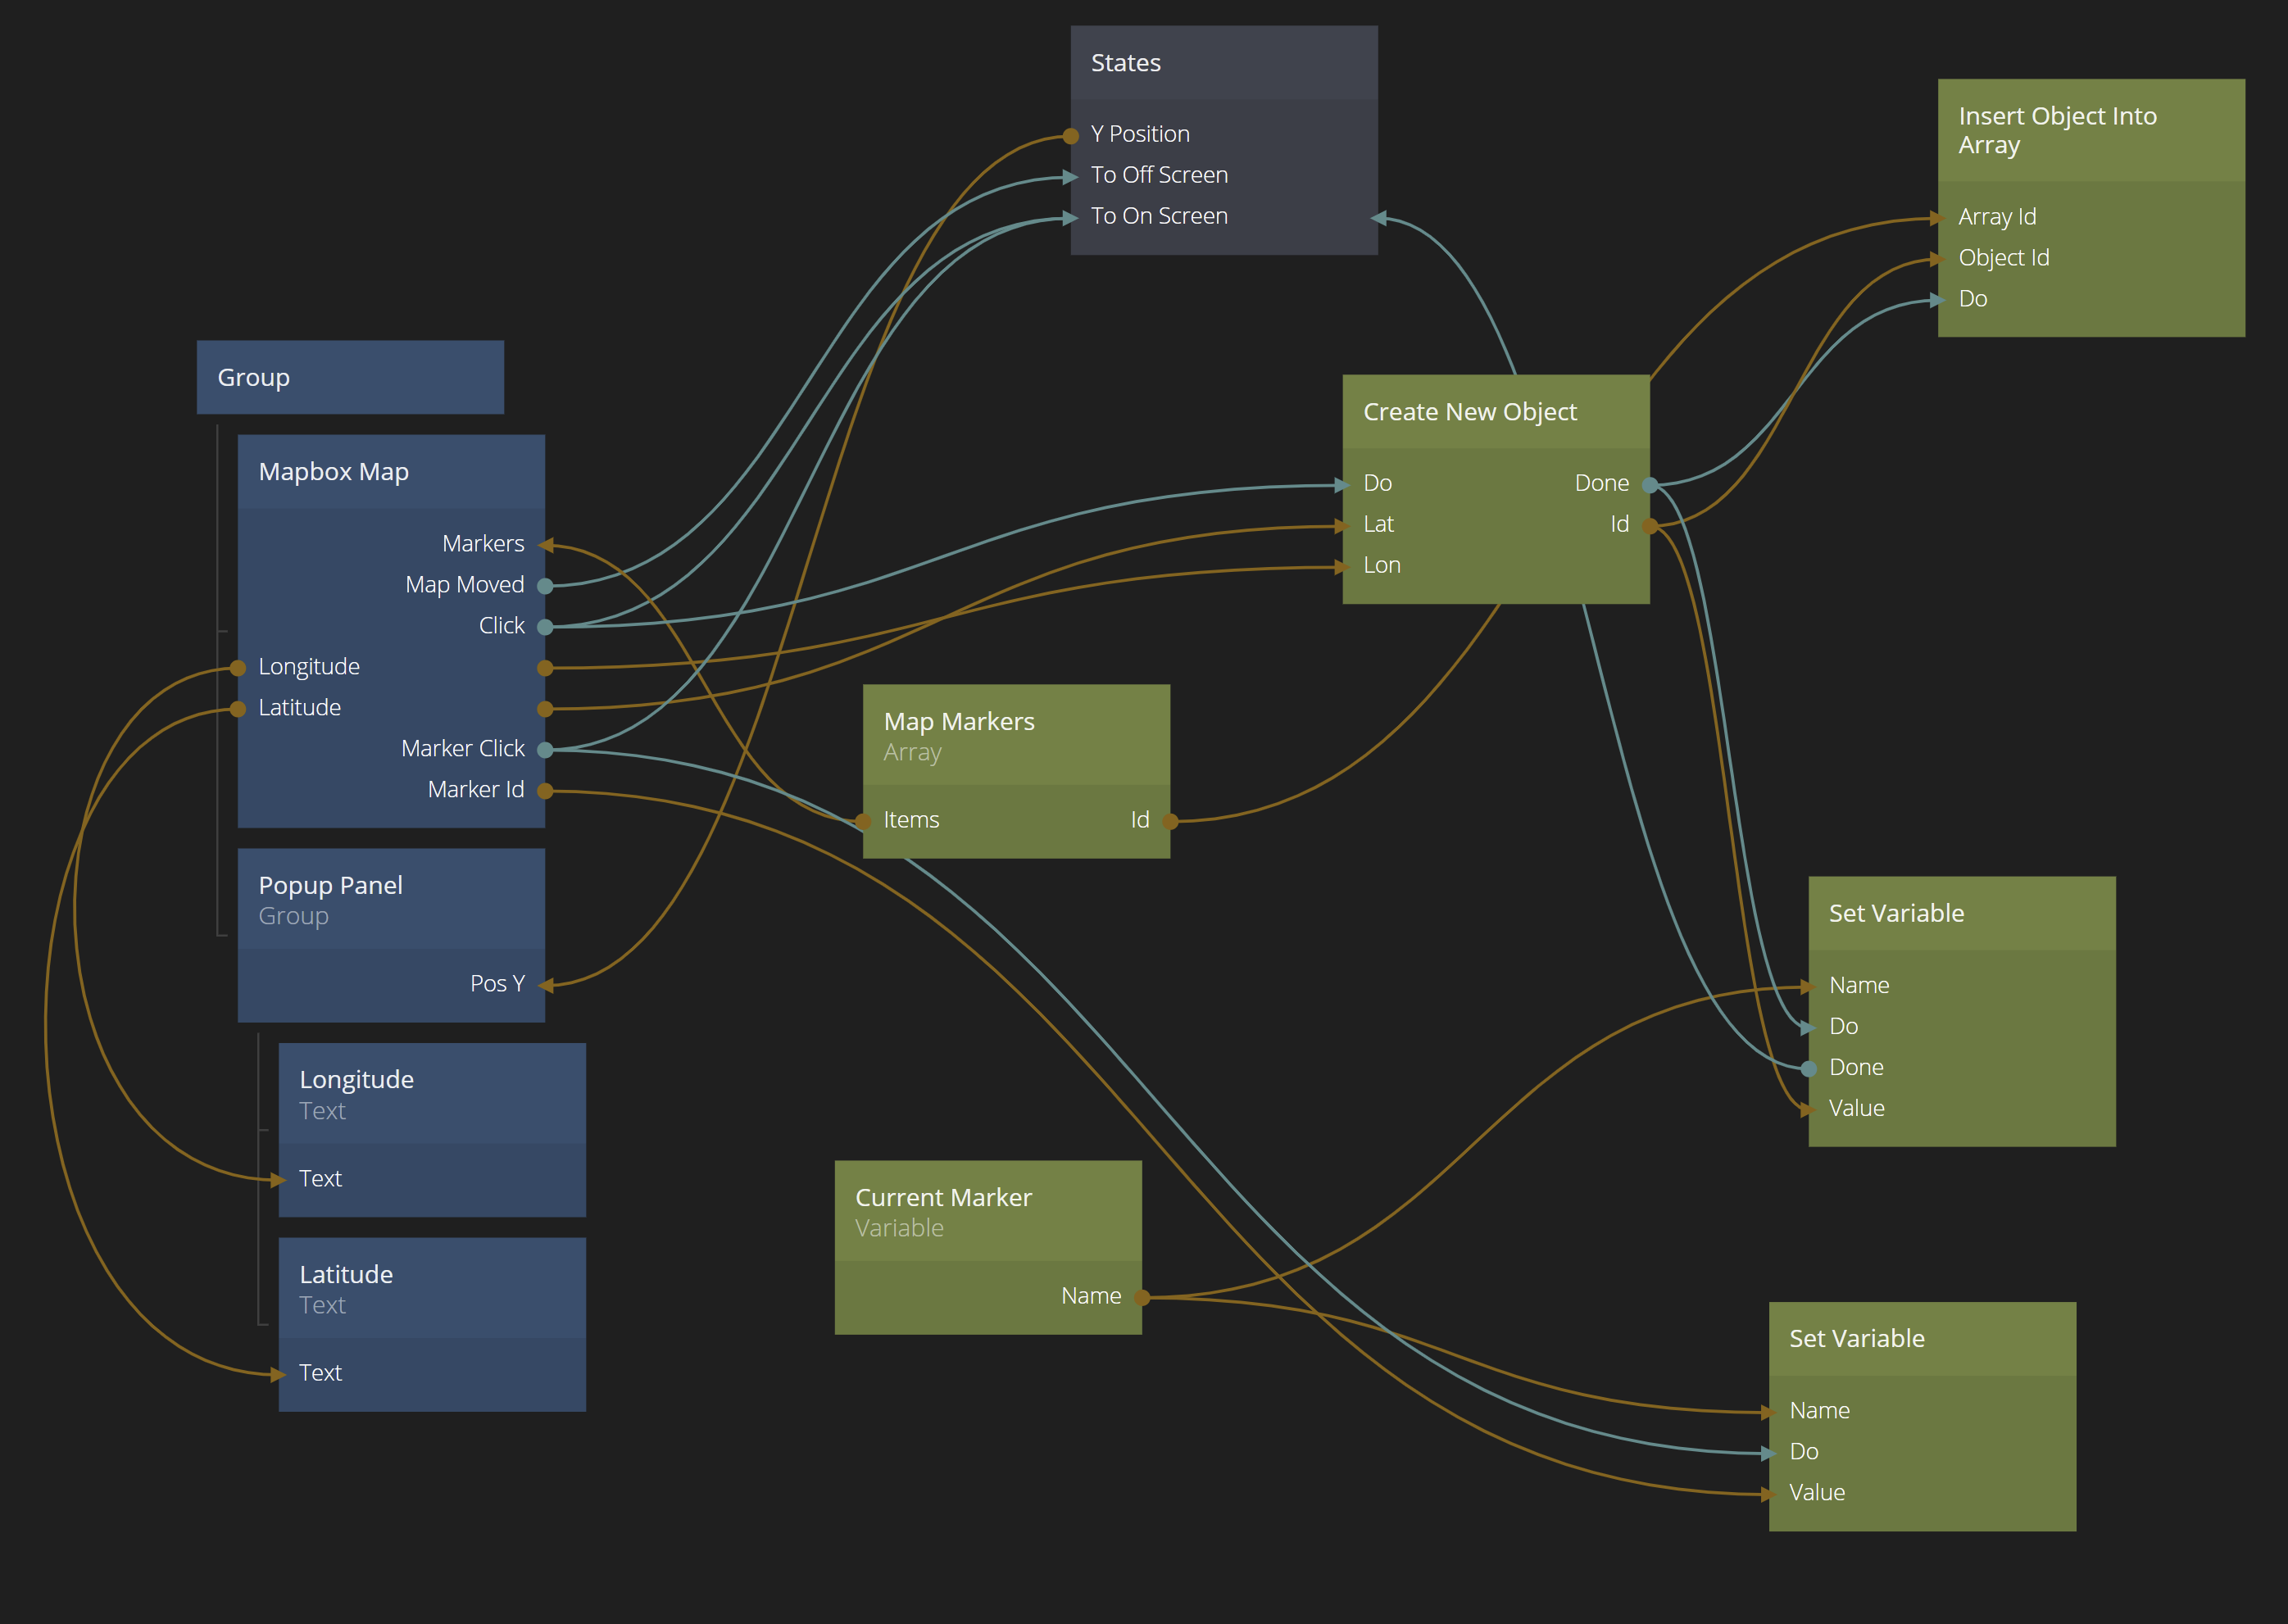
Next step is to be able to do something when the user clicks a marker. So we need to differentiate between clicking on the map and clicking on a marker. Conveniently there is an additional outgoing signal on the Mapbox Map node called Marker Click. Another signal will be important too, the Marker Id output that will contain the Id of the Object in the marker Array that represents the clicked marker.
So let's change up the logic slightly, so the panel either shows the marker that was clicked, or the newly created marker if the user didn't click the marker but on the map instead.
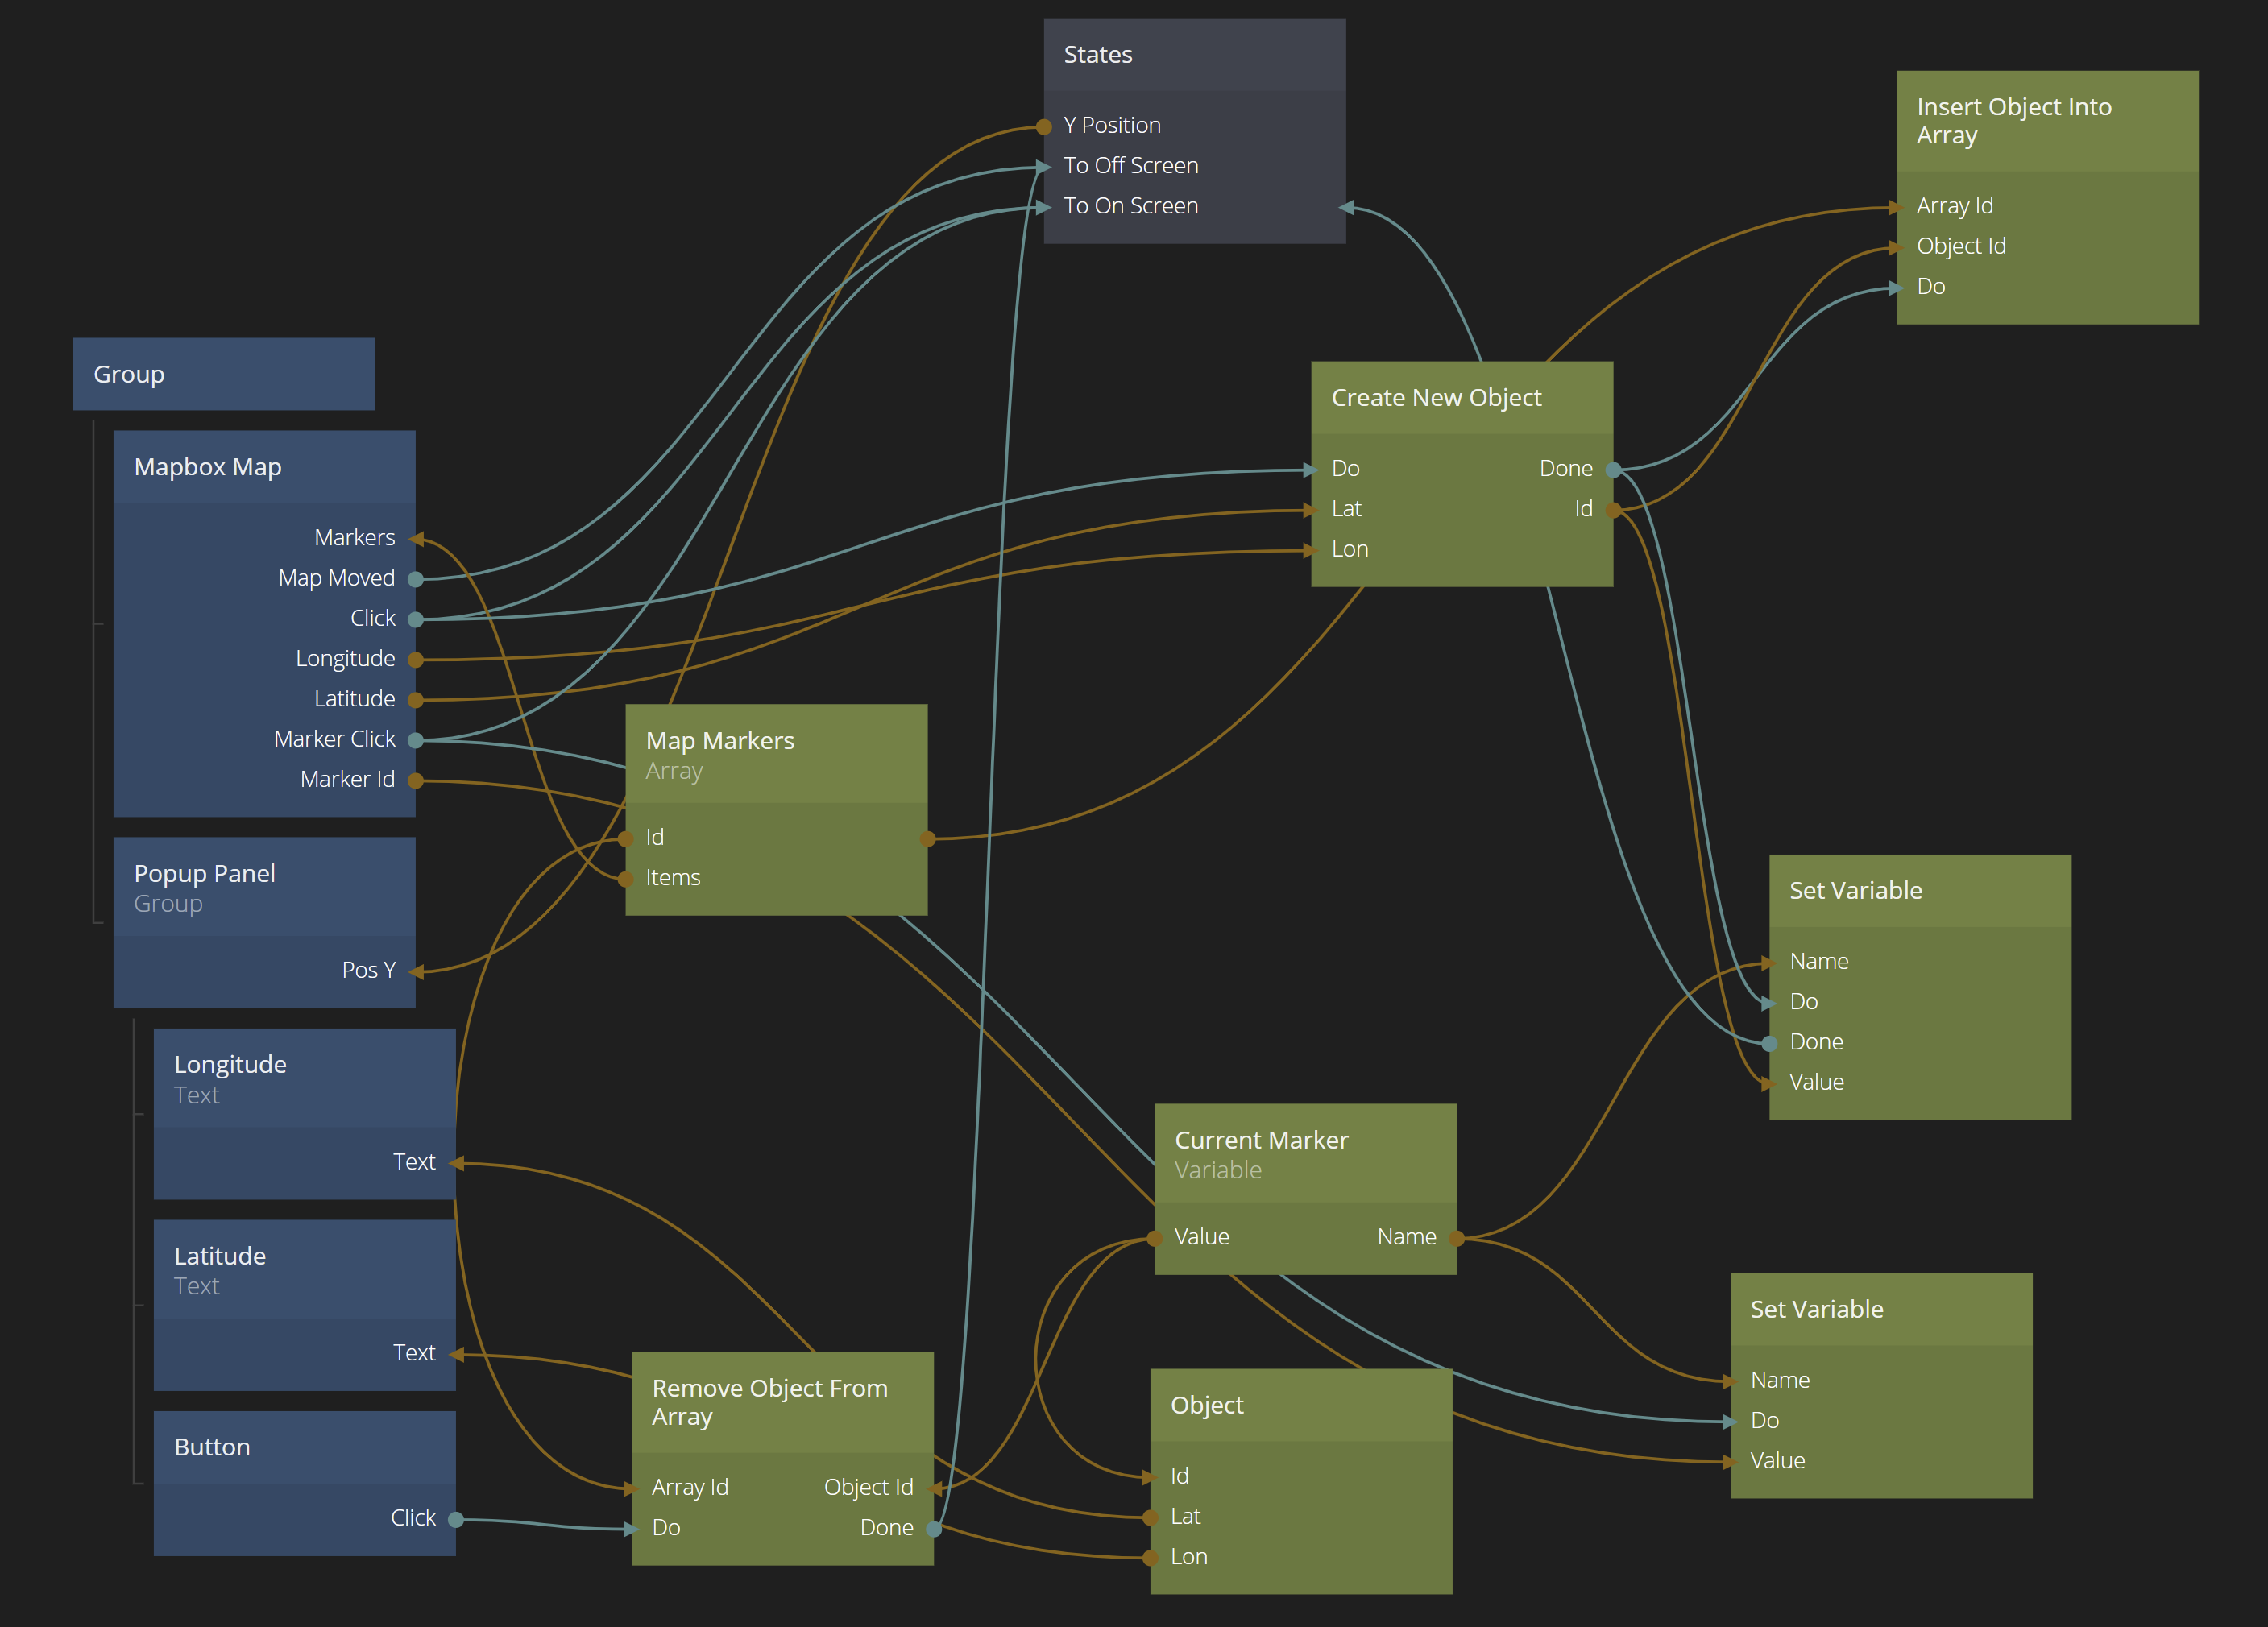
Using Variable and Set Variable node and some logic around that, we make sure a Variable holds the current marker. See the guide on using Variables if you want to know more about how to use them. Also, the Marker Click signal now makes the panel visible as well. The full node design can be seen below.
Finally, let's update the panel logic. We want to make sure the latitude/longitude values comes from the marker and not from where you clicked on the map. It won't make a difference now, but we might want to capture more information in the marker to show in the panel, so this is a better design.
The Current Marker Variable holds the Id of the current marker, so just connect it to an Object and take out the Lon and Lat properties from it. The updated design is shown below.

Removing Markers
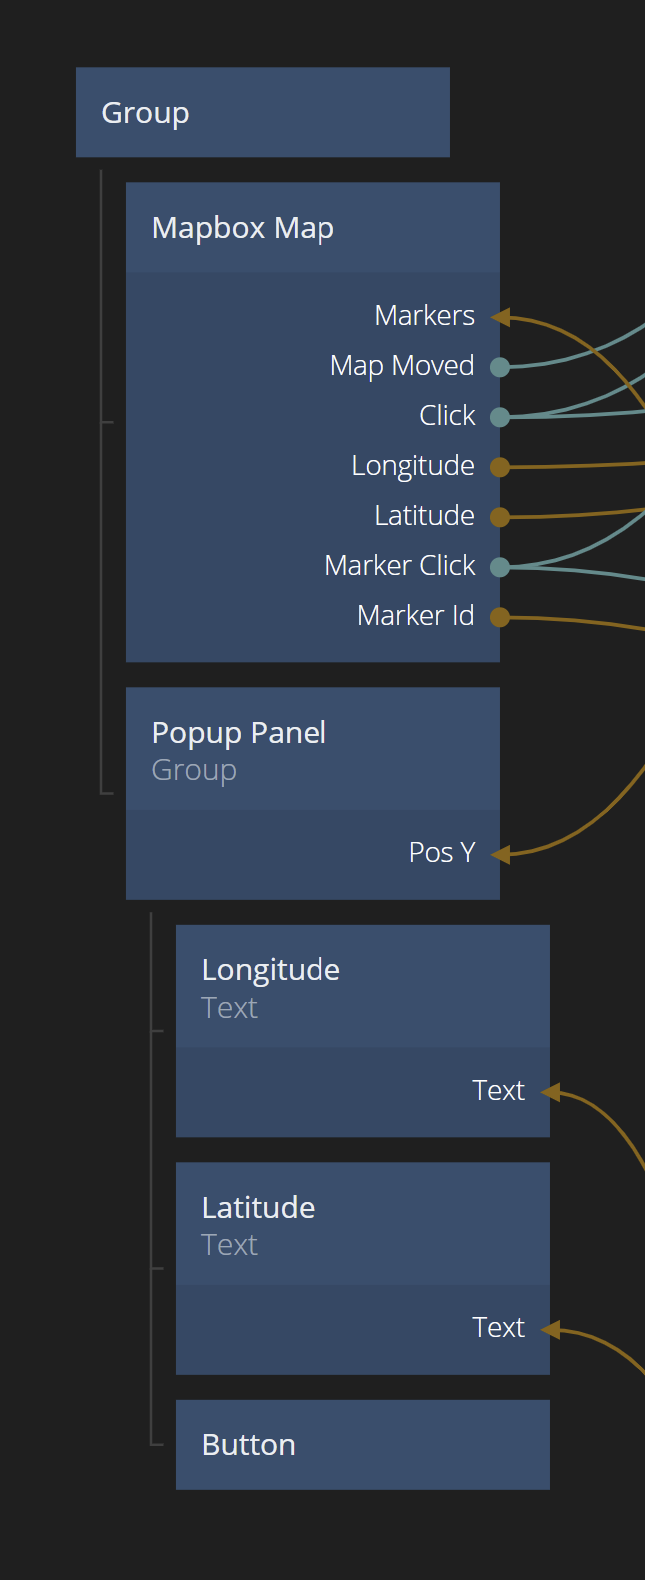
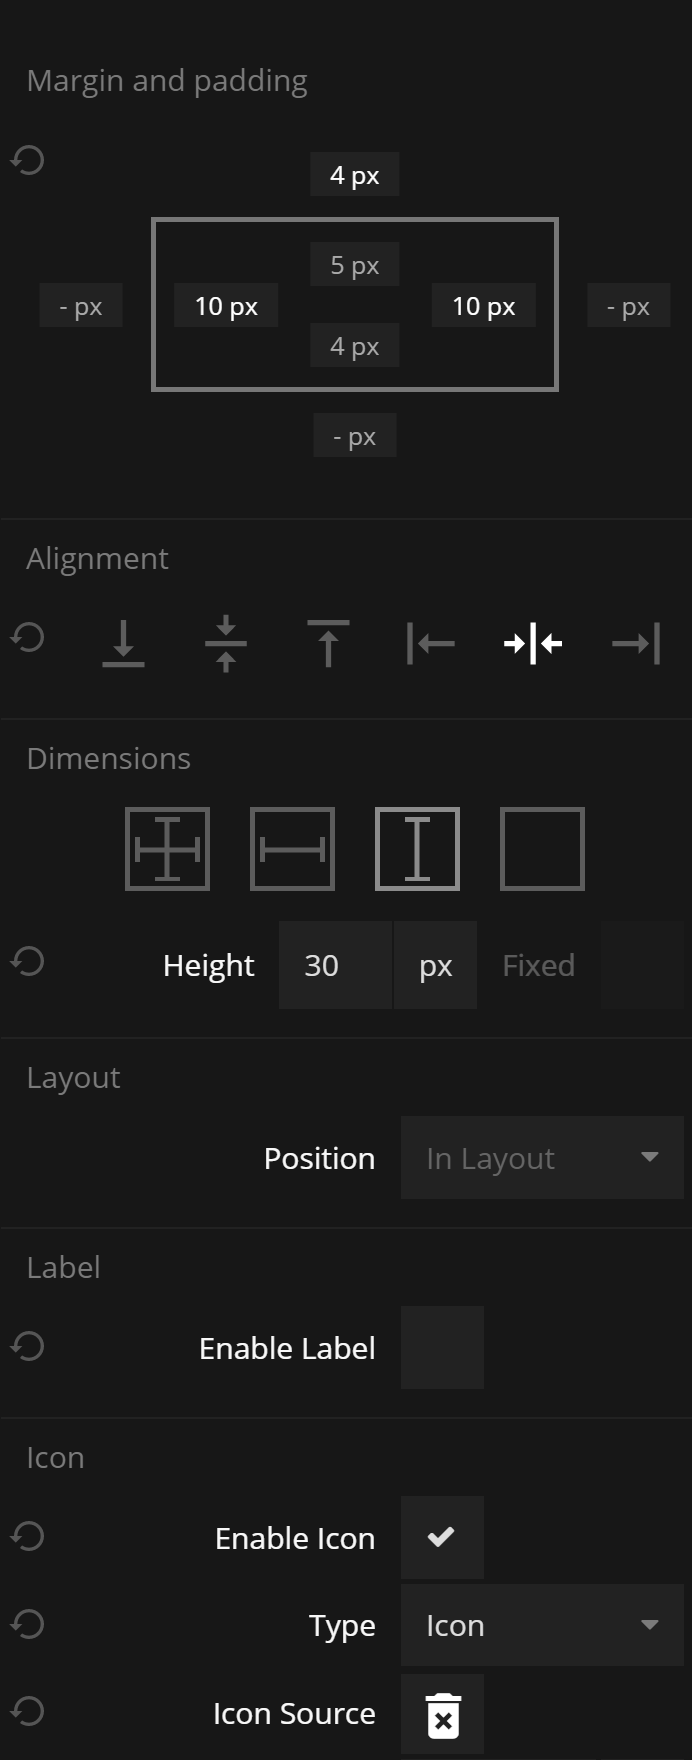
Finally we want to be able to remove markers. It's very easy, just remove them from the Marker Array. So let's add a Button to the panel. Remove its label and instead add an icon that represents "delete". Also make it smaller by adapting its padding and size. Finally make it red so it's clear it's a destructive action.

We connect the functionality for the button. We add a Remove Object From Array node and make sure the Object Id is what's stored in the Current Marker Variable and the Array Id comes the same Id as the Map Markers Array.
The Click signal from the Button is connected to Do on the Remove Object From Array node. Finally we also close the panel when the removal is Done.
This is what the final node construct looks like. If you want to import the final project click the "Import" button: