PDF Export
note
This prefab only works on Noodl hosted cloud services.
It's recommended that you have a grasp of the following concepts before diving into this prefab:
- Page Navigation - How to create pages and navigate between them.
- Cloud Functions - How to create cloud functions and run logic on the backend.
Here is a nifty prefab for exporting / generating PDFs. Exporting a PDF involves two components:
- A PDF Page This needs to be a page in your applications that is accessible externally. This page will be turned into a PDF in the next step.
- A PDF export cloud function This is a cloud function that will perform the PDF export, the exported PDF will be uploaded as a file to the cloud service and you will receive a URL that can be send to the frontend and opened in a new tab.
Let's review the two components one by one:
The PDF Page
First you need to create a Noodl page in a page router that will be accessible at a specific url when you deploy the application. This web page should contain the content pages of your PDF. We have found that you get the best result when simply stacking groups on top of each other as shown below:
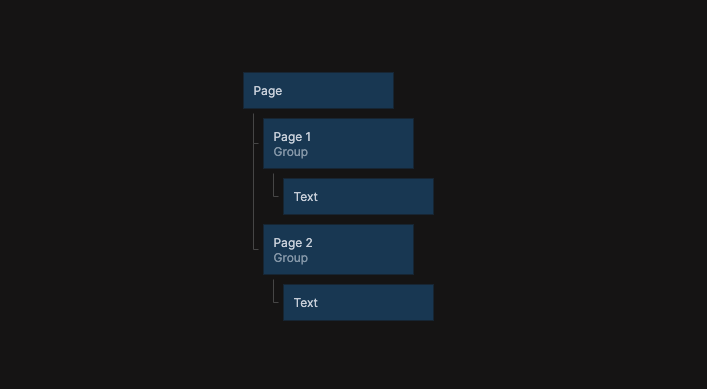
We also recommend setting the dimensions of each page to explicit values as shown below:

In this way you can put the content of each page within these groups. You could also use a Repeater to dynamically generate the pages with data. You need to make sure that the page is publicly available so it doesn't require a login for any data you put on the pages. Here is an example: https://pdf-test.sandbox.noodl.app/pdf.
The PDF export cloud function
The second step is to create a cloud function that performs the PDF export and returns a URL with the ready PDF. After cloning the prefab into your project you will have

The cloud function Create PDF will simply create a PDF from a prodived web page URL, upload the file and return the URL. The content of the cloud functions is very simple:
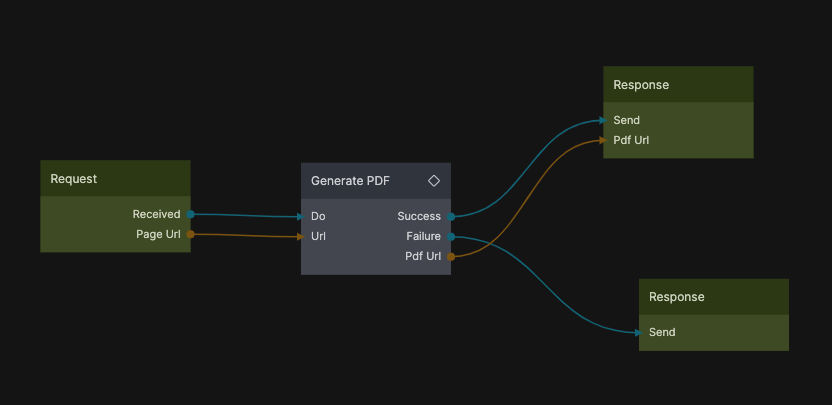
The request is connected to the Generate PDF logic component that does the PDF export and when it succeeds the url with the location of the PDF is returned in the request.
Hooking it up
Here is a very simple example of to hook it up in your application. When the button is clicked the cloud function is called with a string with the URL of the web page that should be made into a PDF.
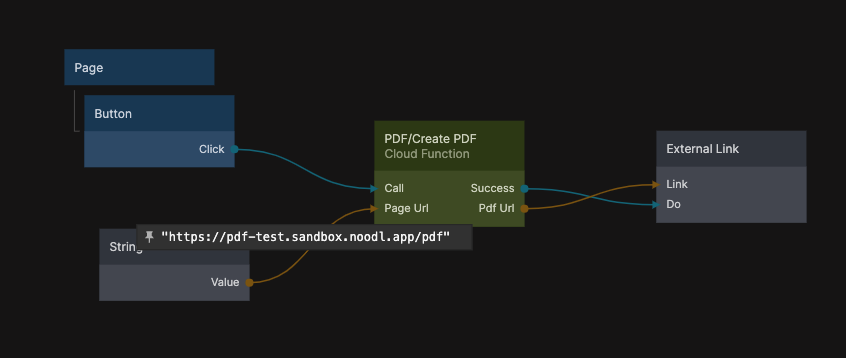
When the cloud function completes the url to the exported PDF is sent to an External Link node that opens the url in a new tab and the browser will show a preview of the PDF.
The PDF generation generally takes a second or two, so it's good to show something like a Loading Spinner while processing.
User sessions
Often the web page that has the content of the PDF requires access the cloud database to include data in the document. This data should generally be protected with Access Control so only users with permissions can access. But the page used to export the PDF will not have a valid user session as it's only used in the export process. We can solve this by providing a session token as a query parameter to the page.
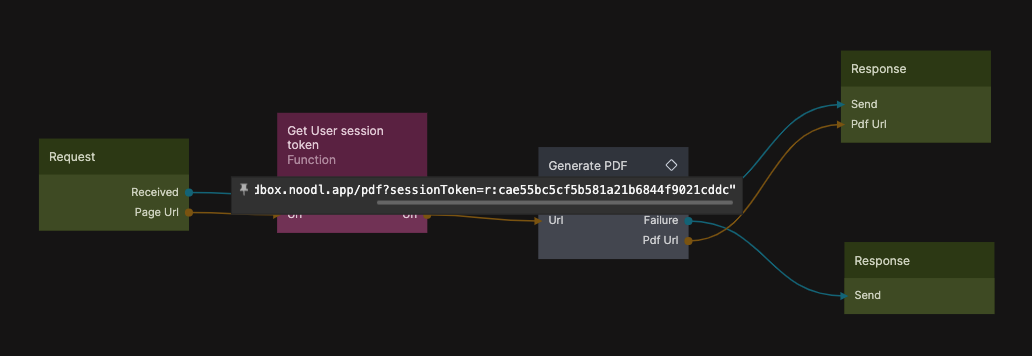
There is a second cloud function called Create PDF With Session that helps us do this, it works like the other but it first fetches a session for the user calling the cloud function (this cloud function requires authentication on the front end to be called). The session is appended to the provided page url, as seen below:
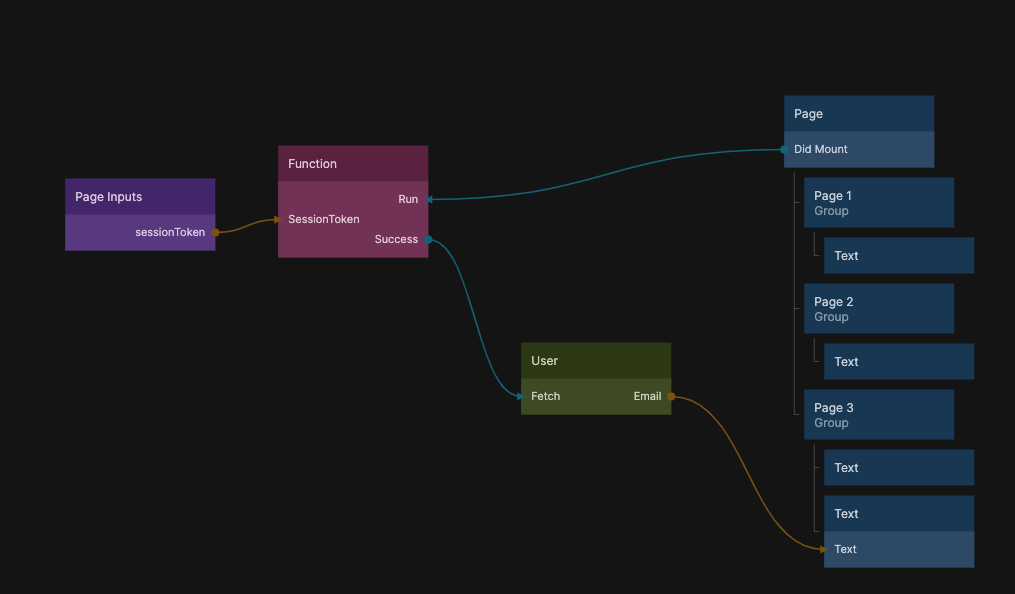
To use the session token on the frontend you need to extract it from the Page Inputs and feed into a function node with this code:
if(Inputs.SessionToken) {
    try {
        await Noodl.Users.become(Inputs.SessionToken);
    }
    catch(e) {
        Outputs.Failure();
        throw e;
    }

    Outputs.Success();
}
else {
    Outputs.Failure();
    throw Error("No session token provided");
}
This code will use the provided session token to authenticate and "become" the user that the session token is valid for. Here is an example of how you can add the user email address to the PDF content.