Setting up the Google Sheets Module
What you will learn in this guide
This guide will show you how to include the Google Sheets module in a project and how to get data from a Google Sheet into your Noodl project.
Overview
In this guide we will build a small application where we display a list of US National Parks. We will get the data for the parks from a public Google Sheet.
We will go though the following steps:
- Install the Google Sheets Module in a Noodl Project.
- Set up a Query Sheets node to pull data from a public Google Sheet
- Create a small list based on the data from the Google Sheet
Install the Google Sheets Module
The easiest way to get started with the Google Sheets Module is to use the "GSheets" template when creating a new project in Noodl. In that template, the Google Sheets module is already included.
However, if you have an existing project, or want to start from a different template, it's easy to get started as well. Just follow these instructions.
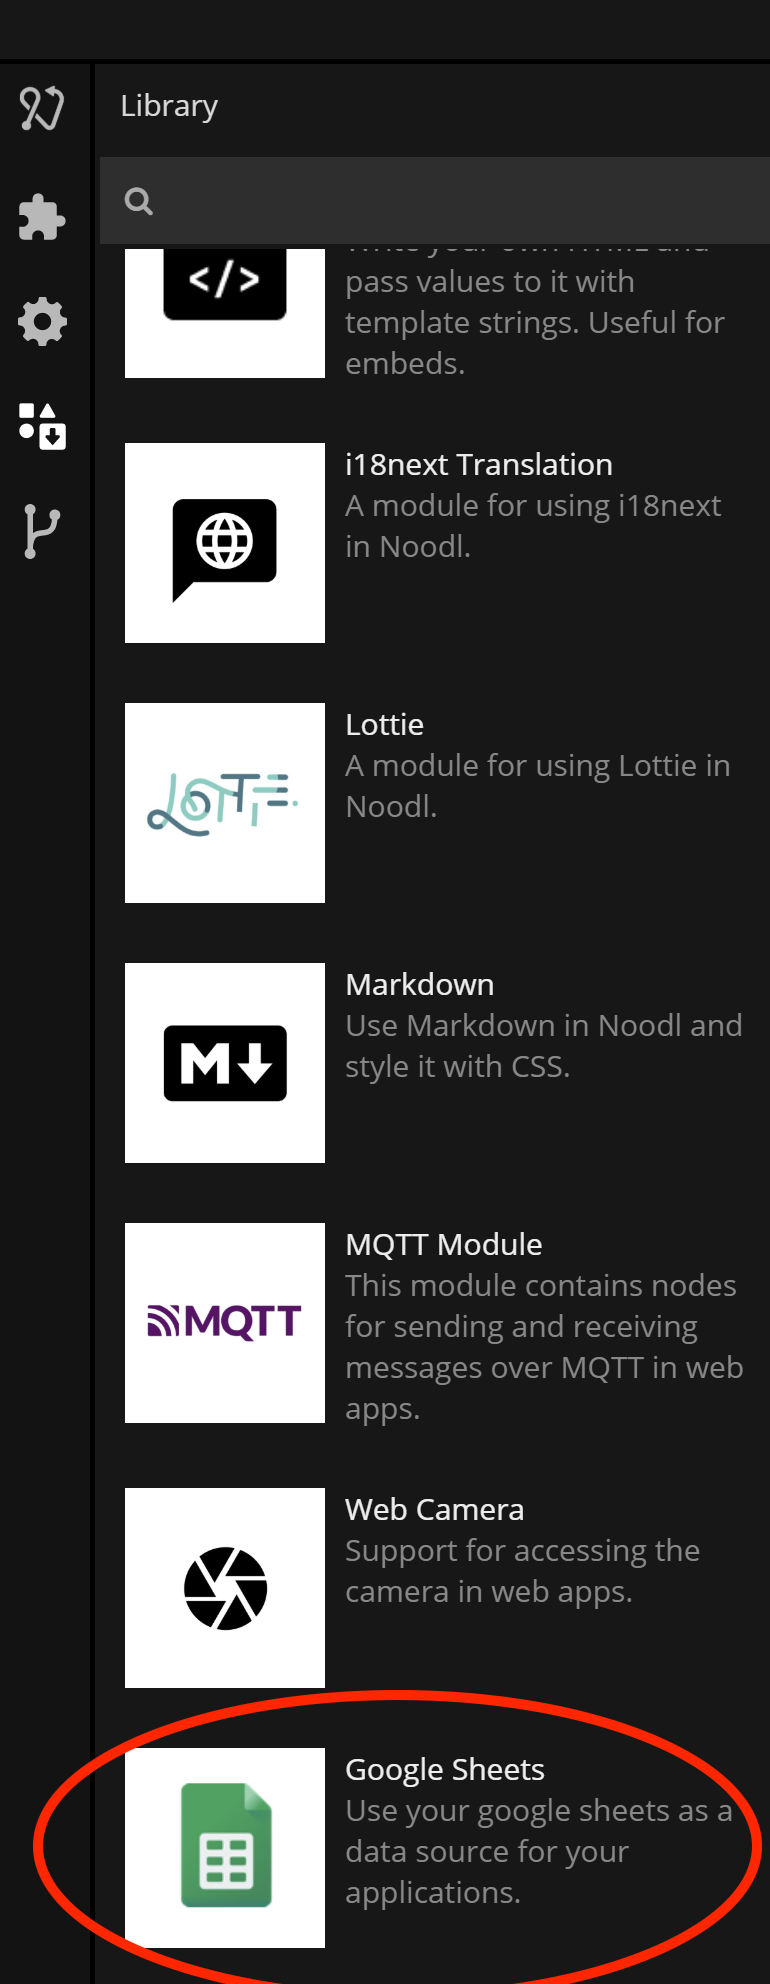
When in the project, open the "Library" tab to the left. Find the "GSheet" module and click "Add".
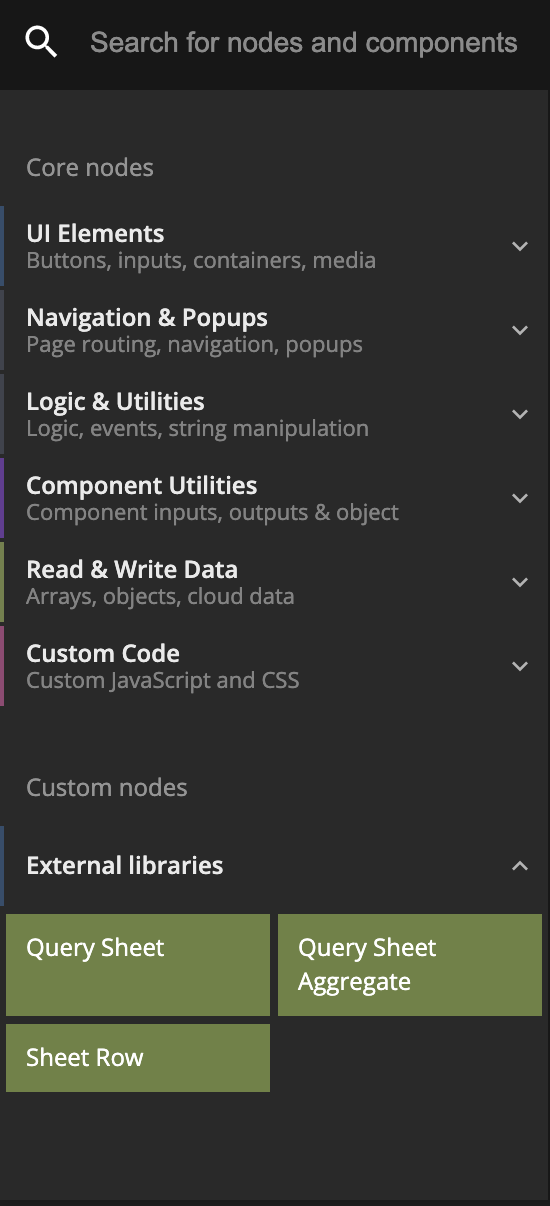
After the module is imported, you should now be able to find the Query Sheet, Query Sheet Aggregate and Sheet Row nodes in the node picker. Right click in the node editor area to bring up the node picker. Look under "External libraries" to find the Google Sheets nodes.
Getting data from a Query Sheet
In this guide we will start building from the Hello World template.
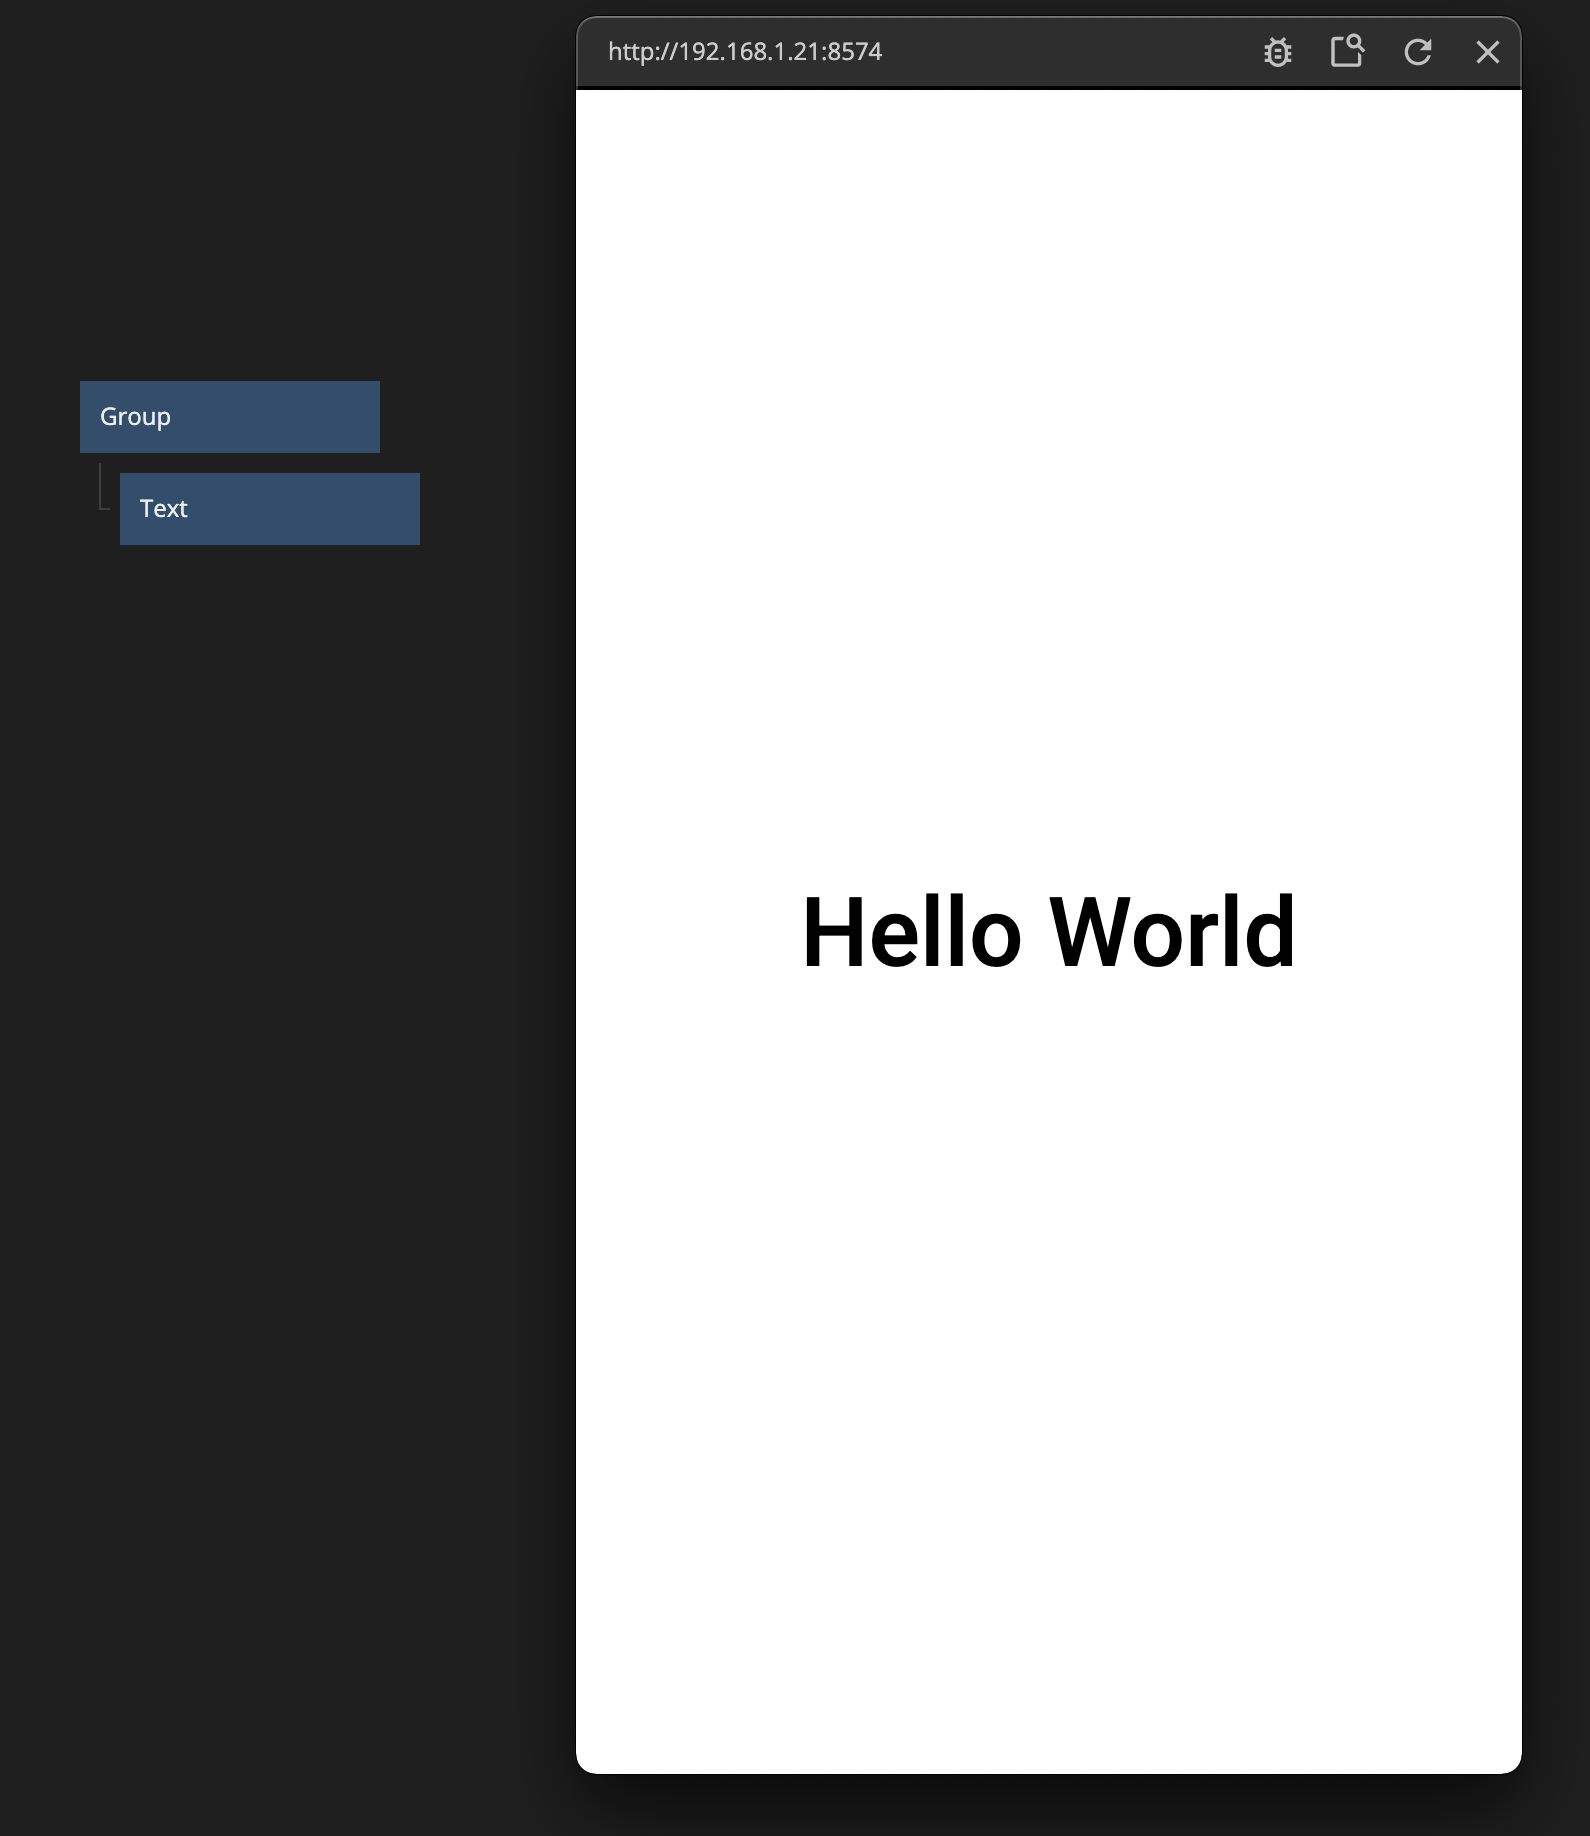
Go ahead and delete the text node and you should end up just having a Group node as in the image below:
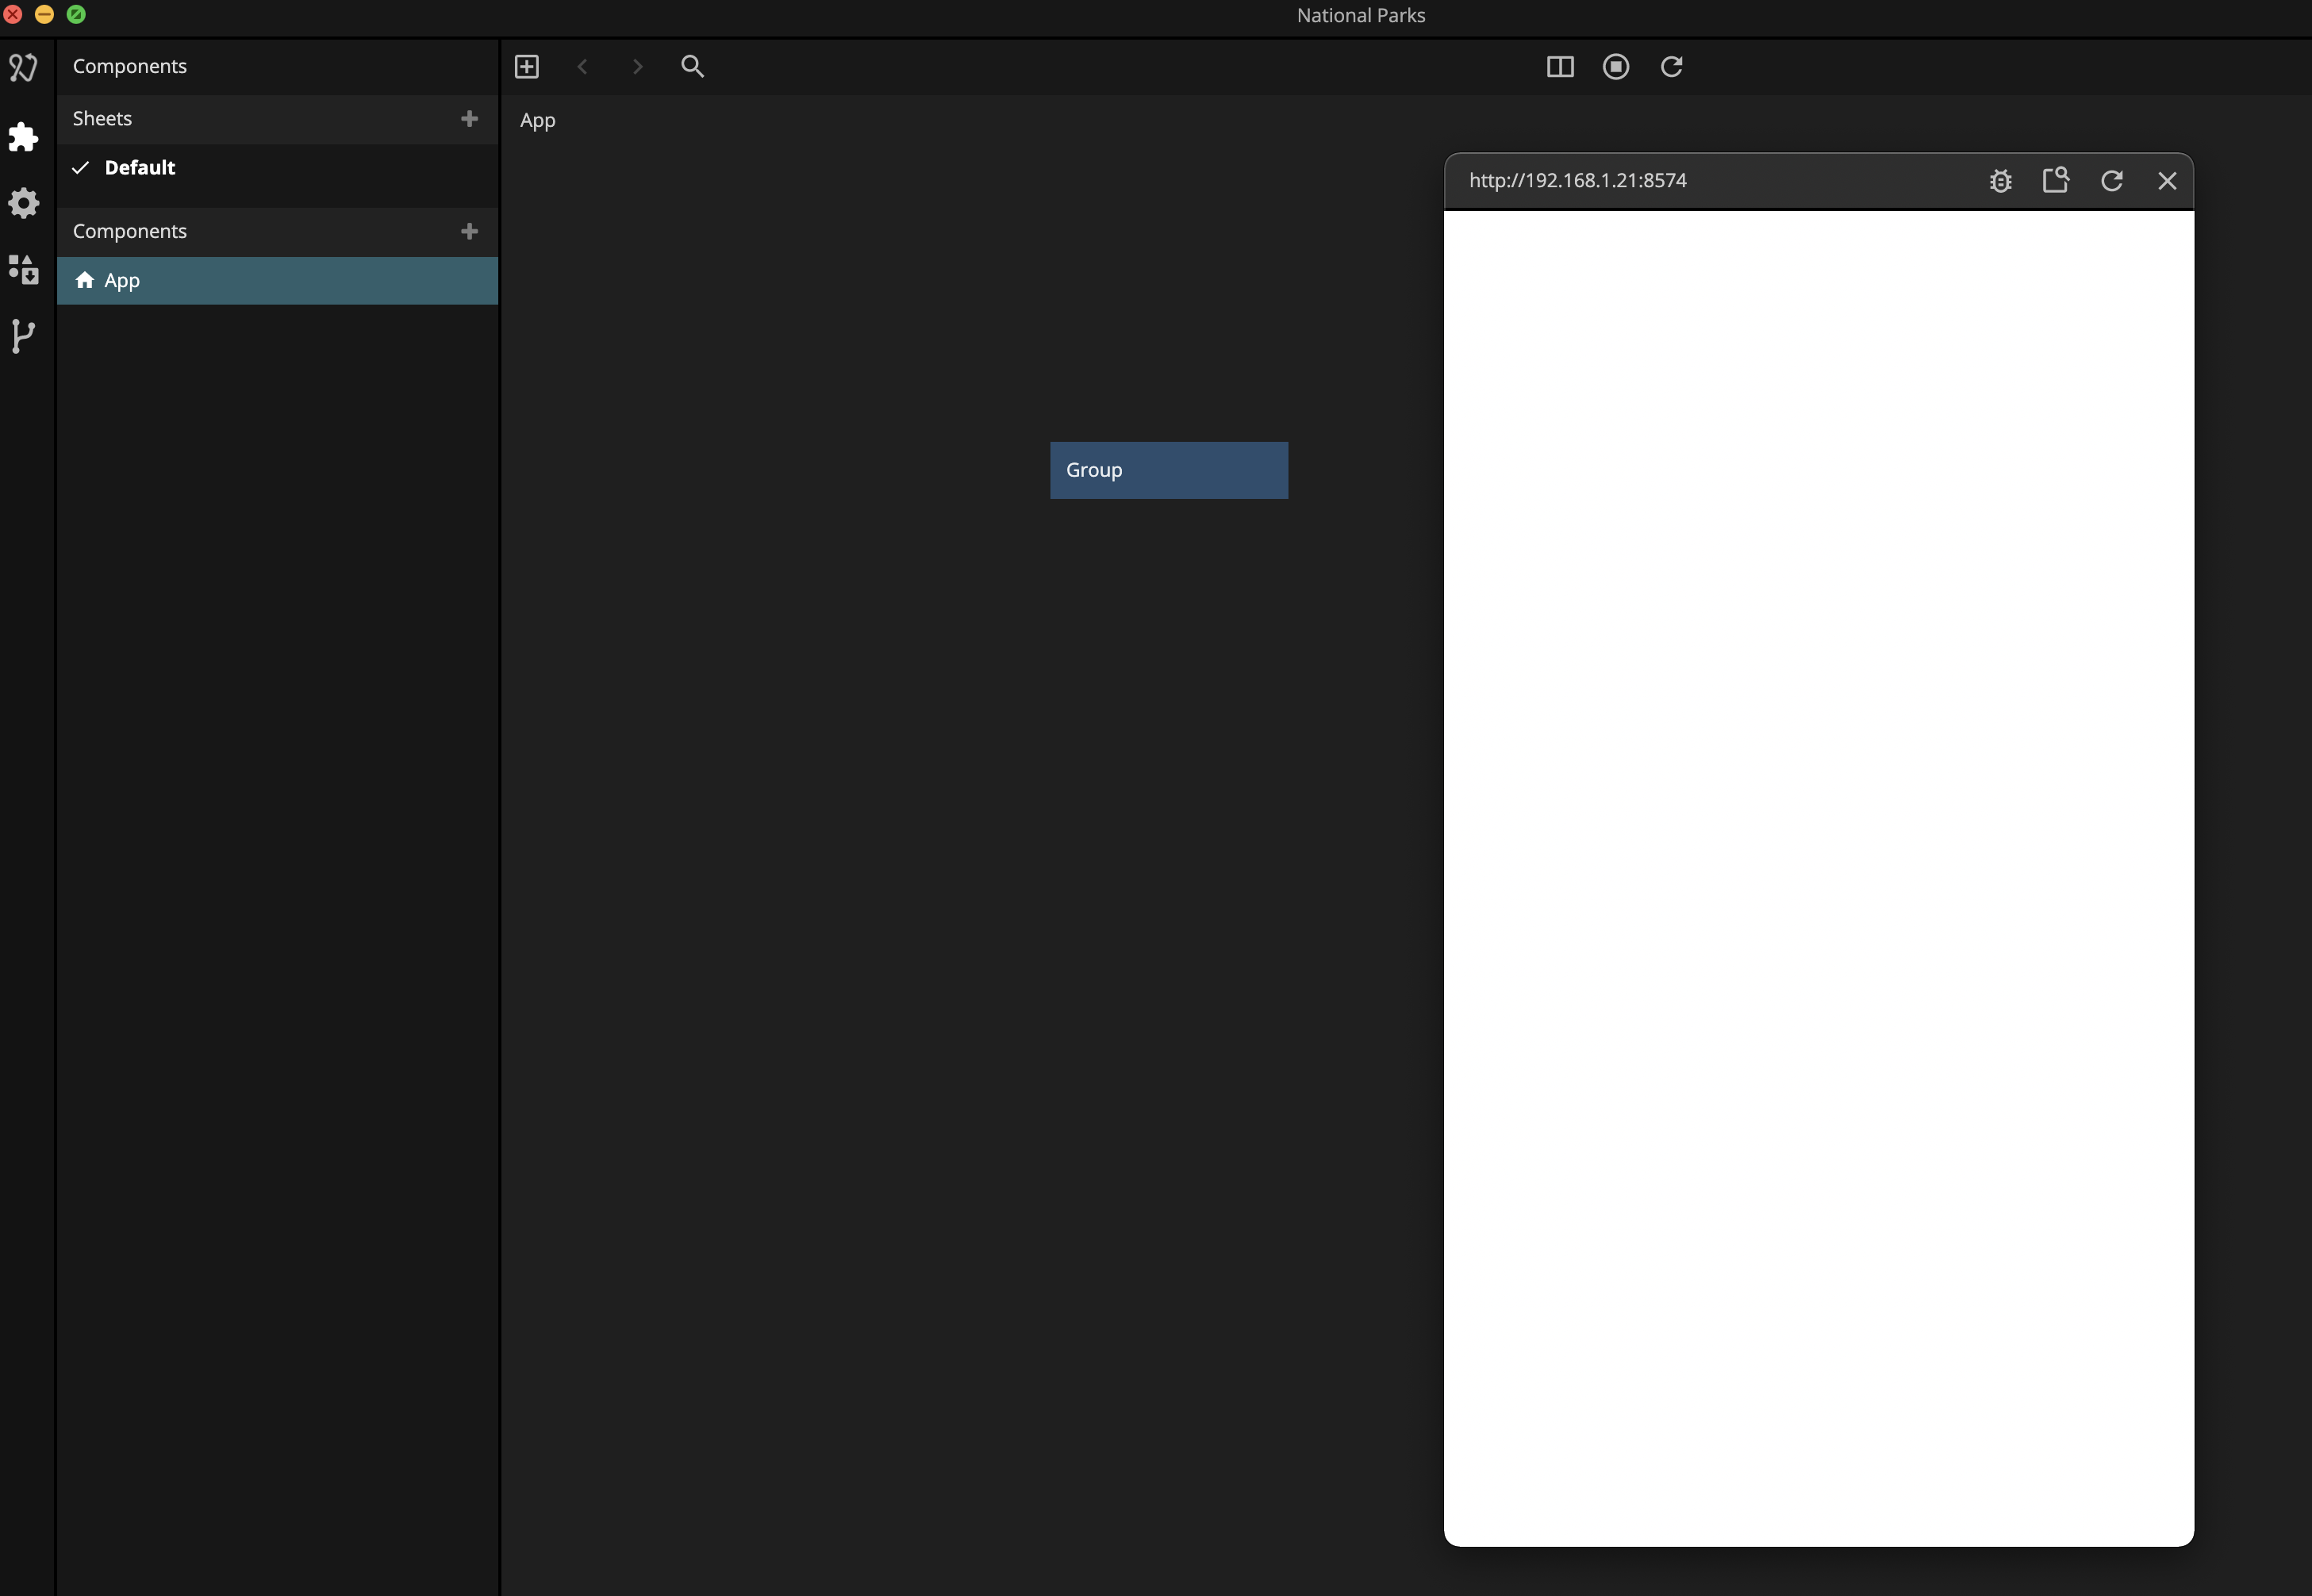
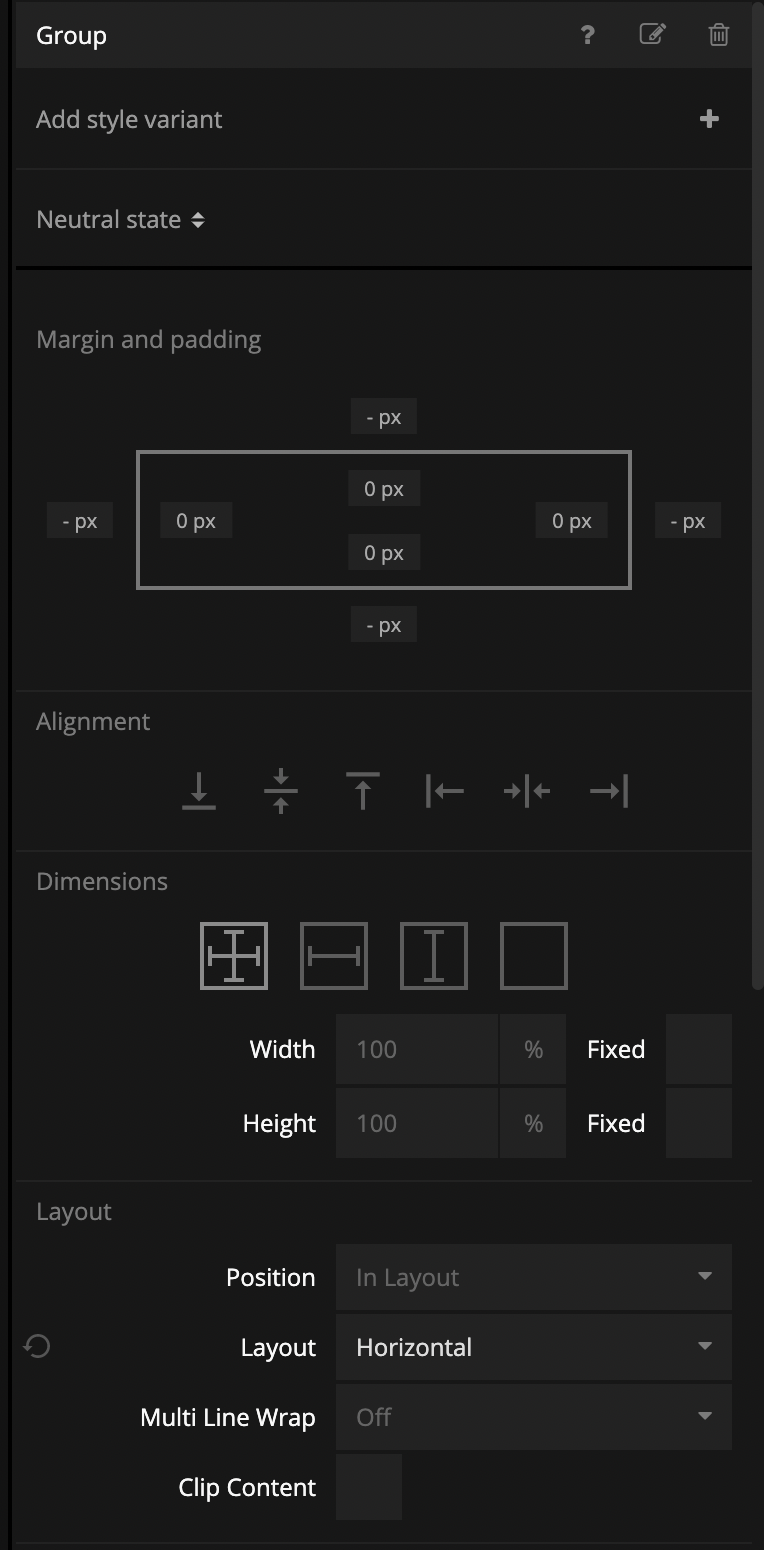
Then style your group like this:
Before we build out our simple list UI, let's have a look at the Google Sheet that contains our data. You will find the document here.
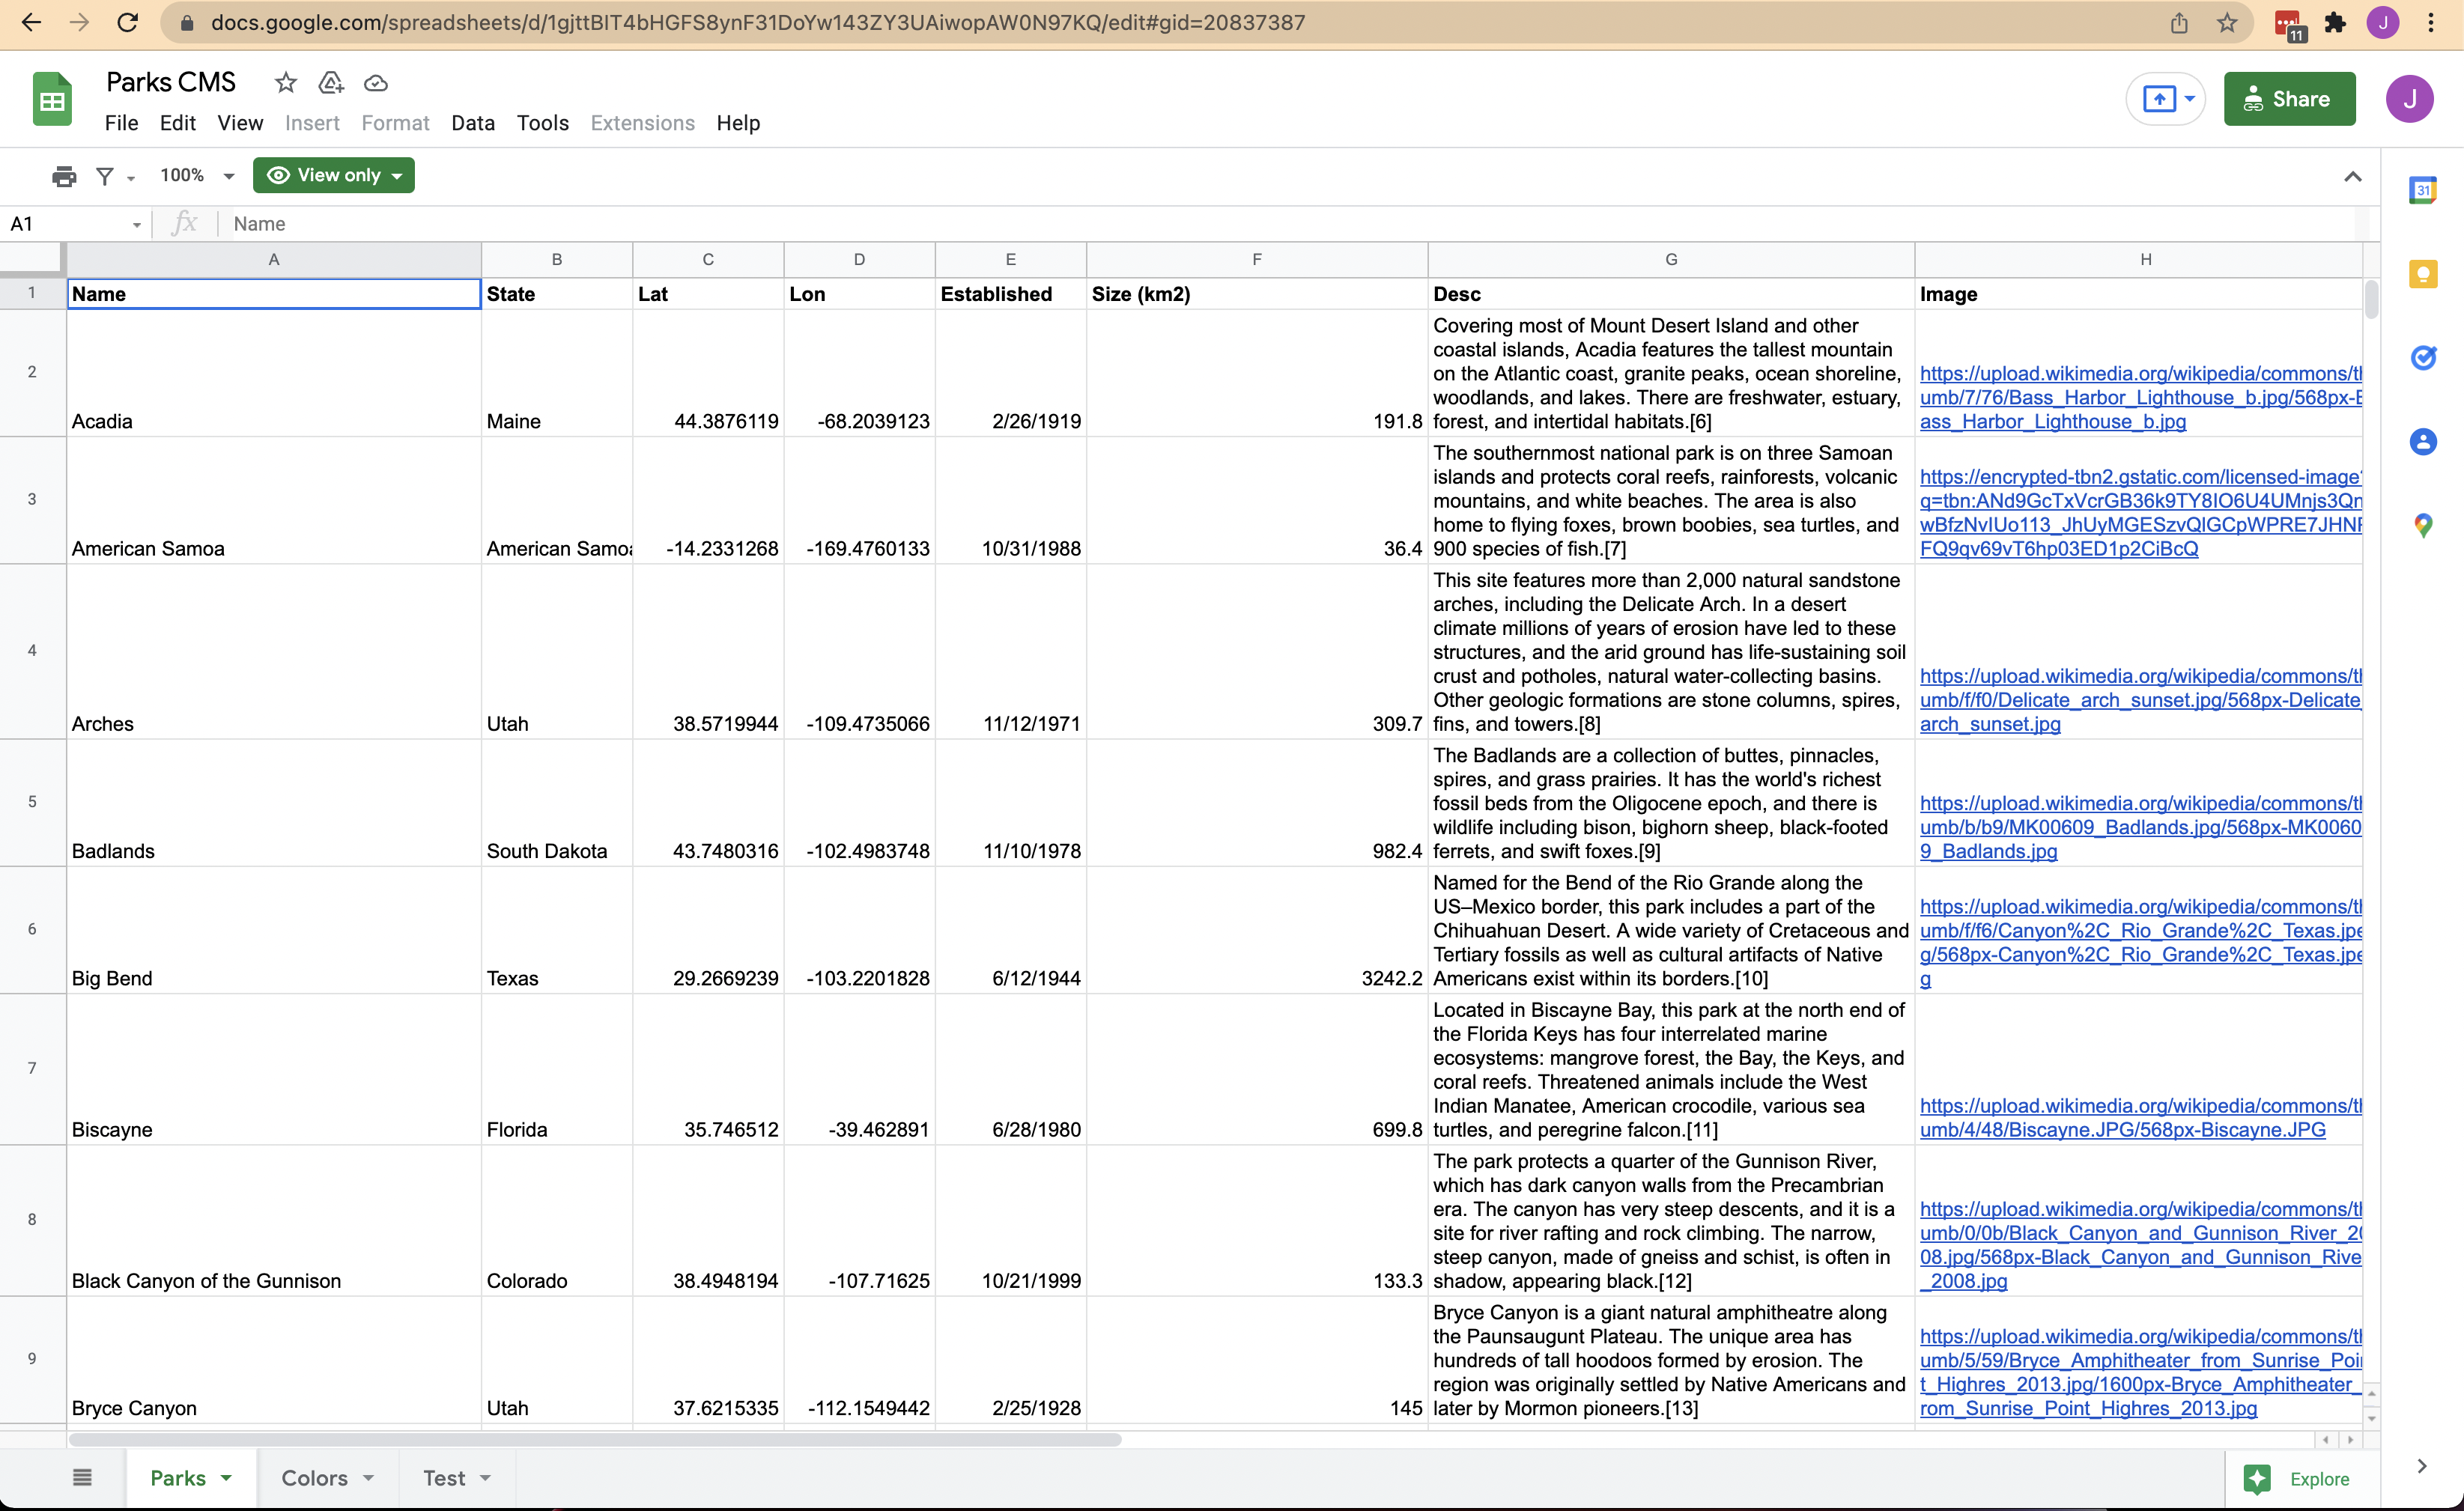
The document contains three different sheets, but we are only interested in the sheet named Parks.

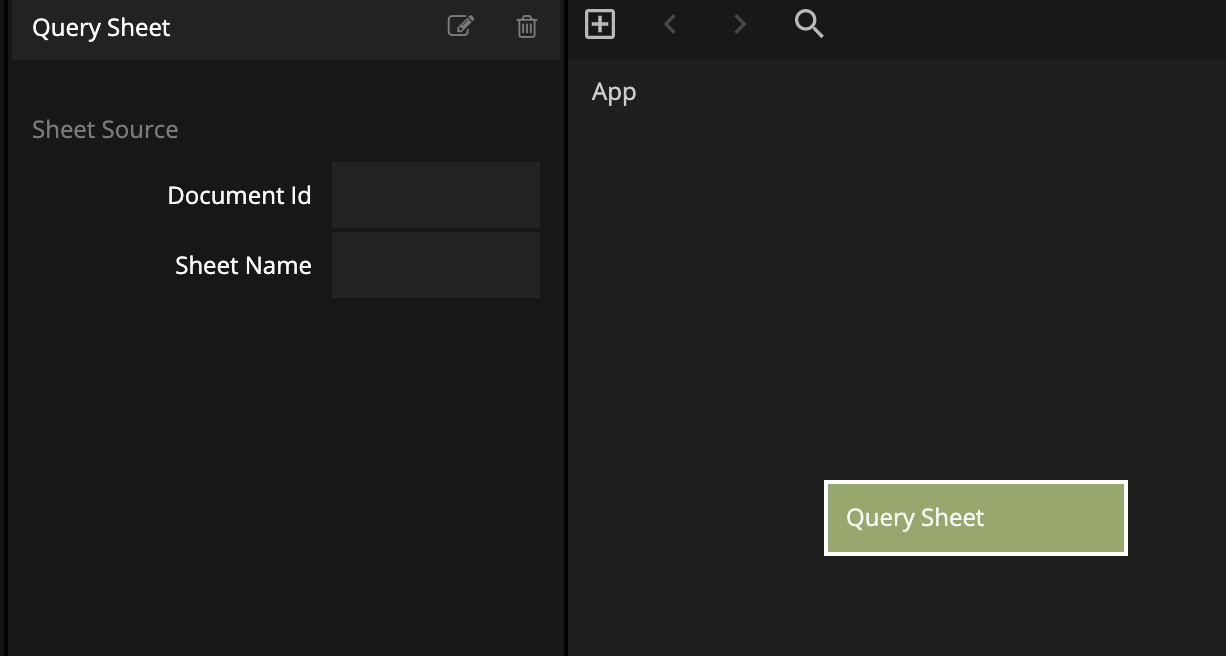
To get all the data from the Parks sheet into our Noodl project we will use a Query Sheets node, so let's add that and have a look at the properties.
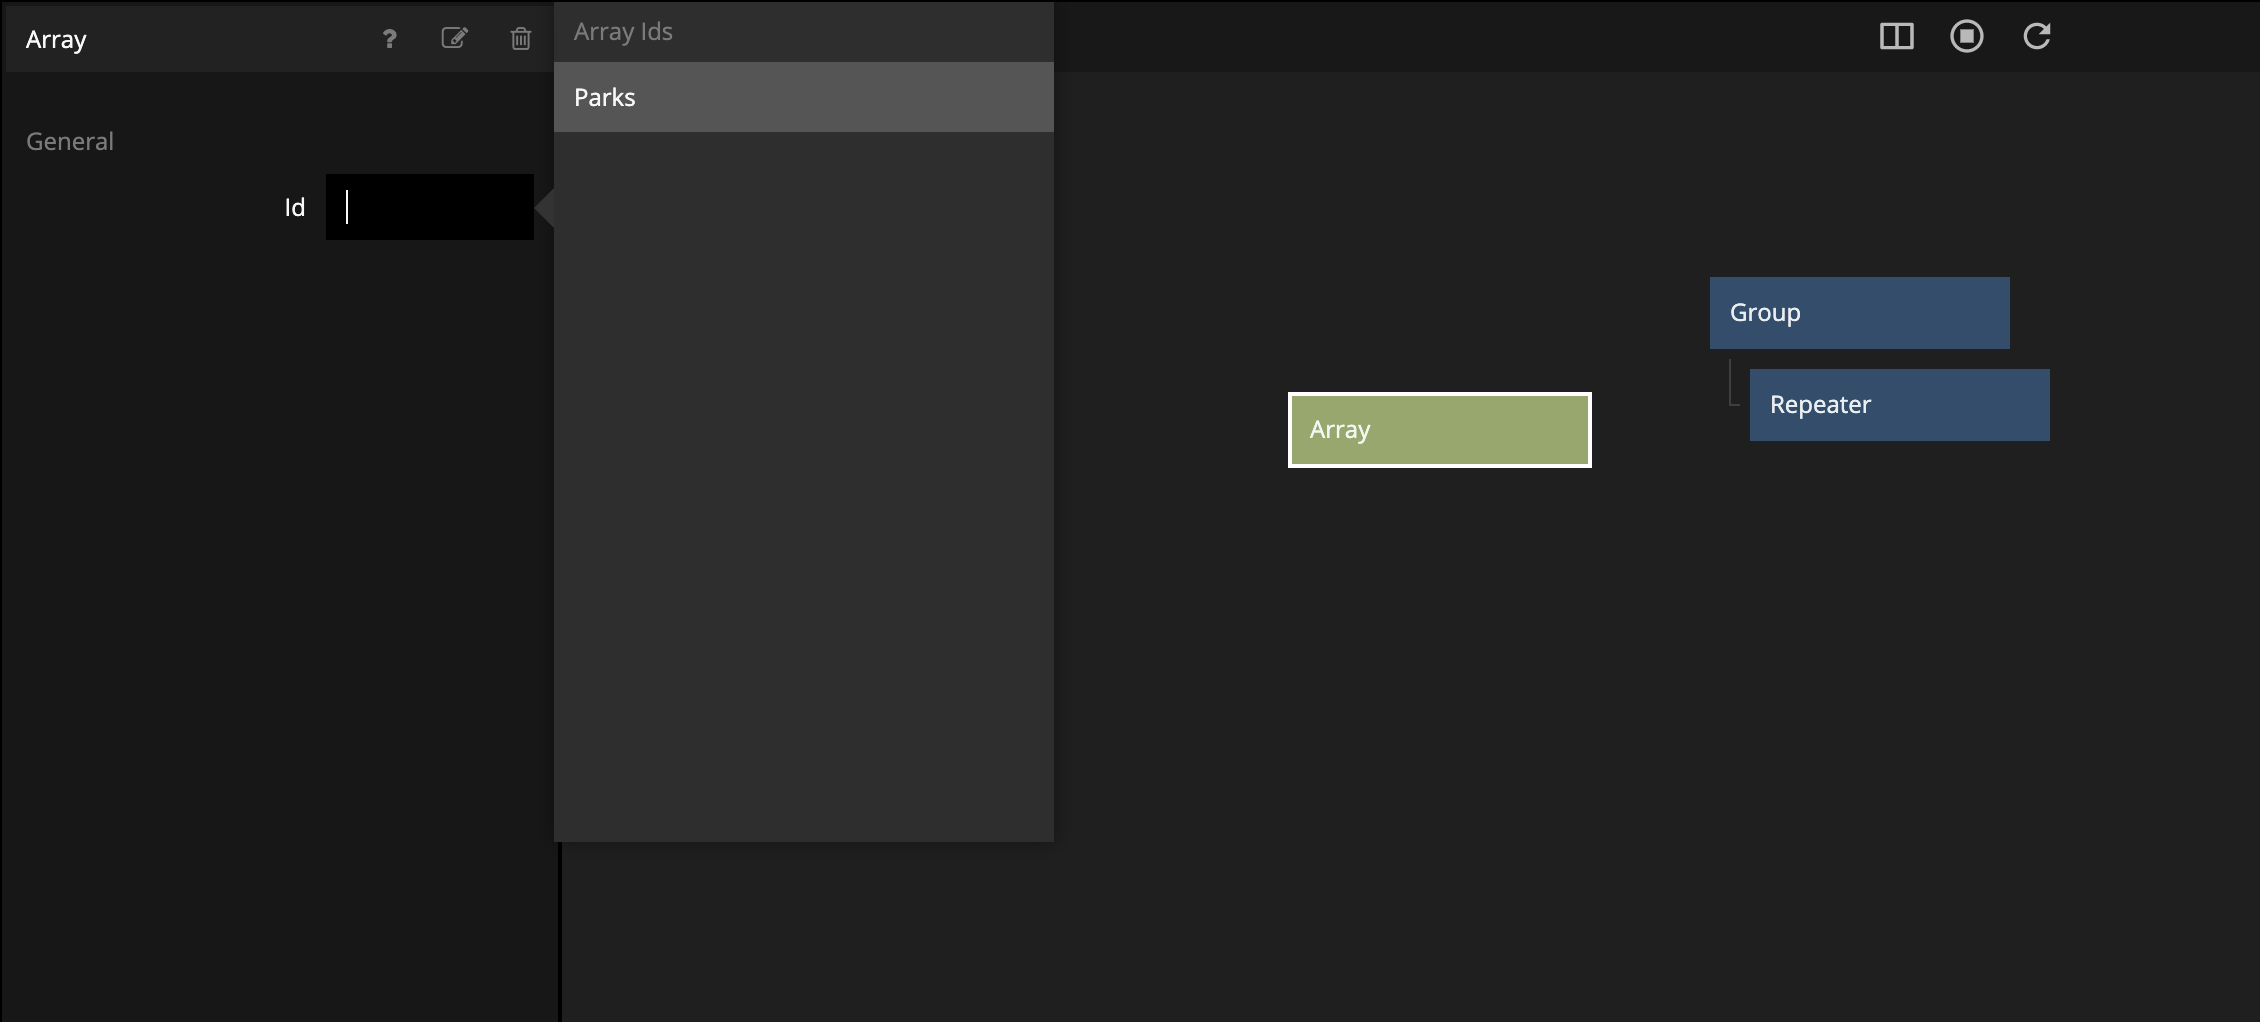
The Document Id property takes the id of the Google Sheet document, and we get that from this part of the Google Sheet URL (1gjttBIT4bHGFS8ynF31DoYw143ZY3UAiwopAW0N97KQ):

Let's also fill in the name of the sheet we are interested wich is Parks. After you have done this, the properies of the Google Sheet node should look like this:
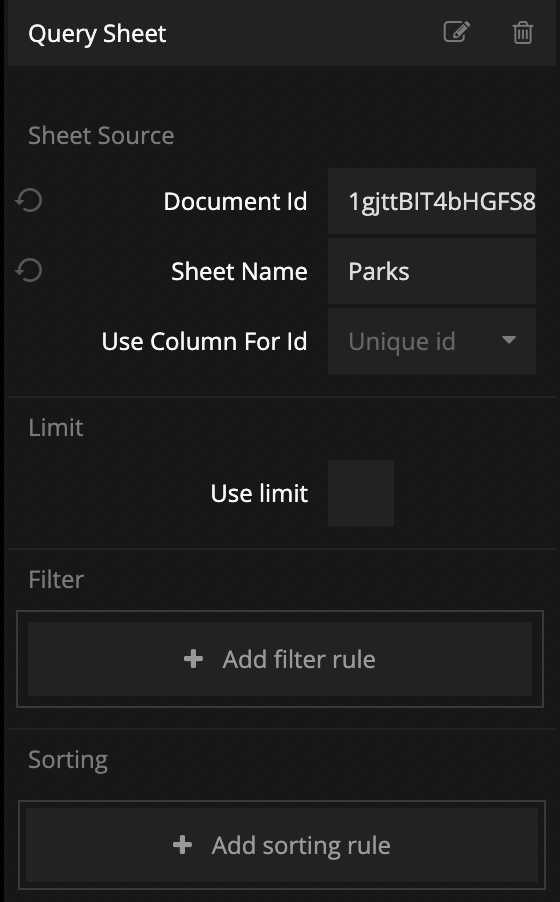
We will leave the Use Column For Id property set to Unique id, but you can select a column that will become the Id of the Noodl Objects that will represent each row. It's important that the values in this column are unique. Since we have chosen Unique Id, Noodl will generate it's own id's for us.
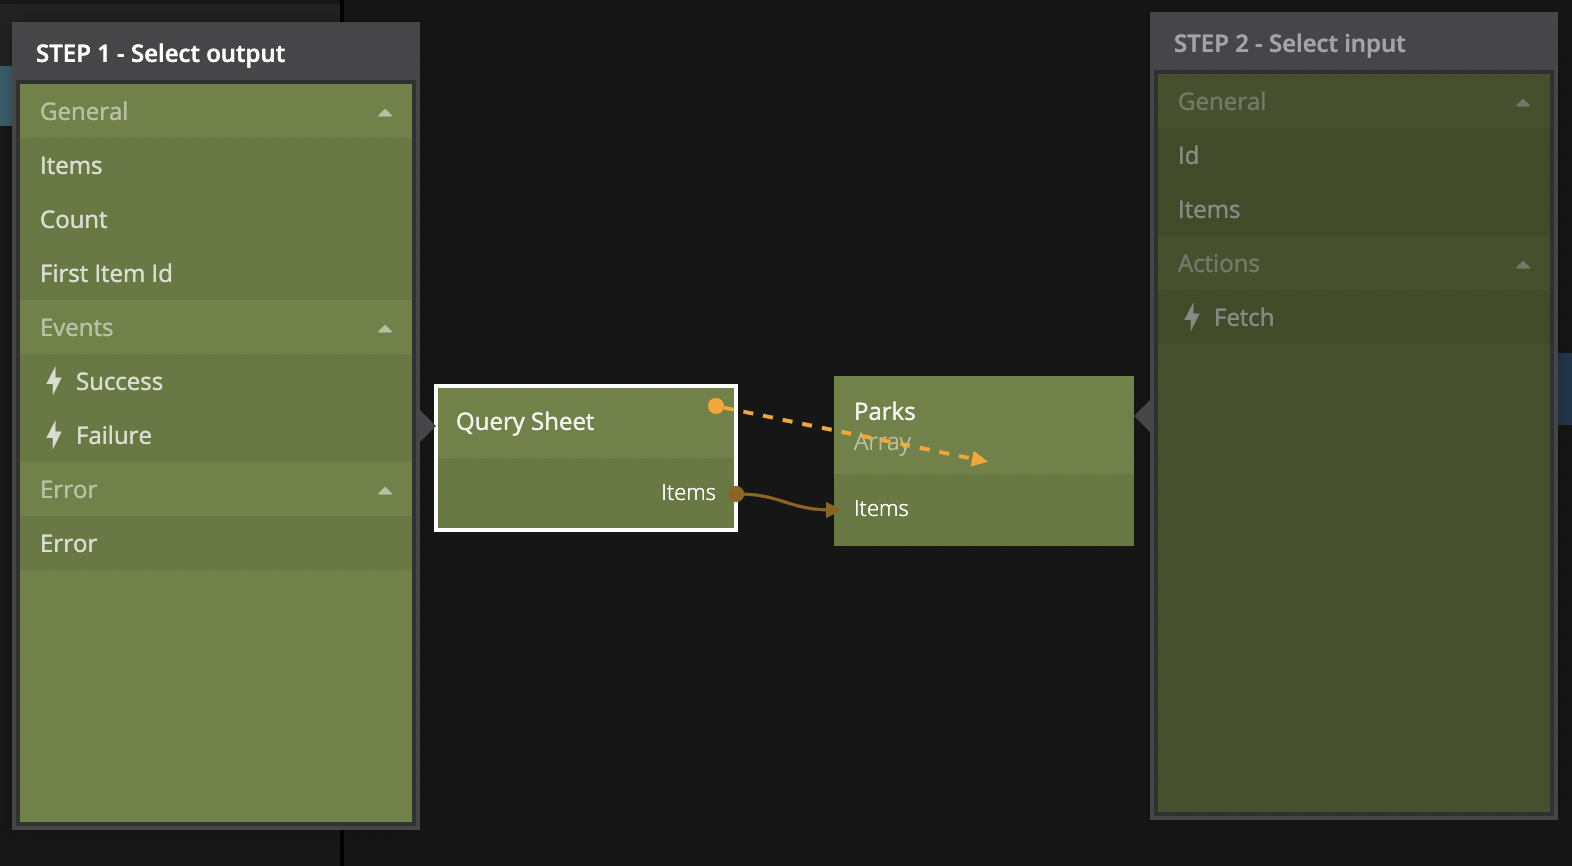
We can now get the data from the Query Sheet on the Items output, so let's create an Array node and give it the Id Parks and connect it like this:
Now that we have all of the parks in an Array node, let's build out our list.
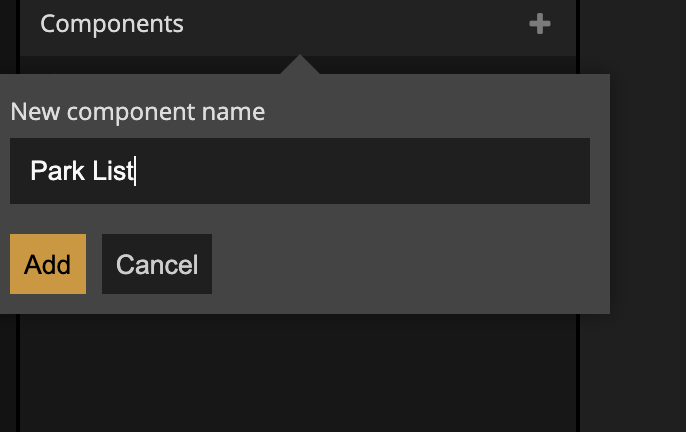
Creating the Park List component
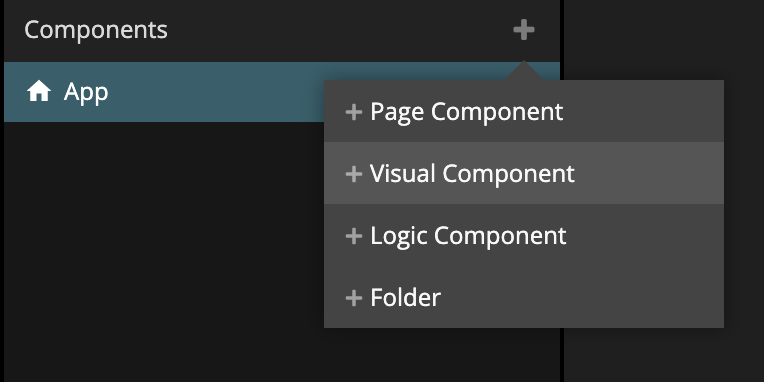
First let's create a new visual component that we will call Park List.
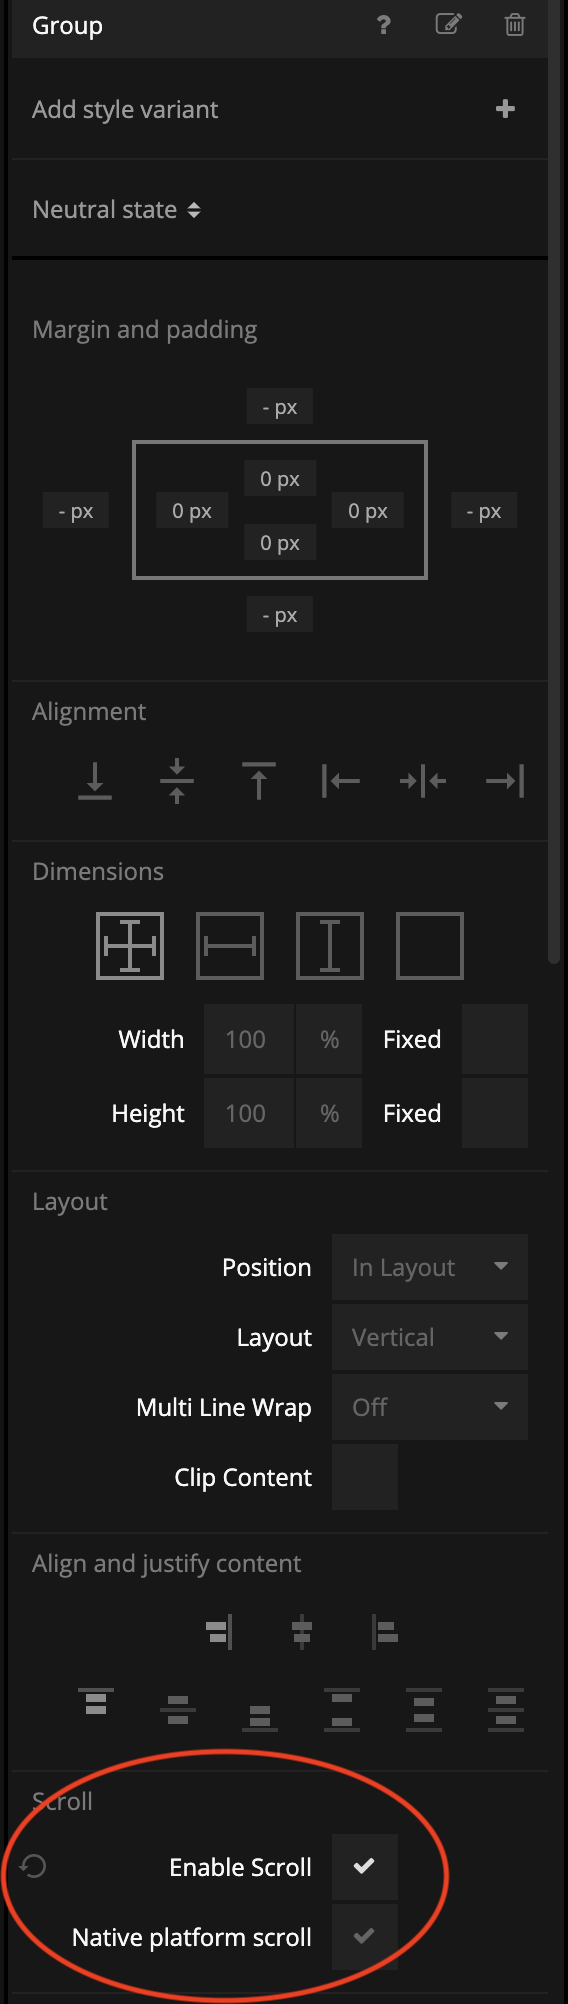
The Park List component will be pretty simple. First let's enable scroll on the Group, by setting the following property.
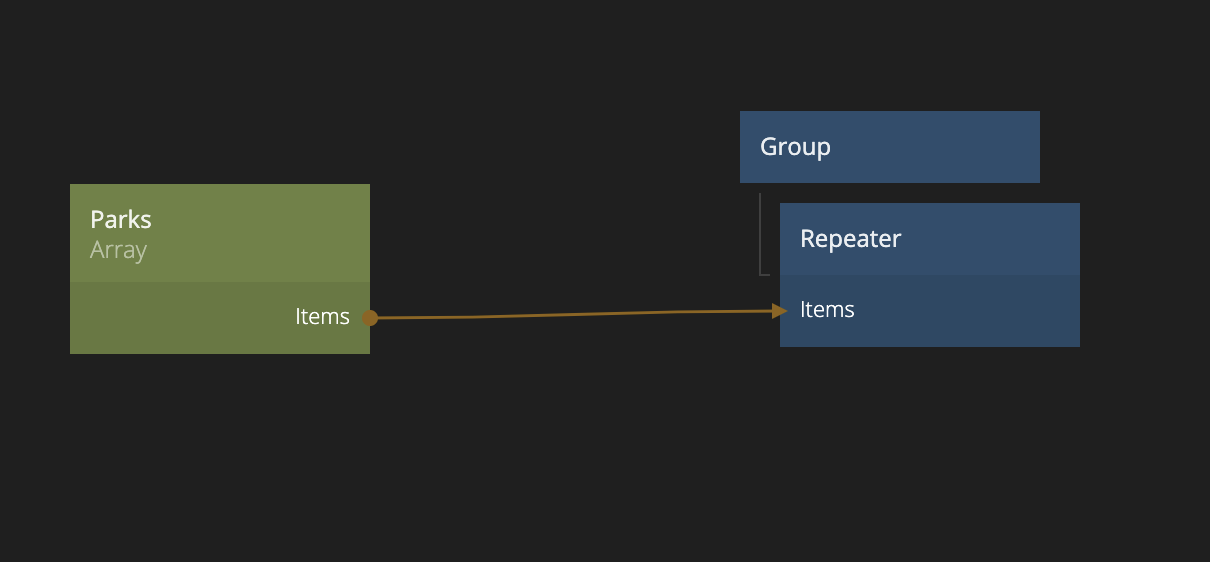
Next we will add a Repeater node as a child to our Group. The Repeater node is used to generate one component for each row in the Parks Array so let's also add an Array node and give it the Parks id.
Then we connect it to the Repeater node like this.
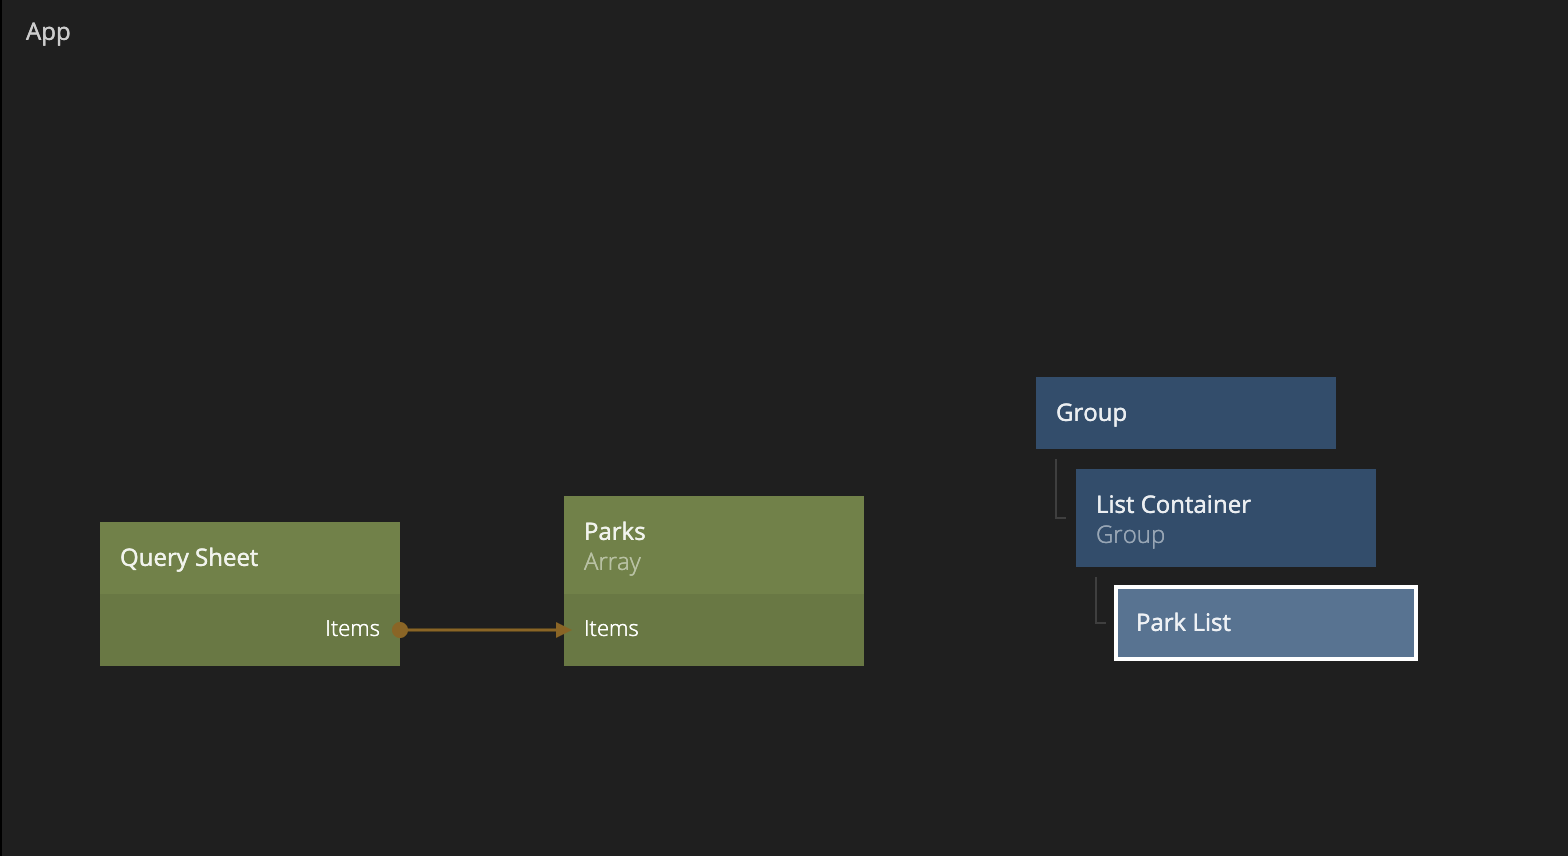
Now let's jump back to our App component and add a Group that we will call List Container.

Let's set this List Container to be 400 px in width and then let's add the Park List component as a child.

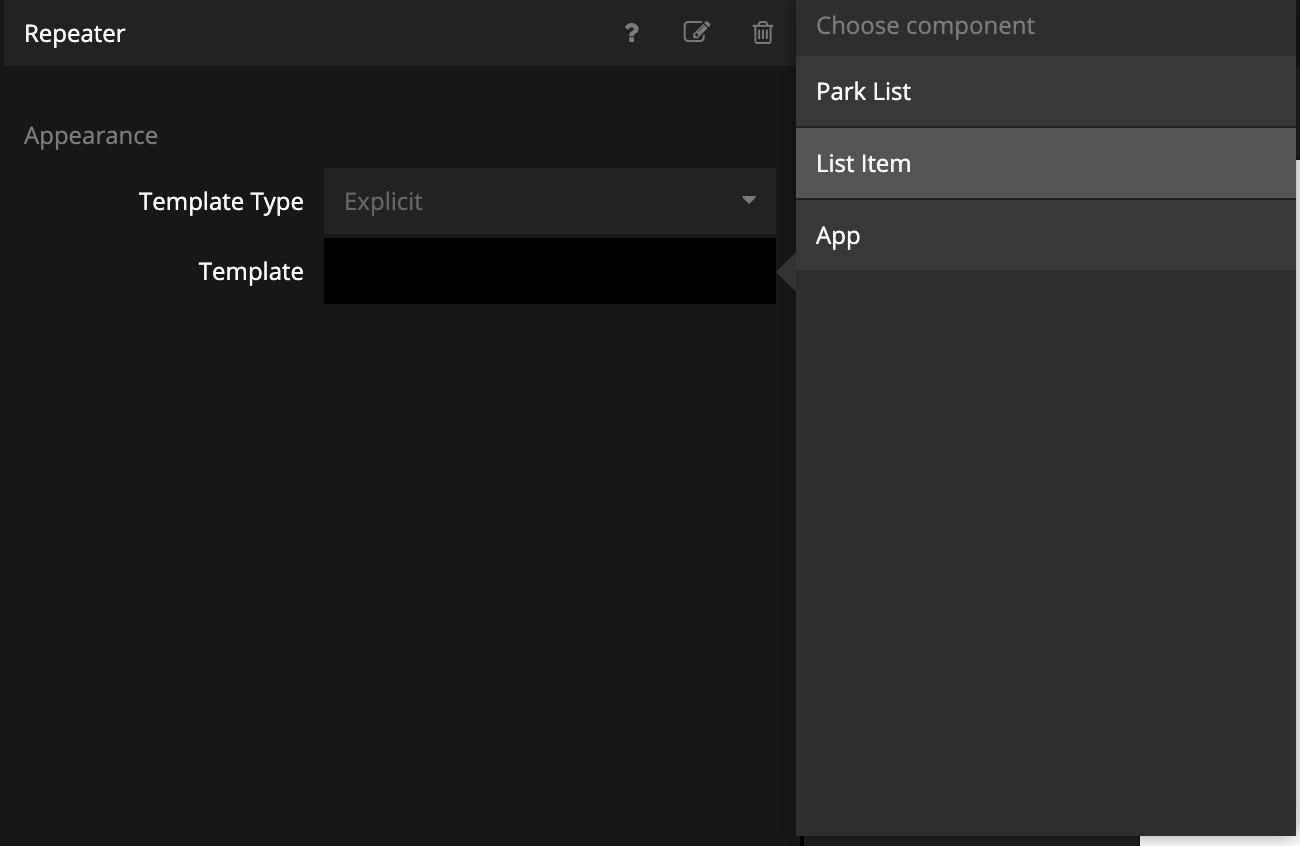
Now let's jump back to the Park List component and look at the Repeater properties. We need to tell the Repeater node which component it should generate, so before we fill this in, let's create our list items.
Building the list items
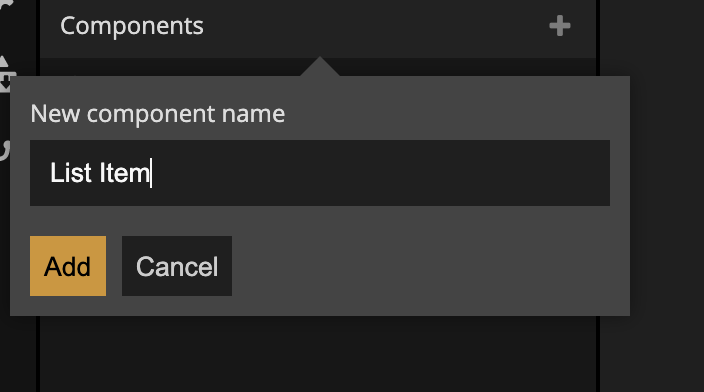
Let's create the visuals for our list items first by creating a new Visual Component that we call List Item.
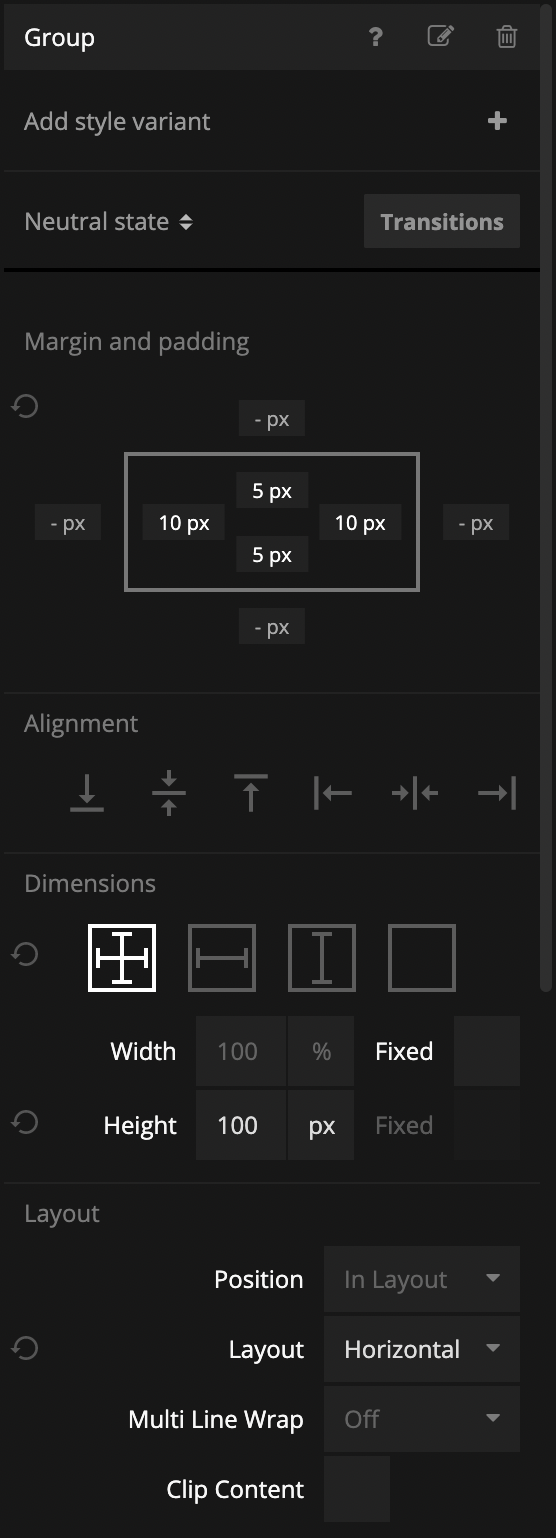
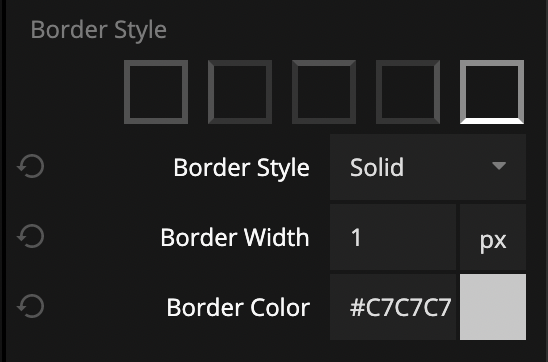
The list items shouldn't be too tall so let's set an explicit height to 100 pixels and let's add some padding and change the Layout to Horizontal. We also want a nice bottom border.
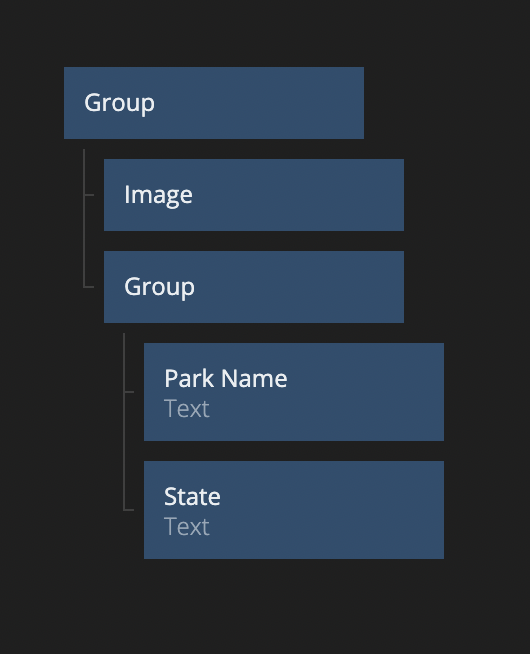
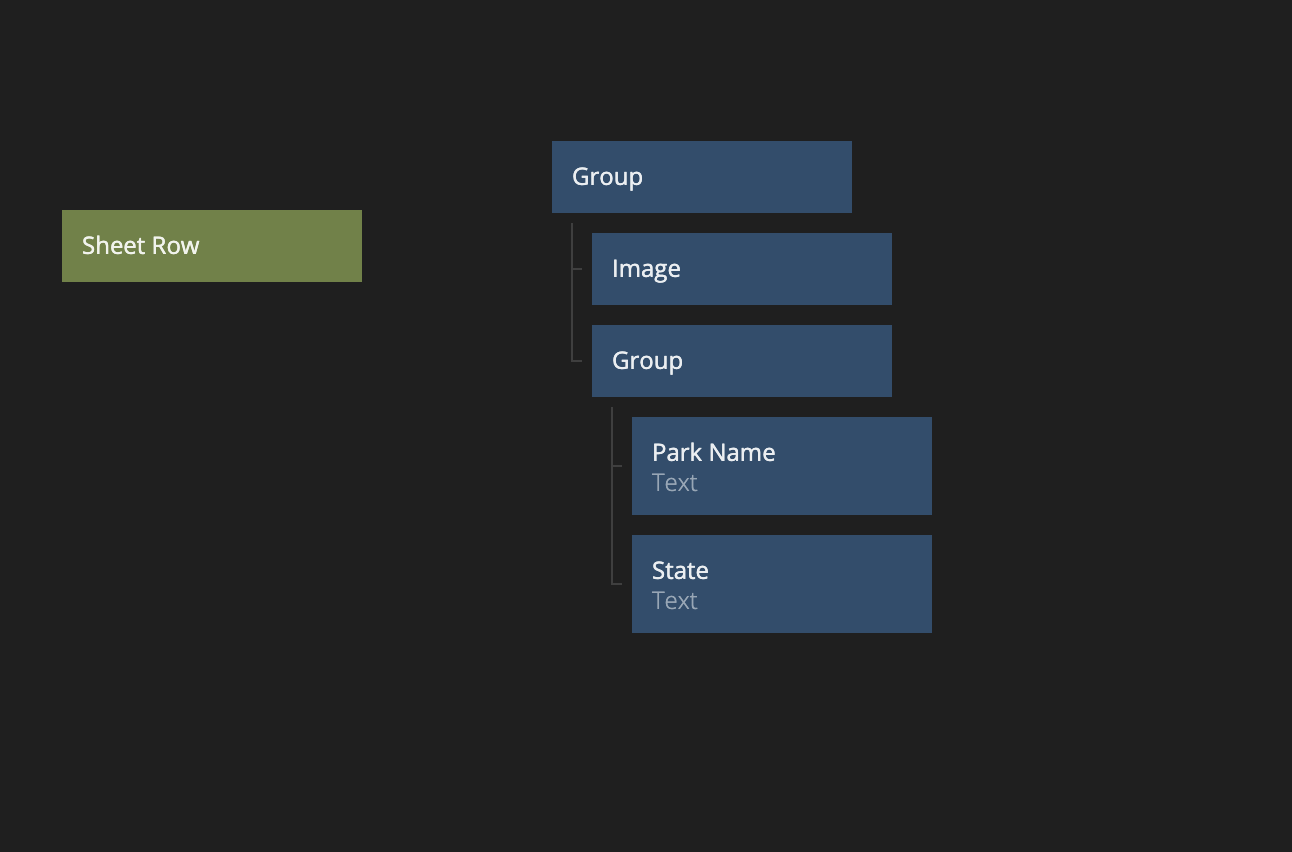
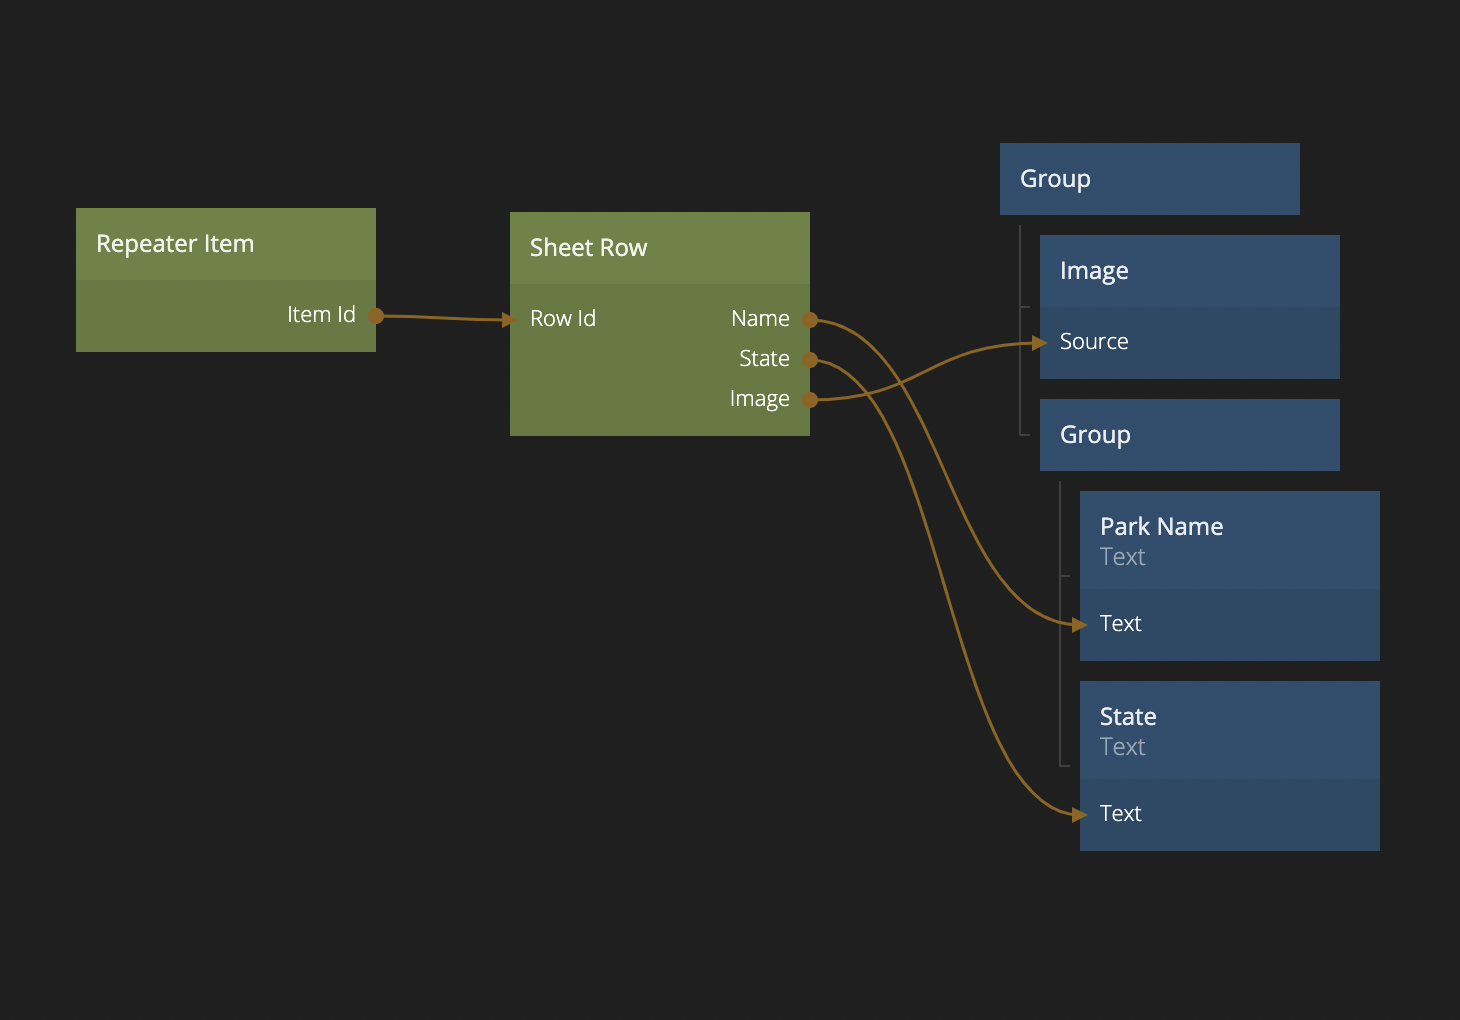
The items should all show an image as well as the park name and which state the park is located, so let's add nodes so that we get the following node tree:
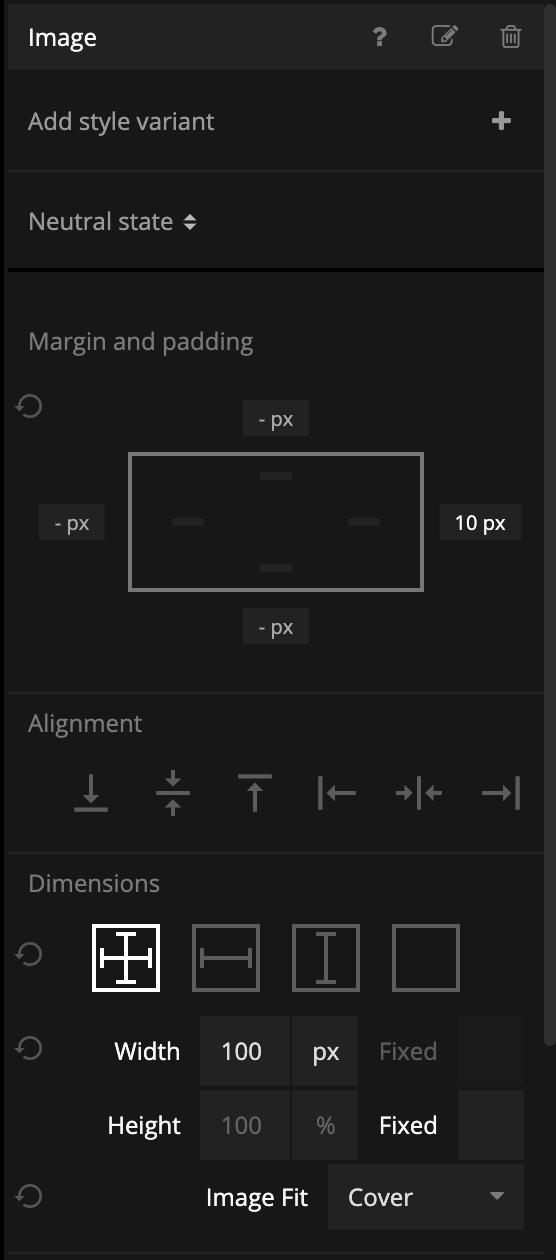
Now set the Image properties like in the image below.
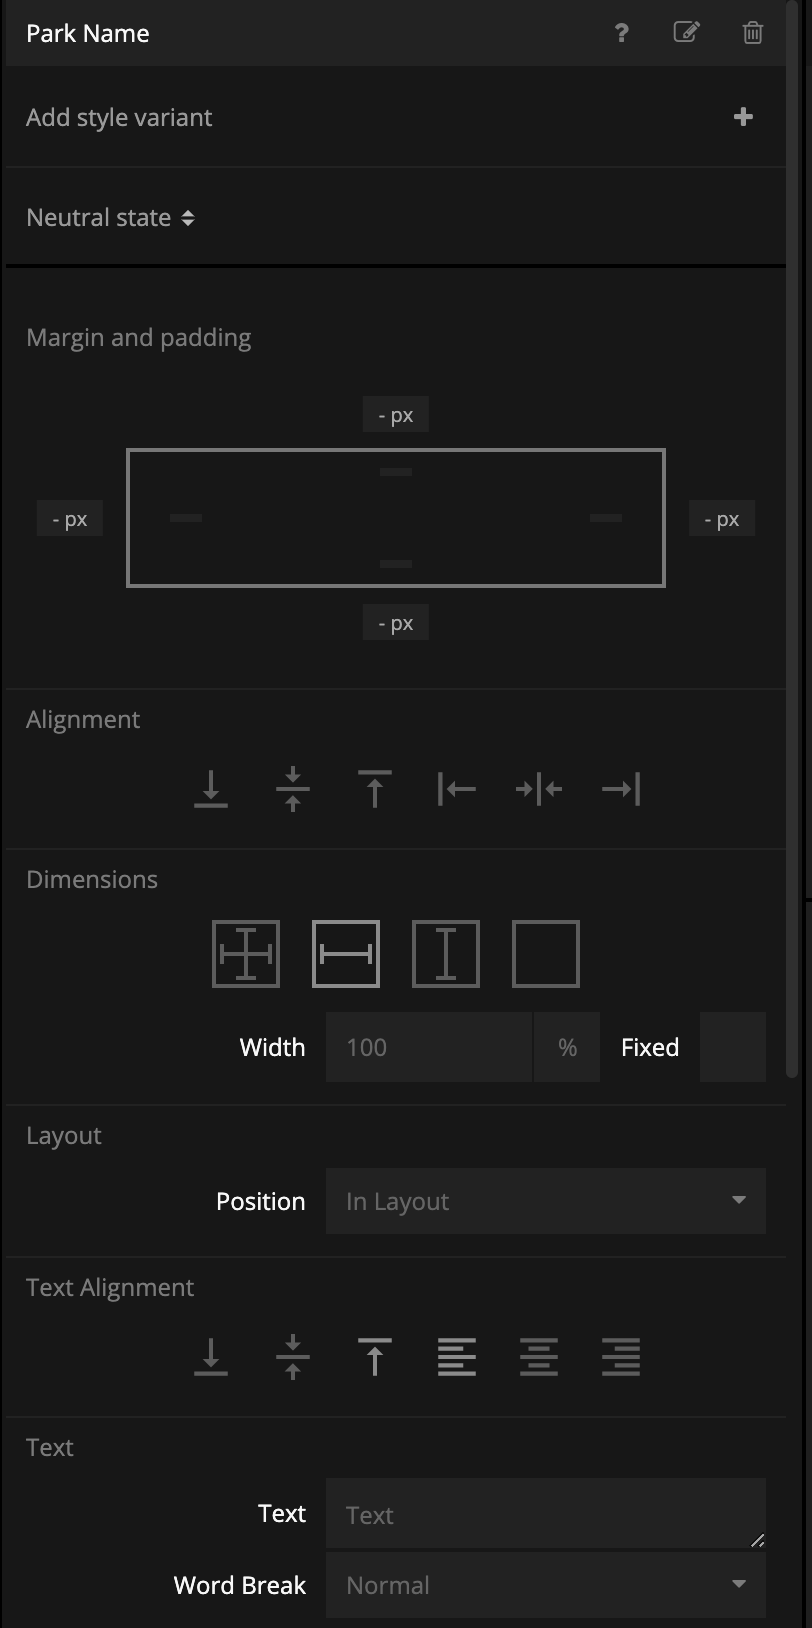
The Group that holds the two Text nodes is using all the default settings so we don't need to change anything there, but set the properties of the Park Name Text node to:
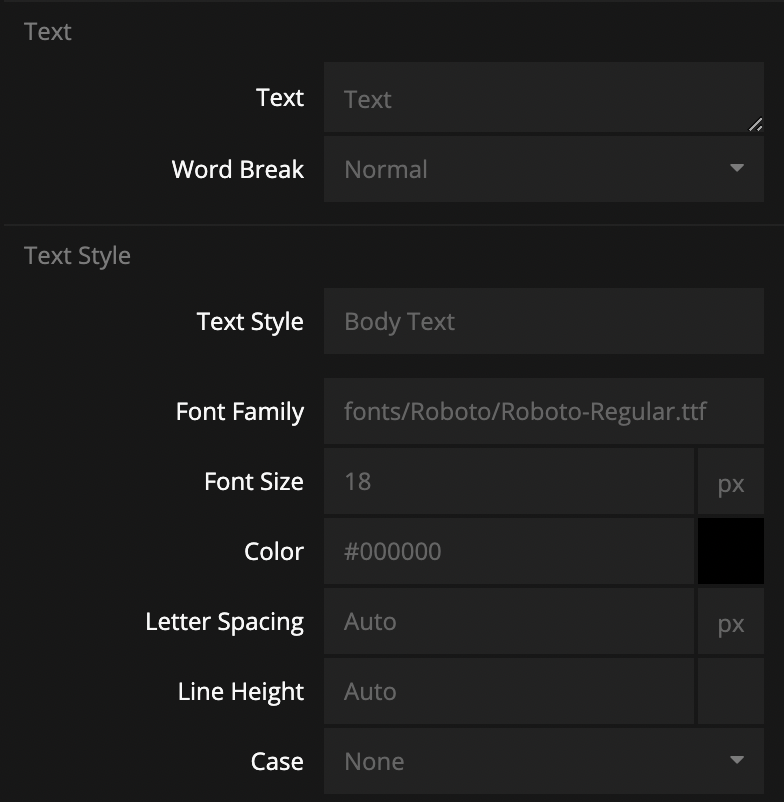
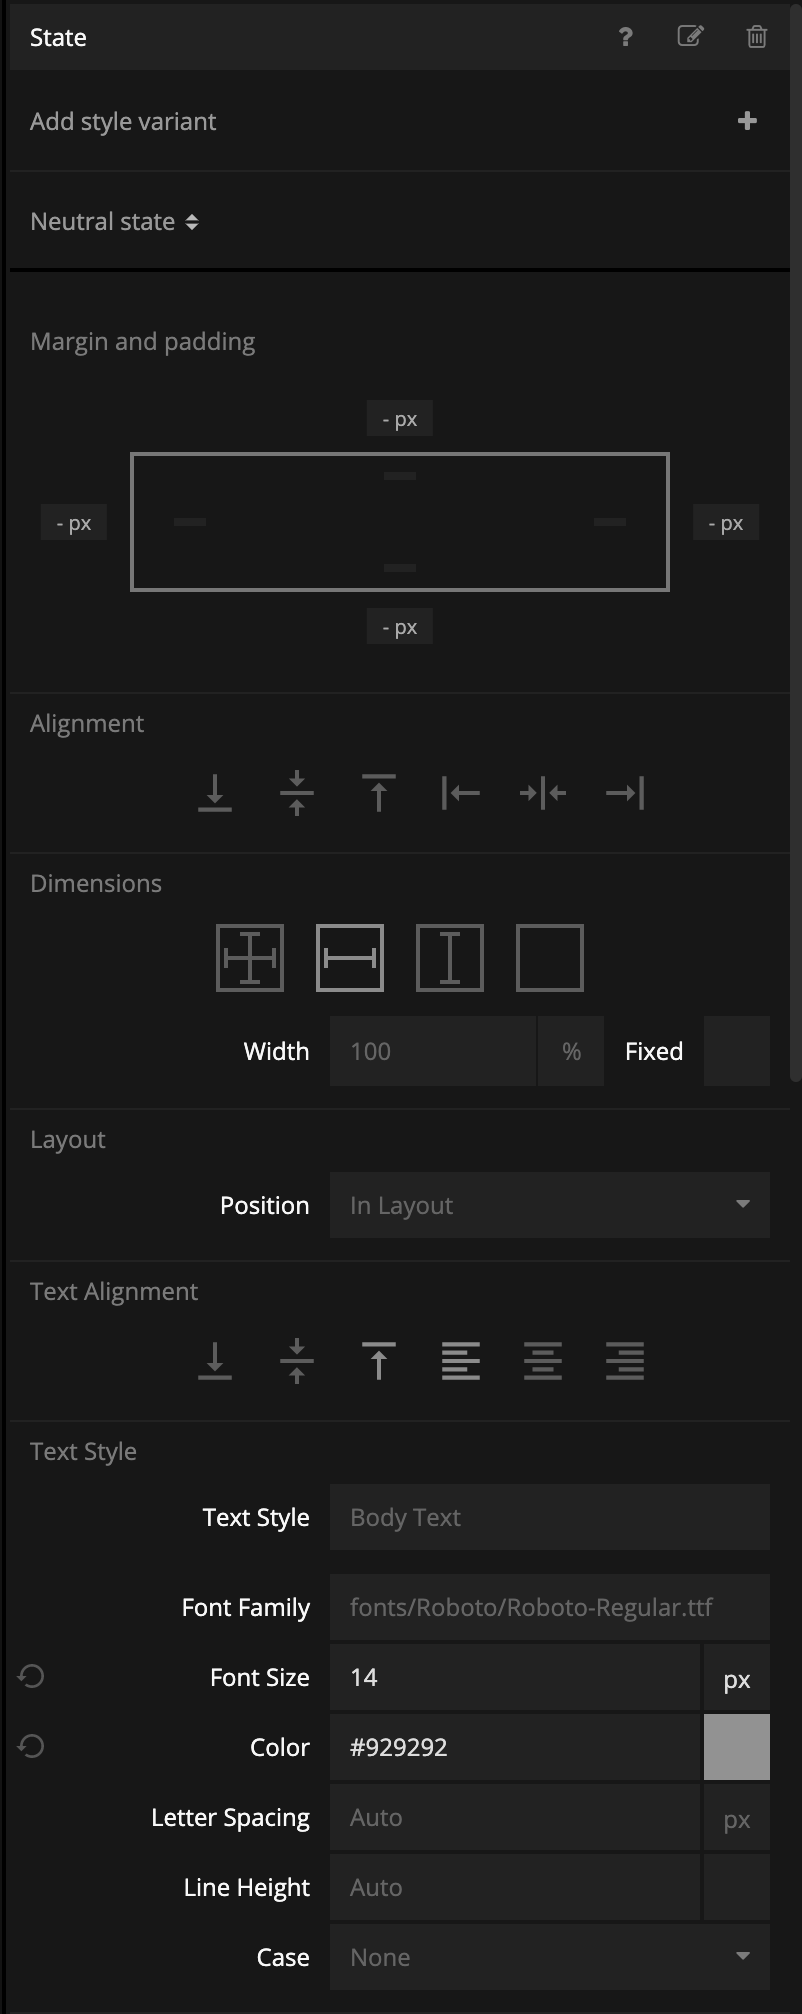
The State Text node should have the following properties:
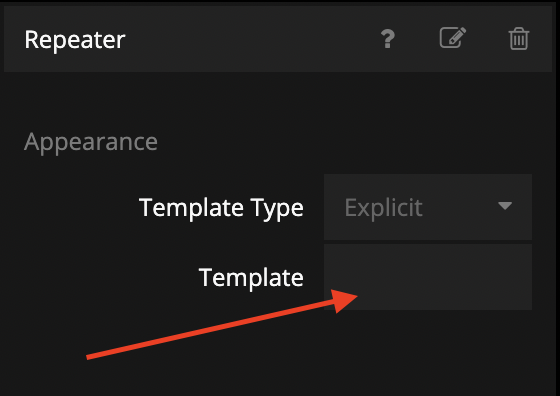
Now that we have visuals for our list items, we can tell the Repeater node in the Park List component to use this as the template so let's do that:
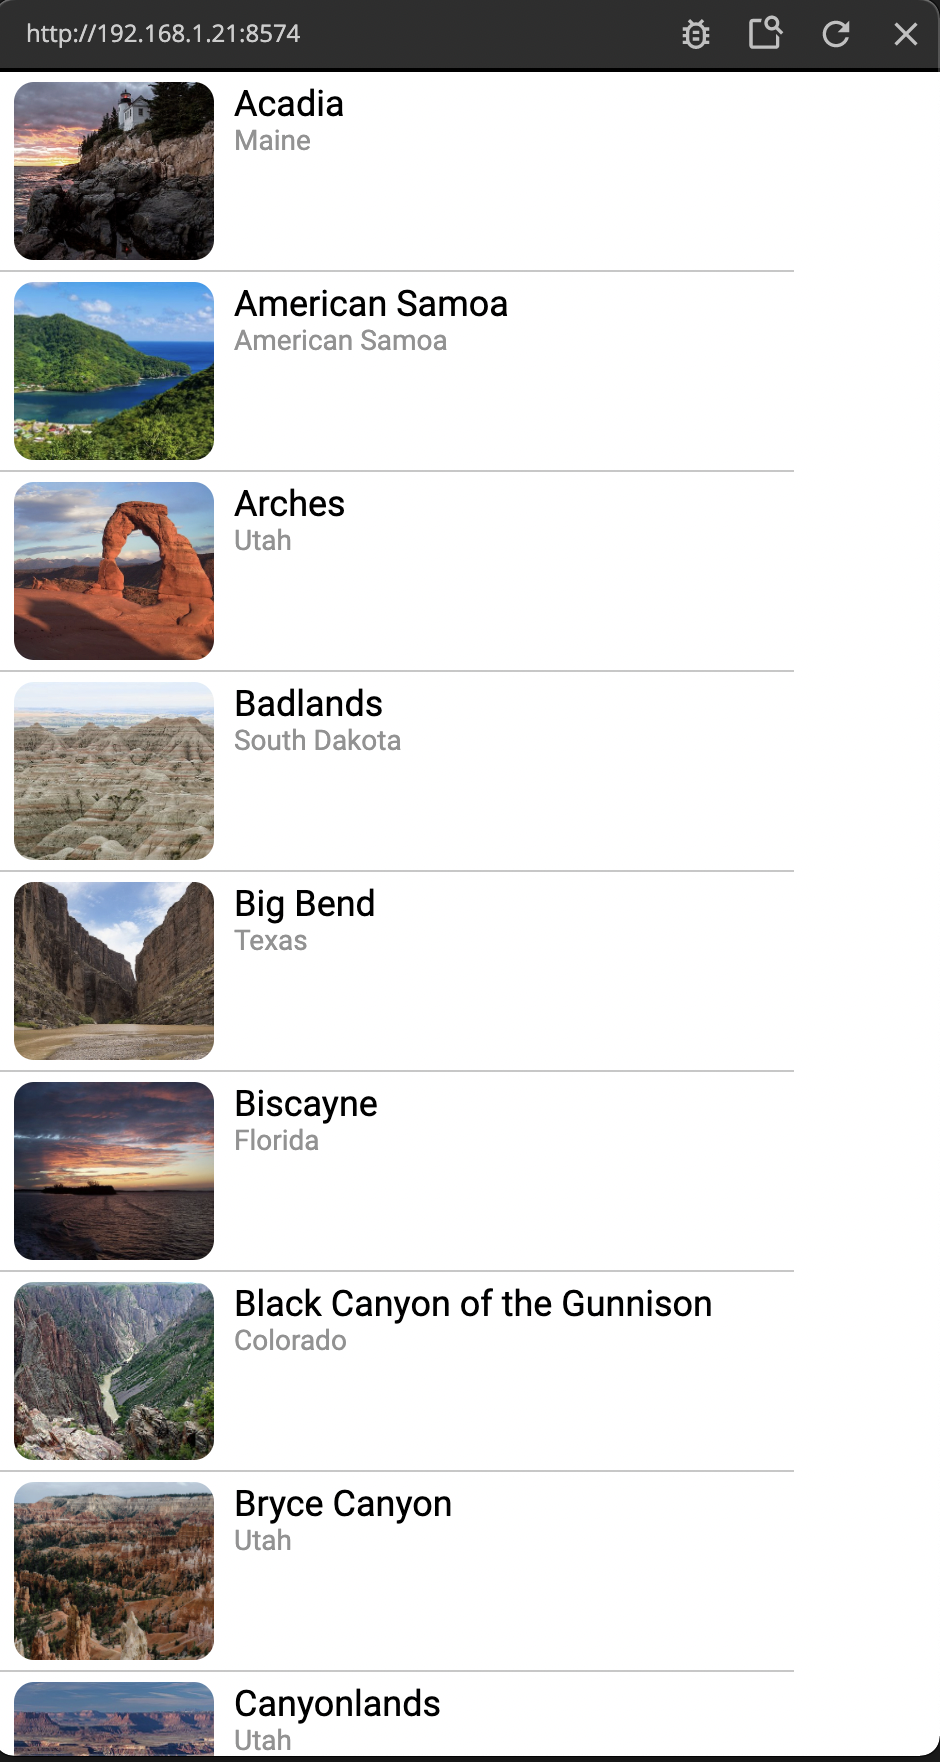
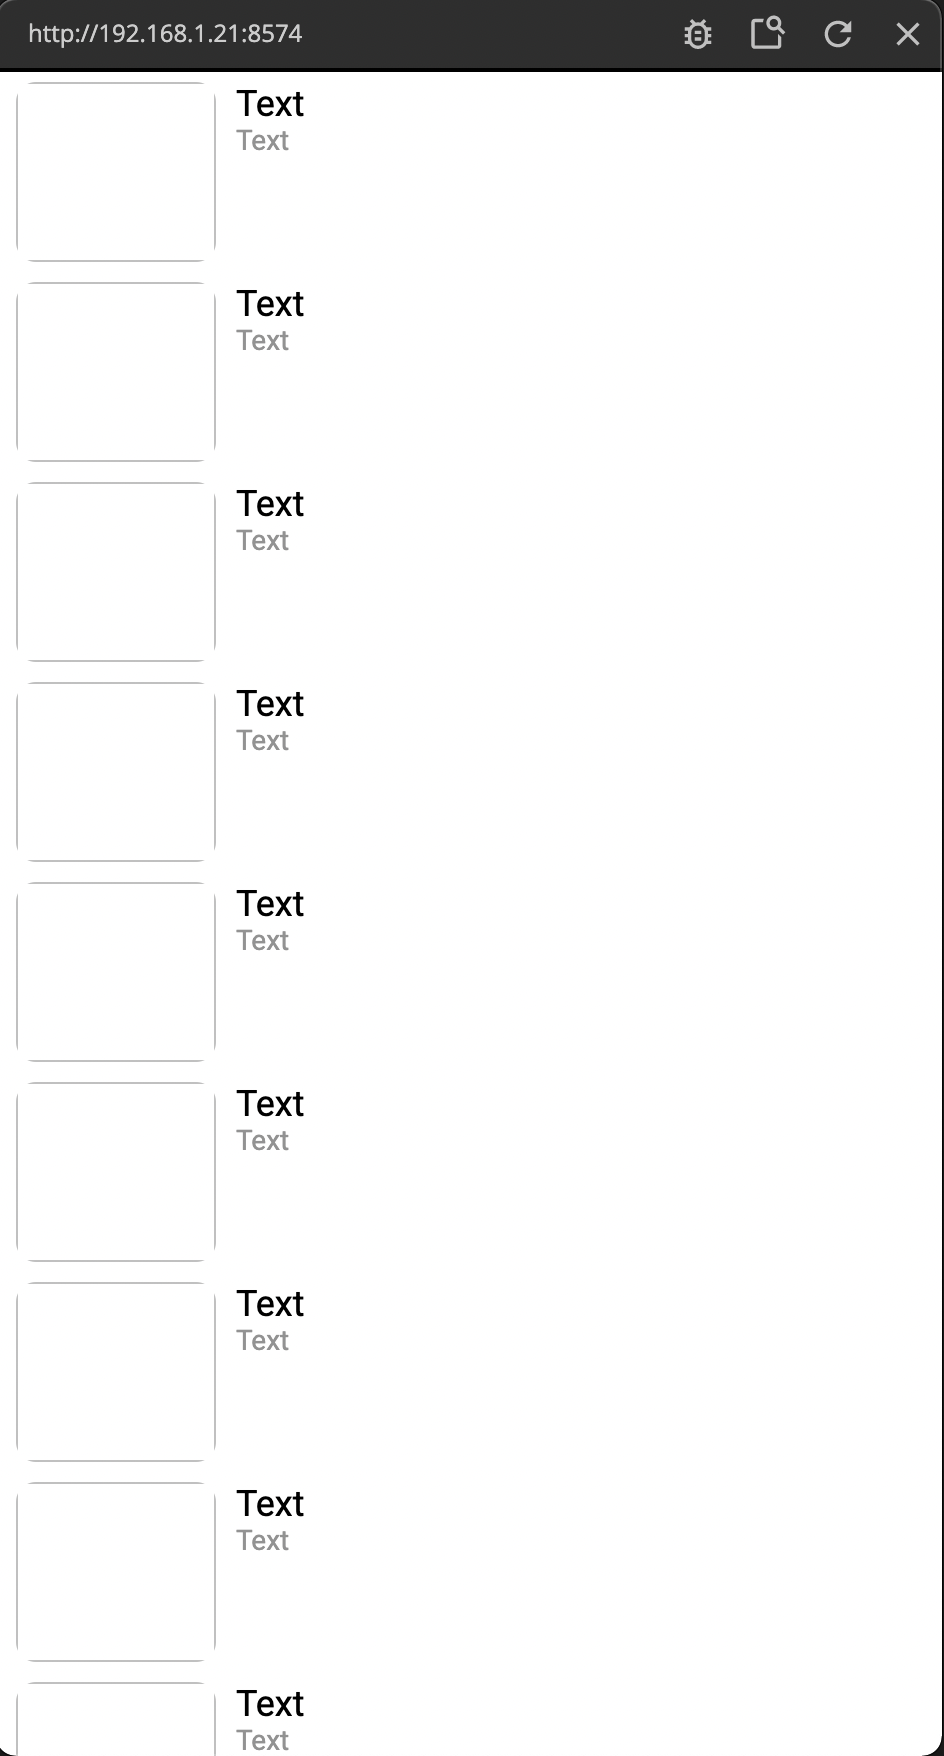
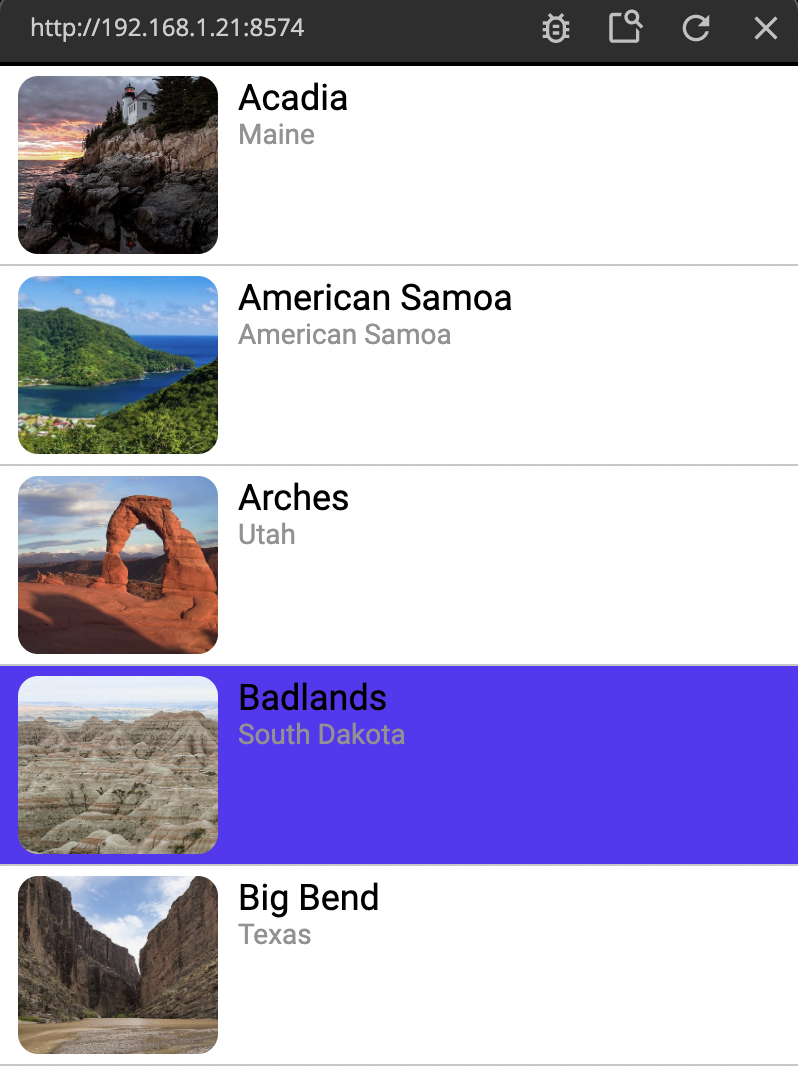
If you reload your project now you should see the following in the preview window.
This is great, now let's make sure each list item displays the correct data.
Using the Sheet Row node in our List Items
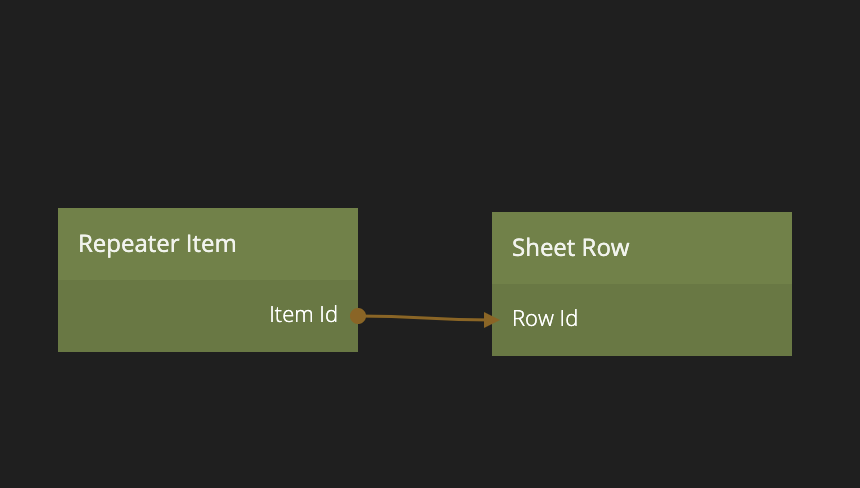
Let's go back to our List Item component and add a Sheet Row node.
The Sheet Row node can point to a specific row in the Google Sheet, but we need to tell it which row by providing an Id. That Id we will get from a Repeater Item node. This all works exactly the same as it does when you are working with the Noodl Query Records and Record nodes, and you can read more about that in this guide.
Connect the Repeater Item and Sheet row like below
Now, the Sheet Row node should have a bunch of new outputs. Let's hook them up like this:
You should now see something like this in your preview window, and you should be able to scroll your list.
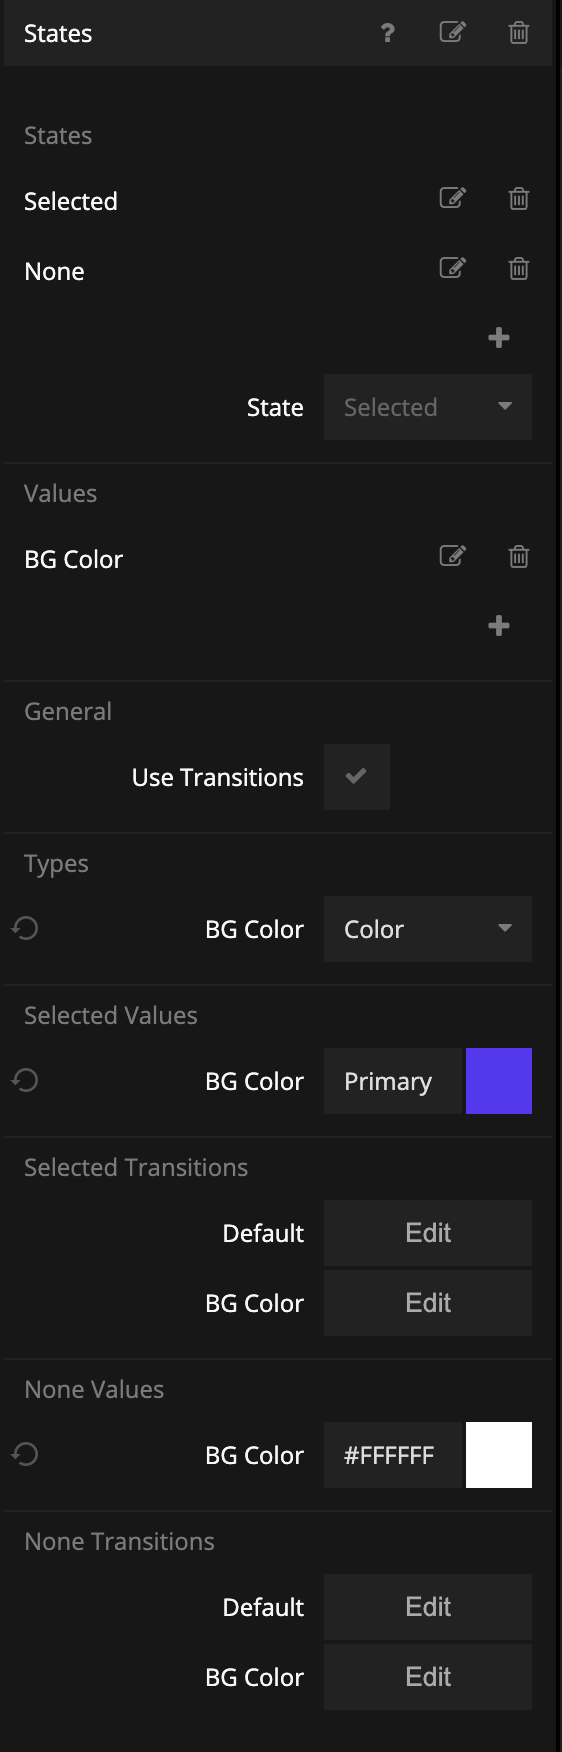
Before we finish, let's add a little bit of logic to highlight which List Item is selected. Create a States node and set it up like this:
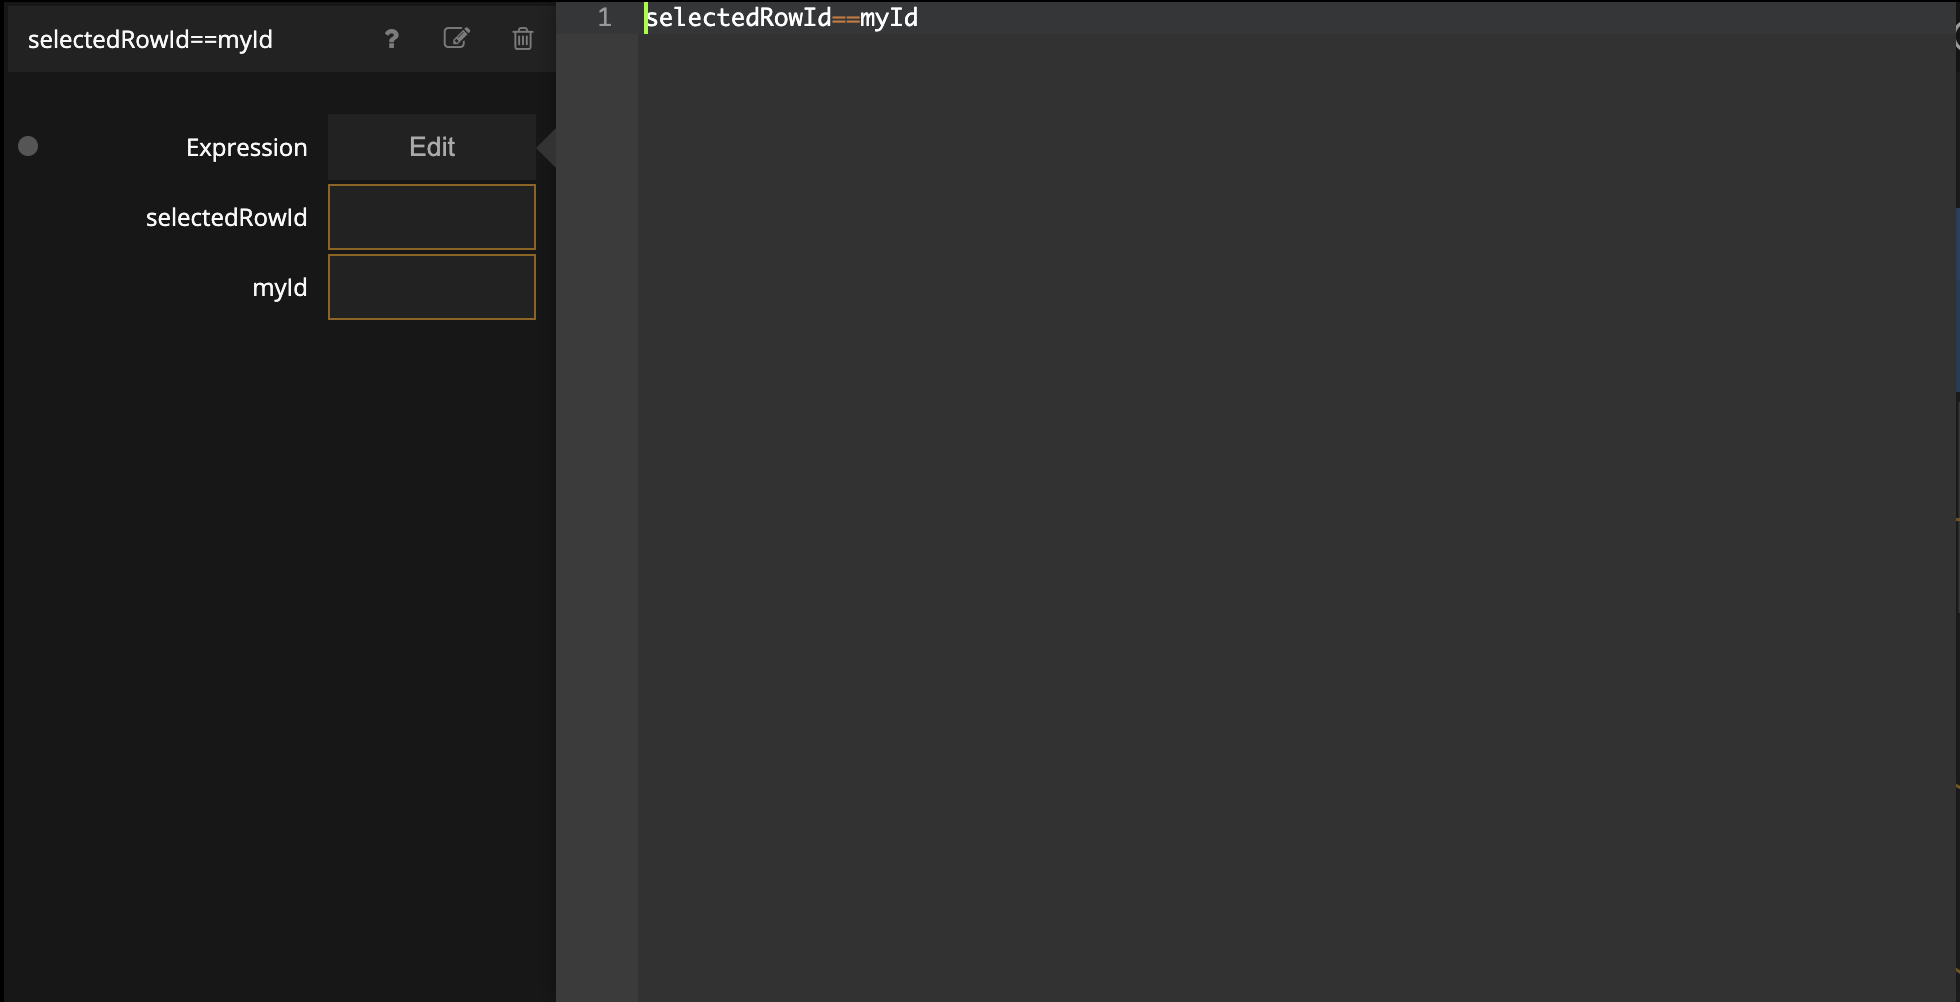
Let's also add an Expression node and set it up like this:
Finally we will add a Variable node with the name SelectedRowId, a Set Variable node, and a Condition node. Then we will hook it all up like this:
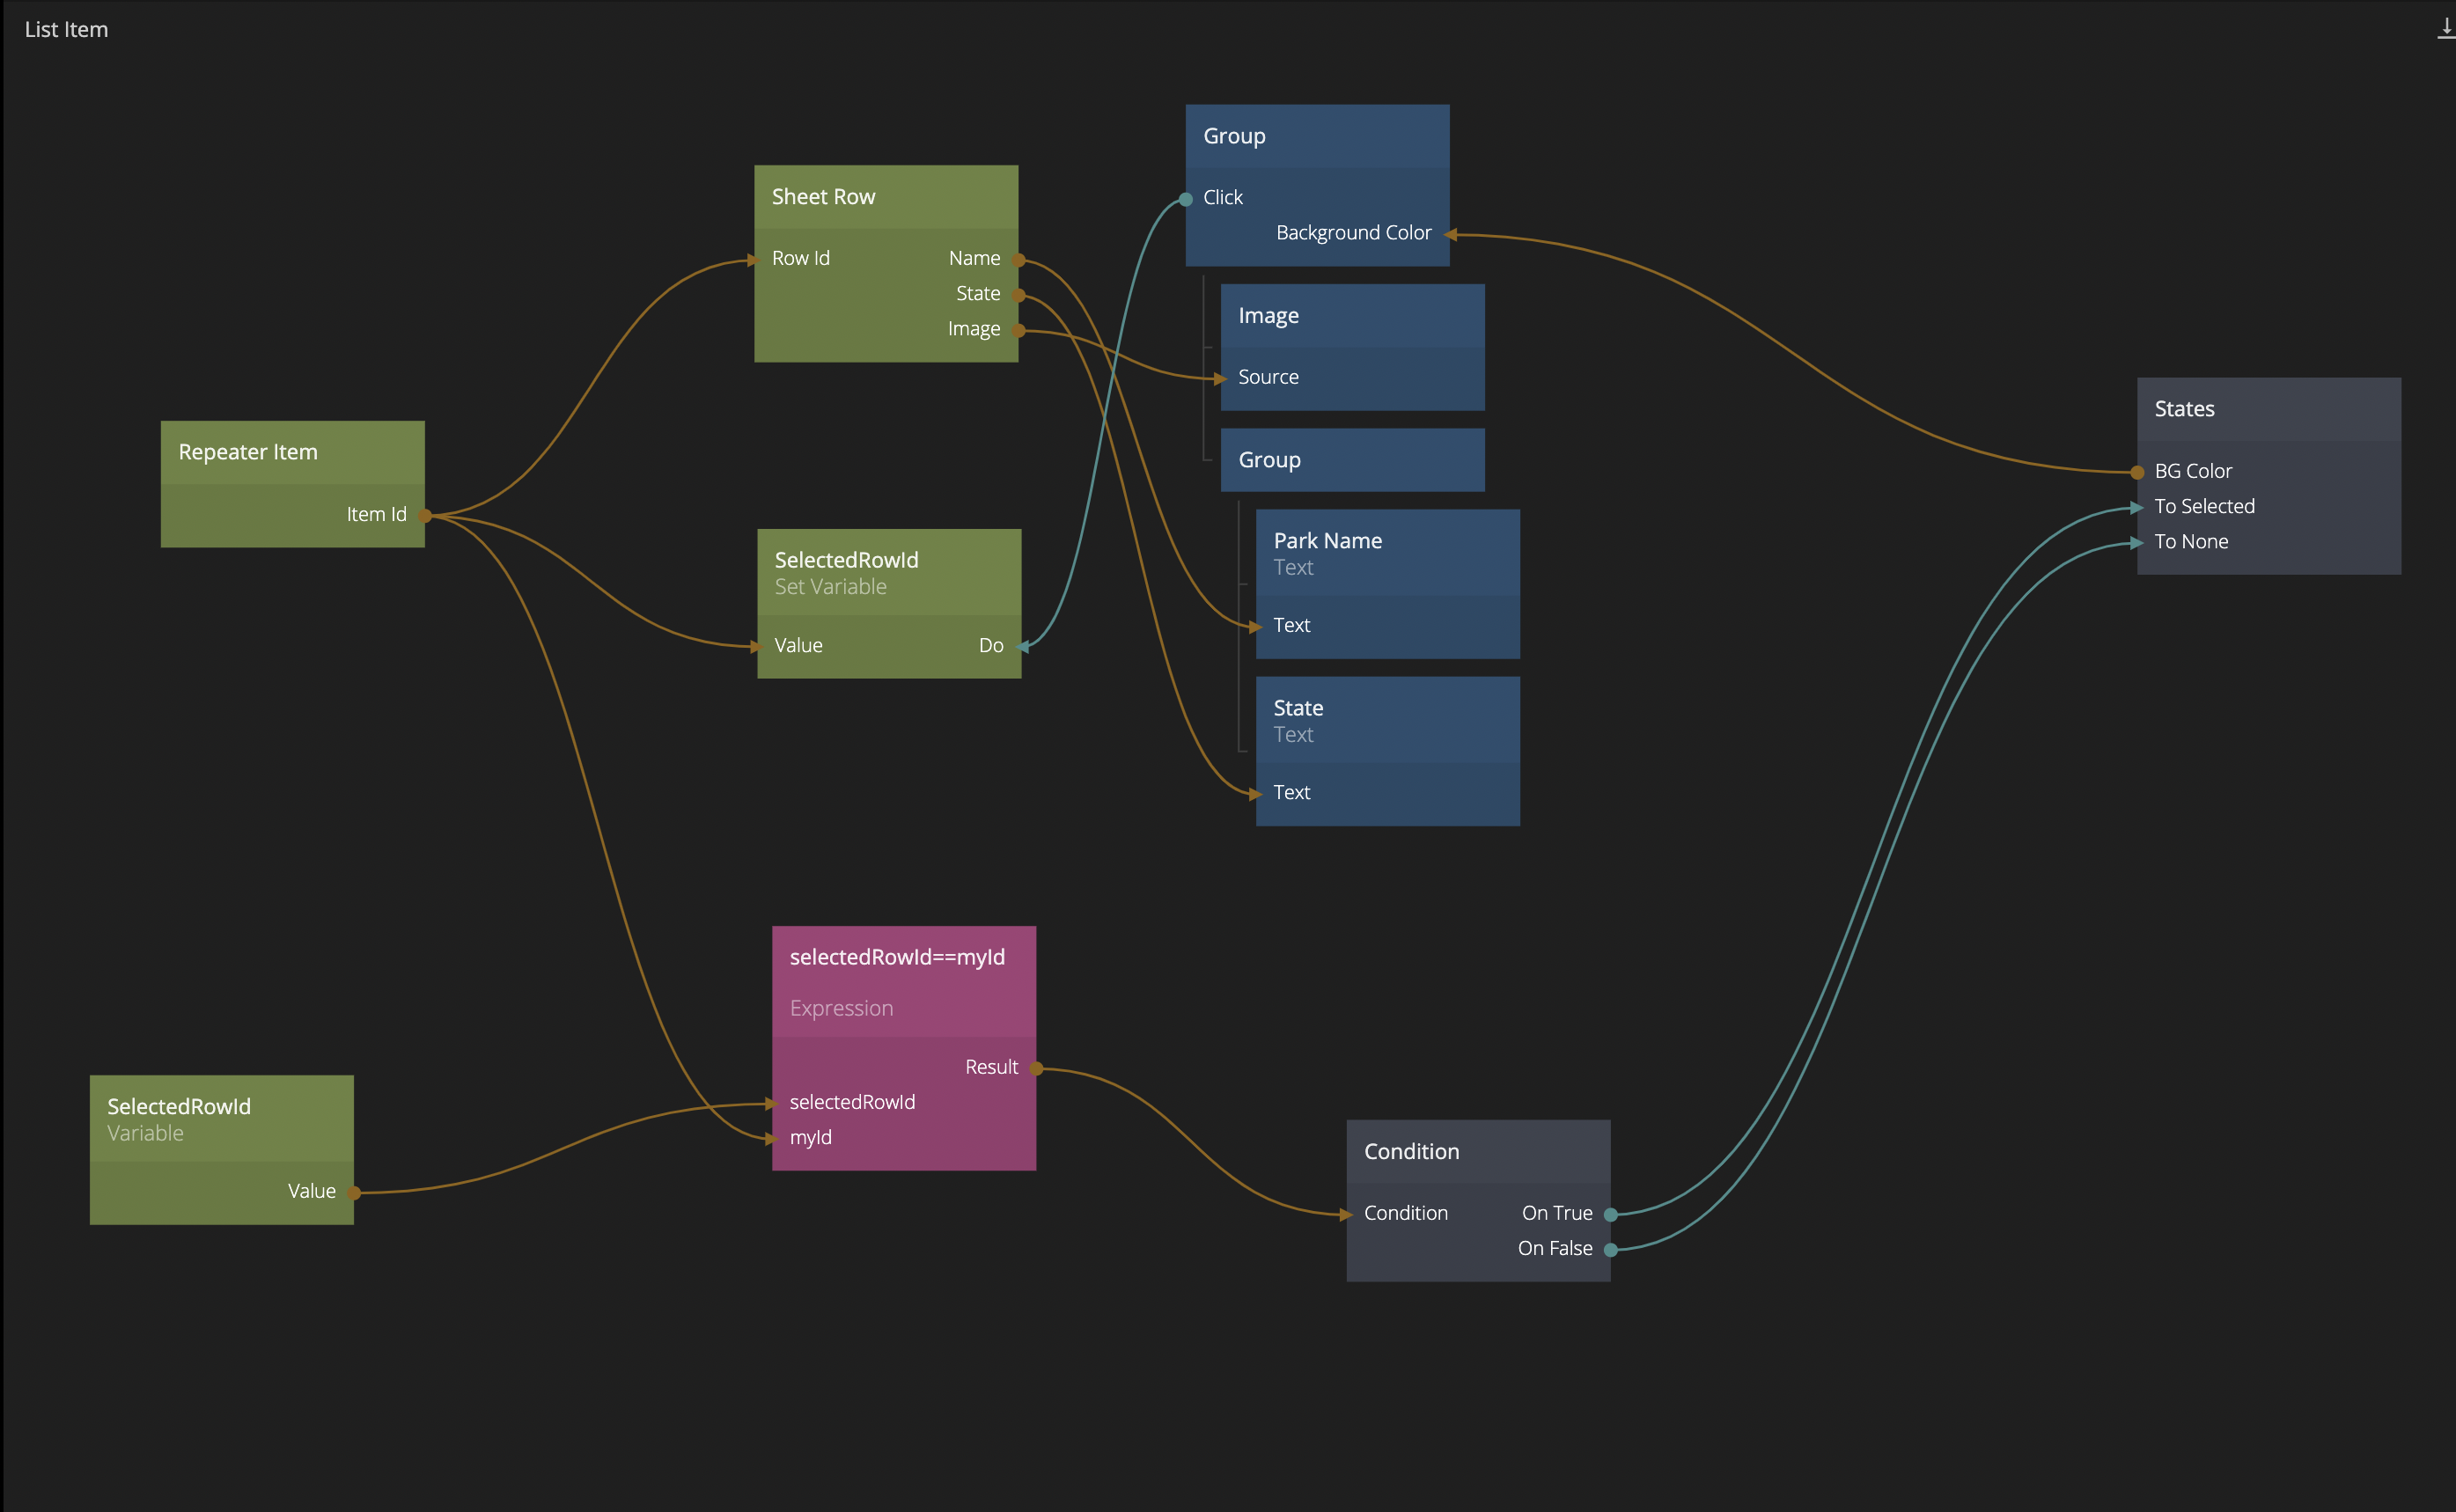
Now when you click on an item in the list it should become highlighted.
Summary
In this guide we built a list of National Parks using data from a Google Sheet. If you want to import the final project, click the "Import" button below and follow the instructions.

In the next guide, we will create a details view for our parks, and in the final guide we will look at how we can filter the data we get in the Query Sheet node.