Form Validation
After adding the module to your project you will have access to the new Validate node. You can find this node in the node picker.
Basic Usage
Validating user inputted data in forms and other input fields are a recurring and often tedious process. This module provides a Validate node with a set of neat tools to make this easier.
First let's take a look at a very basic example.
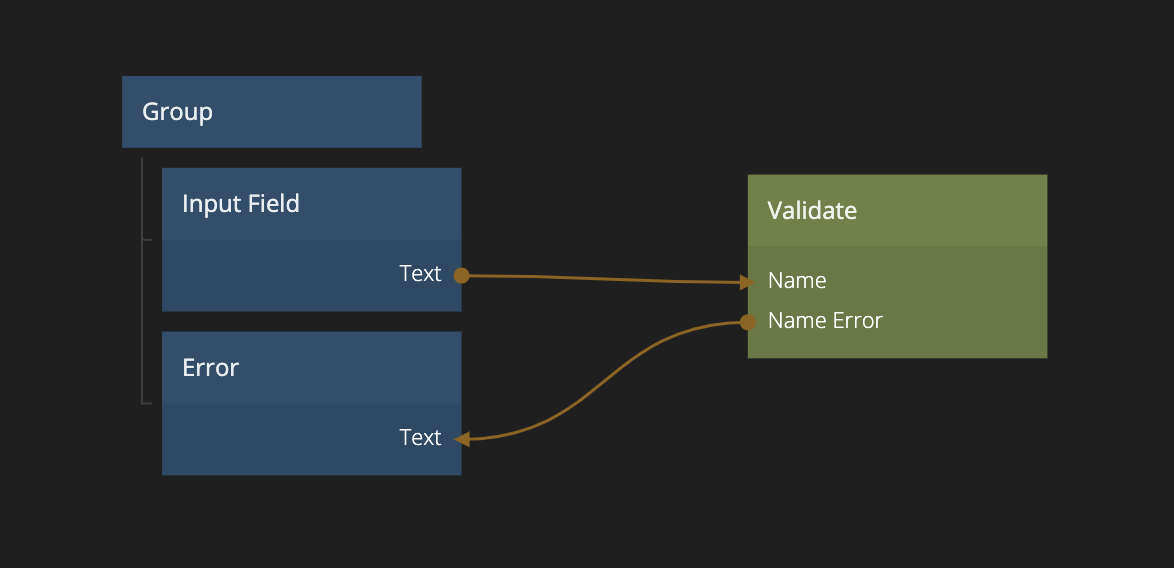
Here we introduce the Validate node and we will use it to validate a simple input field. Using the Validate node you create a schema for the inputs that you want to validate, this schema is a property of the Validate node.
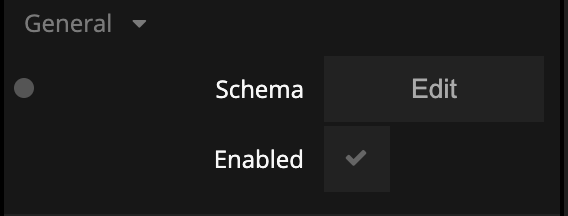
You edit the schema script by clicking the edit button. The simple schema for this example looks something like this:
schema({
    Name: string().required('Must provide name.'),
})
This schema has one property Name that must be a string and it is required. Each property in the schema will create an input on the Validate node. The error message can be provided, so if the validation fails that error message is sent on the Name Error output.
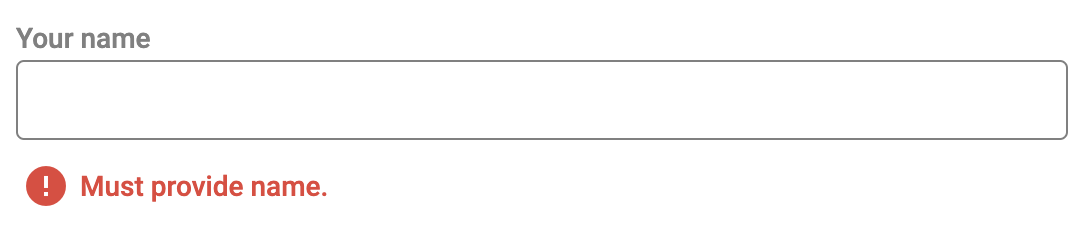
This will result in the following. If there is no non empty string provided on the Name input the Name Error will output "Must provide name."
A bit more advanced
So that's a very basic example. Now let's take a look at one a little bit more involved.
This example has the following schema script:
schema({
    Name: string().required('Must provide name'),
    Email: string().required('Must provide email').email('Must be valid email'),
})
It's not much more complicated, it has an additional property Email that is both require and needs to be a valid email, with provided error messages.
A few notes on this example:
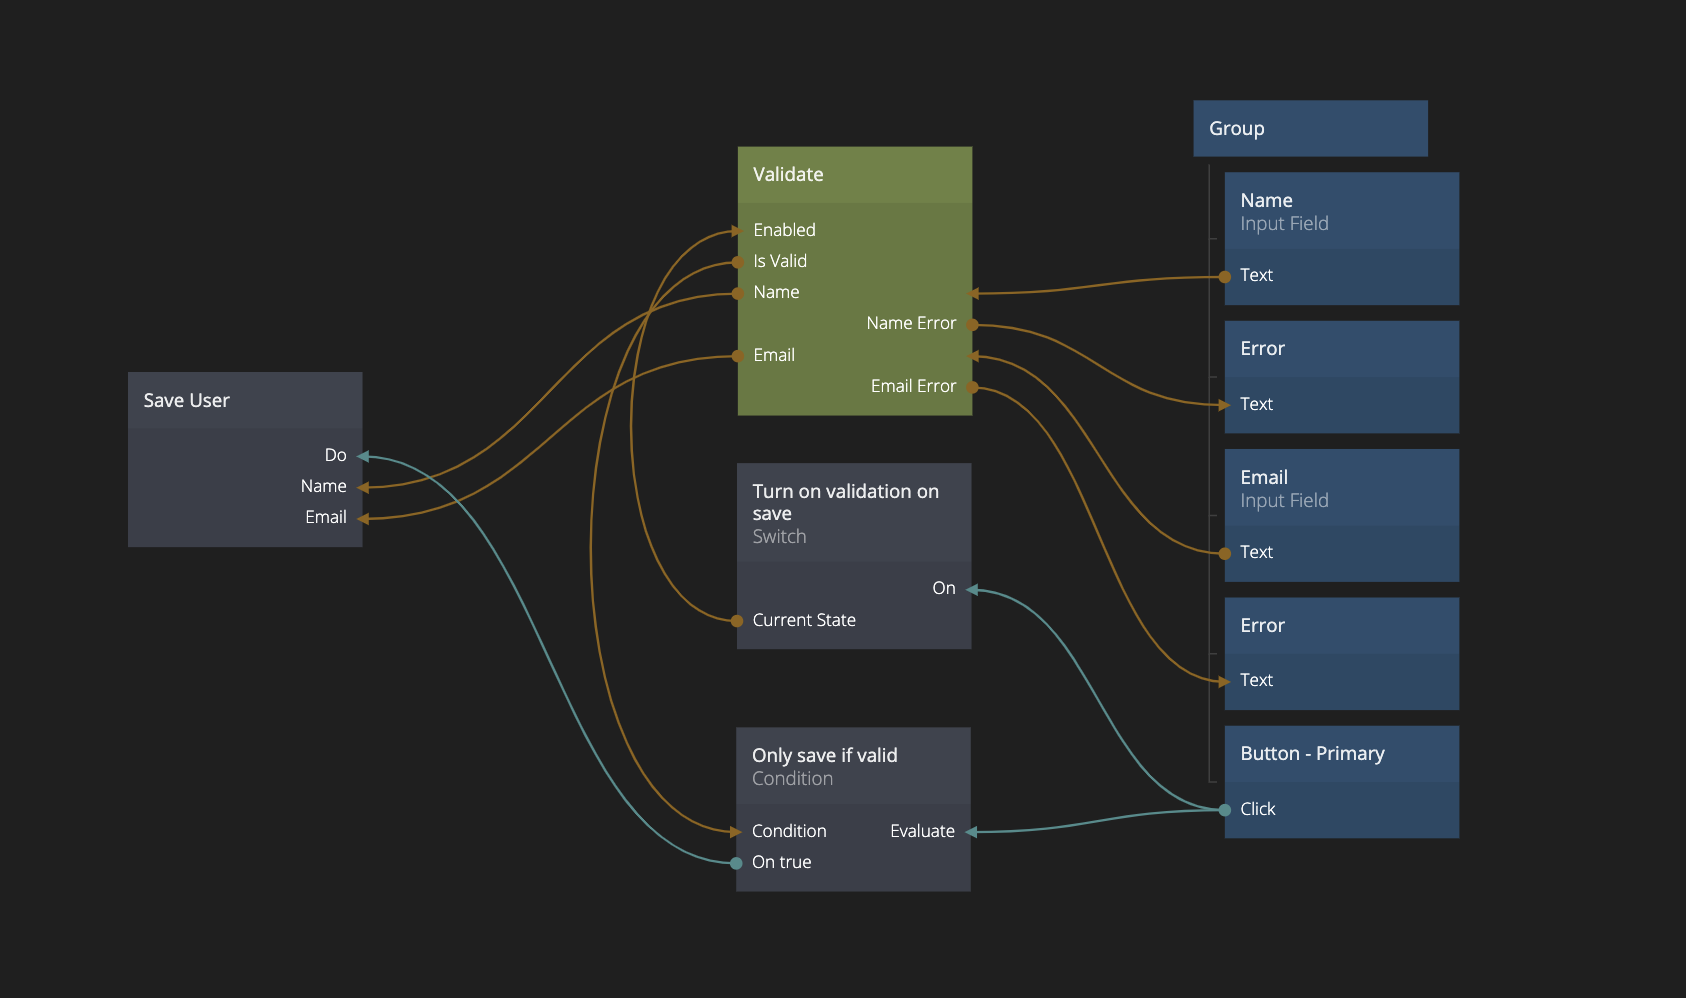
The Validate nodes Enabled input can be used to control if the validation should run or not. If it doesn't run it will not emit any error messages. This is connected to a Switch node that is false by default and when the save button is clicked it enables the validation. This a common wanted behavior to not show the error messages while the user is first inputting.
The Is Valid output is used to determin if the form is valid and thus if the submit action should be performed. In this case the Save User action is not performed unless the Only save if valid condition is true.
The Name and Email outputs from the Validate node are the ones that are sent to the action. The validation node can also perform modifiers on the property, such as trimming etc and the modified propertys are provided as outputs of the Validate node.
The Validate node is based on the open source library Yup and in the documentation you can find many more examples. Here are a few others that can be useful:
schema({
    Password: string()
        .required('Must provide password')
        .matches(
            /^(?=.*[a-z])(?=.*[A-Z])(?=.*[0-9])(?=.*[!@#\$%\^&\*])(?=.{8,})/,
            'Must Contain 8 Characters, One Uppercase, One Lowercase, One Number and One Special Case Character'
        ),
    ConfirmPassword: string()
        .required('Must confirm password')
        .oneOf([ref('Password')], 'Passwords must match'),
})
This can be used to validate that a password is formatted correctly and you can also use this module to make sure that two input fields match.
schema({
    'Due Date': date().min(new Date(), 'Must be a date in the future'),
})
If you want to use spaces in your property names, make sure they are provided as strings i.e. in quatation marks. This example above tests a date and make sure that it is a date in the future.
Validating objects
You don't need to connect each individual property if you instead have an object that you want to validate you can simply pass the Id of the object ot validate.
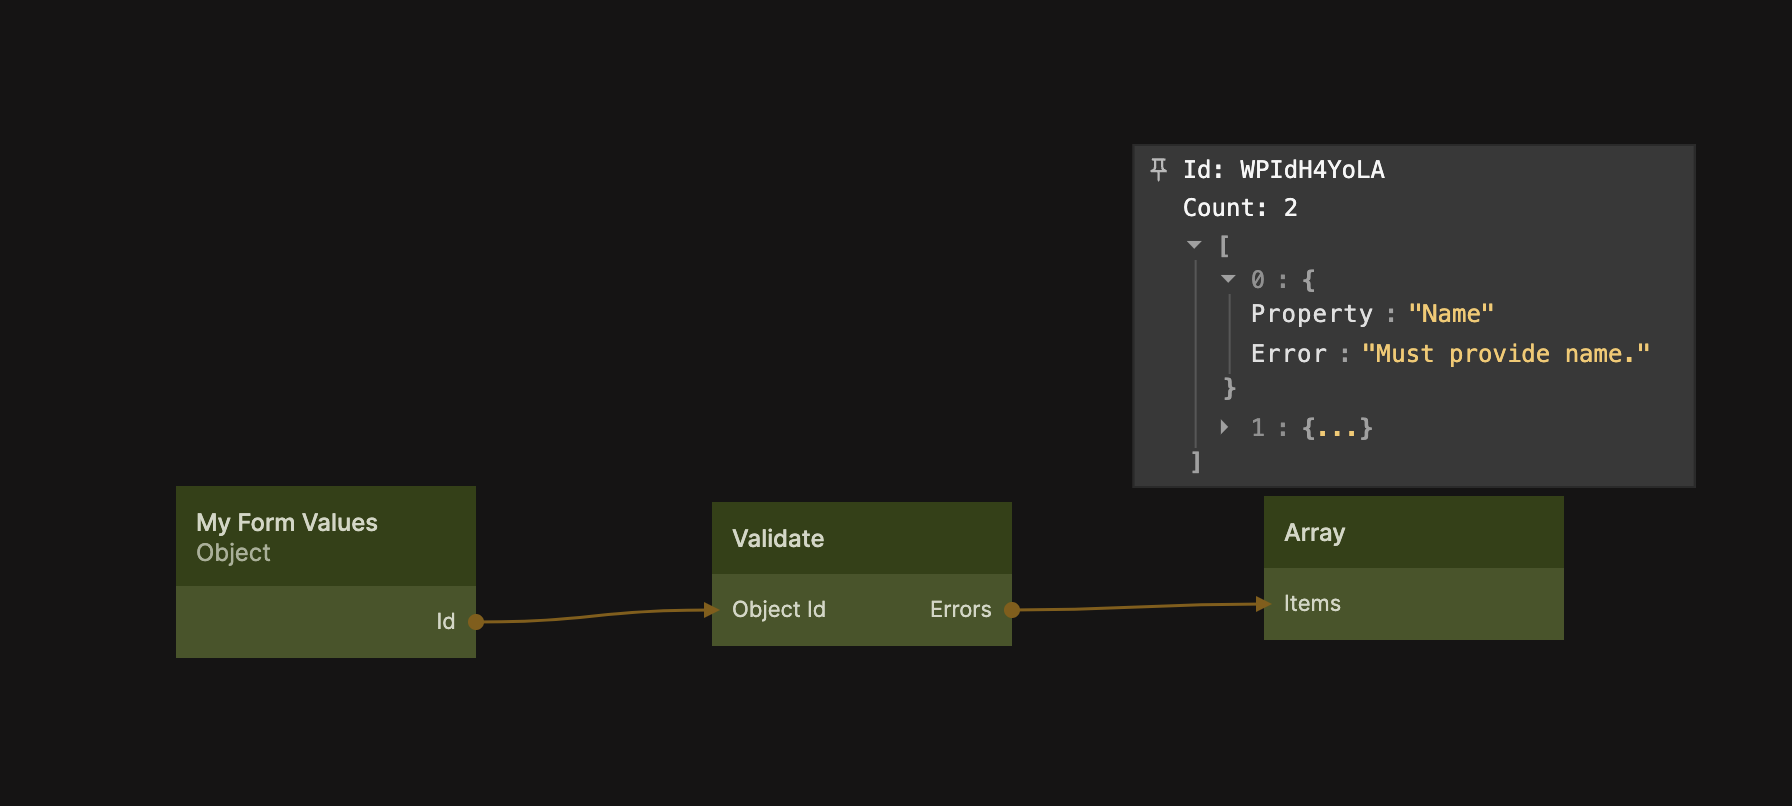
You can use the individual error outputs as shown above, but there is also a collection of all errors in the Errors output. This is an array with the following format:
[
    {
        Property:"The property that has an error",
        Error:"The error message"
    }
]