Using Variables
What you will learn in this guide
In this guide you will learn how to use the Variable node and the Set Variable node to store data in your application for later use. Variables are local meaning they will not be stored in a persistent database. They are very useful to store data and states that applies to a usage session of an app or a screen.
Overview
The guide covers the following topics
- Setting variables
- Reading variables
- Accessing variables globally
- Using variables with conditions
When to use Variables?
When developing an app, you often run into the situation that you need to hold on to a value - a piece of data - and use it at a different place in your app.
For example, you may have a TextInput where the user can input their name. You want the name first letter of the name to be always capitalized, no matter what the user inputs it. This name should be used through out the App. Hence you would like to store it so you can retrieve it on various places in the app.
You cannot really make a connection directly from the TextInput node to all the places where the name will be used. First of all, there might be too many of those connections. Second of all, the nodes that need the name are maybe not in the same component so you can't really reach them. And lastly, you don't want the intermittent name, while the user is entering it, you only want it when the user is done, and then you want it with a capital first letter and not exactly how the user wrote it. This is use one case of many, where a Variable comes in handy.
Storing and reading variables
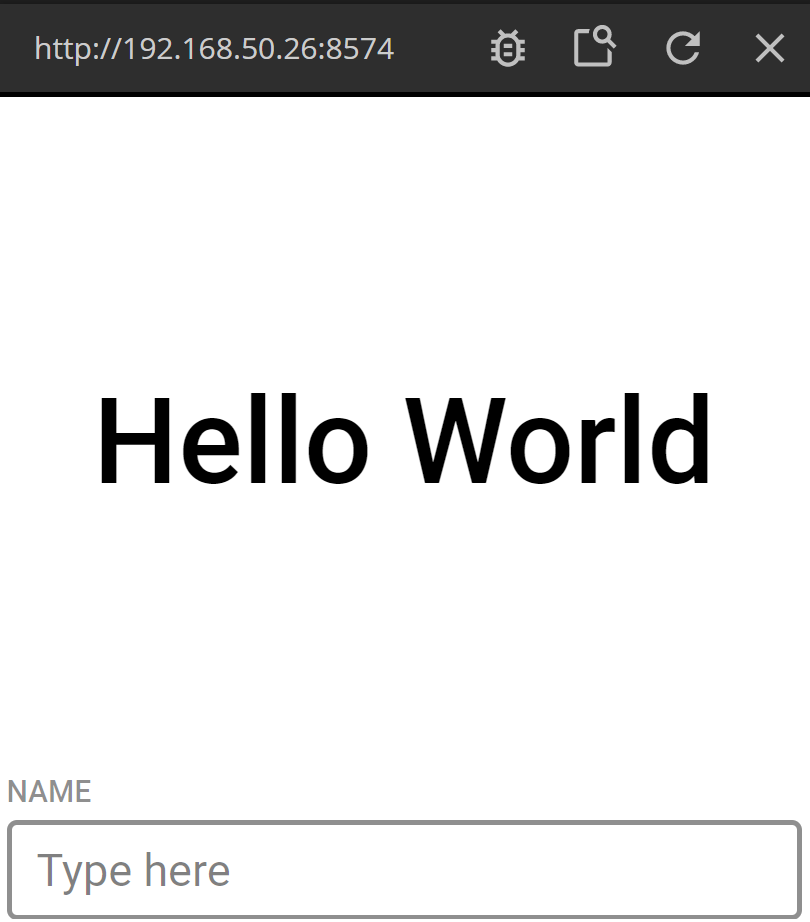
Let's start by opening a new project. You can base it on the Hello World template. Then add a TextInput node. Change its' label to "Name". You may want to add a little bit of padding to the parent container as well, to make sure the TextInput get some air around itself.

Now we are going to do two things. 1. We want to store the value of the TextField in a Variable node when the user hits Enter. 2. We also want to capitalize the first letter of the name, before we store it.
Let's start with the capitalization. Add a Function node. Edit the script and paste the following:
if (Inputs.name !== undefined) {
    Outputs.capitalizedName =
        Inputs.name.substr(0, 1).toUpperCase() + Inputs.name.substr(1)
}
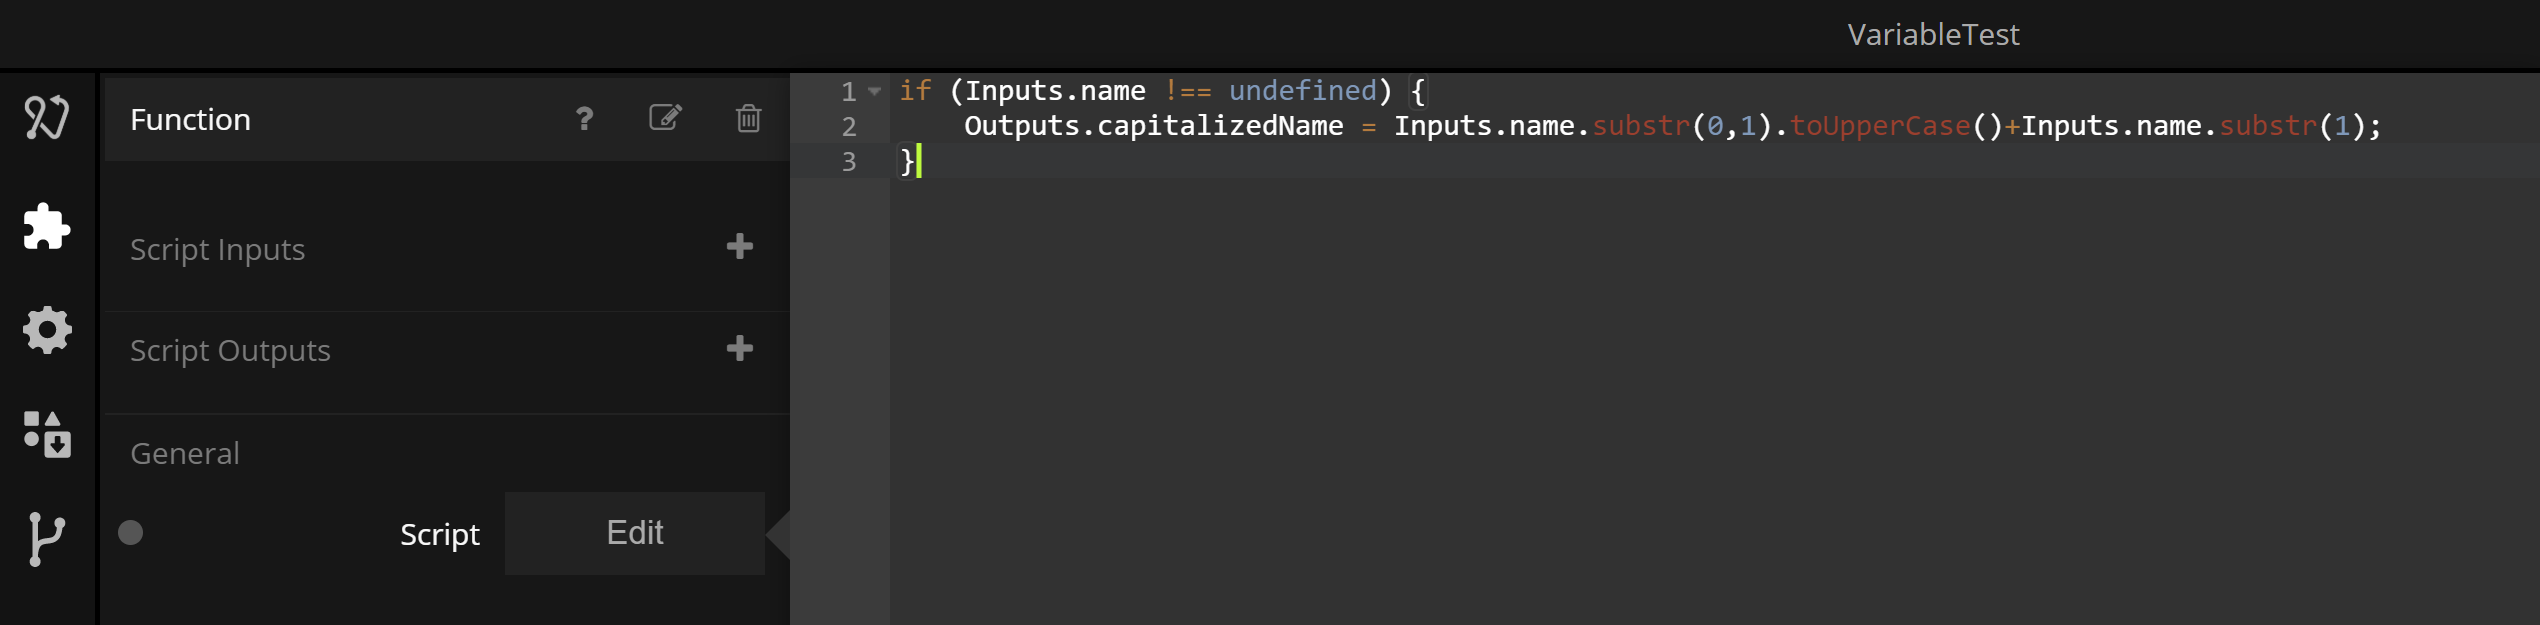
It's not important right now that you understand exactly how the Javascript works, but it will capitalize the first letter of what you feed into the Function node and set it on the output named capitalizedName.
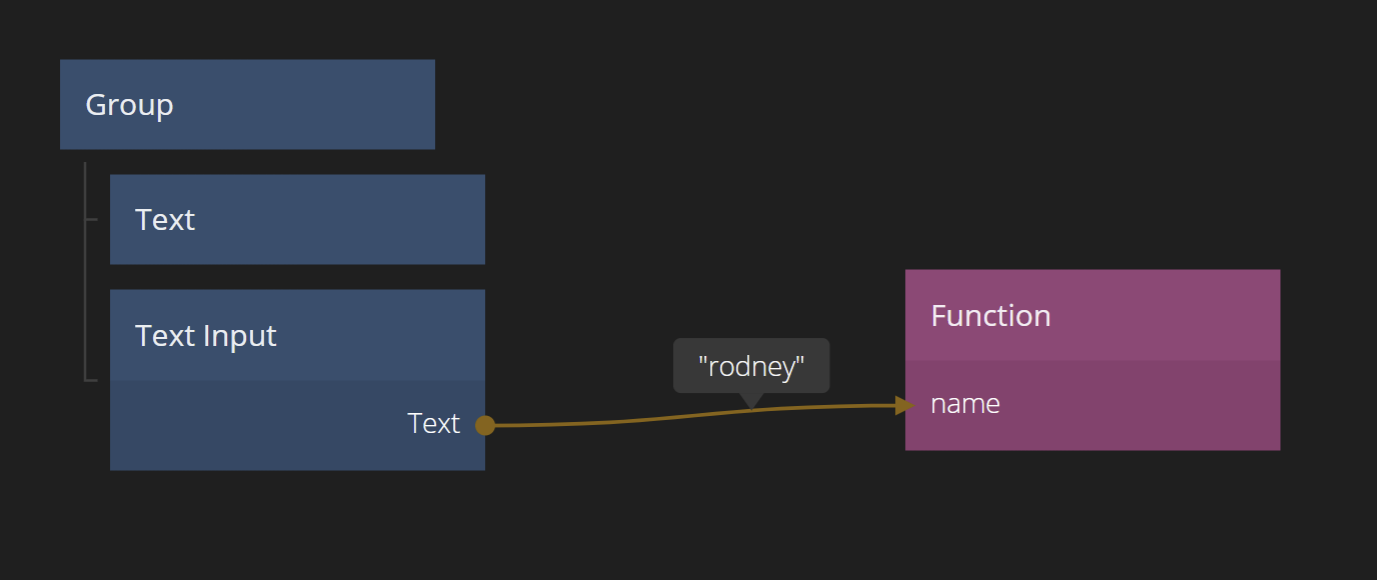
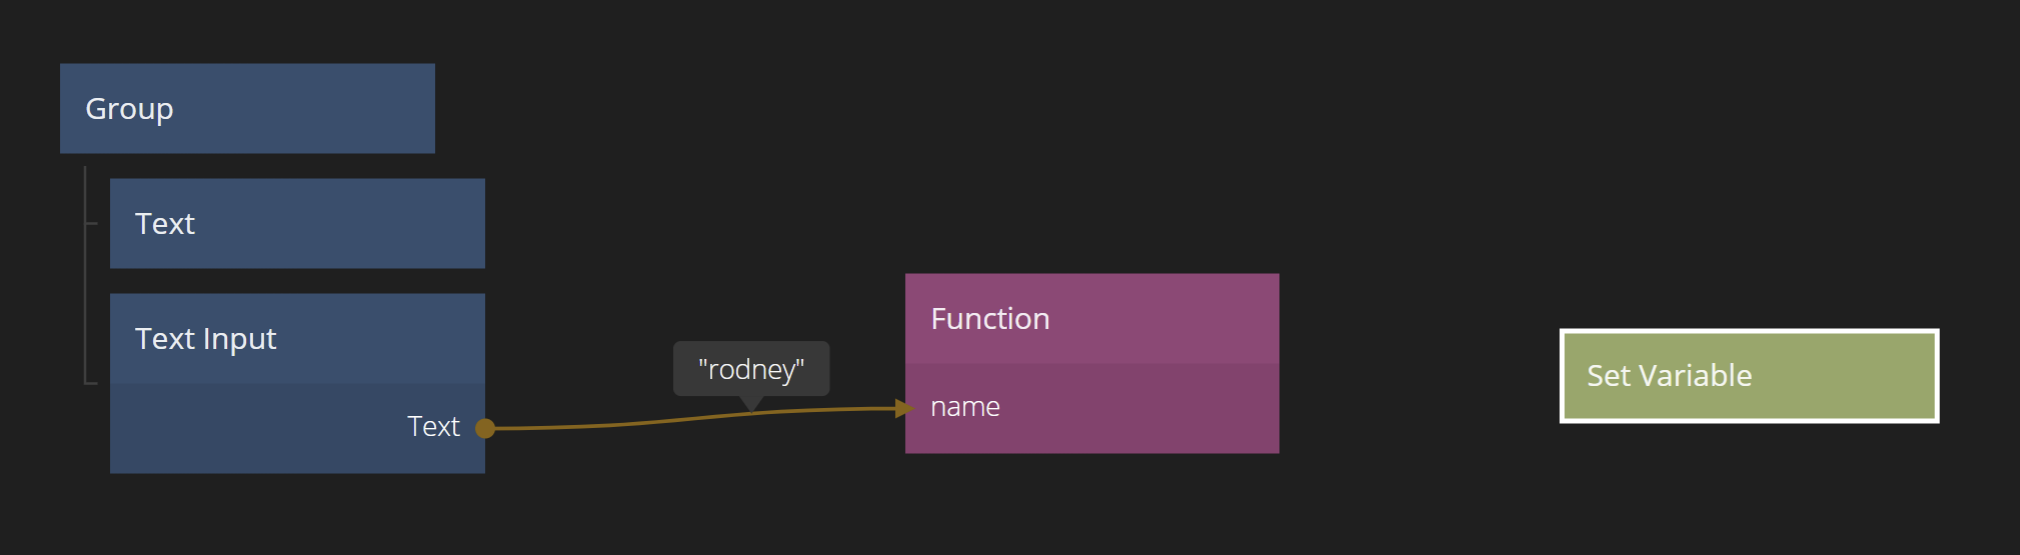
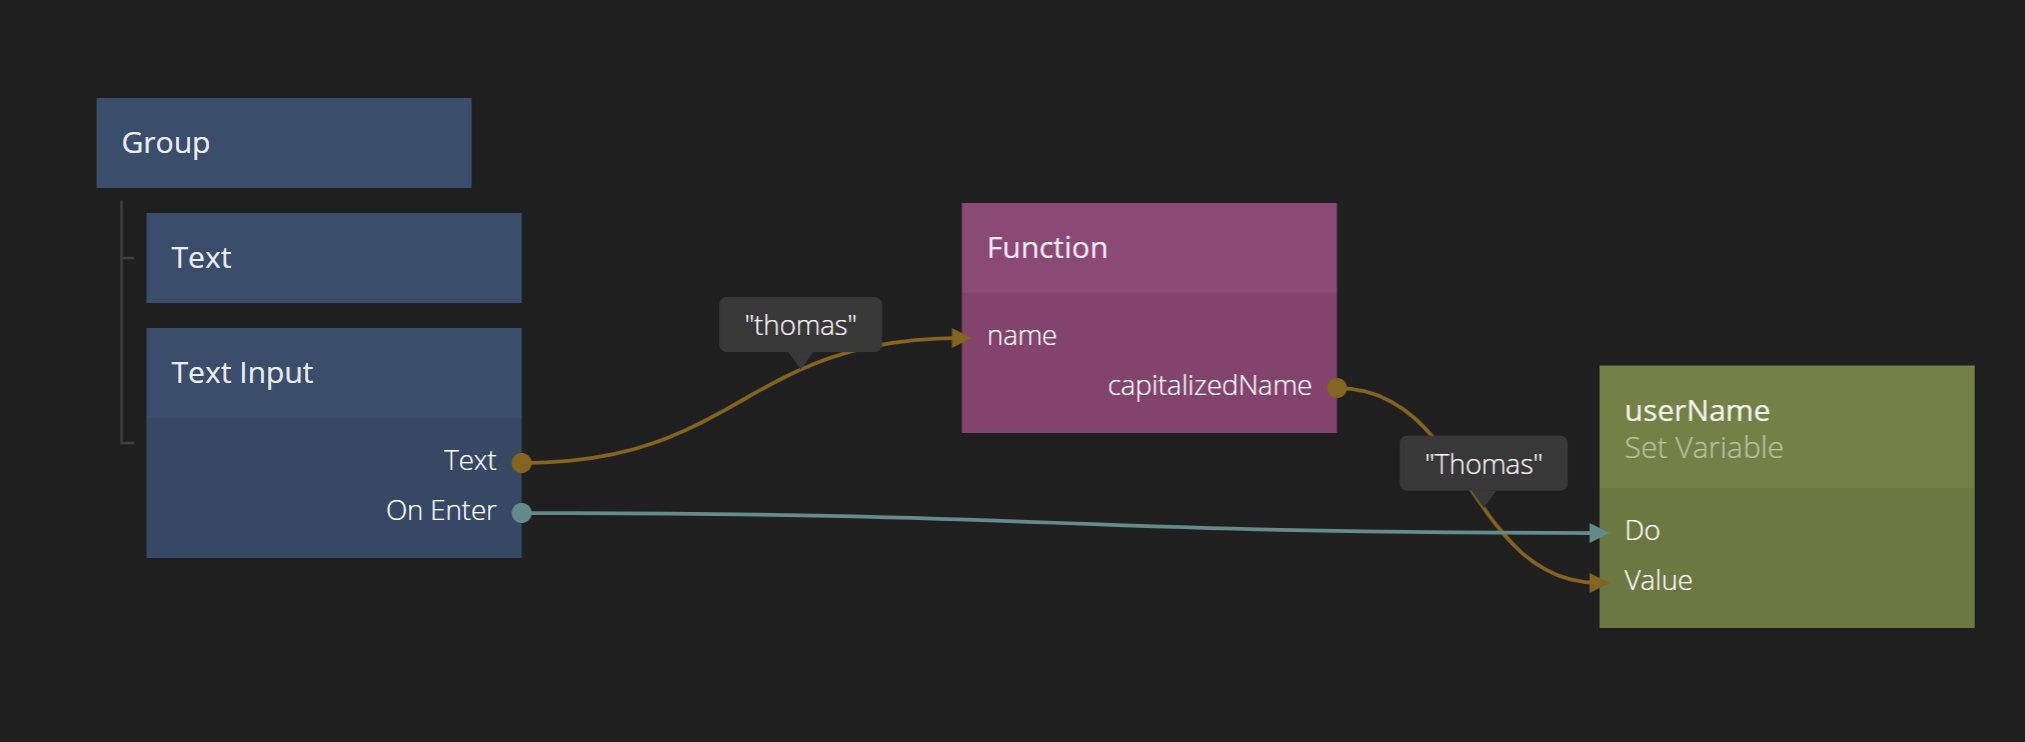
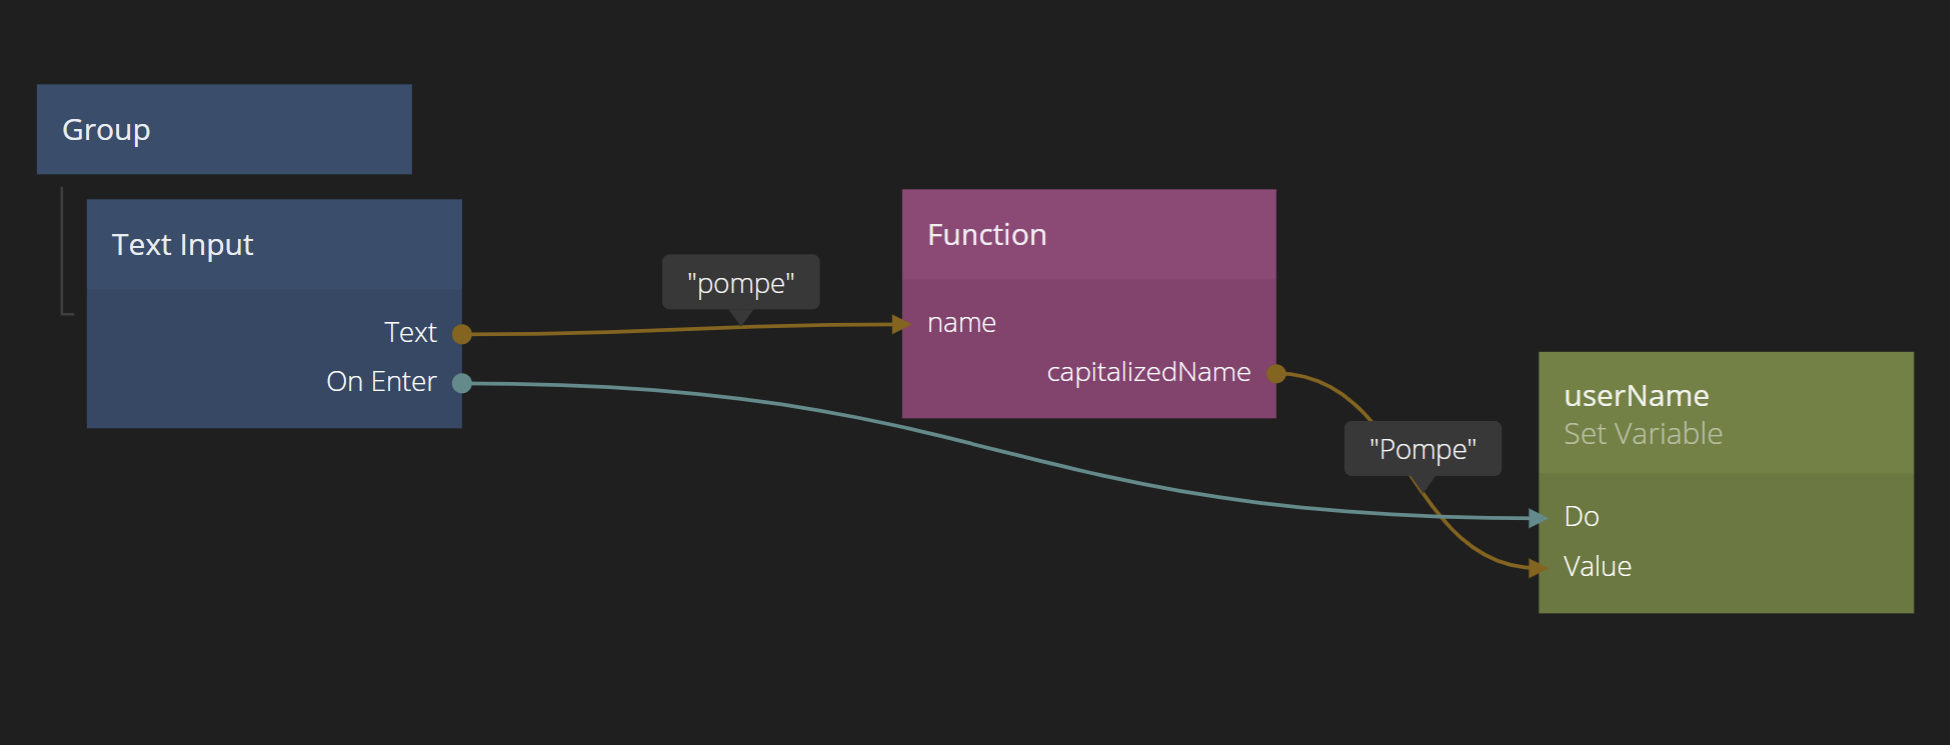
Connect the Text output from the TextInput node to the name input on the newly created Function node.
Setting a Variable
Ok so let's store the capitalized name in a Variable. To do this, add a Set Variable node.
The Variable Name
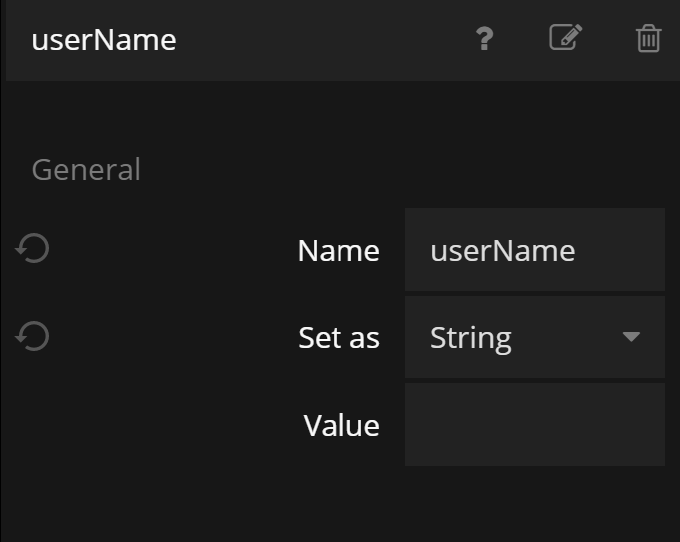
Each variable need a Name. Any Variable or Set Variable node anywhere in your App that has the same Name will refer to the same actual data. The Name is case sensitive, and we are going to pick the name userName.
We will also set the type of the Variable to a String. This is important, for example, if the user chooses a username which are only numbers. With the String type set, we know even in that case, what's stored in this Variable is a String.
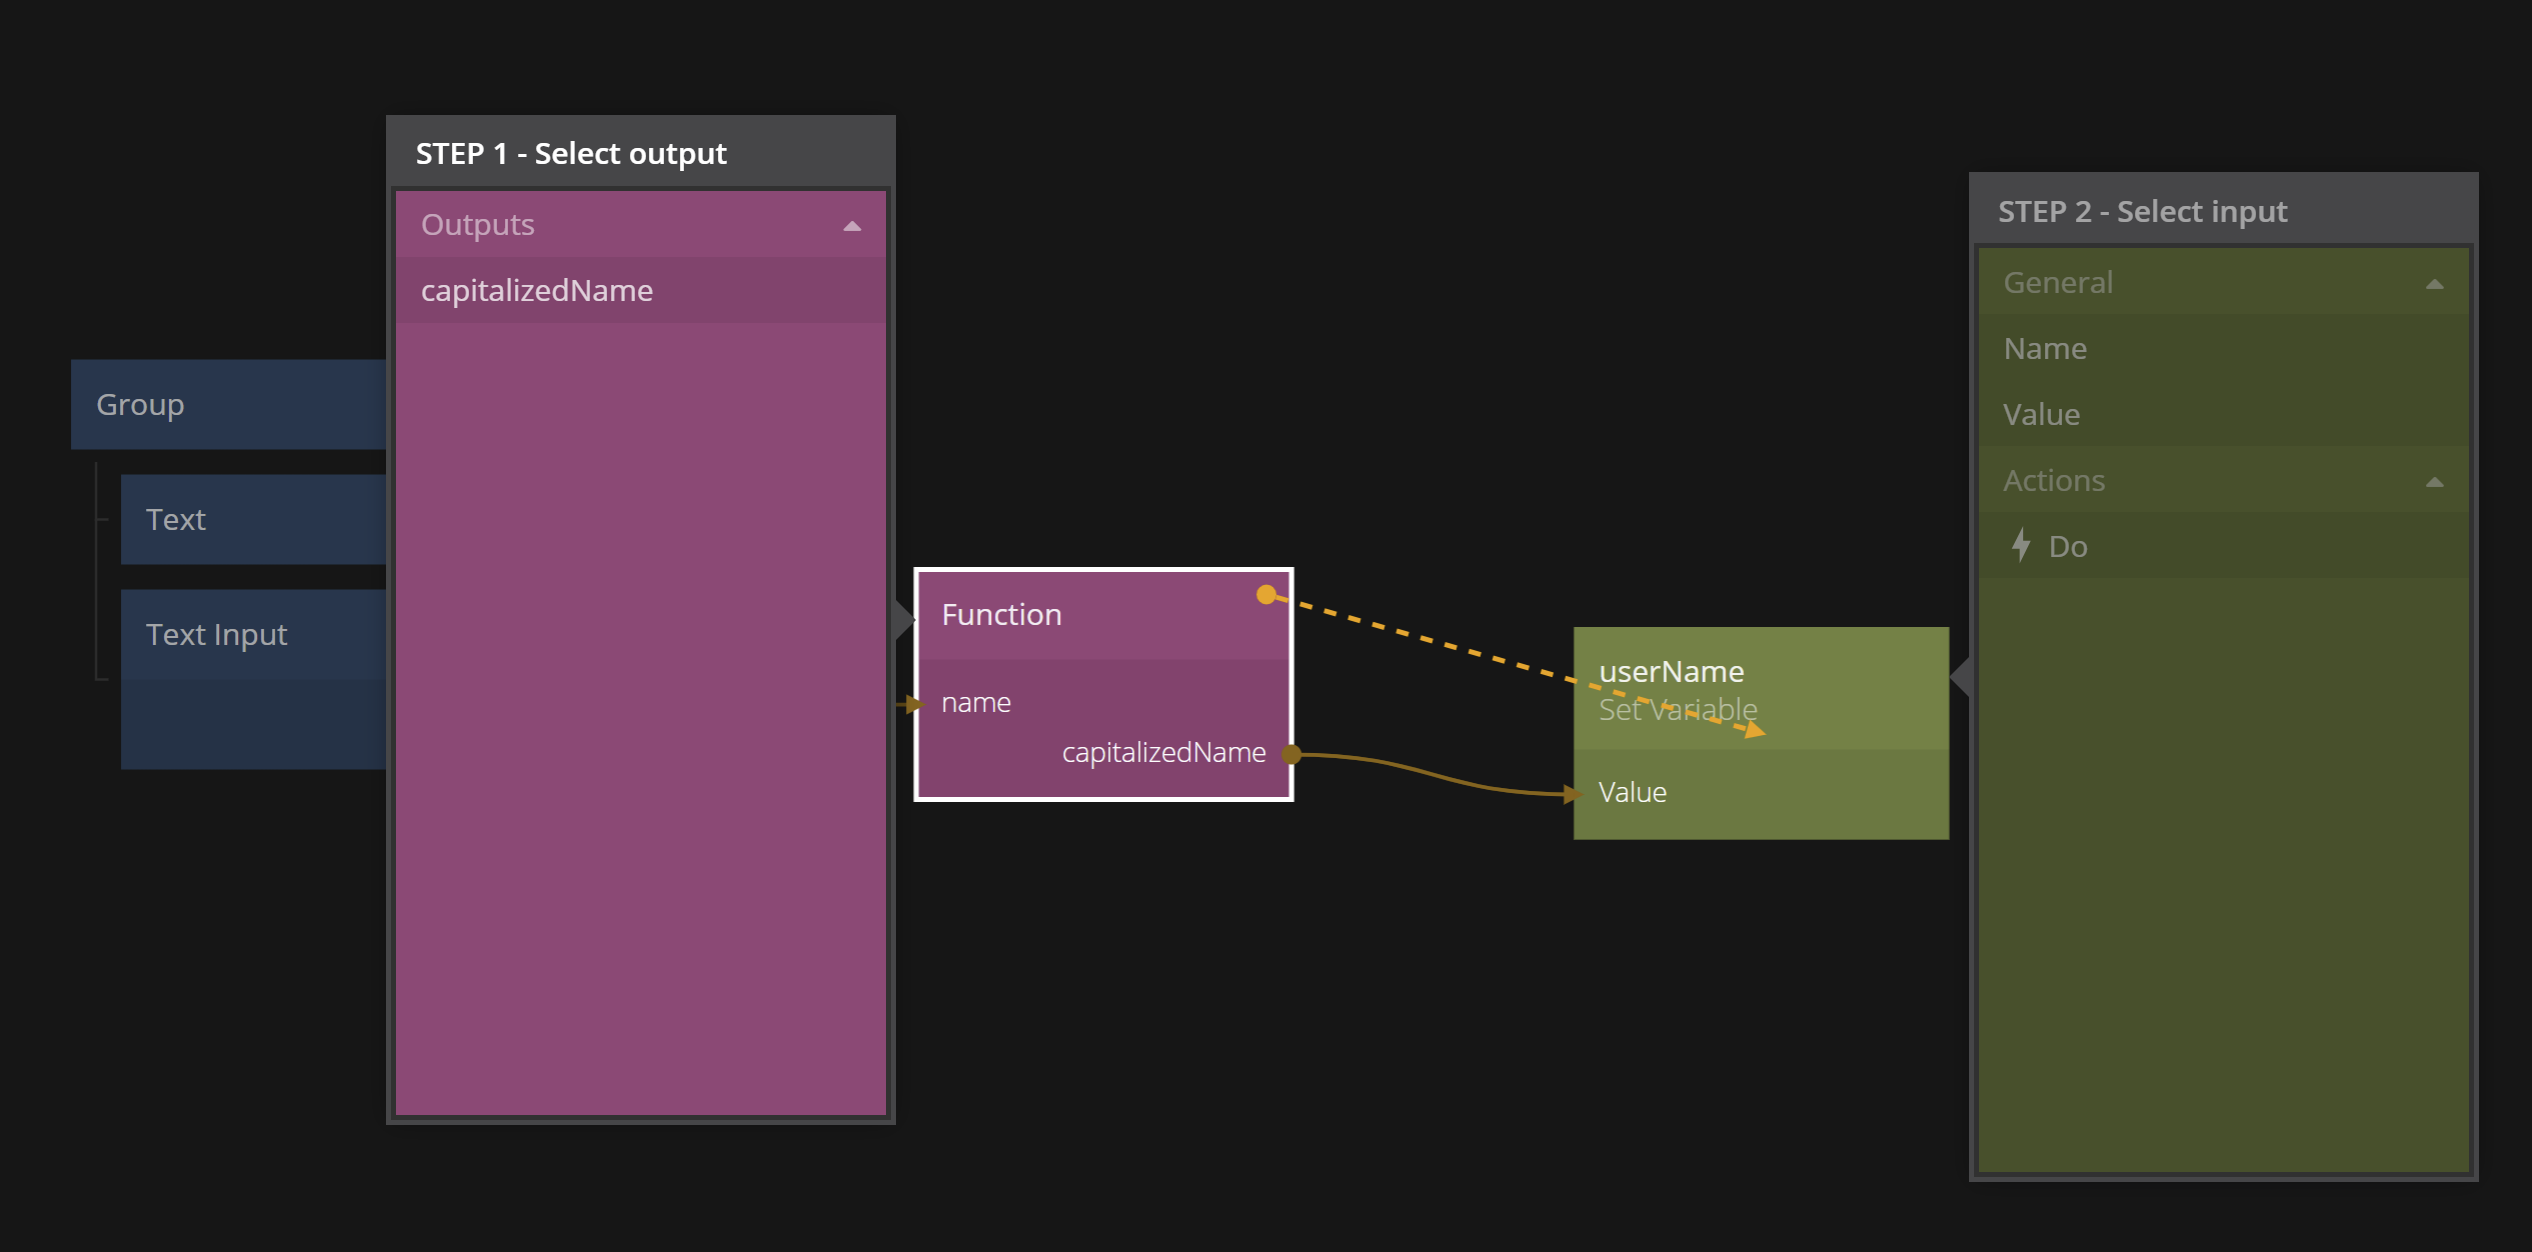
Then connect the capitalizedName output from the Function node to the Value input of the Set Variable node.
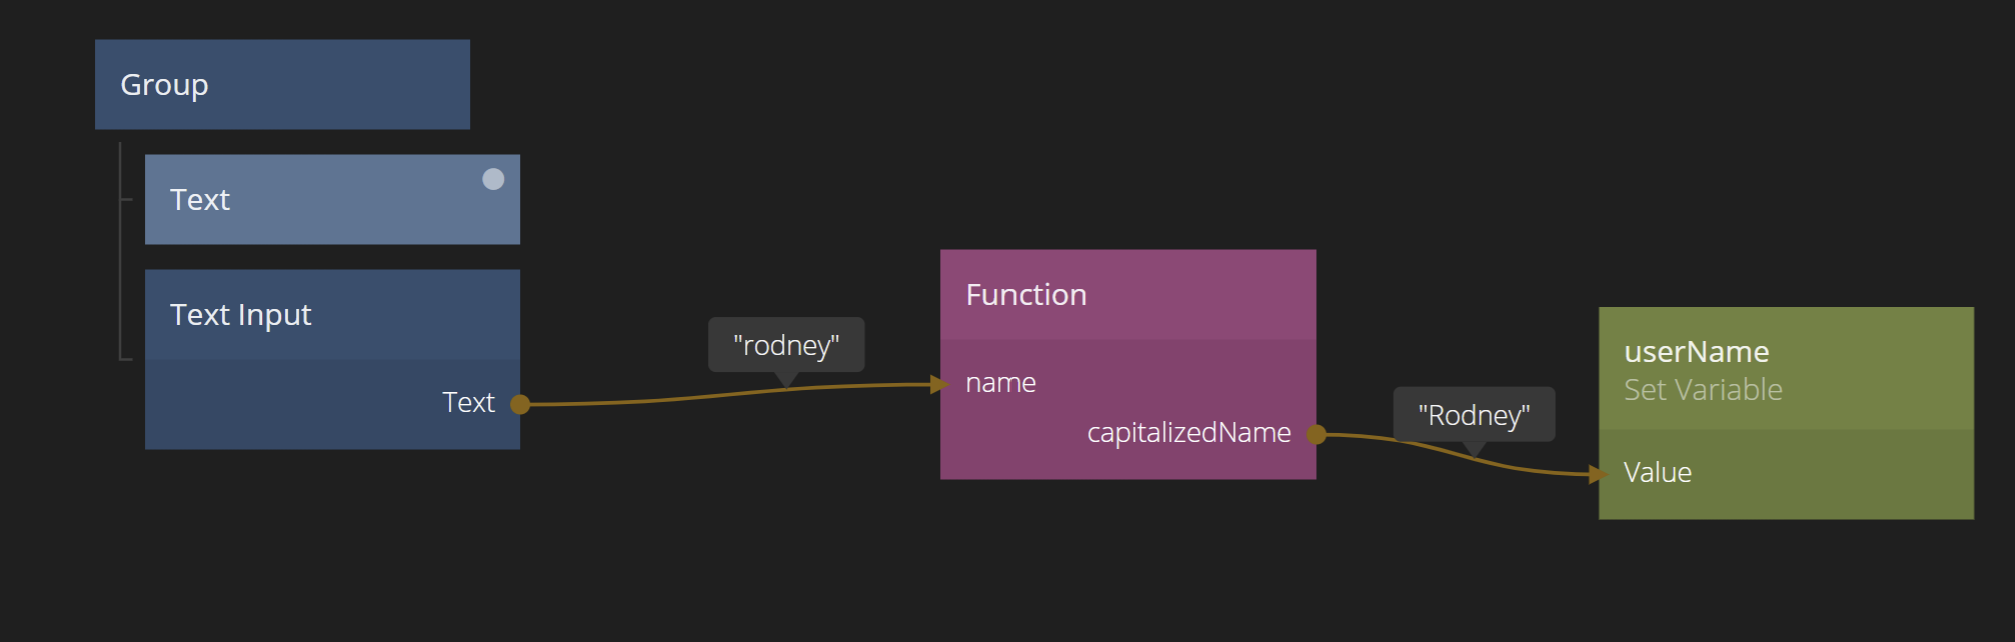
We have one more thing we need to do to actually store the value in the Variable. We need to trigger the Do signal in the Set Variable node. This makes it possible for us to control exactly what we save. Again, as the user is typing in the TextInput the capitalizedName output will keep updating (try it!) and we only want to save once the user press Enter.
So, connect the onEnter output on the TextField to the Do input signal on the Set Variable and we are done with storing data in a Variable.
Reading a Variable
Ok, now we want to use the value we just stored. We want to include the name in the Hello World greeting. So lets first add a String Format node. Make sure the text in the node is "Hello World {name}".
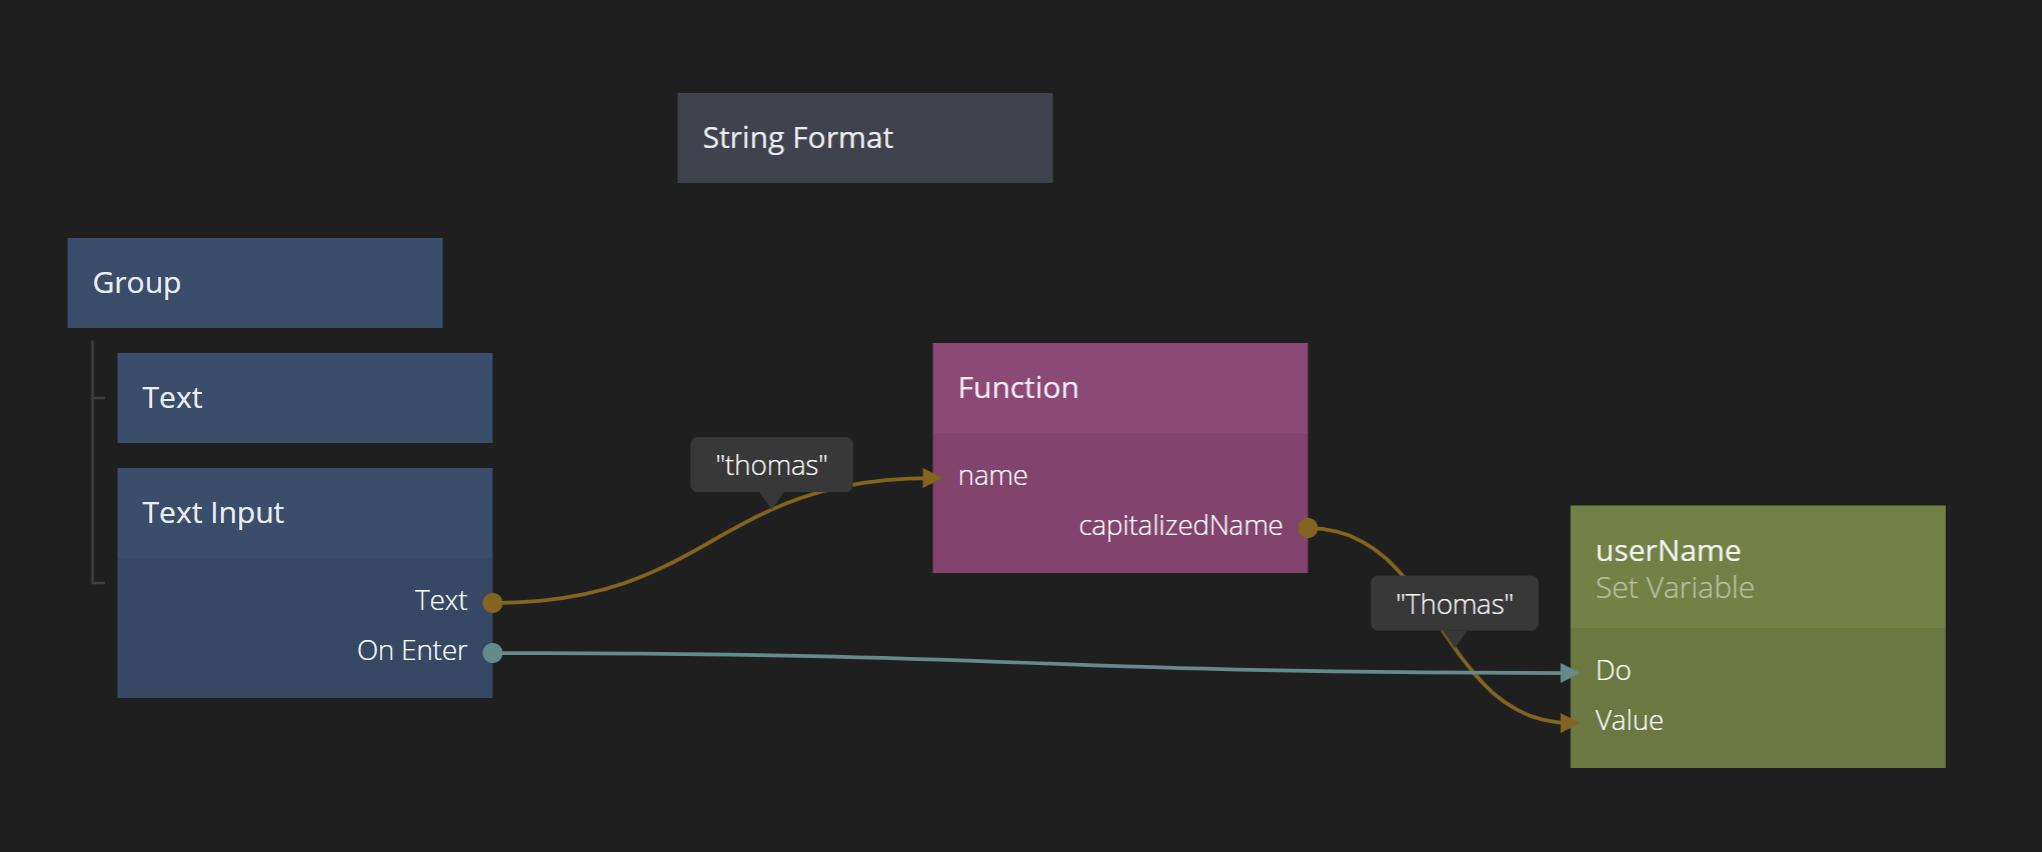
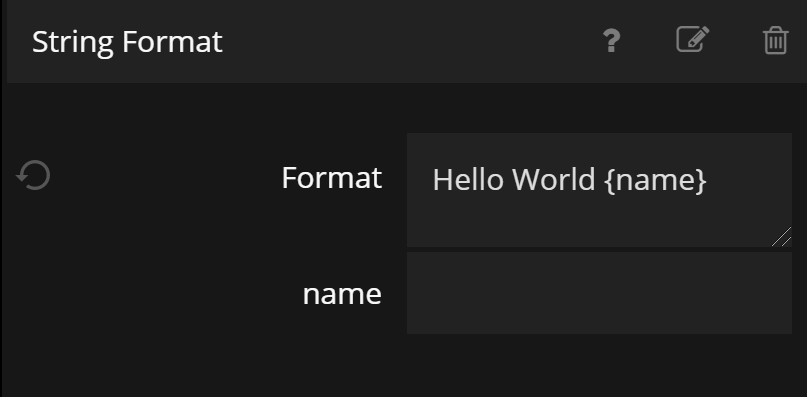
The String Format node now should have an input called name.
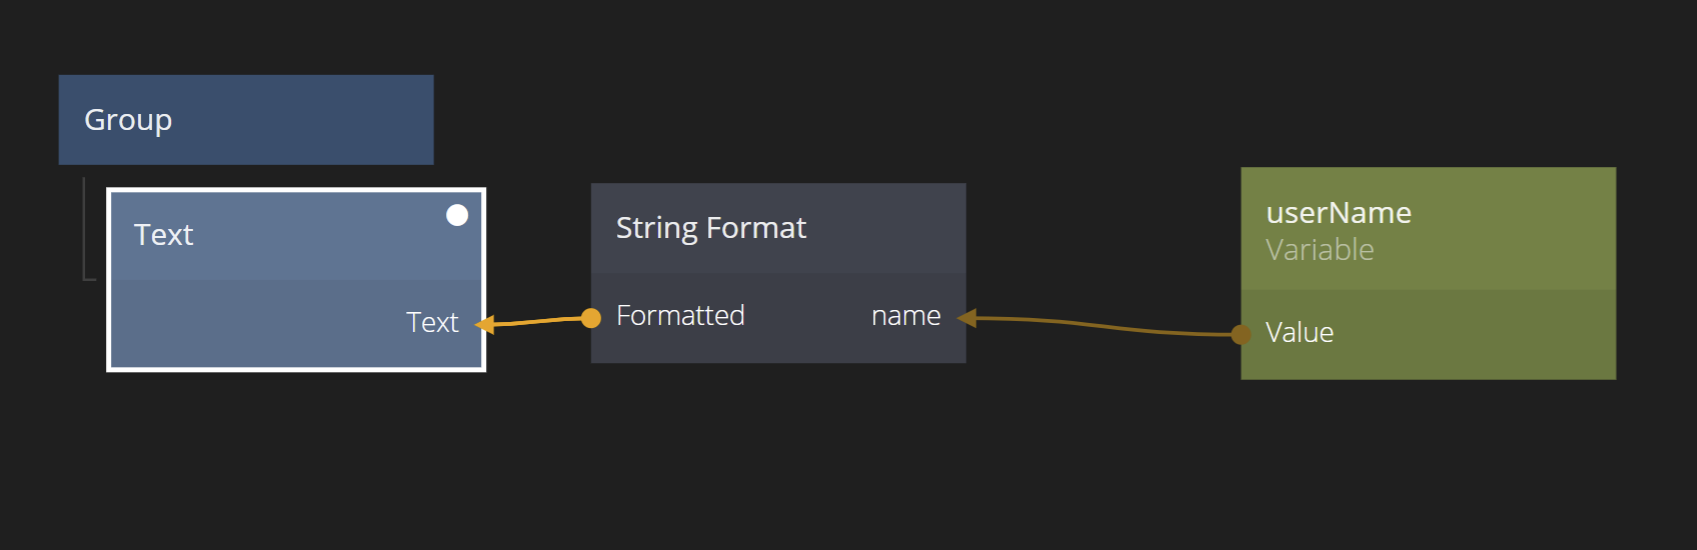
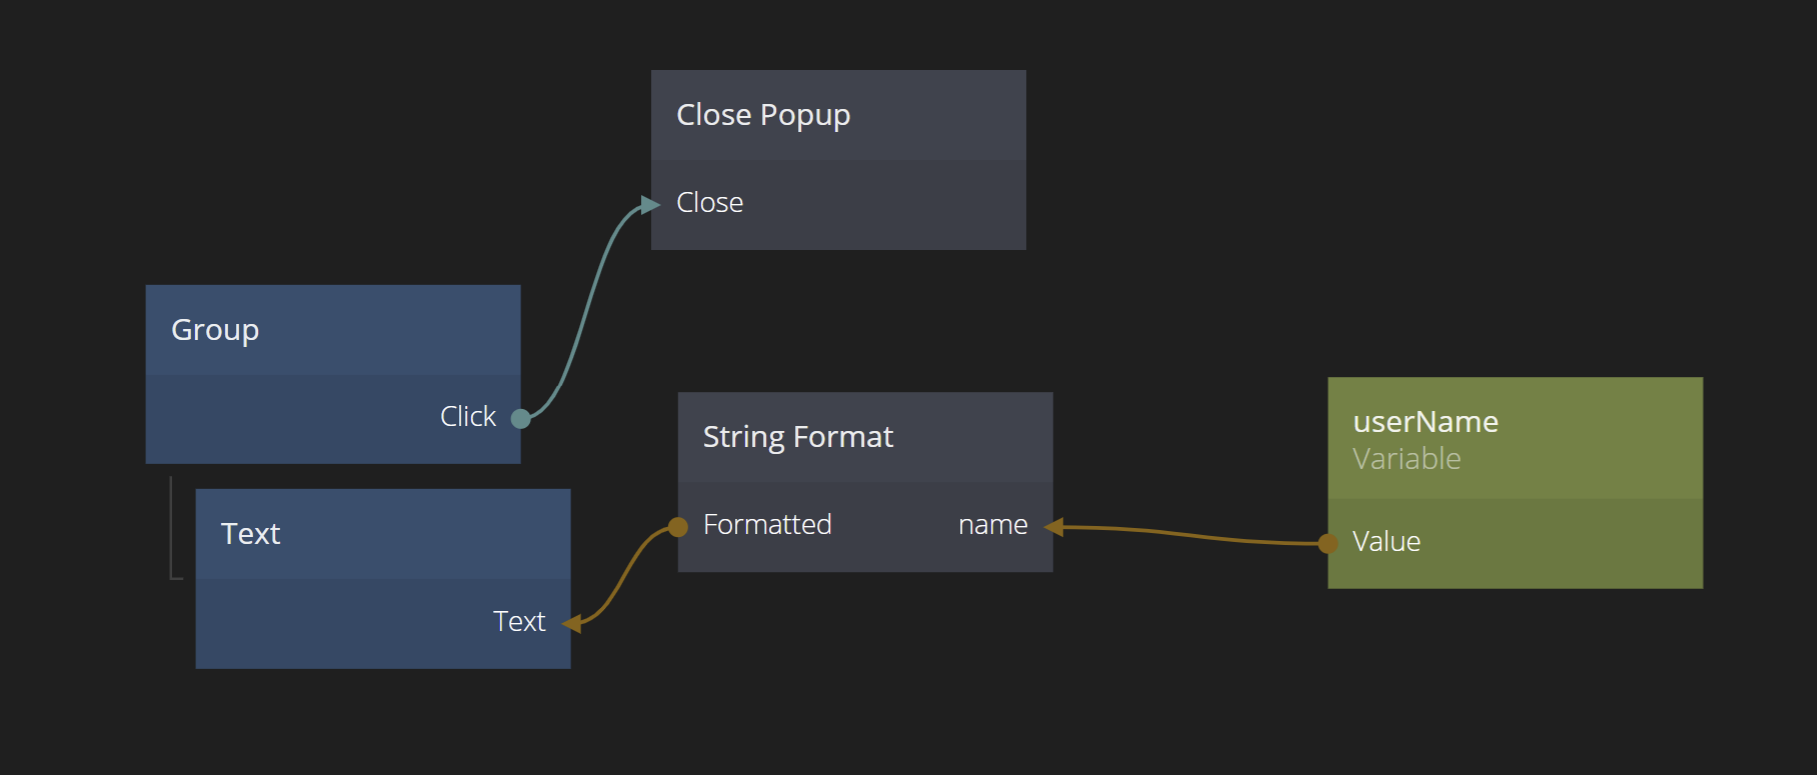
Create a Variable node. Make sure its' name is userName (it should pop up as a suggestion when you click the Name input in the panel), just as before. This Variable node will now refer to the same Variable as we were storing before.
Connect the Value output of the Variable to the name input of the String Format node. Finally, connect the Formatted output from the String Format node to the Text input on the Text node.

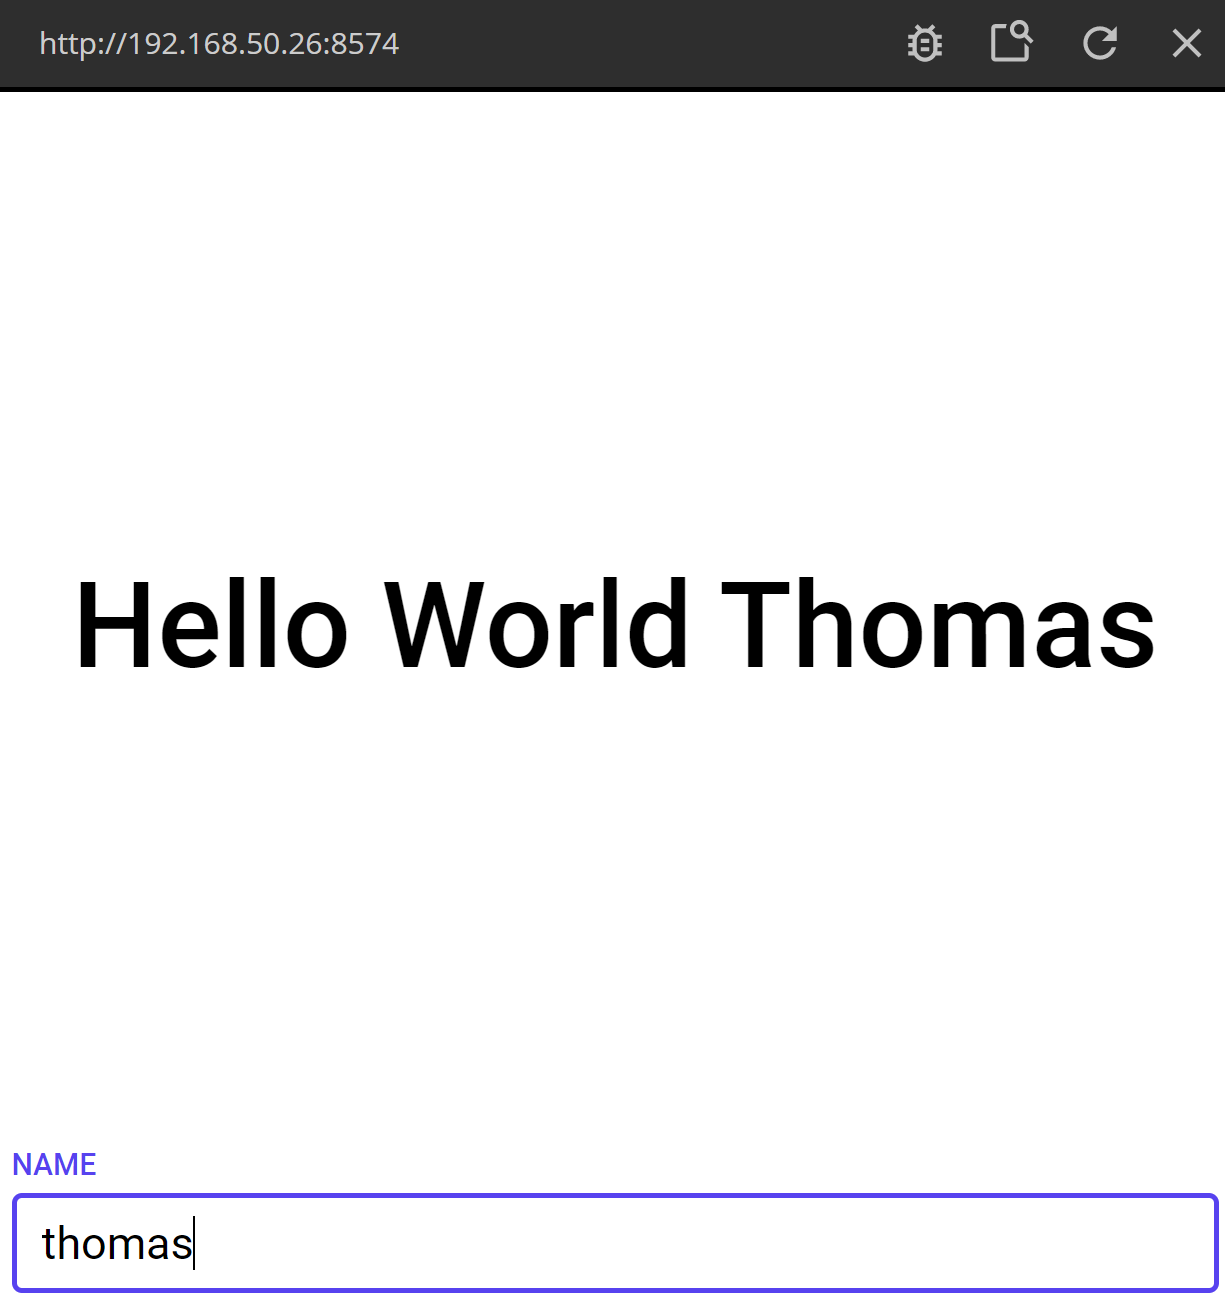
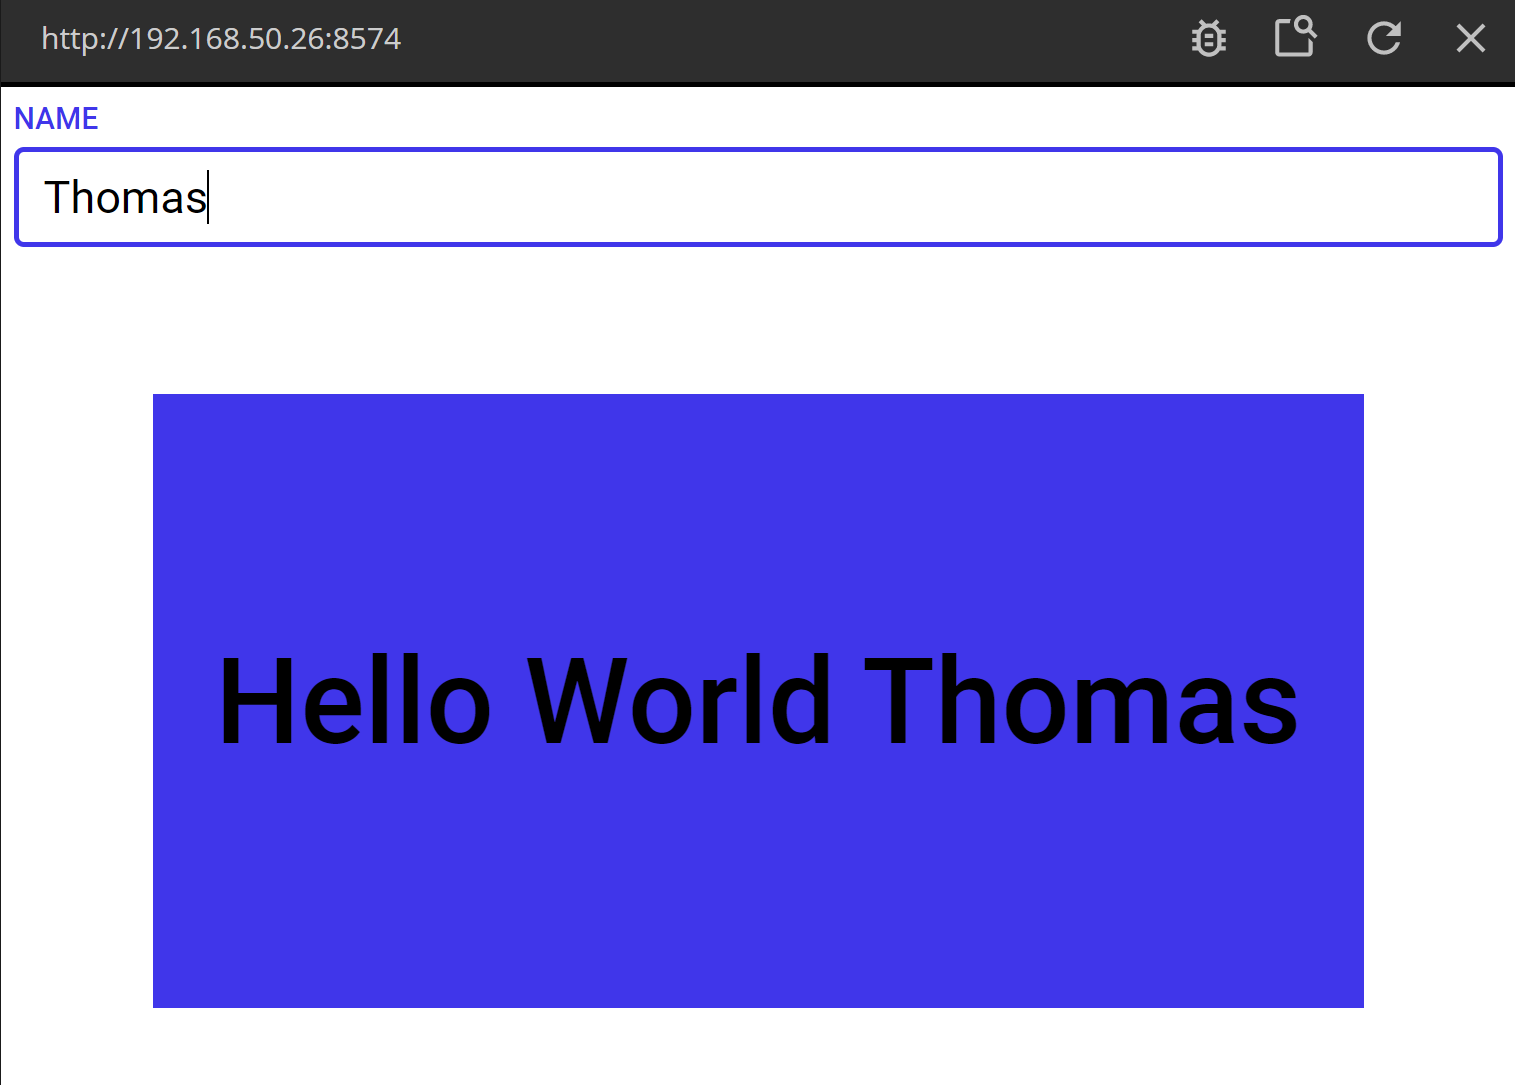
Now test your app. Start writing a name in the Text Input, press Enter and you should see the "Hello World"-text changing.
Accessing Variables Globally
Now let's change the structure a little. We will create a Popup and present the "Hello World" message in it only after the user have pressed Enter.
note
If you want to learn more about popups, take a look at the Popups guide.
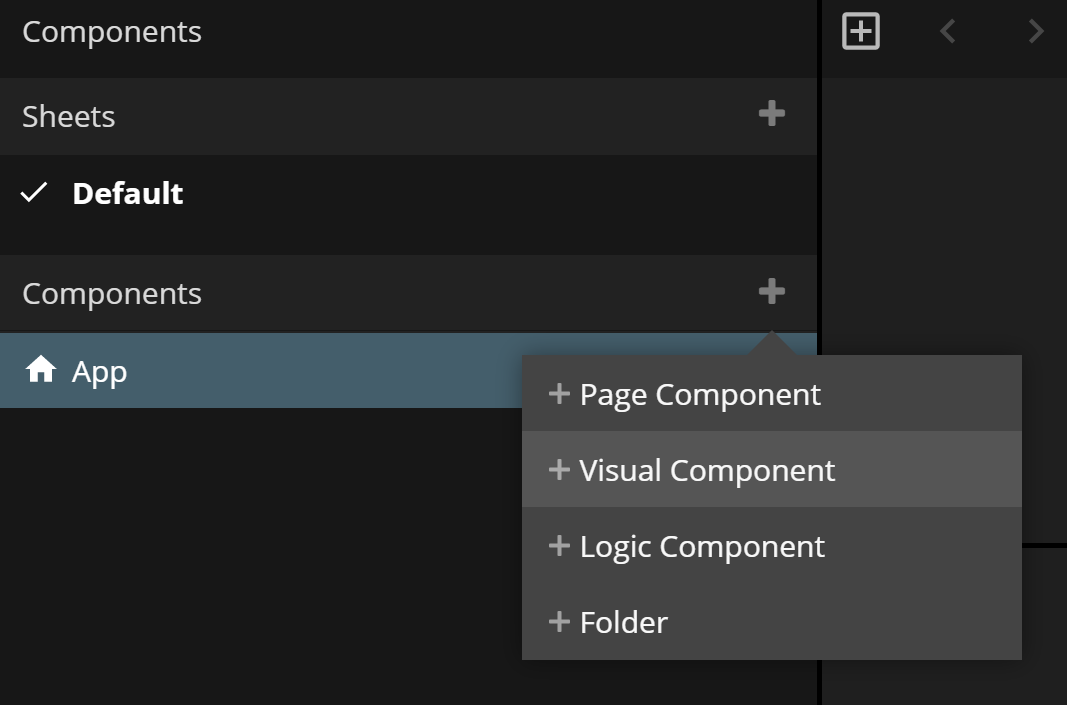
Start by creating a new visual component, call it "Hello Popup".
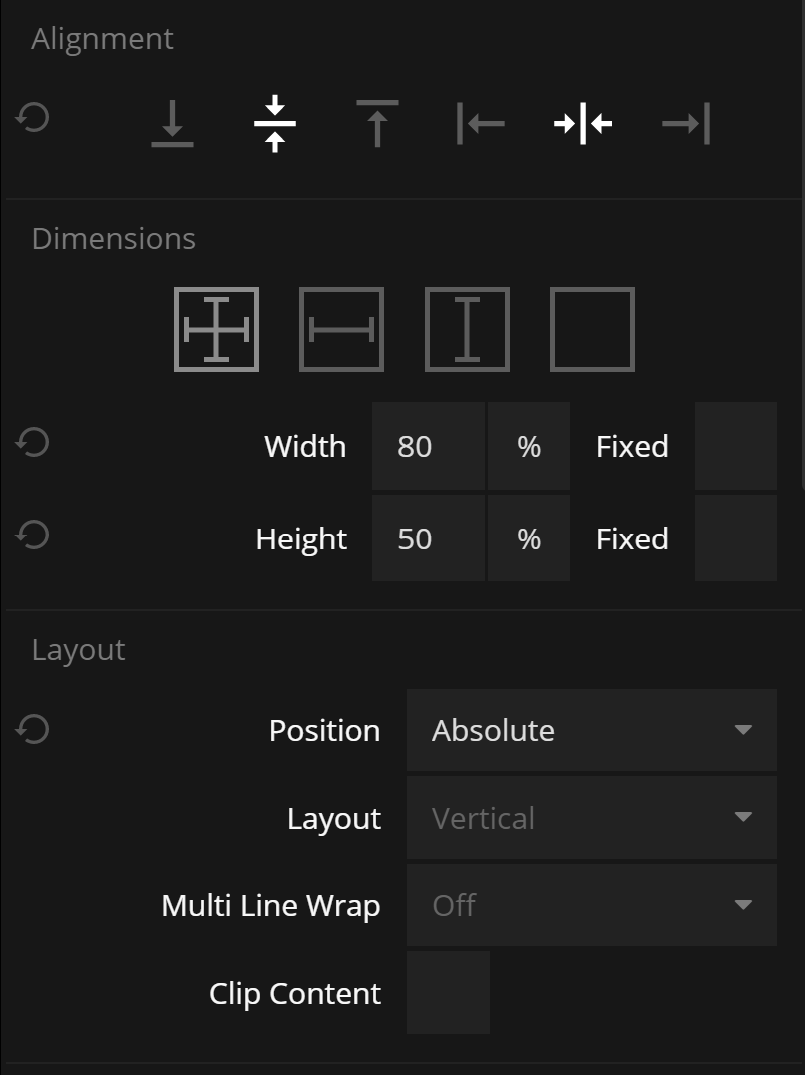
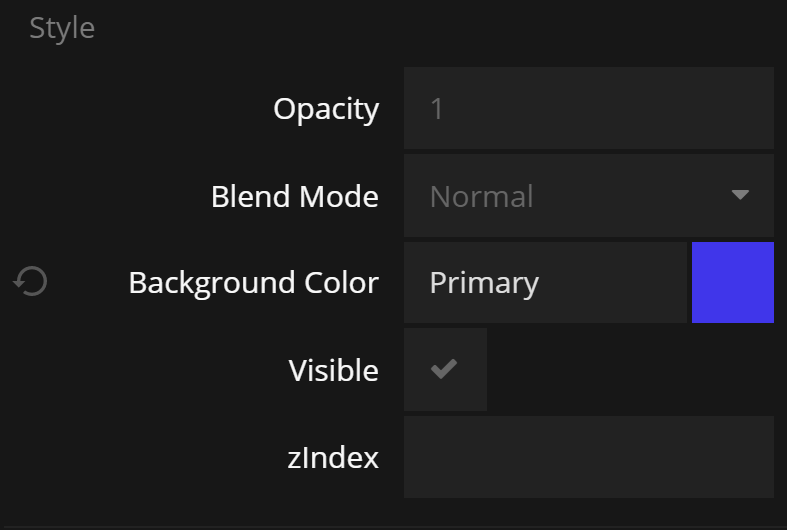
This will become our popup. In the new component. Change the size so it takes up 80% of the width and 50% of the height. Make it's layout "Absolute". Align it in the center. Also change the color to a nice color, perhaps blue.
Now, we want to move the Text node and the nodes feeding it with the text from the App component to the popup. Go back to the "App" component and selecte all nodes. Then copy them (Ctrl+C/Cmd+C). Go back to the "Hello Popup" component and paste the nodes.
Remove all nodes except the Text node, the String Format node and the Variable node. Then drag in the Text node so it becomes the only child of the Group node.
Then remove the same nodes from the "App" component.
We have now moved the "Hello World" text into a Popup. So let's open the Popup using the Show Popup node. Create the node and connect the Done signal from the Set Variable node to the Show signal on the Show Popup node.
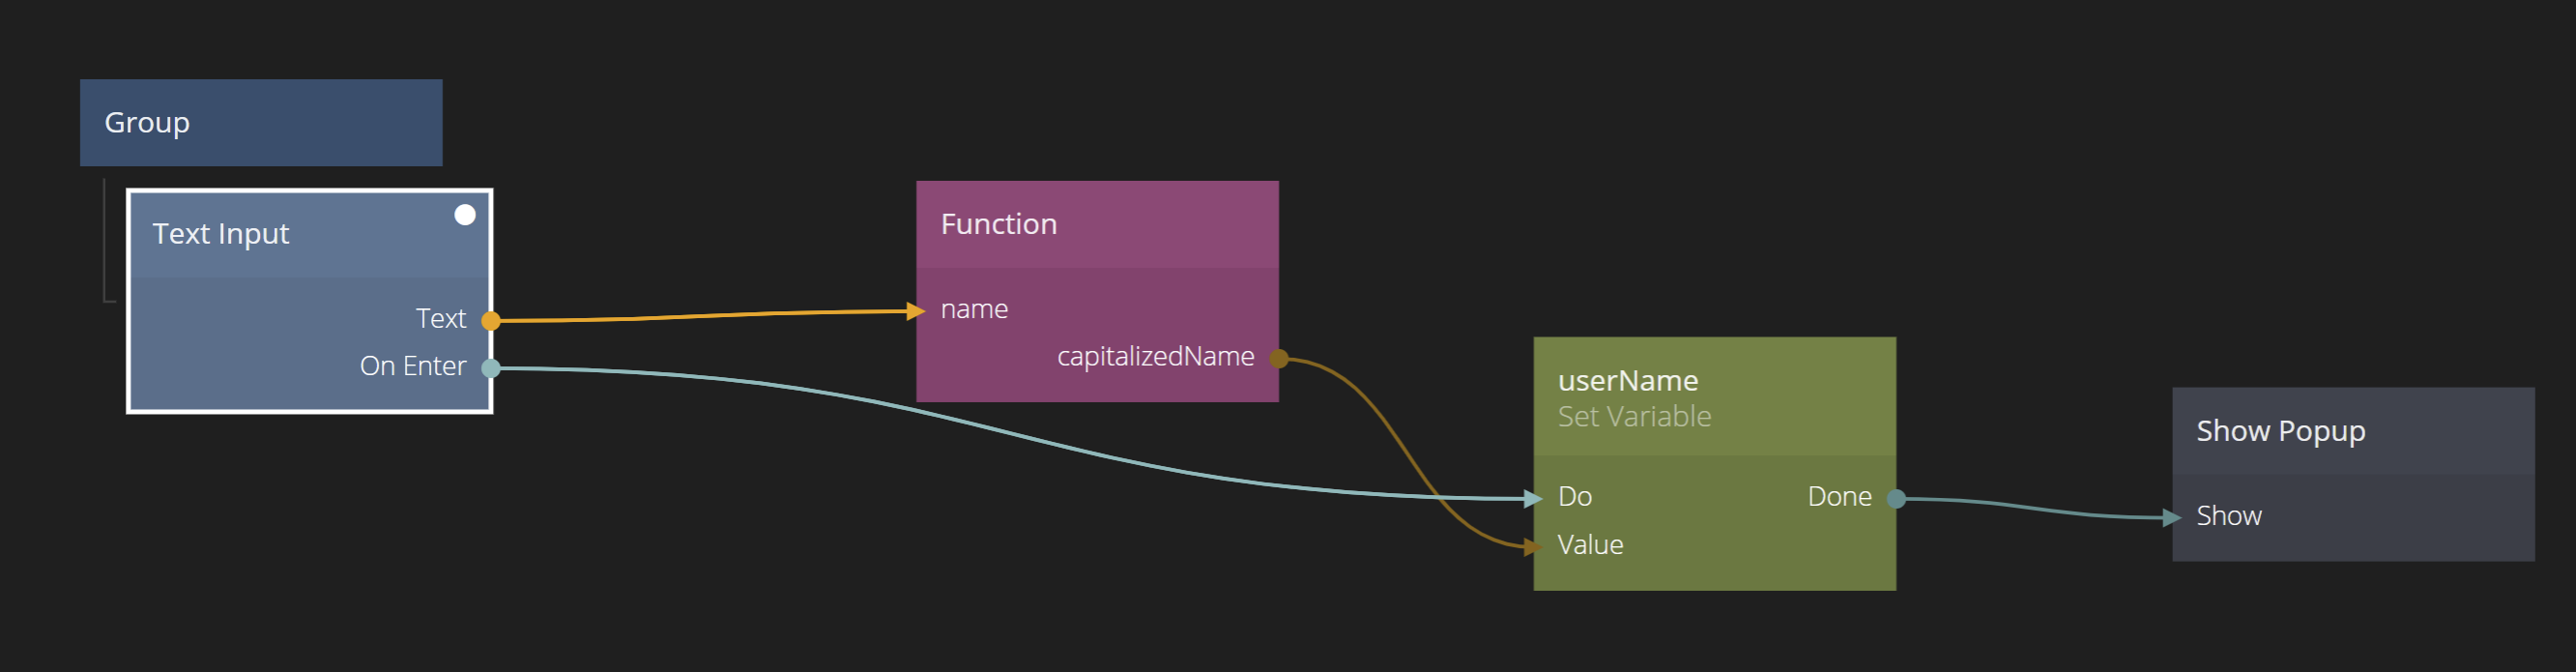
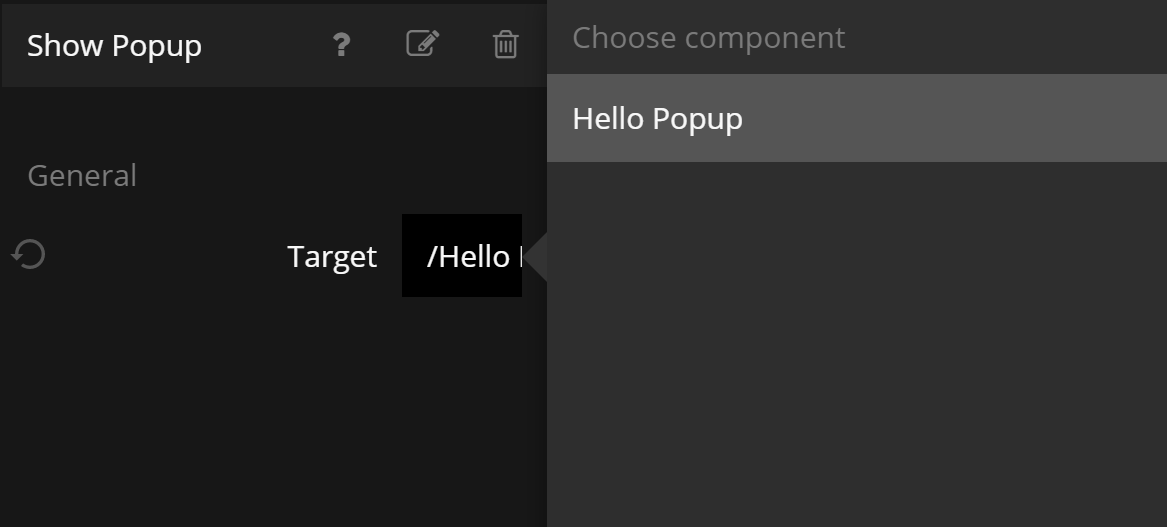
Also make sure the component that's being shown as a popup is the "Hello Popup".
To back up for a second; what we have done now is to set the Variable userName when the user hits Enter. When the Variable have been set (the Done signal) we open a Popup with a new component. The component access the same Variable and shows the "Hello Message".
Before trying it, we should probably make it possible to close the popup.
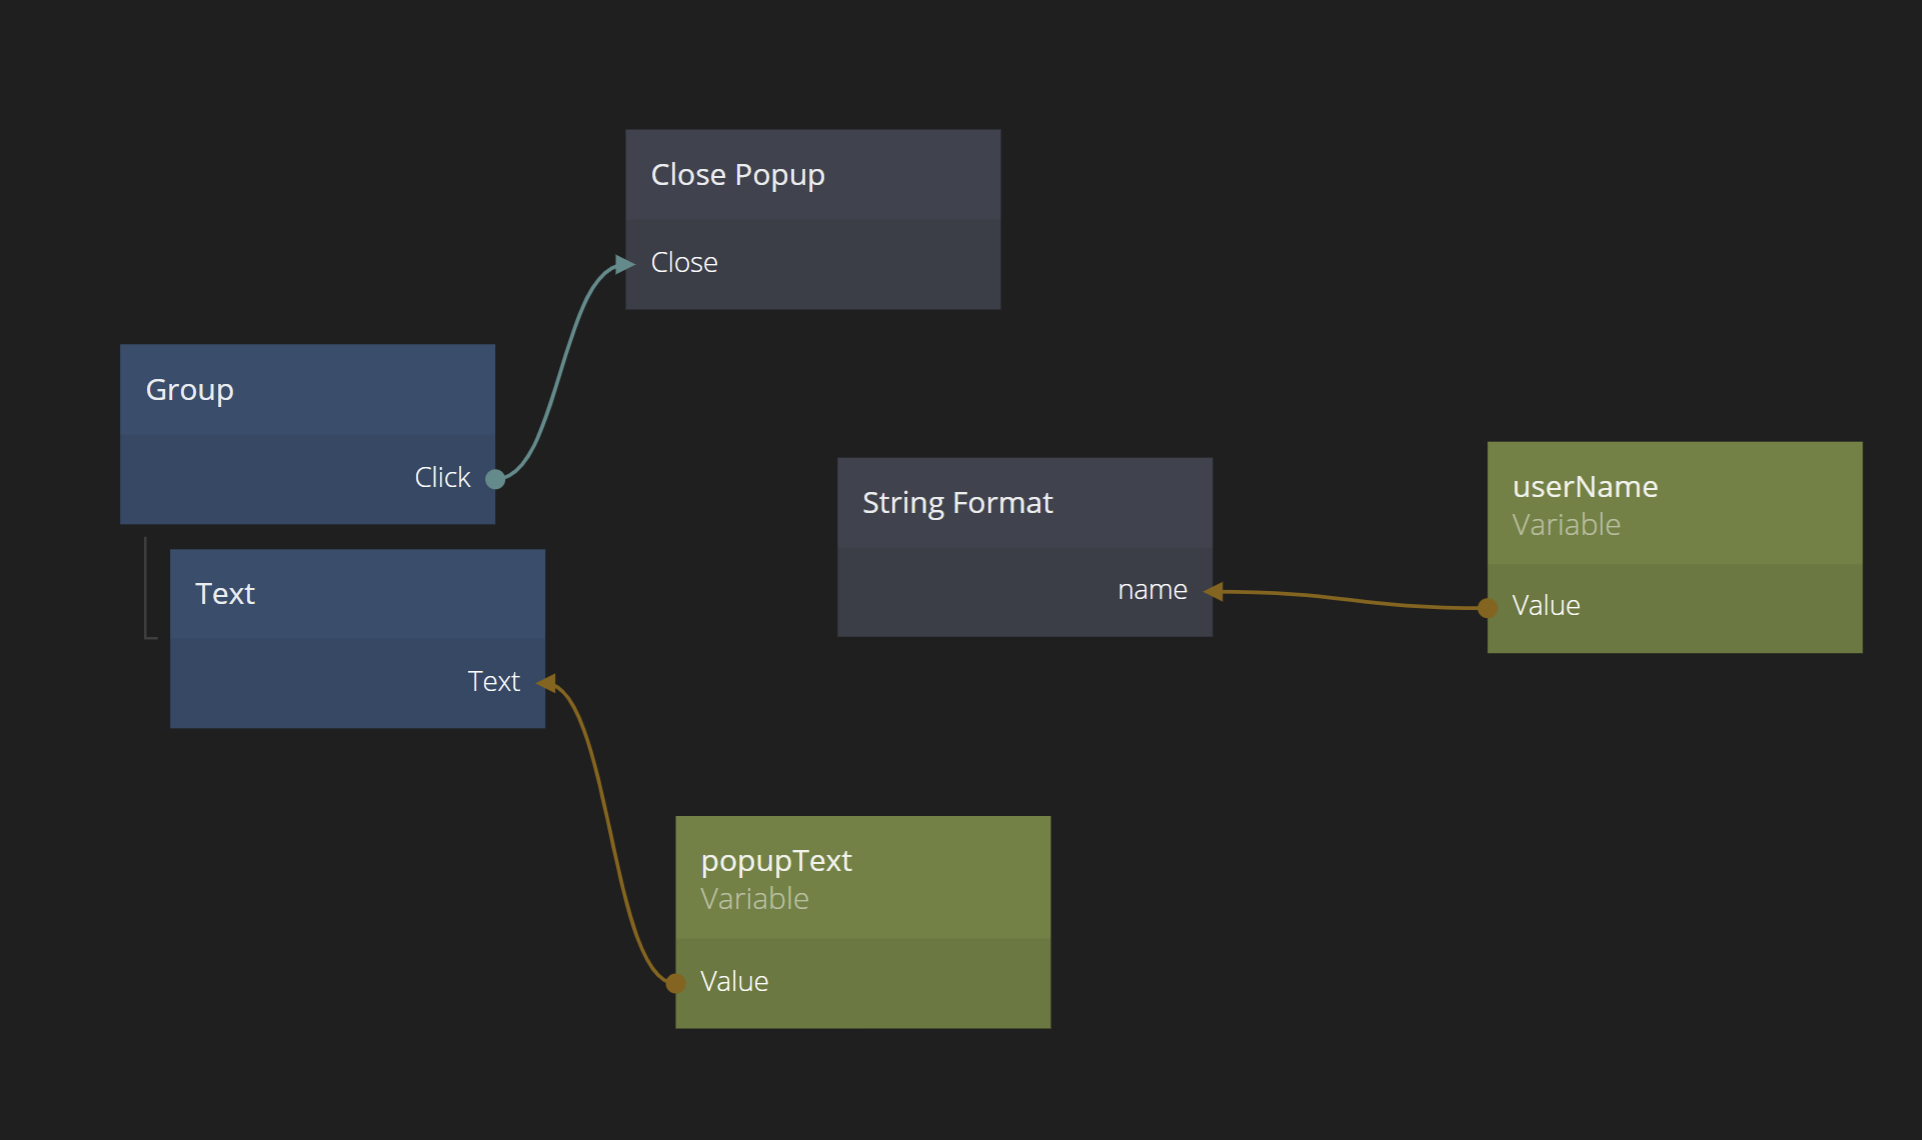
In the "Hello Popup" component. Add a Close Popup node and connect the Click signal from the parent group to the Close signal.
As you can see from this example, Variables are available in any component in your App.
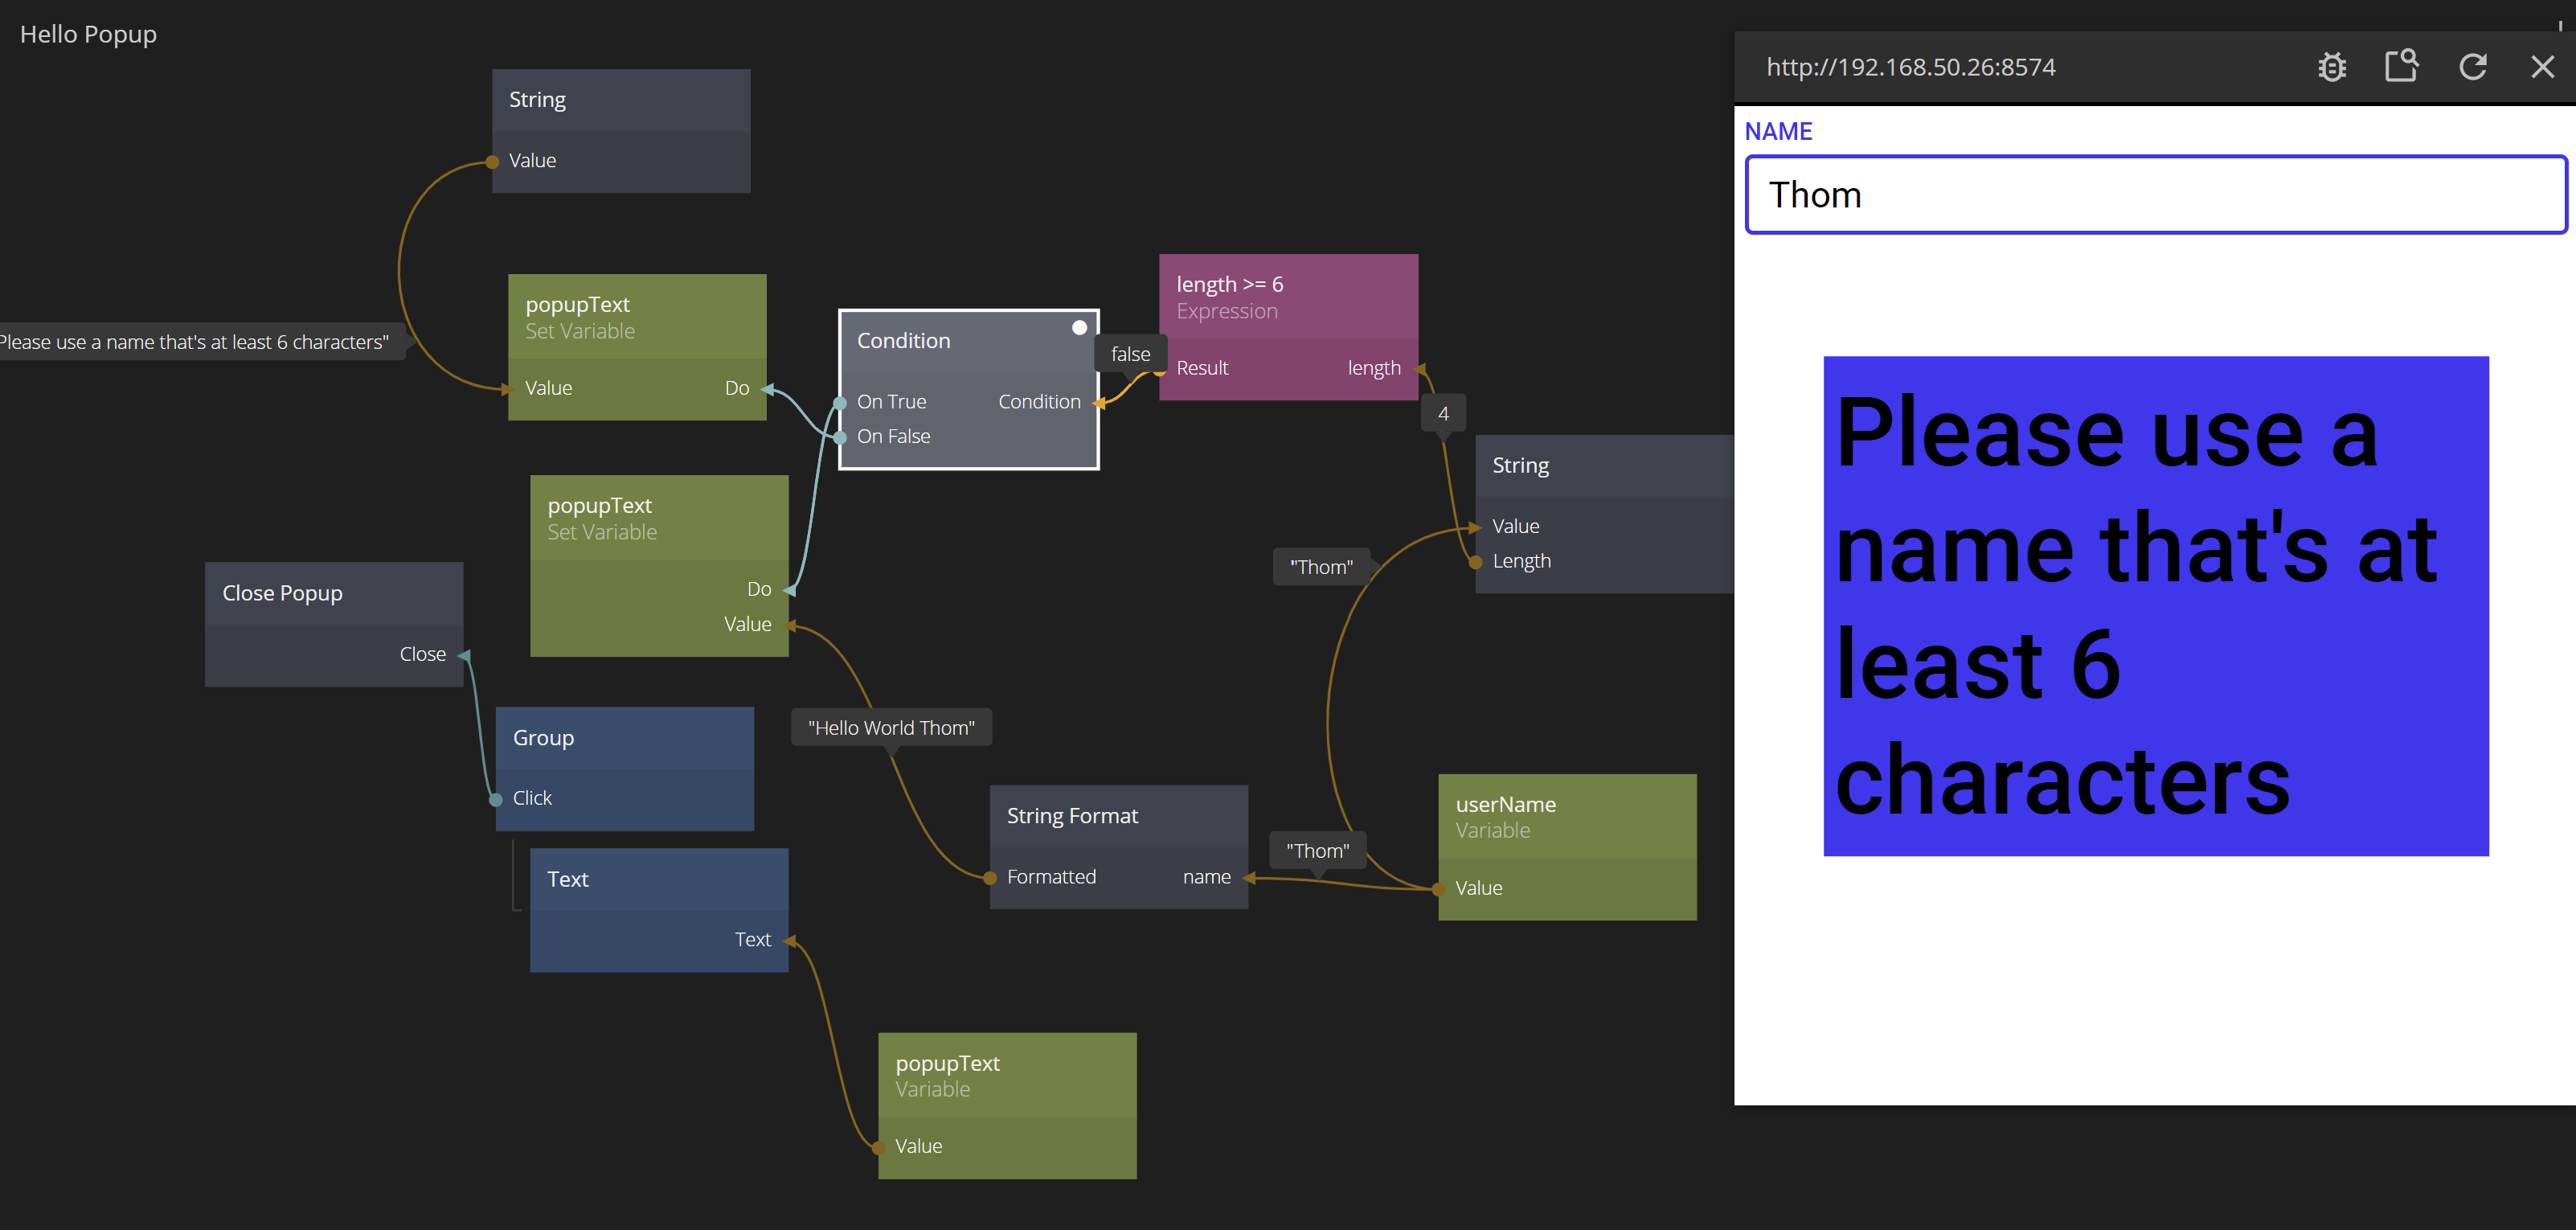
Using Variables with Conditions
A very useful way to use Variables is when you want your App to show different things depending on certain conditions. For example, if the user enters a name that's too short, you want the text to ask them to pick another name. Otherwise you want to show the Hello message.
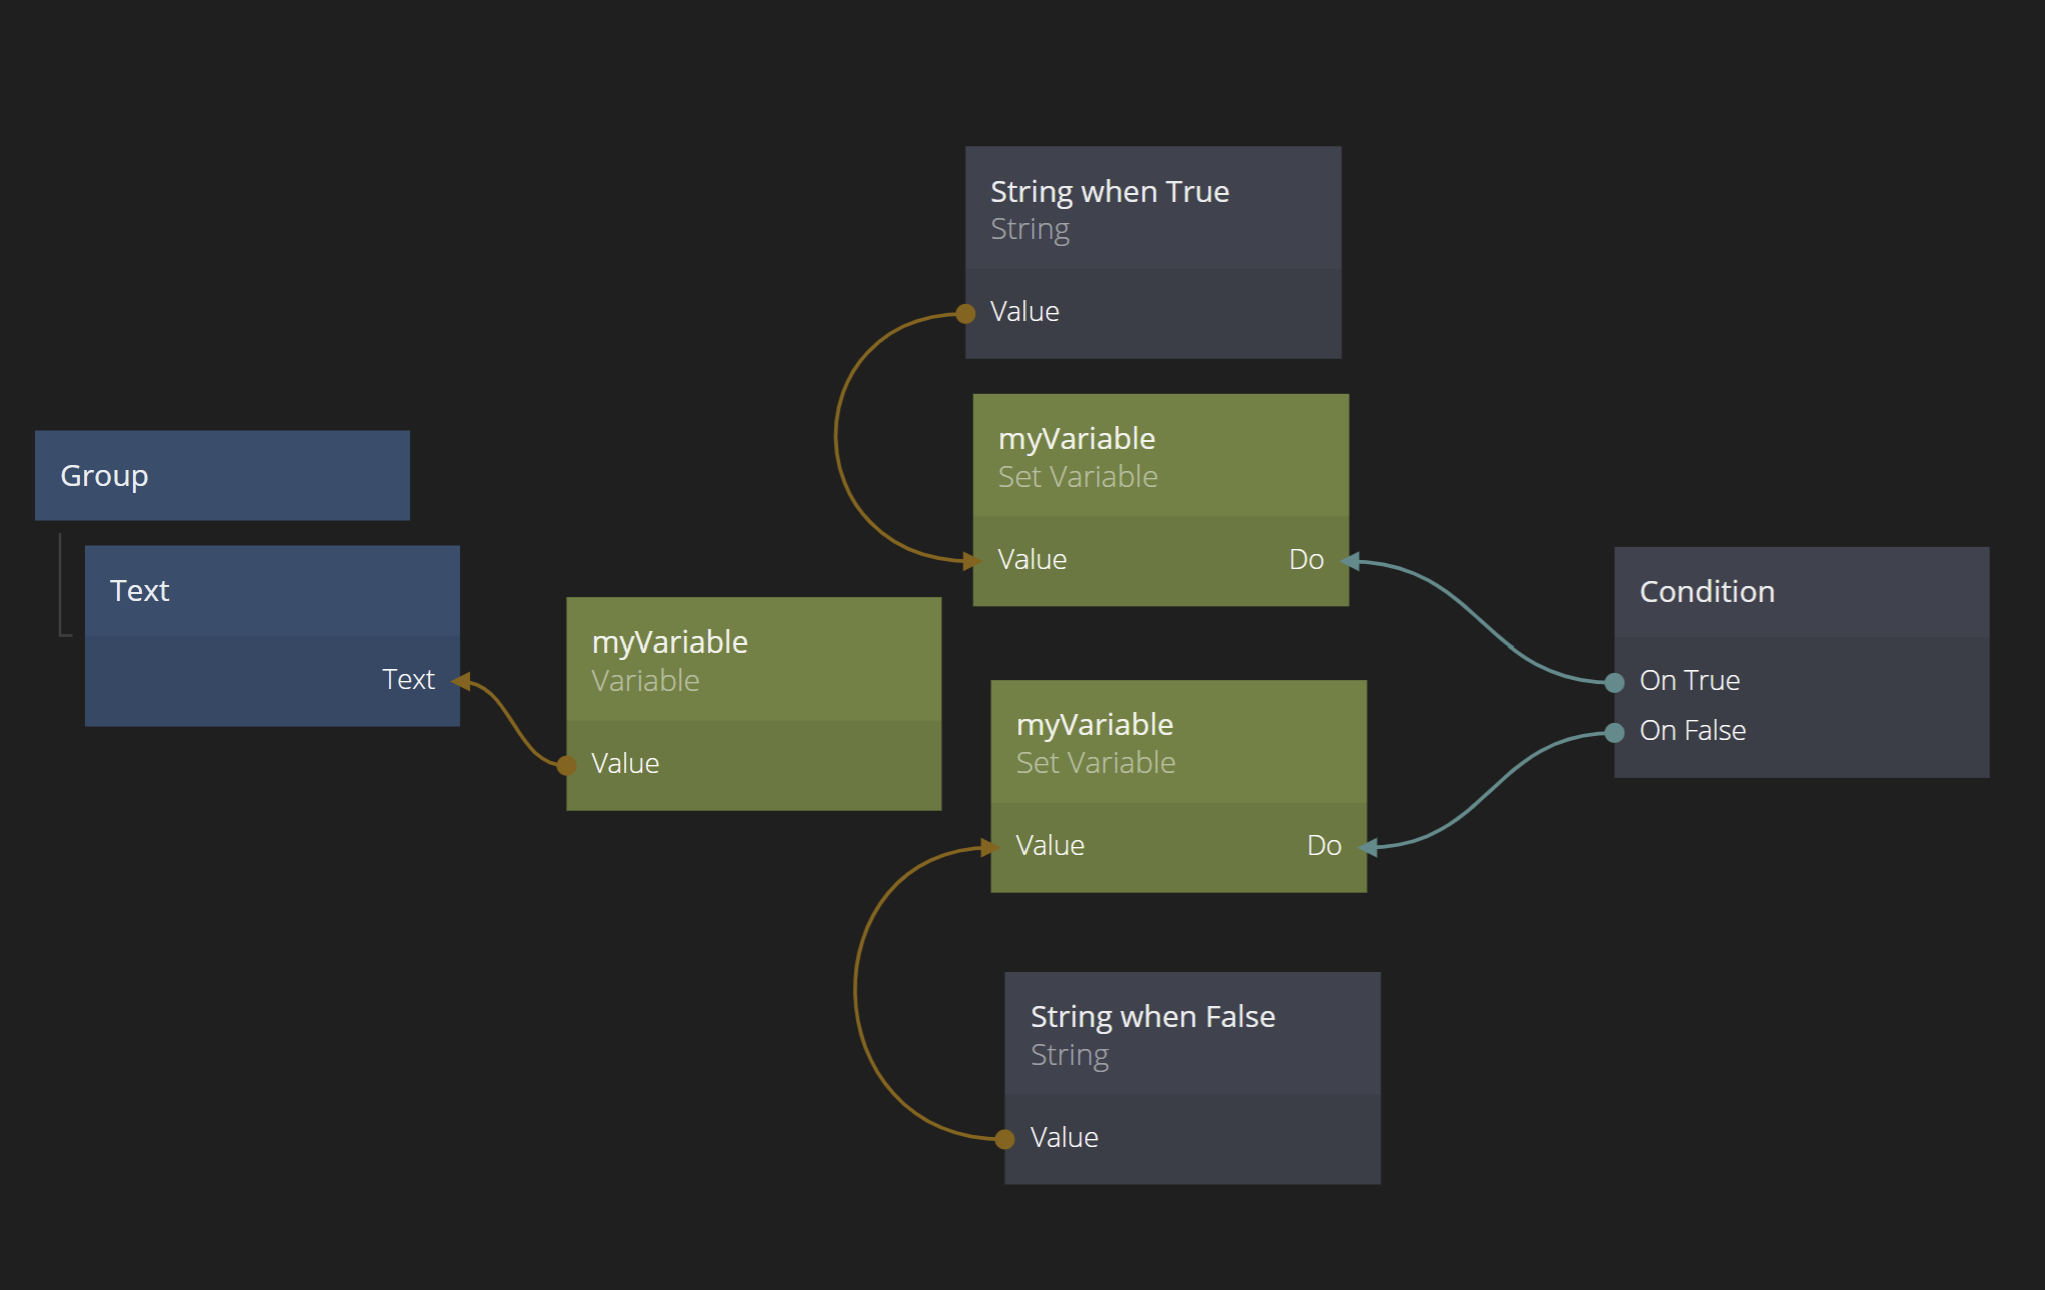
The general pattern is the following: Have a Variable that holds the final value to be used by a component (in this case a text to be shown by a Text node). Then use a Condition to trigger two different Set Variable nodes, depending on the condition. The pattern is outlined below.
So let's try it on our example. We want to check for the case when the user name is less than 6 characters and ask the user to enter a new and longer name.
So using the pattern above we introduce a new Variable in the "Hello Popup". Let's call it popupText. We connect its value to the text node and remove the old connection.
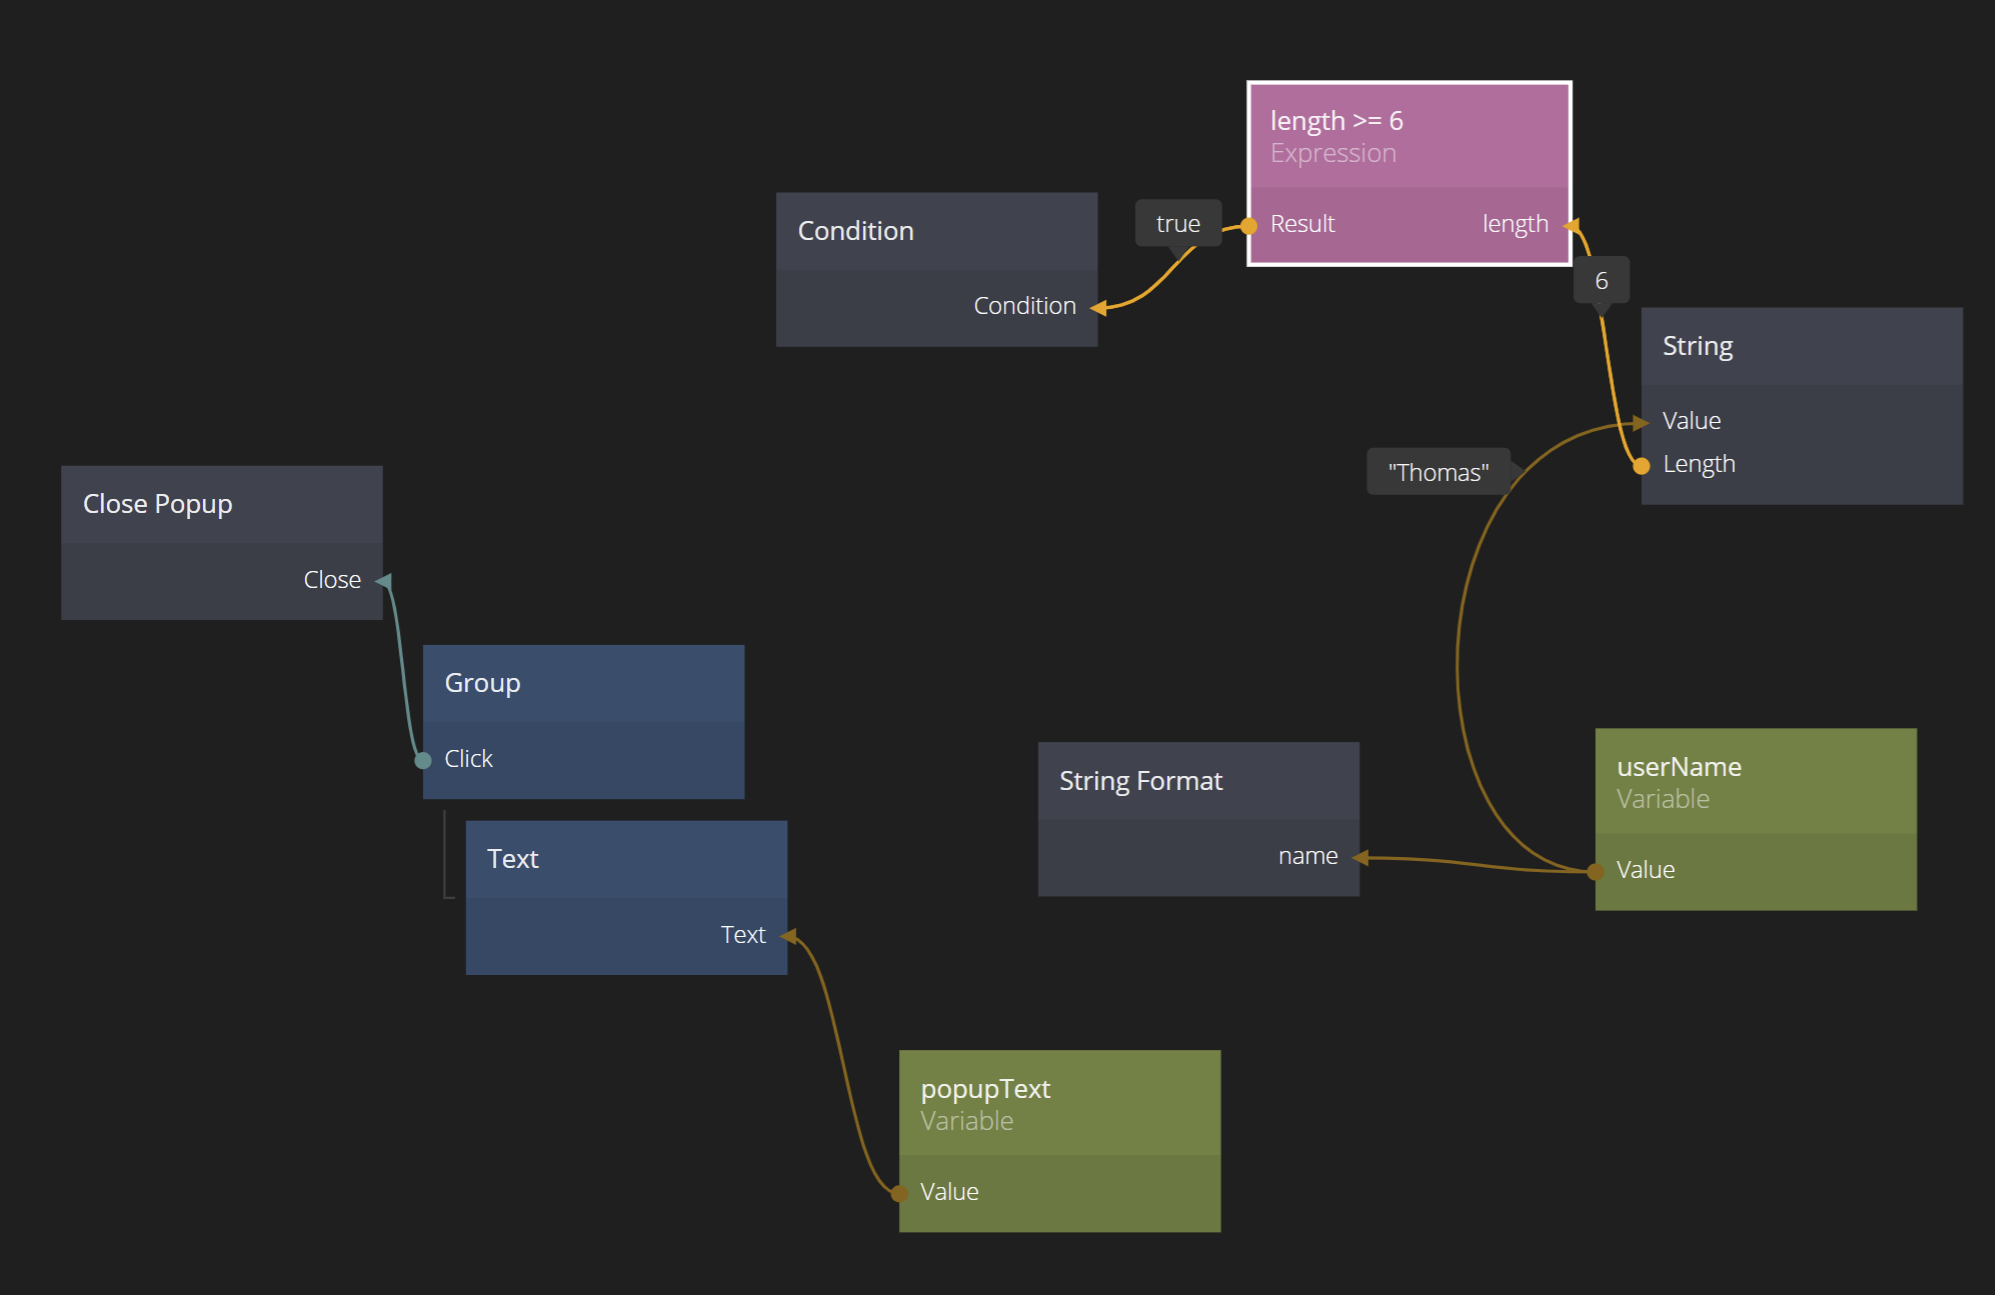
Now we need to check the length of the provided name. This is easy using a combination of a String node, an Expression node and a Condition node.
Connect the value output from the Variable userName to the a String node. There is an output from the String called Length which holds the length (i.e. number of characters) of the string.
Then create an Expression node. We want to check that the length of the name is 6 characters or more. So edit the expression and write
length >= 6
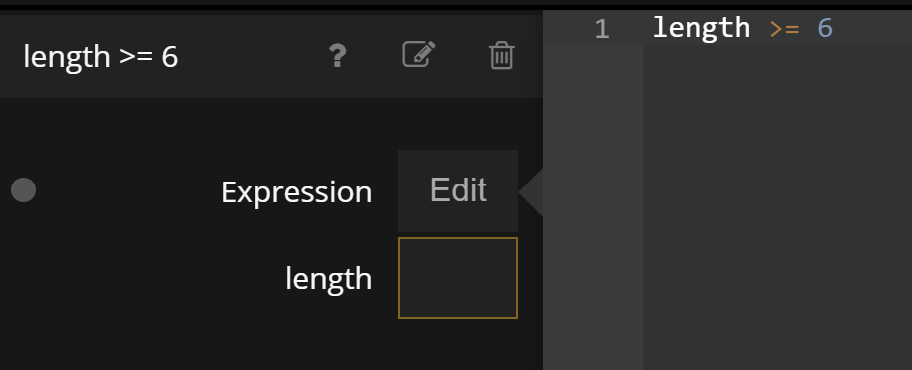
The expression node should now have an input called length. Connect the Length output from the String node to that input.
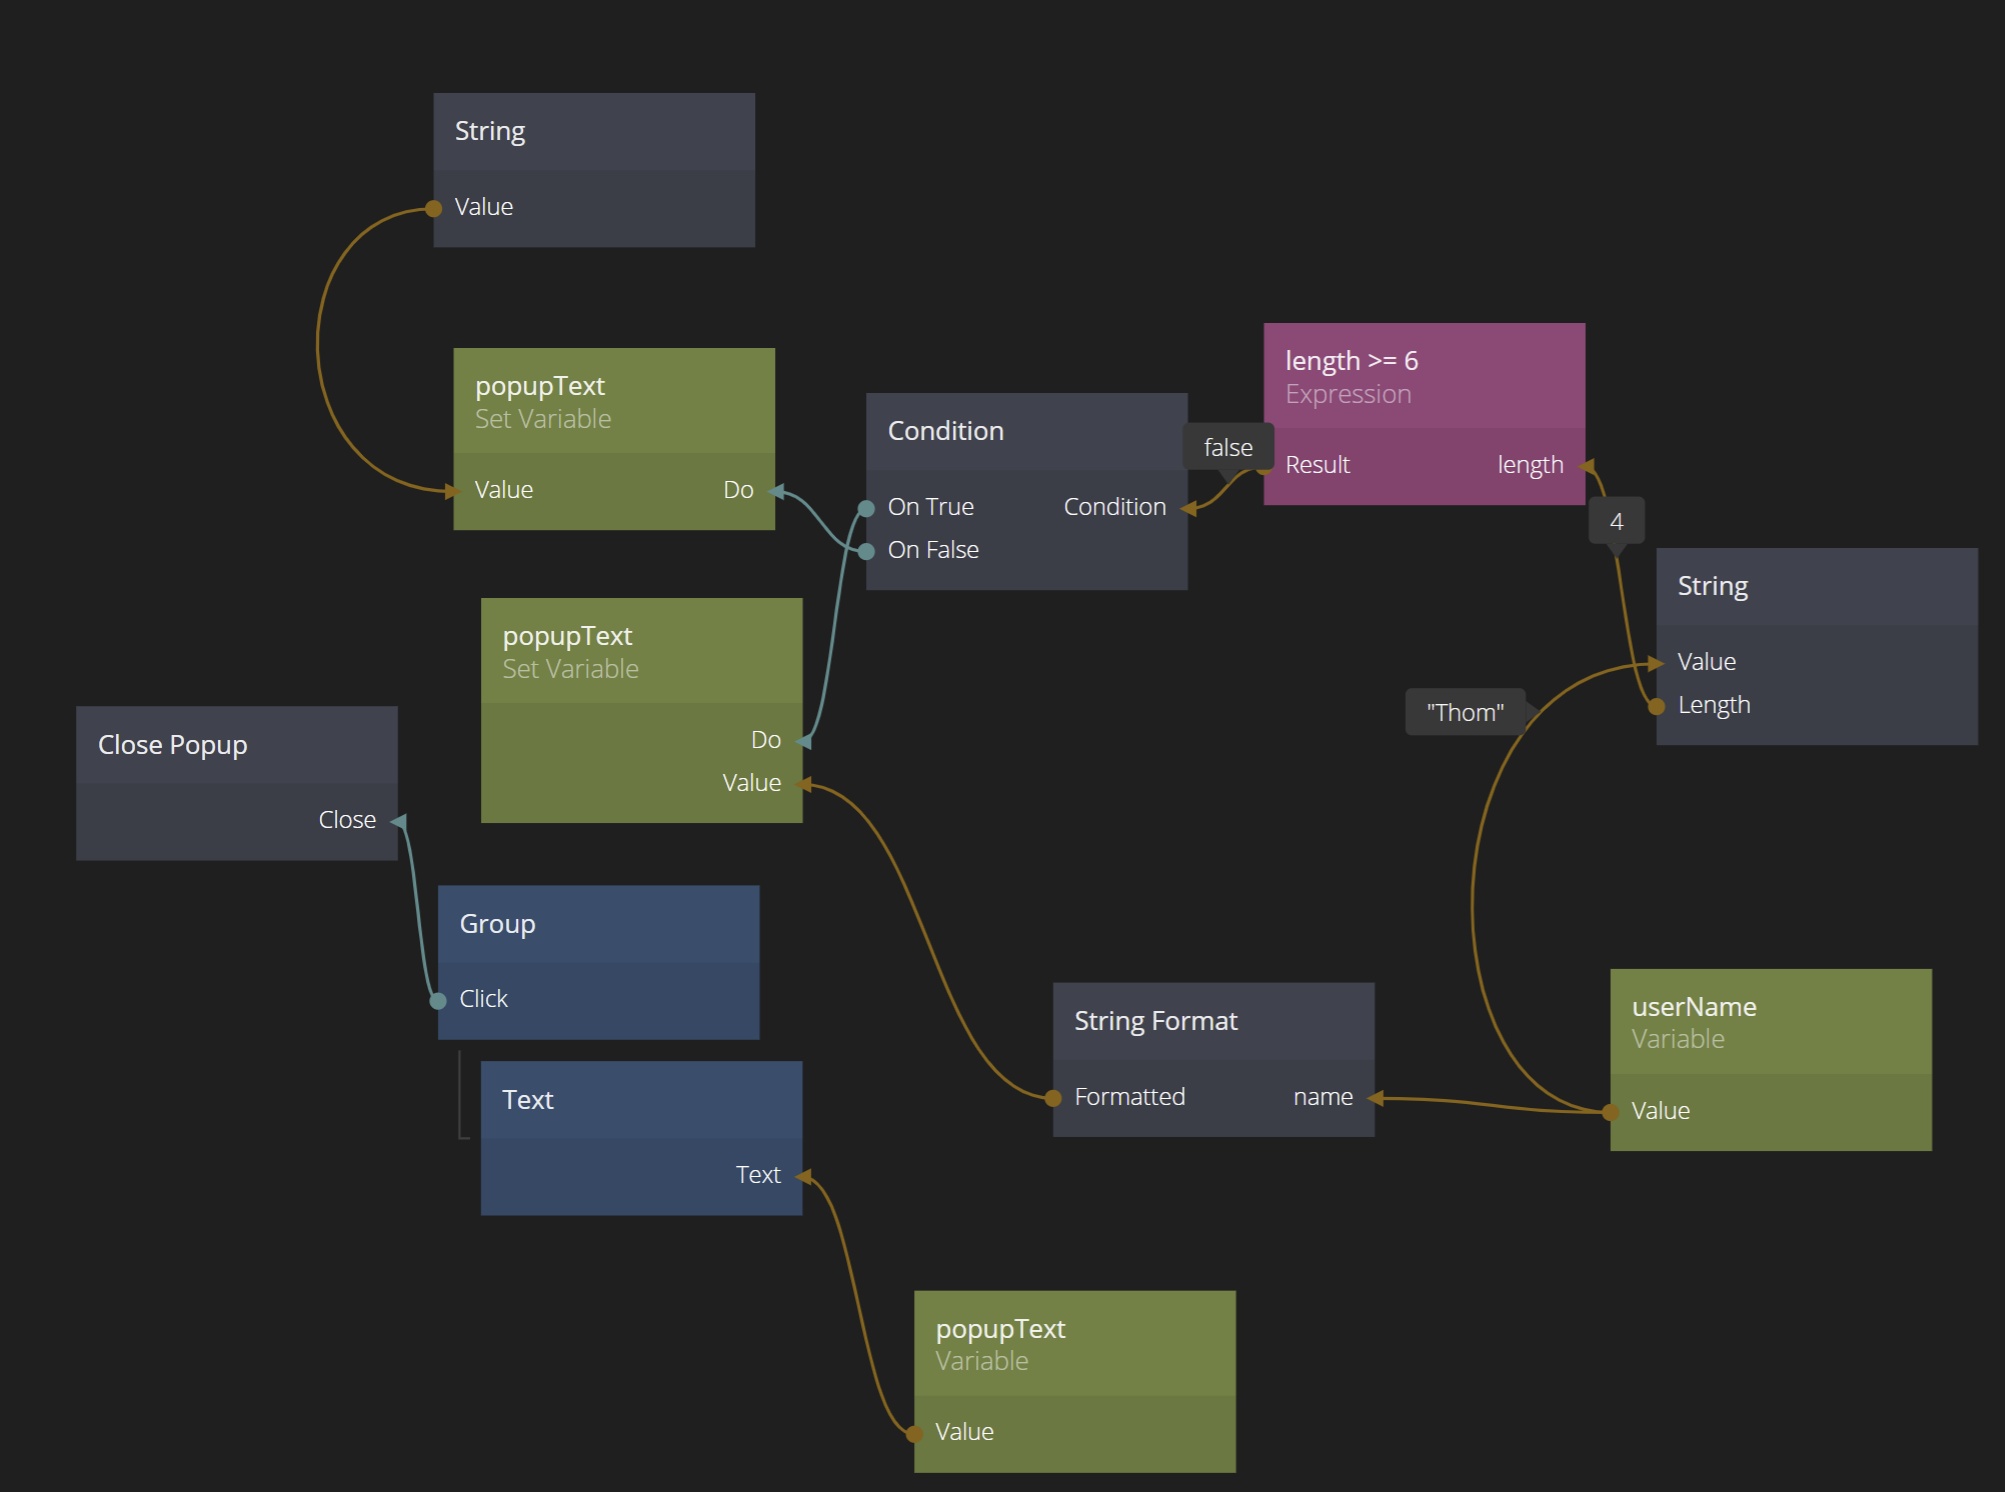
Finally connect the Result output to the Condition input of a Condition node.
The Condition node has two signal outputs, on True and on False. We will use these signals to either set the previous "Hello World" string, or the warning string about the too short name. Let's set it up using a String node with a predefined error string and the Set Variable nodes we used before.
Try it out with a few different names and see that it works. You may have to tweak the layout of the text to make it look nicer.
You can import the whole project in Noodl by clicking import below.