External Data
What you will learn in this guide
So far we have been working exclusively with local data, often coming from a Static Array. This is great for building prototypes and getting started quickly but in real life we will need to integrate with external data. This guide shows you how to do that using REST APIs, the most common type of APIs for web applications.
Airtable
For this guide we are going to use the Airtable REST API to read and write to an Airtable table. This guide assumes that you know a little bit about REST APIs, and to follow along you need to create an account for Airtable. You can read more about the Airtable REST API here. Most REST APIs work in similar ways so the knowledge gained here should be applicable on most other APIs.
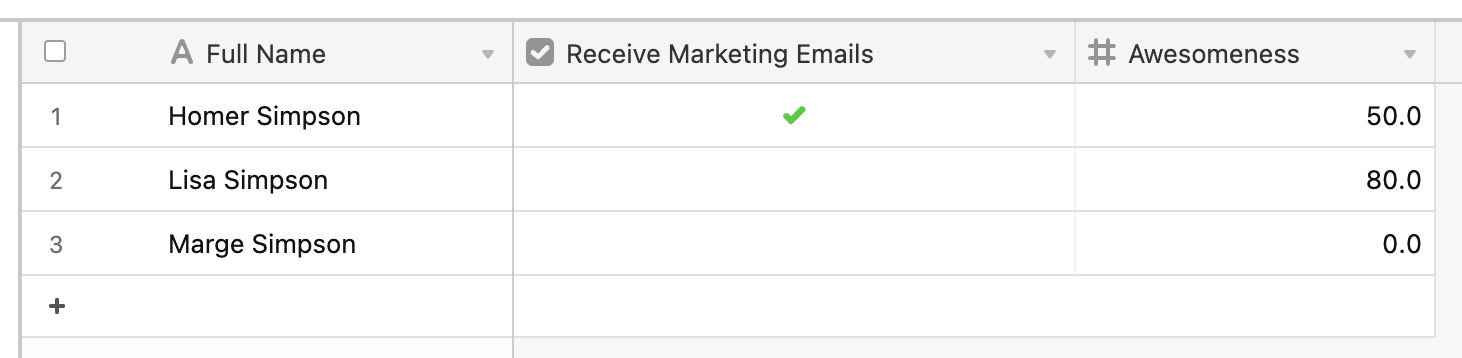
In this guide we are going to extend the CRUD example from the UI Controls and data guide by connecting it to an Airtable table to create, update, read and delete records. To do this I have create a new airtable base and added a table called Members, I have also created three fields corresponding to the member object of the guide.
- Full Name, a string that contain the name of the member.
- Receive Marketing Emails, a checkbox (boolean) that indicated if the member should receive marketing emails
- Awesomeness, a number between 0 and 100 indicating the general awesomeness of the member
There is a nice documentation for the different Airtable REST API operations that you can perform on a table, but we will review them briefly here before we use them.
Let's get started. We are going to start where we left off in the UI Controls and data guide, if you don't have ready you can import the finished components here.
The REST node
To do REST API calls we are going to use the built in REST node. First the let's go over some of the properties that are important to know about:
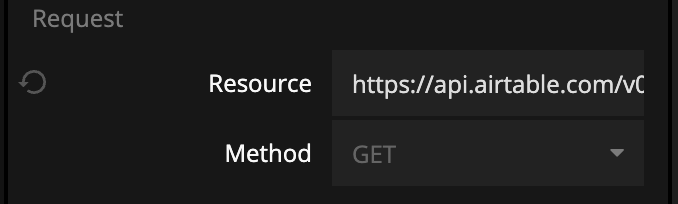
- Resources this is the REST API endpoint and resource, i.e. the URI that will be requested.
- Method is the HTTP method that will be used, it can be any of GET, POST, PUT, DELETE, PATCH
Once you have specified the resource as well as the method there are two small scripts that you will need to use to the first script prepares the request before it is sent, and the second script parses the response.
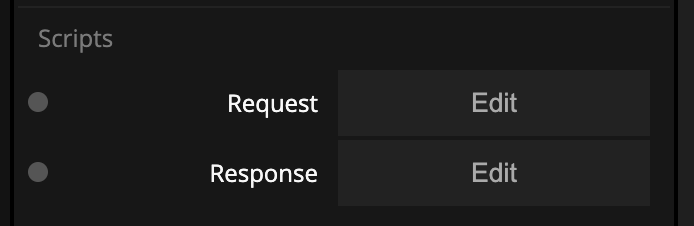
First, let's take a look at the request script. Using this script you will prepare the request, this is done be modifying the Request object. You can change the resource (the URI) and the method from before.
Request.resource = "https://example.org"
Request.method = "POST"
You can also modify the HTTP headers.
Request.headers['authorization'] = "shhh it's a secret"
The Reuqest.parameters object can be used to set query parameters for the URI. The script below would add ?search=find-this to the URI before the request is made.
Request.parameters['search'] = "find-this"
Finally you can modify the Reuqest.content object. This should be a JSON compatible object that is sent if the method is PUT, POST or PATCH. As in many scripts in Noodl you can use the Inputs object to specify any custom inputs you would like for the node.
Request.content = {
    something:Inputs.MyInput
}
The script above will create a custom input called MyInput on the Rest node. Any value connected to that input will be available in the request script using Inputs.MyInput and in the script above it is used as part of the request content.
Second, we have the response script. This script will take the reponse from the REST API call (if it is successful), parse it and expose it as custom outputs on the REST node. You have two important objects Response.status which will contain the HTTP status of the response, and Response.content which will contain the content parsed as JSON. Just like the request script used the Inputs object to create custom inputs, this script can also use the Ouputs object to create custom outputs to expose the response. Let's take a look at a way to use this with the Airtable API.
This is a brief introduction to how the REST node works. You can read more in the reference documentation for the REST node. Now let's continue with connecting the CRUD example to Airtable using the REST node.
Listing all members
First we're going to use a REST node to list all members from our Airtable table and put in the Array node we use to store members. To do this we need to perform the following REST API call (you need to replace the id of the Airtable base with your own, and make sure your table is called Members).
GET https://api.airtable.com/v0/appGx6whFNzxu54eP/Members
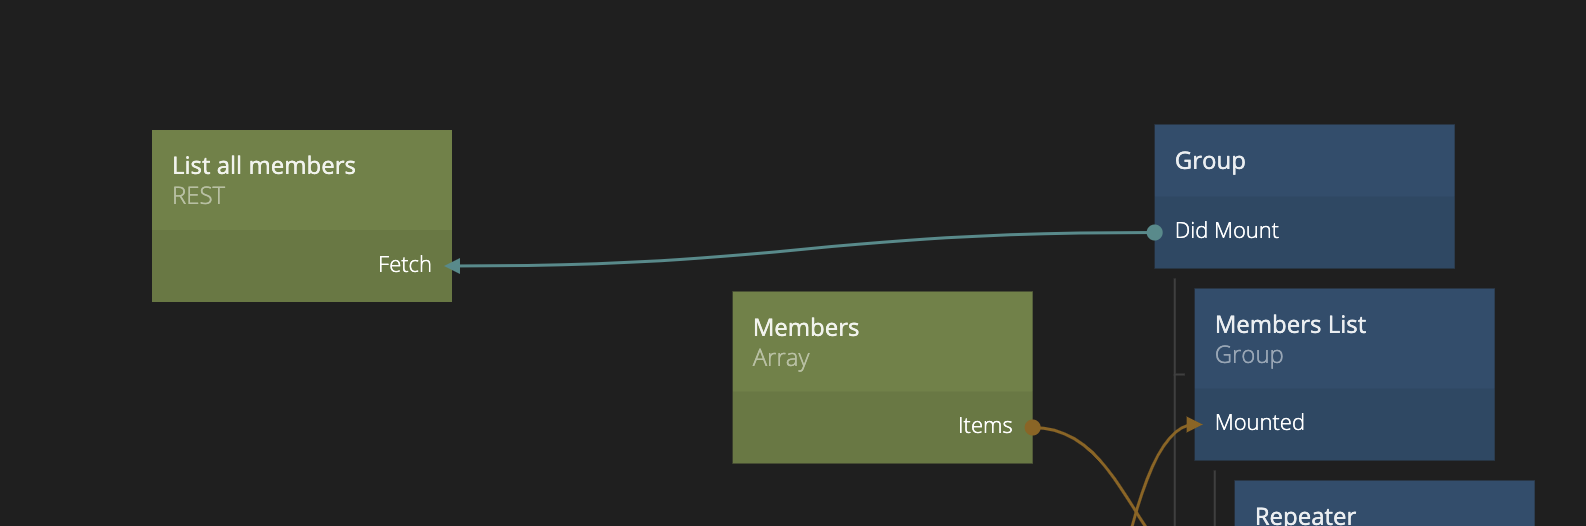
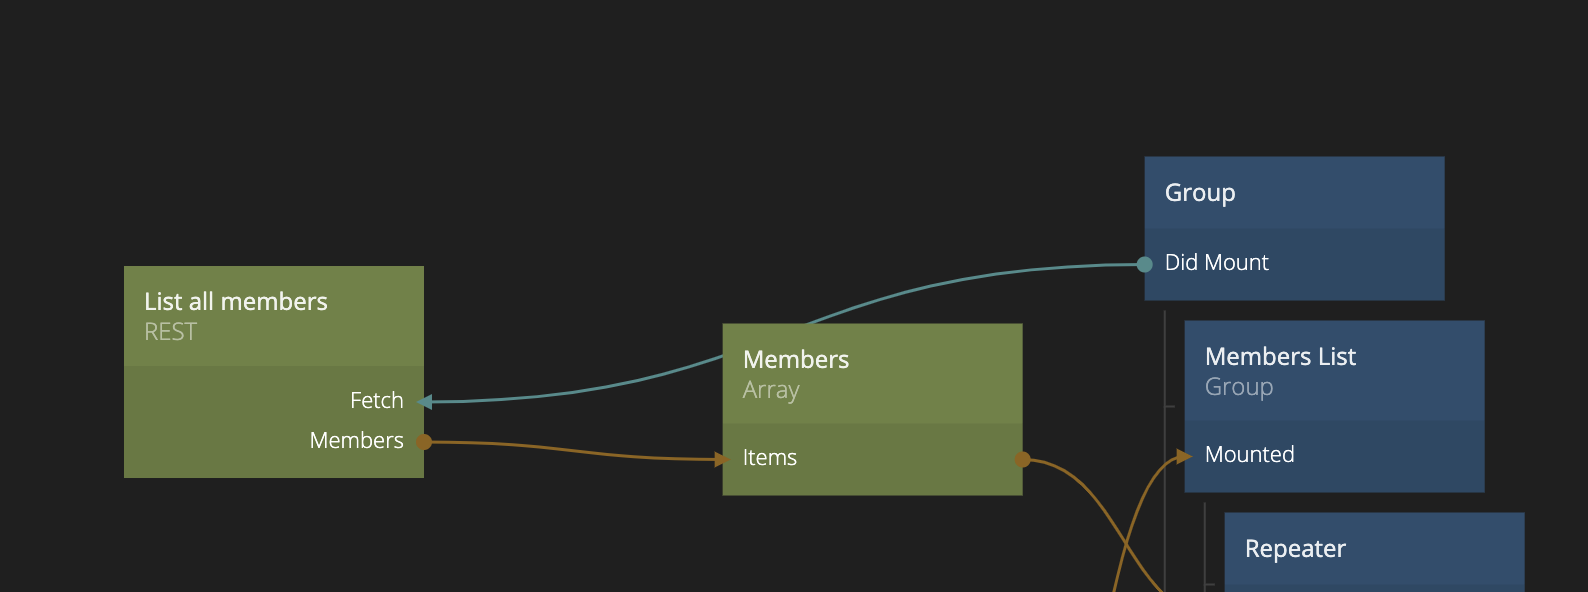
We will simplye create a REST node and change the Resource property to the URI above (with your own base id). Then we will connect the Fetch input of the REST node to the Did mount signal output of the root Group node. This will make sure that we perform the request as soon as the Group node becomes visible. I gave the node a new label "List all members", just to keep track of what it is doing.
We also need to modify the Request script to provide the Airtable API Token, otherwise the requrest will not go through. Change the request script of the REST node to the following, providing your own API token.
Request.headers['Authorization'] = 'Bearer your-api-token'
Now the request should go through if you refresh the viewer in the Noodl editor so that the Did mount signal is sent. A sample response from Airtable will look something like below. We are going to need to parse this response for it to be useful in our app.
{
  "records": [
    {
      "id": "rec0Qw9FdqjcaDF2W",
      "createdTime": "2022-04-14T08:40:28.000Z",
      "fields": {
        "Full Name": "Lisa Simpson",
        "Awesomeness": 80
      }
    },
    {
      "id": "recMbwuixscqMroQn",
      "createdTime": "2022-04-14T14:26:42.000Z",
      "fields": {
        "Full Name": "Marge Simpson",
        "Awesomeness": 0
      }
    },
    {
      "id": "recScNKnPqO3xHd4c",
      "createdTime": "2022-04-14T08:40:28.000Z",
      "fields": {
        "Receive Marketing Emails": true,
        "Full Name": "Homer Simpson",
        "Awesomeness": 50
      }
    }
  ]
}
We will do that in the response script of the REST node. We will need to create a simple array with objects with the id and fields directly as properties, then we will return it as an output of the REST node. The following small script will do the trick. This should go into the Response script.
Outputs.Members = Response.content.records.map((r) => ({
    id:r.id,
    'Full Name':r.fields['Full Name'],
    'Receive Marketing Emails':r.fields['Receive Marketing Emails'] == true,
    'Awesomeness':r.fields['Awesomeness']
}))
We use the Outputs object to specify a new custom output on the REST node that will contain an array of all member objects. It's important that we keep the id (it should be lowercase) as it will become the id of our Objects and we need to use it later. With that script in place, we will have a new output on our REST node that we can connect to the Array where we keep our members.
That's great, now we can list all members and show in the user interface. With that in place, let's move onto to editing and deleting.
Creating a new member
Now we will repeat the same process for doing a REST API call to create a new member in the Airtable table. For that we will use a REST node and provide the following resources and method.
POST https://api.airtable.com/v0/appGx6whFNzxu54eP/Members
Here we need to modify the request script to take an Object Id as input and put the properties of that object in the Request.content object. The following script will do the trick:
Request.headers['Authorization'] = 'Bearer your-api-key'

const obj = Noodl.Object.get(Inputs.ObjectId)
Request.content = {
    records: [
        {
          fields: {
            "Full Name": obj["Full Name"],
            "Receive Marketing Emails": obj["Receive Marketing Emails"],
            "Awesomeness": obj["Awesomeness"]
          }
        }
    ]
}
First set the Authorization header with the API token just as before. Then we use a custom input Inputs.ObjectId that will contain the Id of the Noodl object we want to send as part of the REST API call. We use the Noodl.Object.get function to get the object from it's Id. With the object at hand we can format the content in a way that the Airtable API is expecting. With the script above in place, we can hook the REST node up as follows.
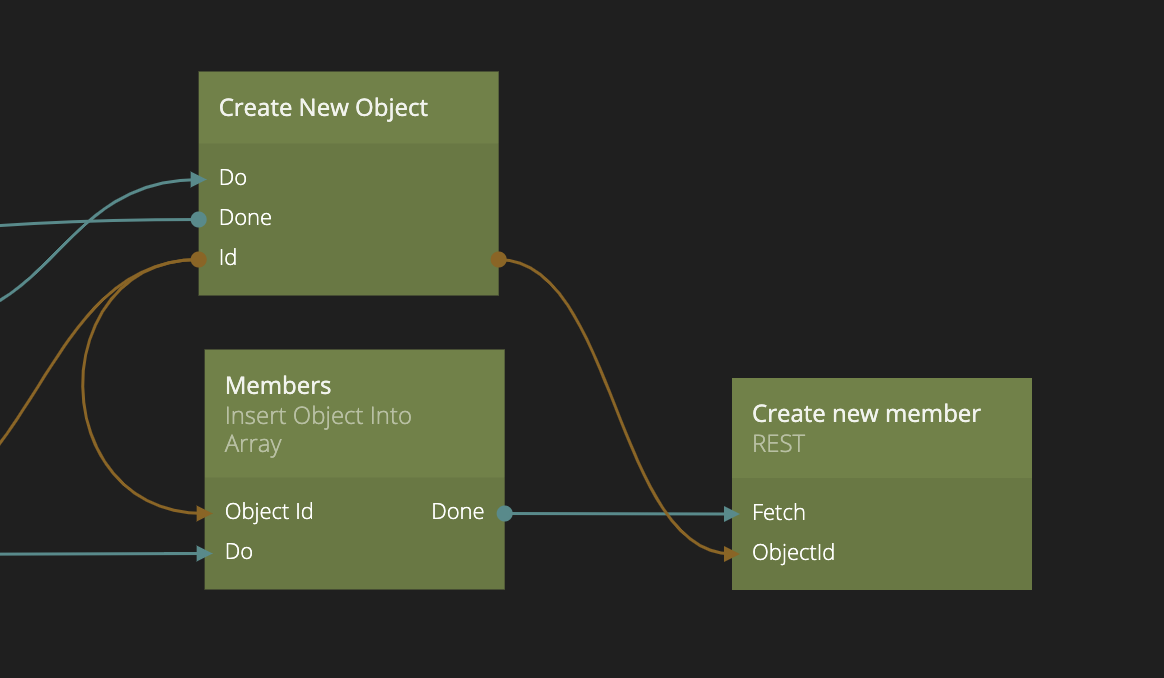
This is, when the newly created member object have been added to the Array we will trigger the REST request by connecting the Done output signal from the Insert Object Into Array node to the Fetch input on the REST node. We will also make sure to connect the Id of the newly created object to the custom ObjectId input that we are using in our request script in the REST node.
note
One small caveat, when you create a new object in Noodl using the Create New Object node it will be assigned a new random Id (you can see it by inspecting the connection). But when we create the member in Airtable using the request above it will get a new Airtable internal id. We need this to perform edits and deletes. The simplest way to solve this is to issue a new "list all members" request. Simply connect the Success signal from the "Create new member" REST node to the Fetch input of the "List all members" REST node.
Sweet, now we can list members, we can look at the details of a member, and we can even create new members. Give it a try, you should see the new member in the Airtable table. Now let's move on to editing a member.
Editing a member
Editing a member is very similair to creating a new member. We need to use a different method but the same resource. We also need to provide the Object Id as part of the URI. As this is a very common pattern for REST APIs there is a neat trick. You can specify a custom input directly in the URI using the {MyInput} notation. So we will use the following resource and method on this REST node. This will automatically create the correct URI for us if we provide the ObjectId as input.
PATCH https://api.airtable.com/v0/appGx6whFNzxu54eP/Members/{ObjectId}
We still need to format the Request.content object in a way that the Airtable API can consume. This is done with the following request script, very similair to the script we used when creating new members.
Request.headers['Authorization'] = 'Bearer your-api-token'

const obj = Noodl.Object.get(Inputs.ObjectId)
Request.content = {
      fields: {
        "Full Name": obj["Full Name"],
        "Receive Marketing Emails": obj["Receive Marketing Emails"],
        "Awesomeness": obj["Awesomeness"]
      }
}
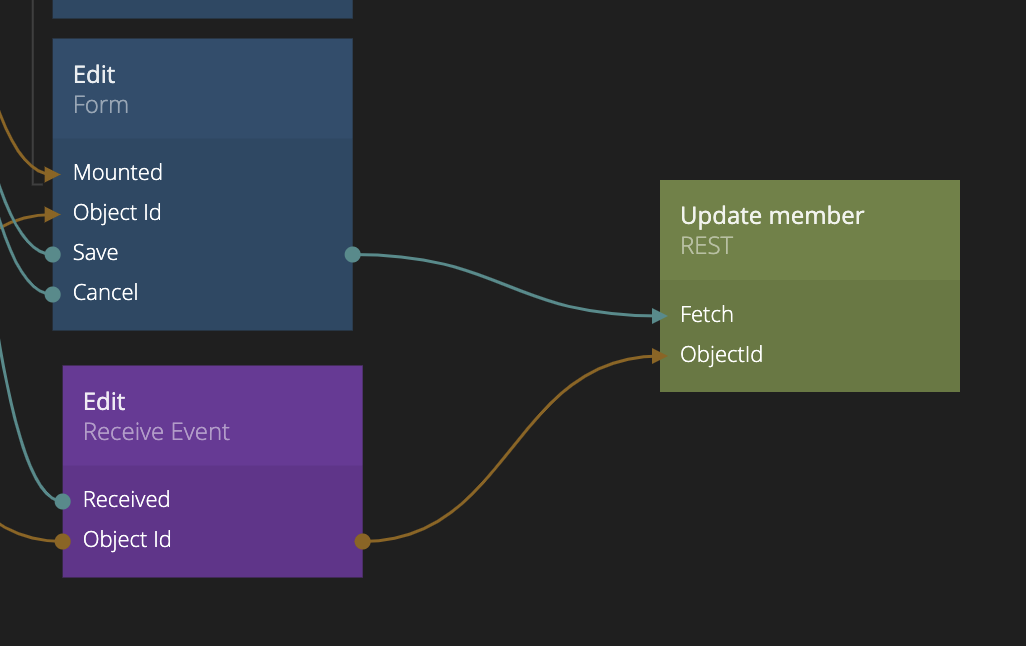
With that in place we can hook it up to the output signal Save that we send from the edit form component. We also need the Object Id as before, and this we can get from the Edit event, that is the Receive Event node. That is the same Object Id that we pass to the edit form component when it is shown. It will look something like this:
Deleting a member
And finally, we need to add support for deleting a member. This we will do, very similair to before, but this time in the Member Item component. For that we will use the following resource and method.
DELETE https://api.airtable.com/v0/appGx6whFNzxu54eP/Members/{ObjectId}
The request script simply needs the API access token.
Request.headers['Authorization'] = 'Bearer your-api-token'
And then we can hook it up as shown below in the Member Item component.

That's it. This guide has shown how to use the REST node to hook up our CRUD example from the previous guide to and external REST API. With the REST node you can connect to most types of APIs that use JSON to send and receive data.