MQTT
In this guide we will create a small MQTT communication example using the Send Message and Receive Message nodes available in the MQTT module.
Overview
MQTT is a very popular communication protocol between IoT devices. It's based on a simple publisher/subscriber architecture where all messages pass through an MQTT broker, who directs messages from publishers to subscribers. As a subscriber, you subscribe to topics, which are typically made up of different subpaths. As a publisher of messages, you publish your messages to these topics. A message can contain a payload, i.e. a data object with one or more pieces of data.
As an example, an IoT thermometer, called "thermometer1", may publish temperature and pressure data to "/thermometer1/thermometer" topic with a payload containing a time, a temperature and a pressure reading.
MQTT is a very capable protocol and we will only cover parts of it in this guide. You can read more about it here;
Using the the MQTT module
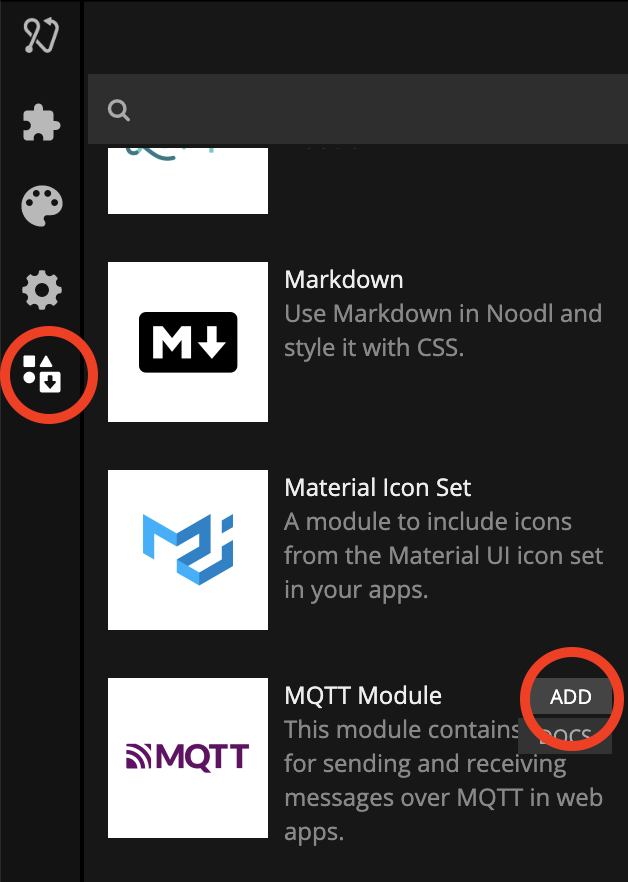
First, let's create a new project using the minimal "Hello" template. Give the project a name, for example "MQTT Messaging". Since the MQTT nodes are not part of the default node set in Noodl, we need to enable the MQTT module. Find the module tab in the sidebar and add the "MQTT" module.
Now two more nodes are available in your project, the Send Message and Receive Message nodes.
Try adding a Send Message and Receive Message node to the project, to see that they are now available.
Connecting to an MQTT broker
For the MQTT messaging to work, we need to connect to an MQTT broker. Setting up and hosting a commercial, secure MQTT broker is a bit of a hassle. So for this guide we will instead use the open MQTT broker "Shiftr". It's being hosted in the cloud so we don't need to worry about hosting it. Another good alternative is the open source broker Mosquitto that you can run locally or host yourself.
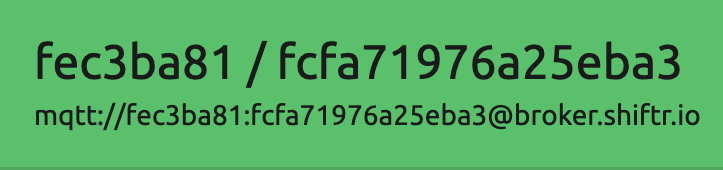
Go to shiftr.io and sign up for an account if you don't already have one. Also create a new "Name space" and a "Token" for the namespace. In the end you should have created an MQTT endpoint to use, similar to the one below.
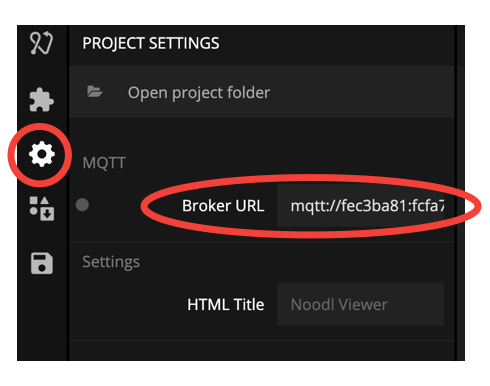
Now go into your project settings and paste in the URL (beginning with "mqtt:") into the "Broker URL" field.
Testing our MQTT broker
Ok, now we have everything to get started to send MQTT messages. Let's try it!
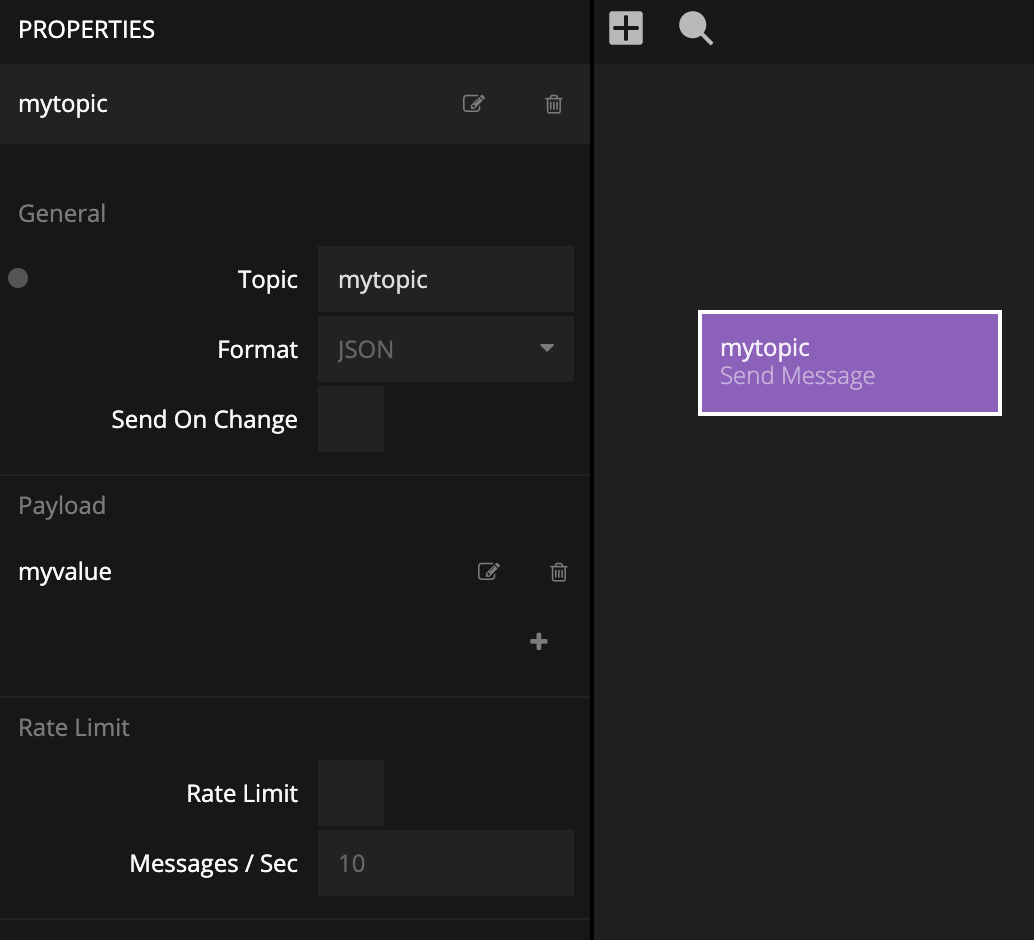
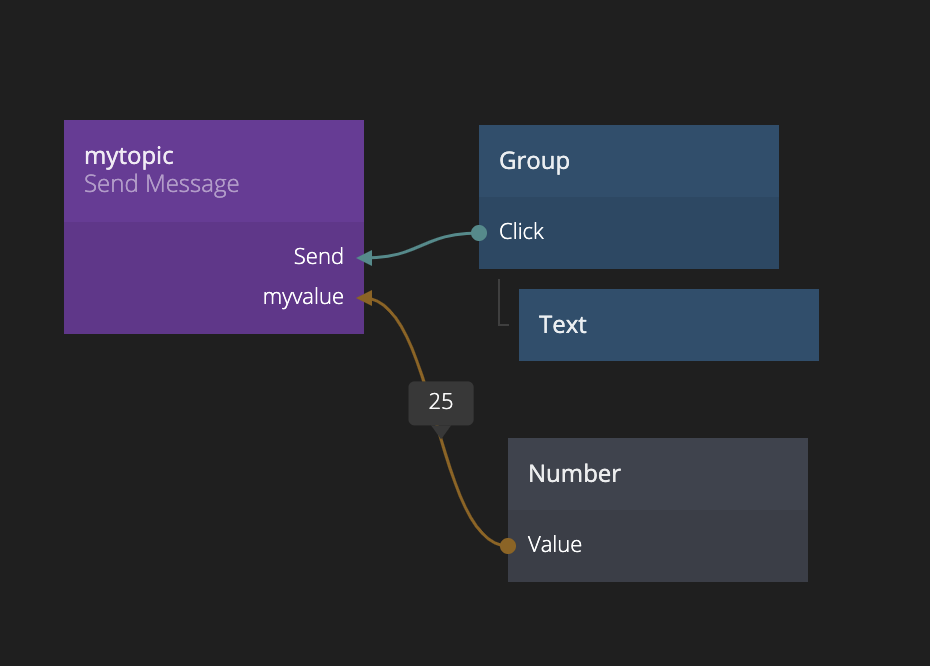
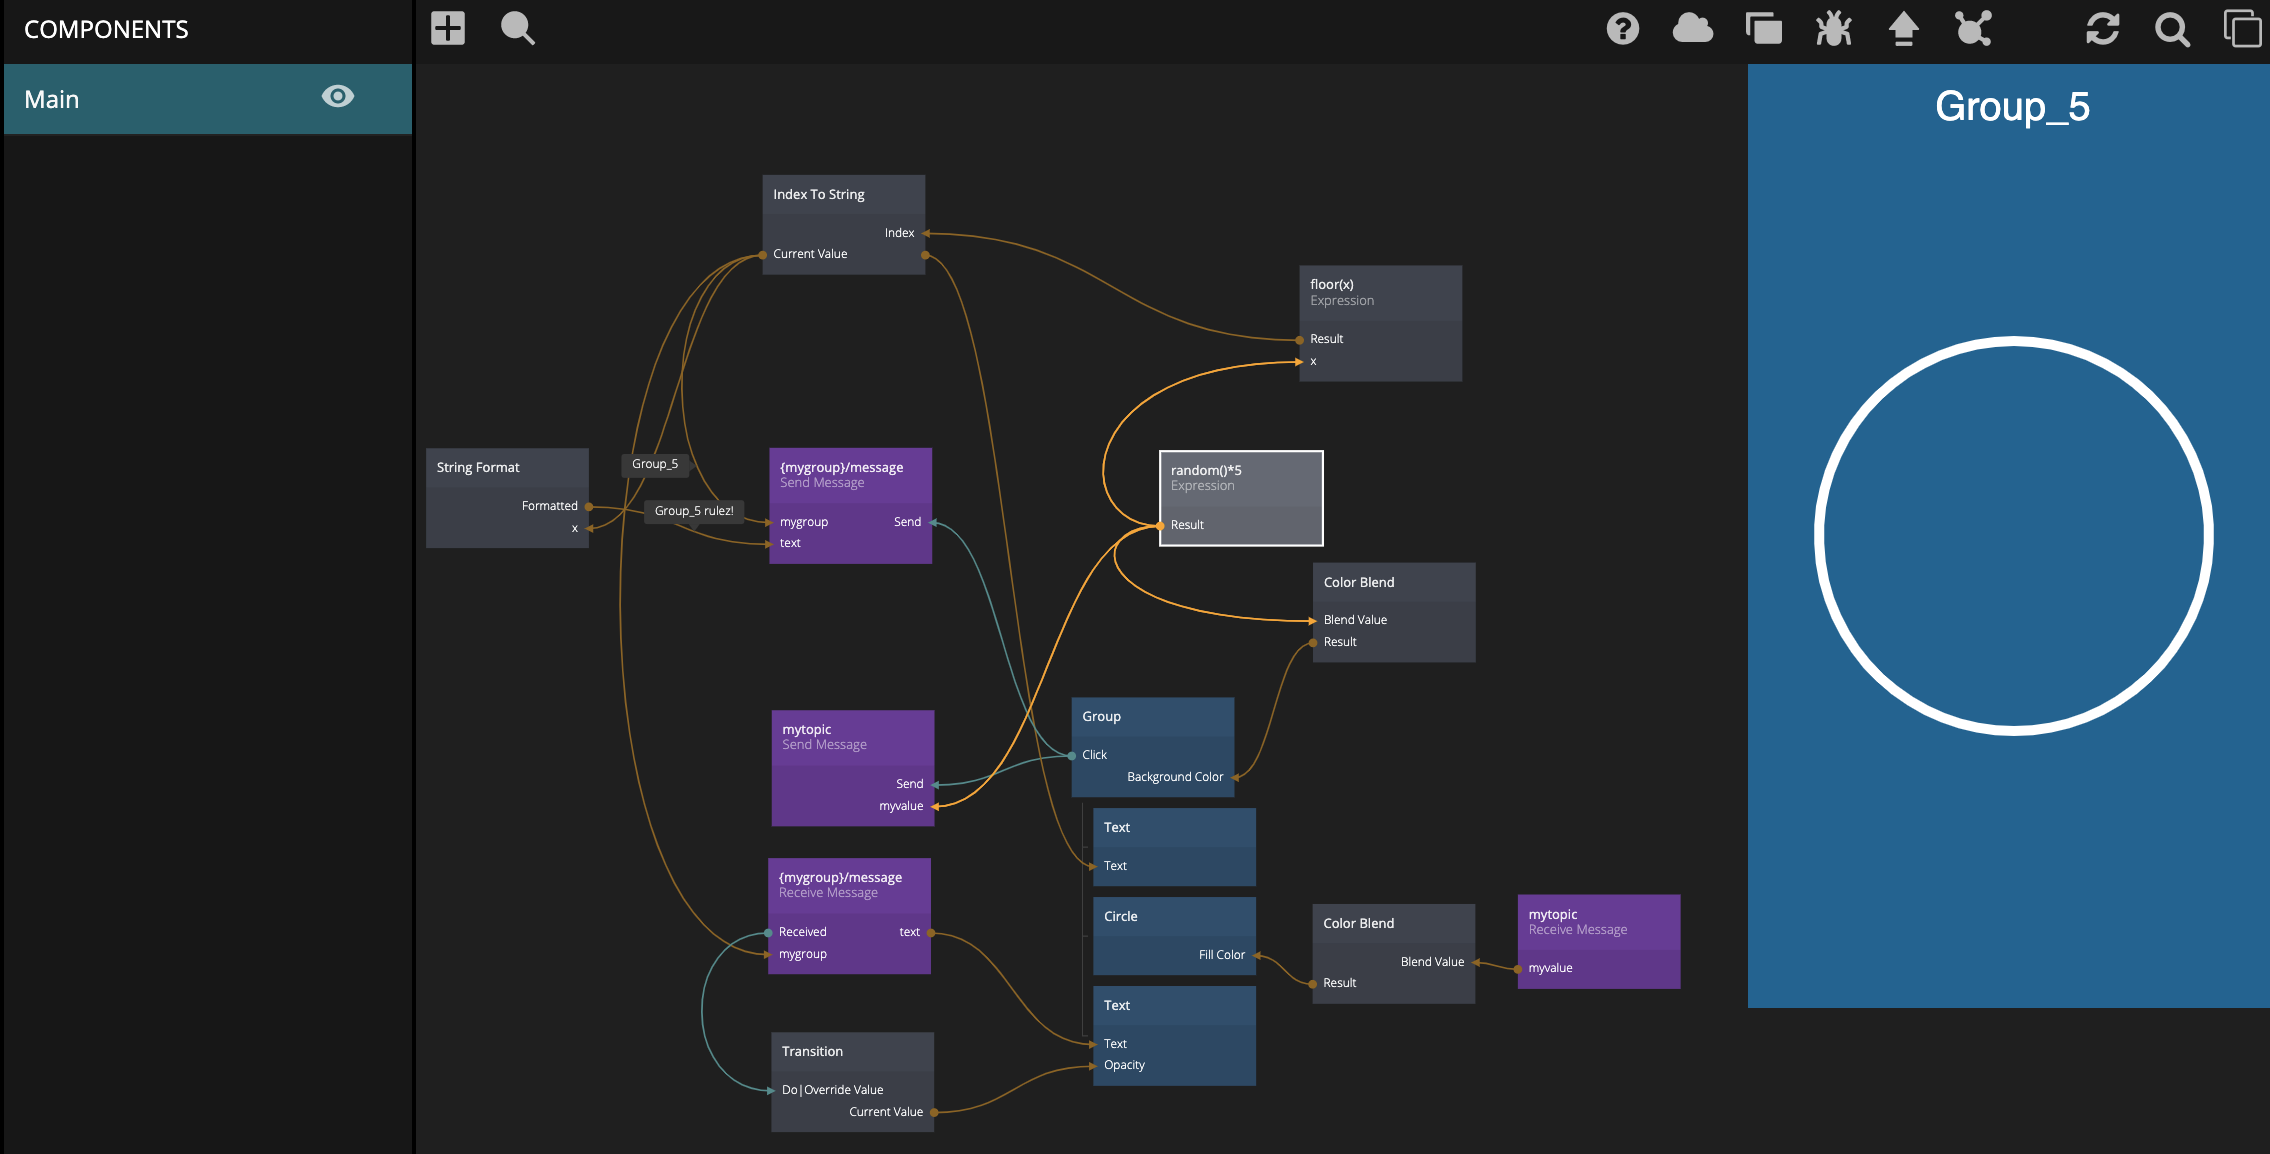
Start by adding a "Send Message" node. Set its topic to "mytopic" and add a payload called "myvalue".
Now let's send our first message to the topic "mytopic". So we assign a value to the input "myvalue", using a Number node and connect the Send signal to the click event of the background Group. Any value is fine, we just want to see if it's working.
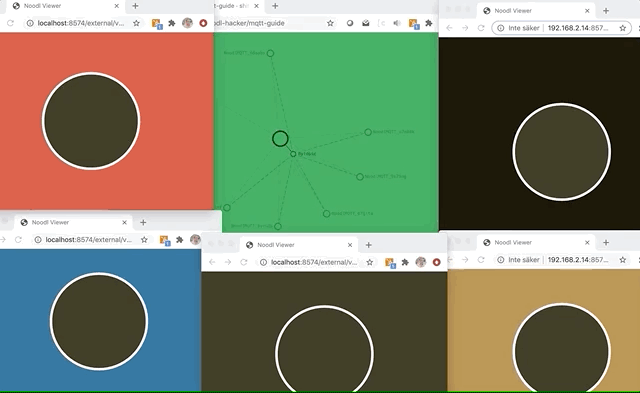
When you start clicking the background rectangle, you should now be sending messages to the MQTT broker. If you bring up you web browser with your Shiftr name space topology you should be seeing some events entering the system everytime you click. Again, remember that the MQTT messages are being sent to a router hosted somewhere in the cloud, which means that any device with an internet connection can now connect to your Noodl app, or vice versa, by sending messages to the router.
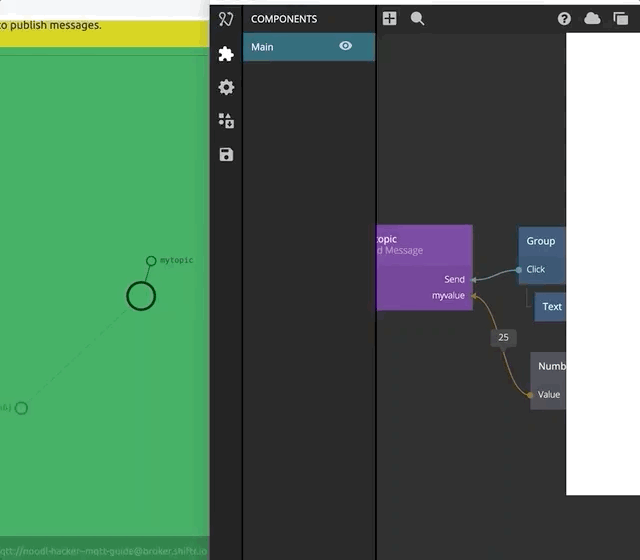
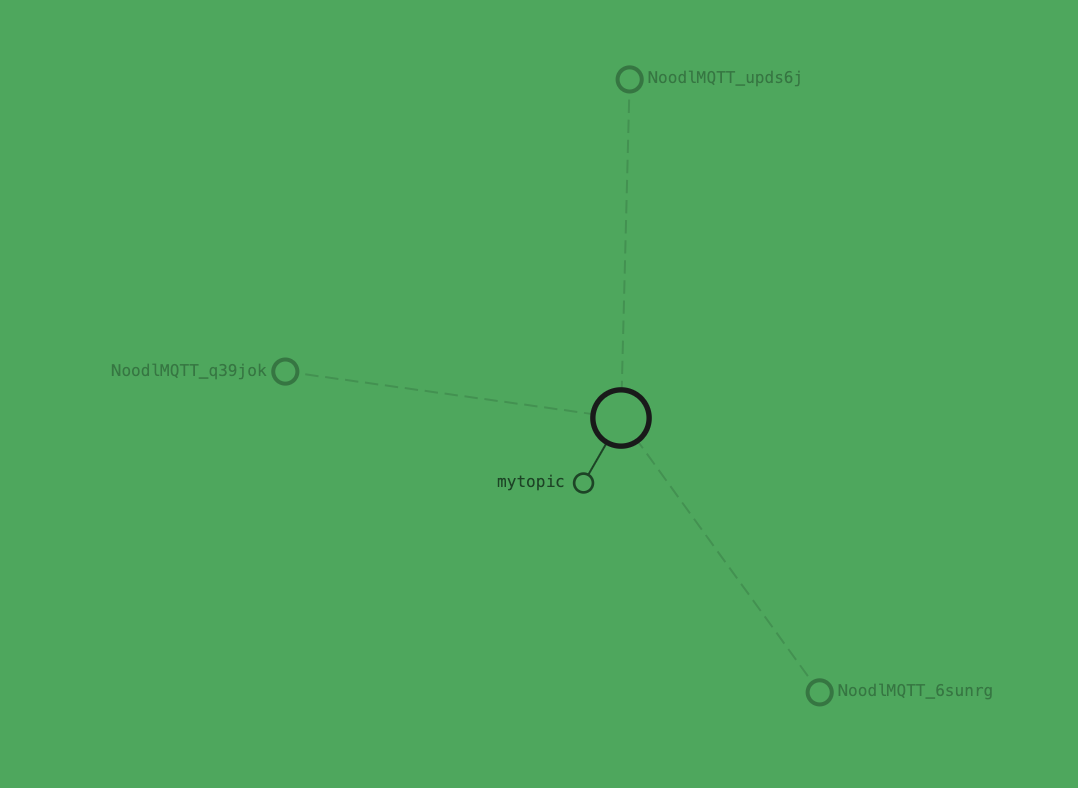
You can inspect the messages in Shiftr and see the payload that's being sent. Also try opening a few browser windows running your simple Noodl app. As you can see, there are now multiple clients in Shiftr that can publish messages to the "mytopic" topic. Each browser window is a publisher in the broker, as well as your Noodl Editor.
Now let's change things up slightly as we are going to receive messages as well. We are going to assign each client a random color. When you click the background, that color will be sent out to all subscribers of the topic "mytopic". A circle in the middle of the screen will present any received value.
The random color is generated using a Color Blend node with 5 different base colors. By generating a random number, between 0 and 5, we randomly pick a color on that color scale. Each client will have their own random number and respective color.
The color is published once the background is clicked, or rather, the random number is published. When you receive a message which will include the random number, that number is translated back to a color through a Color Blend node with the same colors as before.
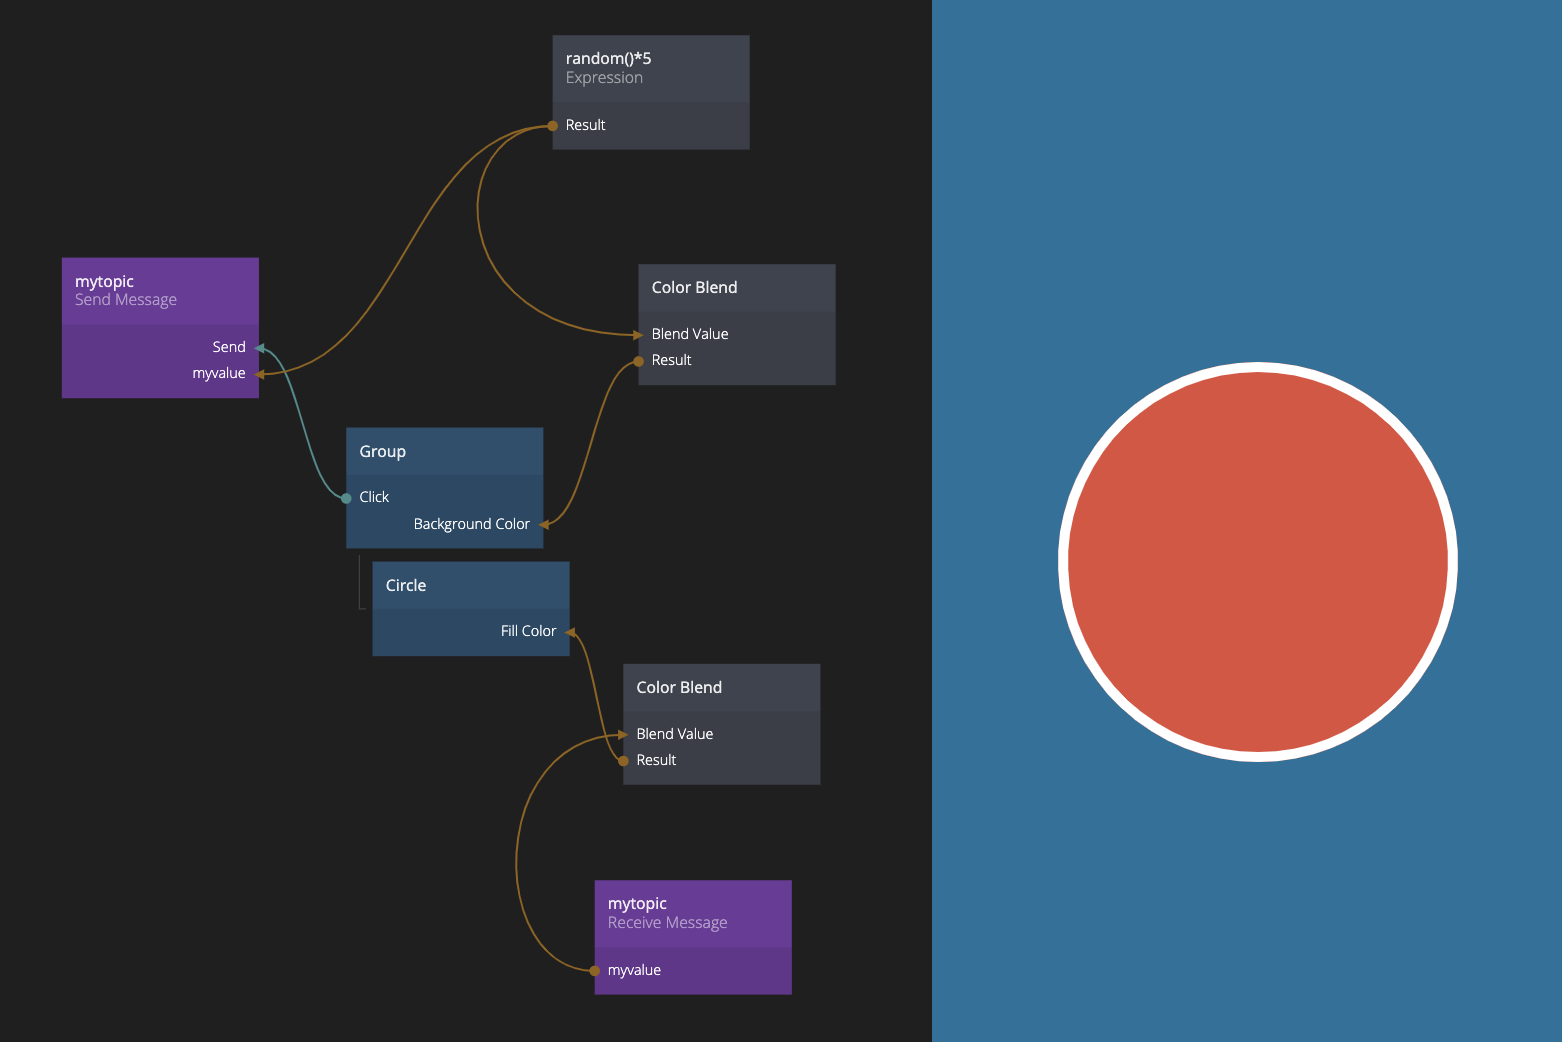
Let's load a couple of browser windows running your app, and maybe your mobile phone as well, and click around in the different windows. If everything works as expected you should see that the inner circles in all clients will change color to the background you just clicked.
Dynamic Topic names
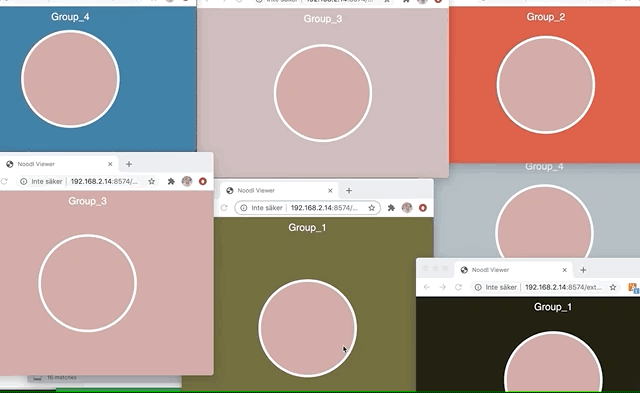
We have now published and subscribed to messages on one single topic, basically broadcasting messages to all clients. You may want to identify yourself as a publisher, or be more selective on what messages you subscribe to. So let's divide the clients into five groups. You belong to a specific group (Group_1 - Group_5) depending on a random number (0-0.999... belong to first group, 1-1.999... to second, etc). We use some neat nodes, i.e. Expressions and String Formats to create the group names and determine which group you belong to.
Each group gets its own topic which is dynamically created using a {} construct. Note that you have to be a bit careful when naming topics. For example, avoid whitespaces, hence we call the groups "Group_X".
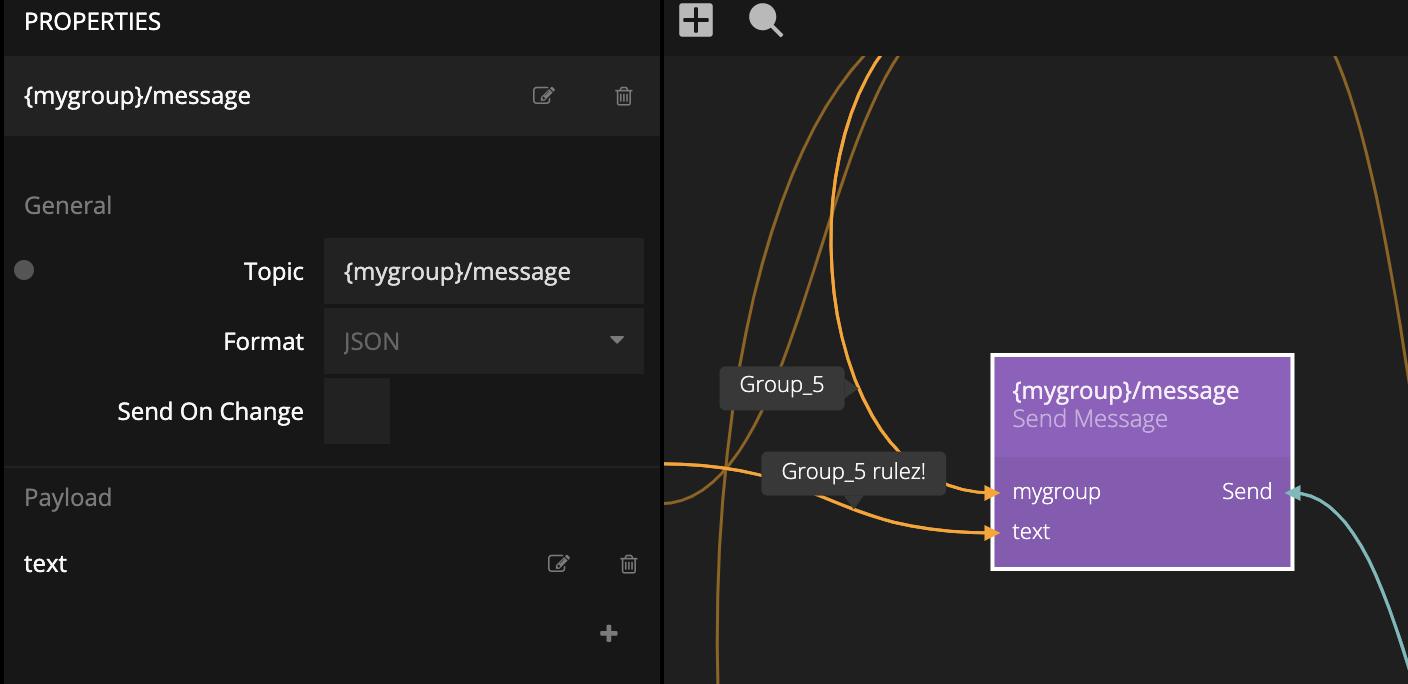
There is also a Receive Message node that each group uses to subscribe to only its group messages. When they receive a message a Transiton node triggers an animation of the opacity of the Text node, causing it to flash in the circle.
{' '}
You can see that the new topics start popping up in the Shiftr topology once you start sending messages between the browser windows.
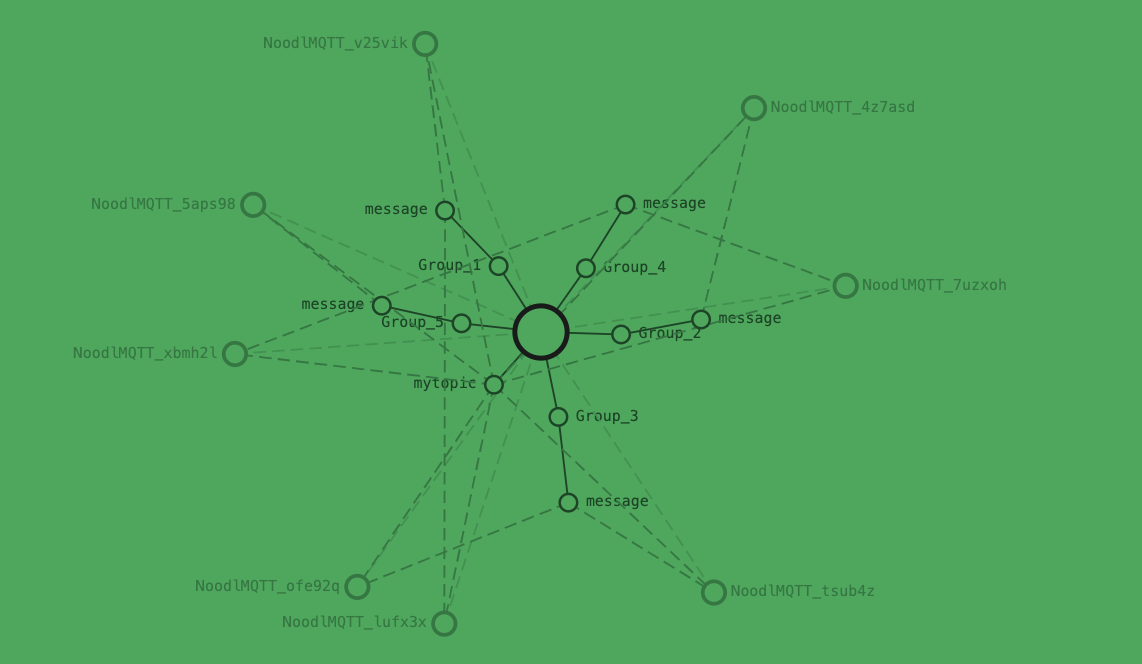
As you click around you in your browser windows you can see that messages are only sent within a group.
Now you know how to publish and subscribe to topics and how to connect to an MQTT broker. This can for example be used to connect to an Arduino or a Raspberry Pi, etc, if you want to play with some hardware. Find some software that can connect to an MQTT broker and start publishing and subscribing to messages. Best of luck!