Setting up Google Analytics
What you will learn in this guide
This guide will show you how to add basic tracking with Google Analytics. After this guide you will be able to collect data on how many users that see your app, some of their behaviors and how they move through your application.
Overview
We will go through the following topics:
- Beginners guide to Google Analytics
- Set up Google Analytics
- Set up the Noodl Module
- Allow tracking
- Next steps
Beginners guide to Google Analytics
If you're already familiar with impressions and page views and just want to set up your tracking, feel free to jump along to the next section.
If tracking in Google Analytics is new to you, keep reading for a quick crash course.
The most common things to track with Google Analytics are visitor count and page views. These are coincidentally two of the metrics that Google Analytics track by default without you having to take any other action than just starting the tracking script in your app.
The user data lets you know how many people visit your app. It also include a lot of helpful information on the visiting demographics and what technologies they use to access your app. What is the average length of the users visit? What part of the world are they from? What languages do they speak? Are they primarily desktop or mobile users? All of this, and much more can be answered by reading the collected data.
While the demographic data is good for tracking general behavior, page views can be used to see details on specific interaction. What are the most visited pages? On what page do your users spend the most time? Are they reaching that last step of the form, or do they drop off earlier? Where do they drop off?
It is well worth learning more about finding your way around Google Analytics, and especially the contents and capabilities of GA4 Reports, as they are the backbone of Google Analytics and an instrumental tool in shaping the success of your app.
Set up Google Analytics
To be able to use Google Analytics you need to have:
- an Analytics account with a Google Analytics 4 (GA4) Property
- with a Web Data Stream
- pointing to the deployed app URL (or a placeholder one, like
example.com) - with Enhanced Measurement disabled
If this list is crystal clear, you already know how to do this and can skip along to the next section of this guide. Otherwise - Google has some handy documentation:
Setting up your Google account
If you don't already have a Google Analytics account you need to create one.
After that we need to set up a Property, which is Google terminology for "a collection of Data Streams that you want to track".
caution
Make sure that you are using Google Analytics 4 and NOT Universal Analytics, as this Module only supports GA4.
So what is a Data Stream? Simply put, it's a connection that will stream data from your app to Google Analytics. You can have multiple Data Streams in your Property, but in most cases you will only need one.
Let's set up our first Data Stream. As Noodl outputs Web Apps, we will need to select the Web option. When asked for the URL of the primary website, this needs to be the URL for your app when it's deployed. example.com works for testing purposes as well.
!> Make sure to disable Enhanced Measurement, as this might send double page views.
Seting up the Noodl Module
In the Google Analytics admin panel, go to your newly created Data Stream settings and copy the Measurement ID. You will be needing this later.
Open up your Noodl Project and locate your Root Component. It's easy to identify, since it has a small house icon in front of it and is called App (if you haven't renamed it).
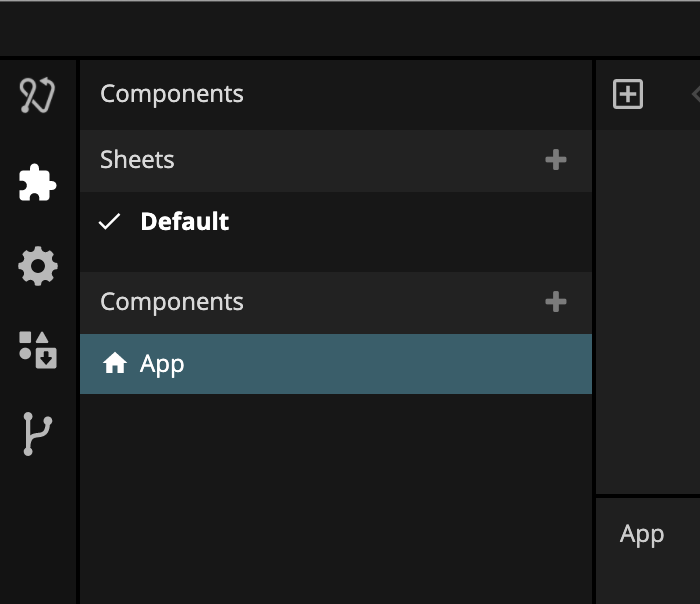
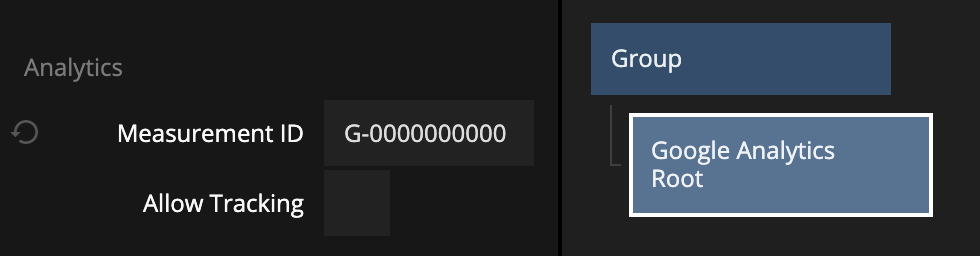
Create a Google Analytics Root node and place it in the visual tree, as high up as you can, then paste the Measurement ID that you copied earlier into the Measurement ID input in the Property Panel.
Allow tracking
To be able to track anything we need to check the Allow Tracking input. This can be done by simply checking the input in the Property Panel.
In most cases it is recommended that you notify the user of your tracking and only track after having been given the users consent.
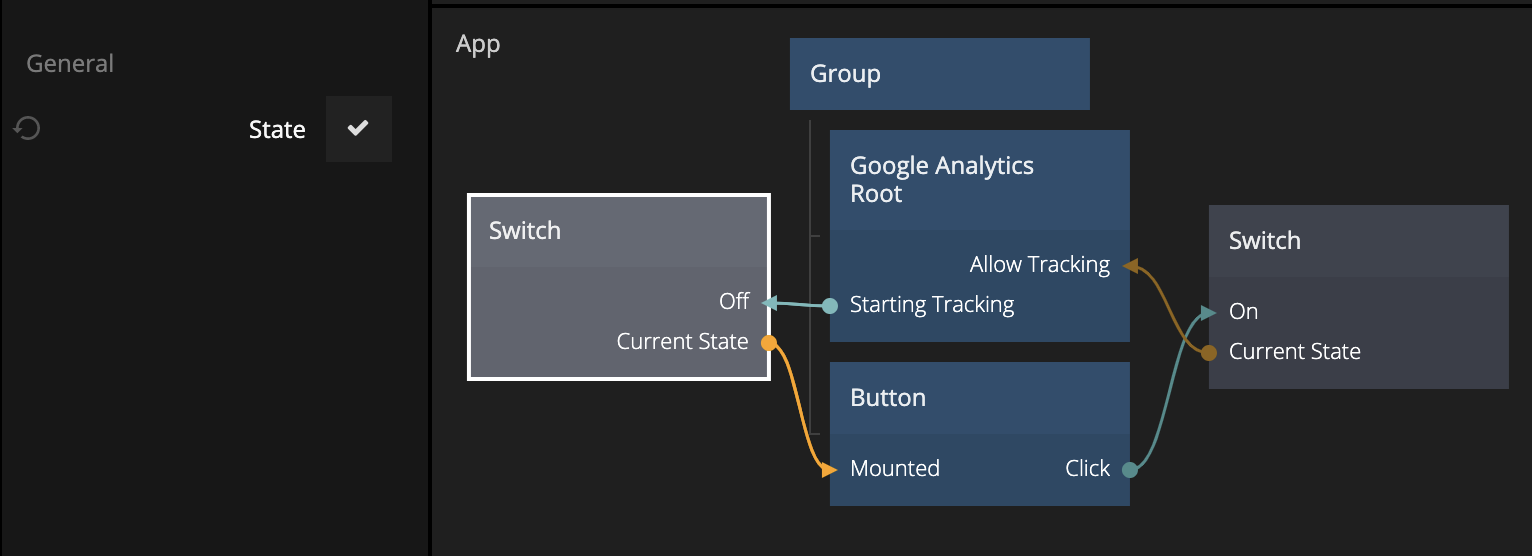
To do this we can use a Button node and a Switch node. Connect the Switch nodes Current State output to the Allow Tracking input on the Google Analytics Root node. Use the Button nodes Click output to flip the Switch to On.
![]()
This will initiate the tracking when the user clicks the button.
To make sure that everything is correct, we can use the Starting Tracking output on the Google Analytics Root node. This will send a signal when the Google Analytics tracking code has been activated. This signal can also be used to hide the button after consent has been given. Simply use the same "flip the switch" trick we did above, but setting the Switch initial state to On (letting the Button flip the switch to Off) and connecting the Current State output to the Mounted input on the Button.
Next steps
Congratulations! The Google Analytics integration is complete! You should now be able to see stored and real time data in your Google Analytics Reports view.
Google Analytics is very powerful and has a lot of features, and it's highly recommended to learn more about it if you're just starting your Analytics journey. Sadly, we've reached the end of this guide, but there are many resources where you can learn more about GA4. Google themselves provide free online courses in the Analytics Academy that are well worth checking out if you want to learn all the ins and outs of both the tool and tracking strategies. Less in-depth information is also available - one Google (or YouTube) search away.
When you feel it's time to go further on your tracking journey in Noodl, check out our guide on tracking custom events.