Updating Records in the Database
What you will learn in this guide
In this guide you will learn how to use the Set Record Properties node to update data in the Database.
Overview
We will go through the following steps in this guide
- Update previously queried Records
To get most out of this guide, it's best that you are already familiar with how to set up a cloud backend, create Classes and Records and query them. You can quickly learn that by going through the following guides:
Updating Records in the database
It's simple to update Records in the database using the Set Record Properties node. You basically make sure the Id is set to the right Record, set the properties to what you want them to be and signal the Do input.
To try it out, make sure you have a backend enabled for your project. Set up a Class in the Database with some Records in. Finally Query some items from the Database. If you follow the previous "Working With Cloud Data" guides you can use the simple Task list created there. It looks something like this:
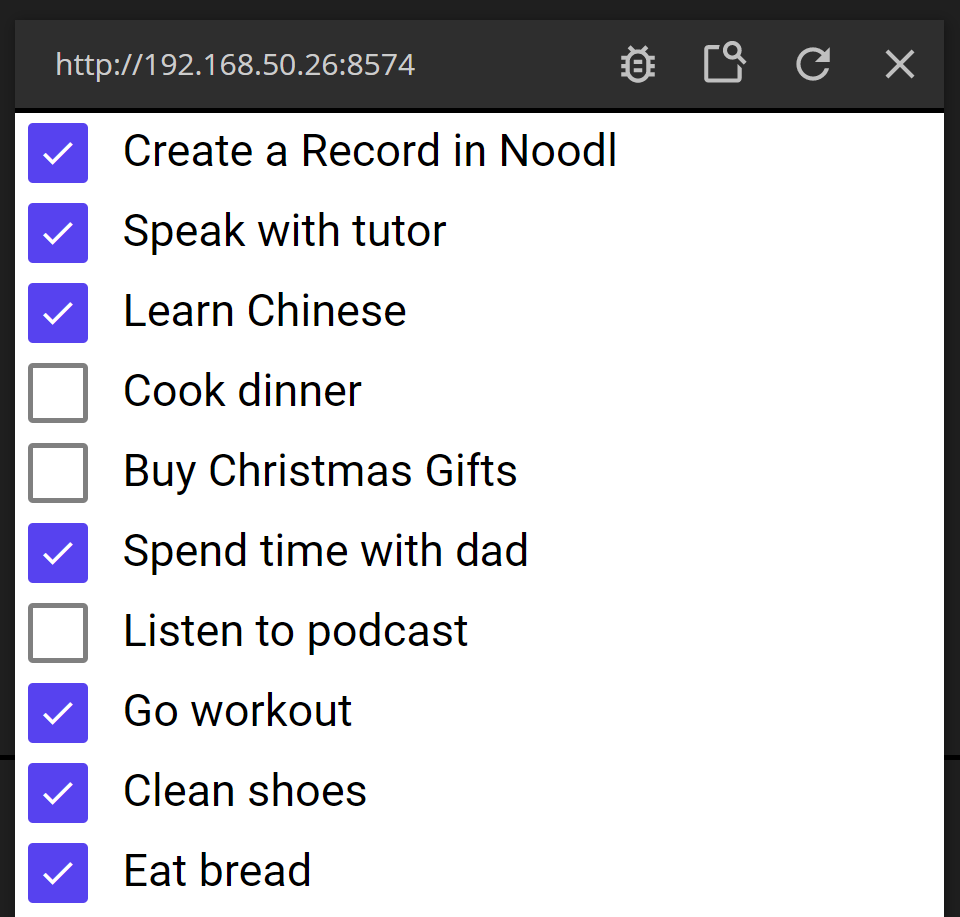
The app has two components, the main component called "App" and a List Item called "Task Item".
The main component that looks like this:
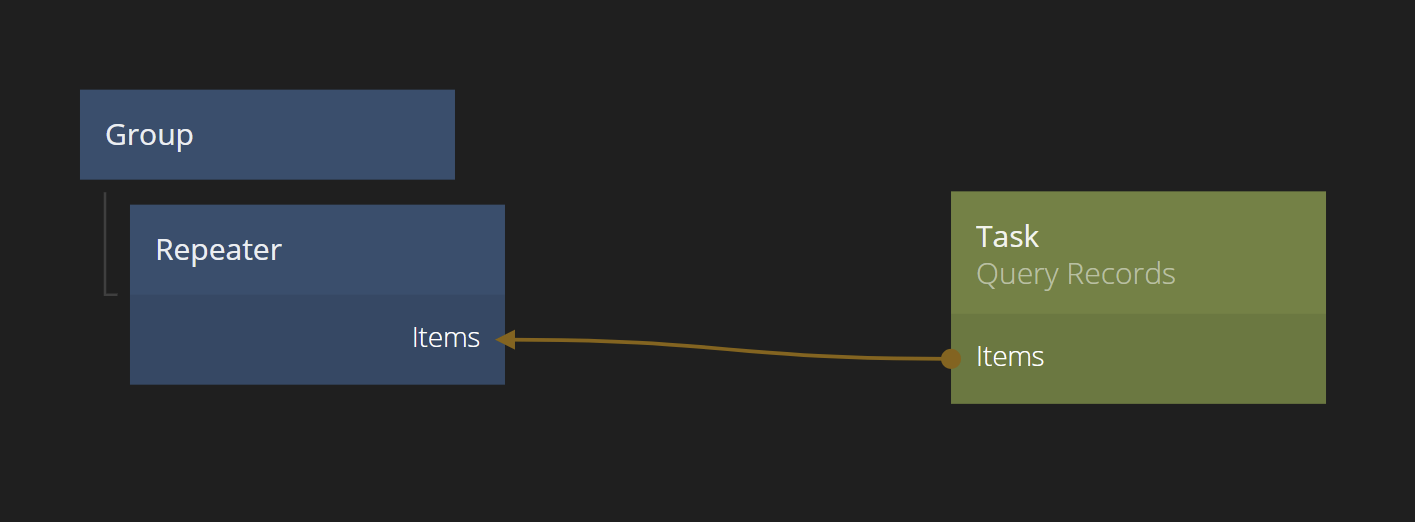
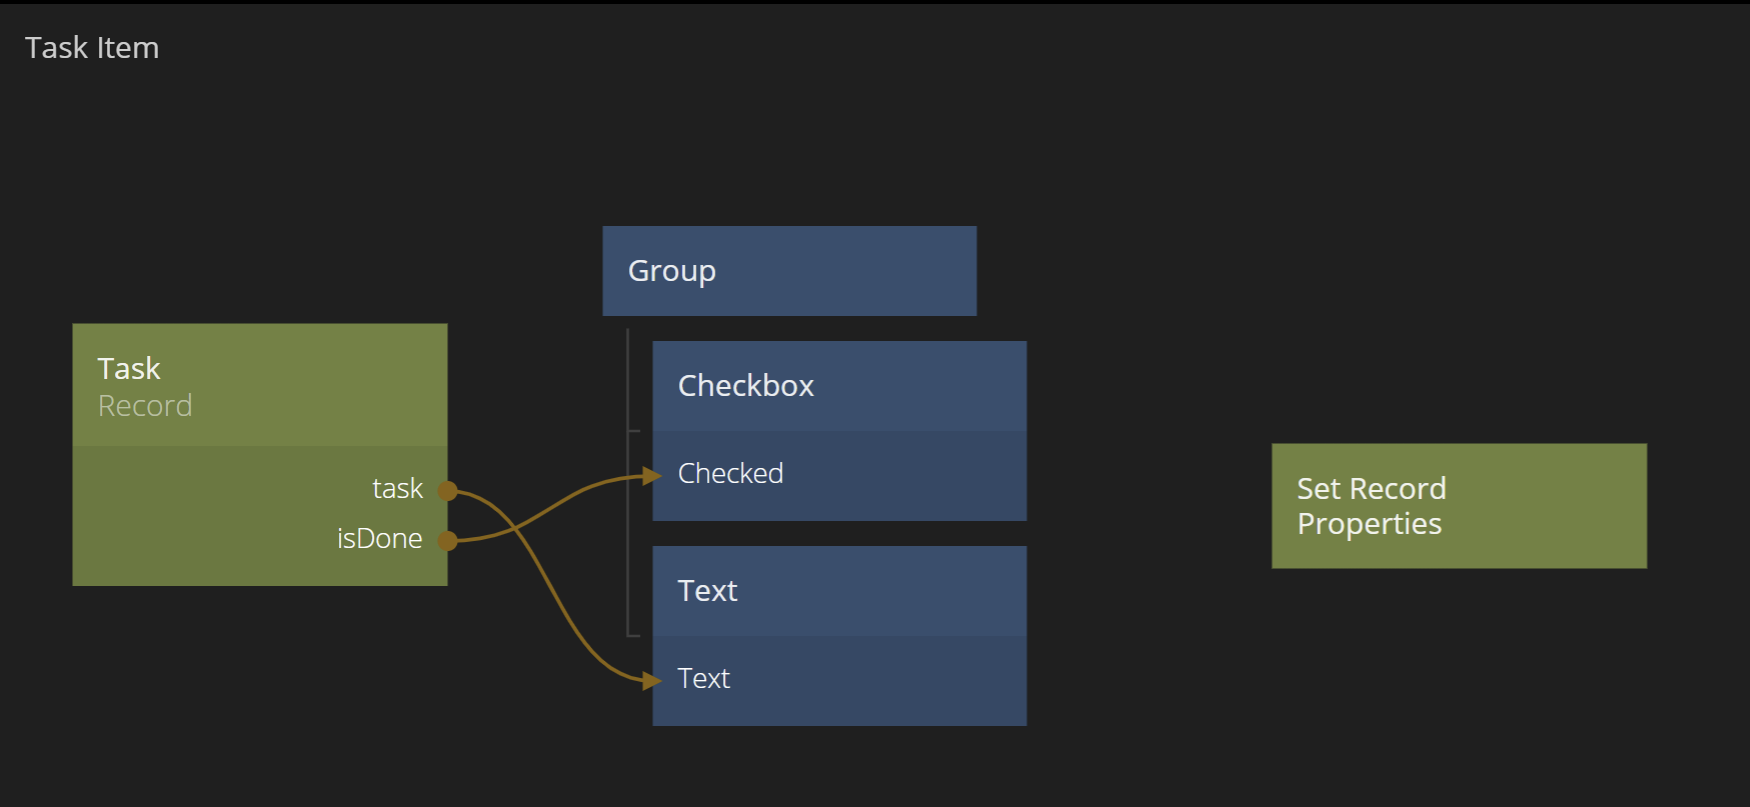
And the list item like this
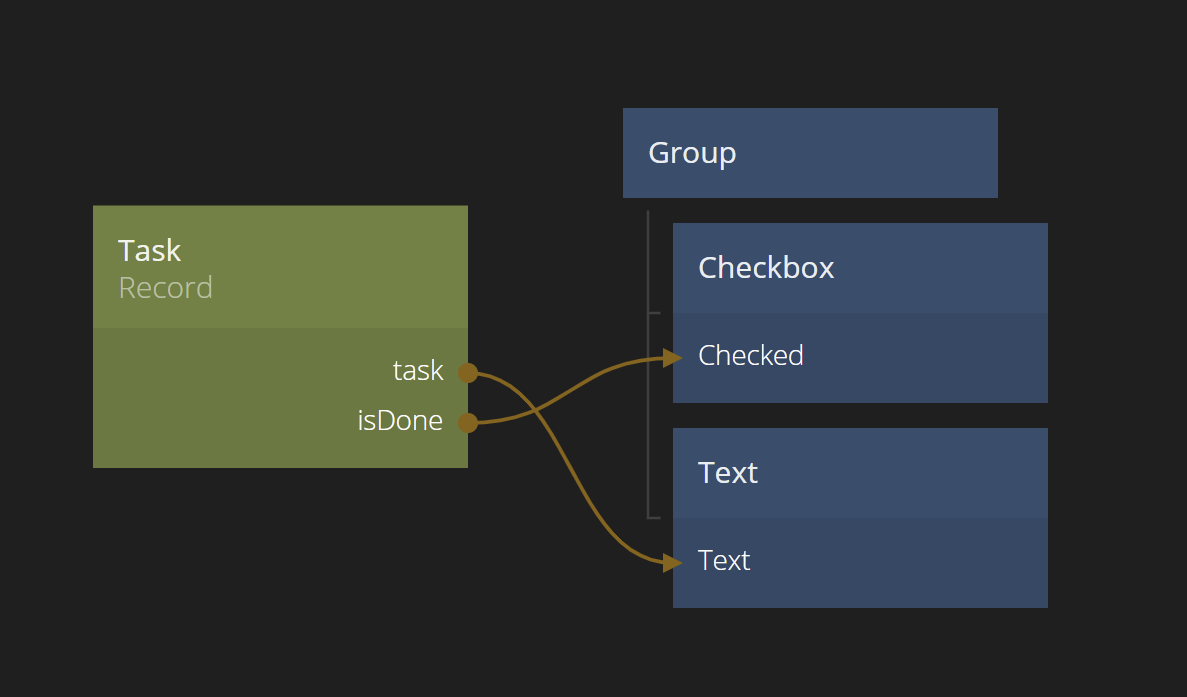
A clear shortcoming of this small app is that when you complete a task and check its checkbox the database wont actually update. The isDone property will not change.
You can double check that by clicking a few items and reload the app. The changes are only visual, the underlying data is not changed.
The Set Record Properties node
To update a Record you use the Set Record Properties node.
Add the node to your List Item. Click it and make sure it points to the correct Class.
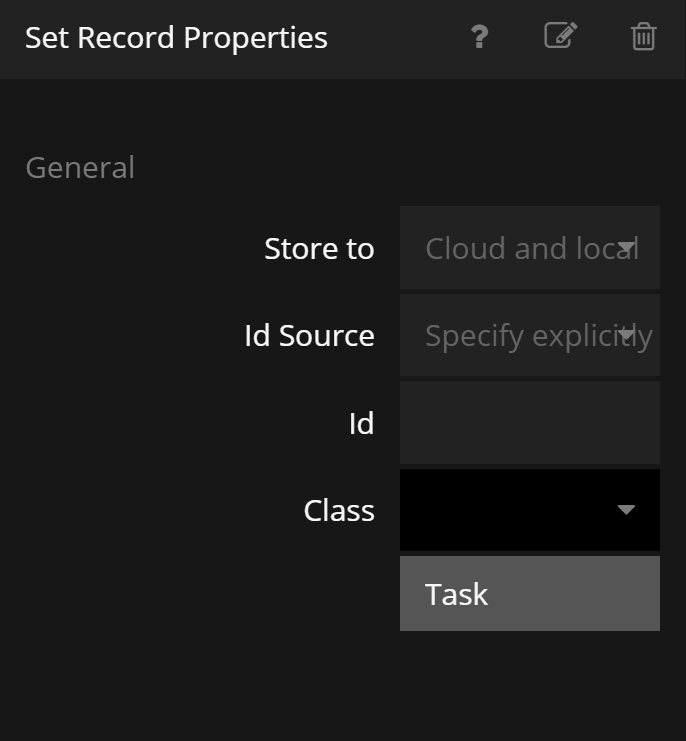
Also note the option Store to. You can chose to store changes either locally and in the cloud, or only locally. Let it be set to Cloud and locally as we our changes to be stored directly in the database.
Sometimes it makes sense to only store the changes locally at first. For example, if you have a form with multiple fields and a "Save" button, it might make sense to first store only locally and when the user presses "Save" to store all changes at once.
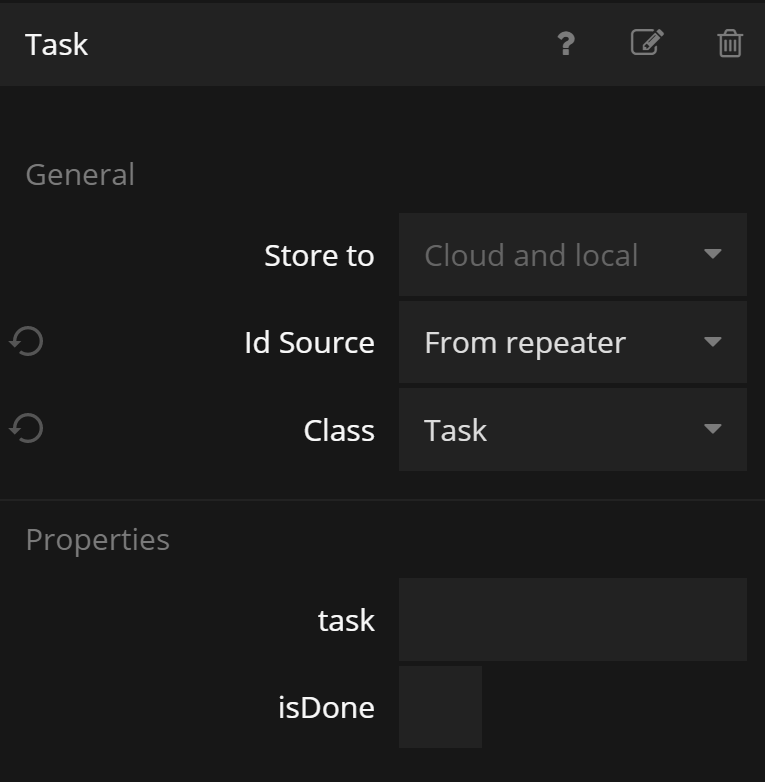
Now we need to make sure the Id of the Set Record Properties are set correctly to the Id that the Repeater provides.
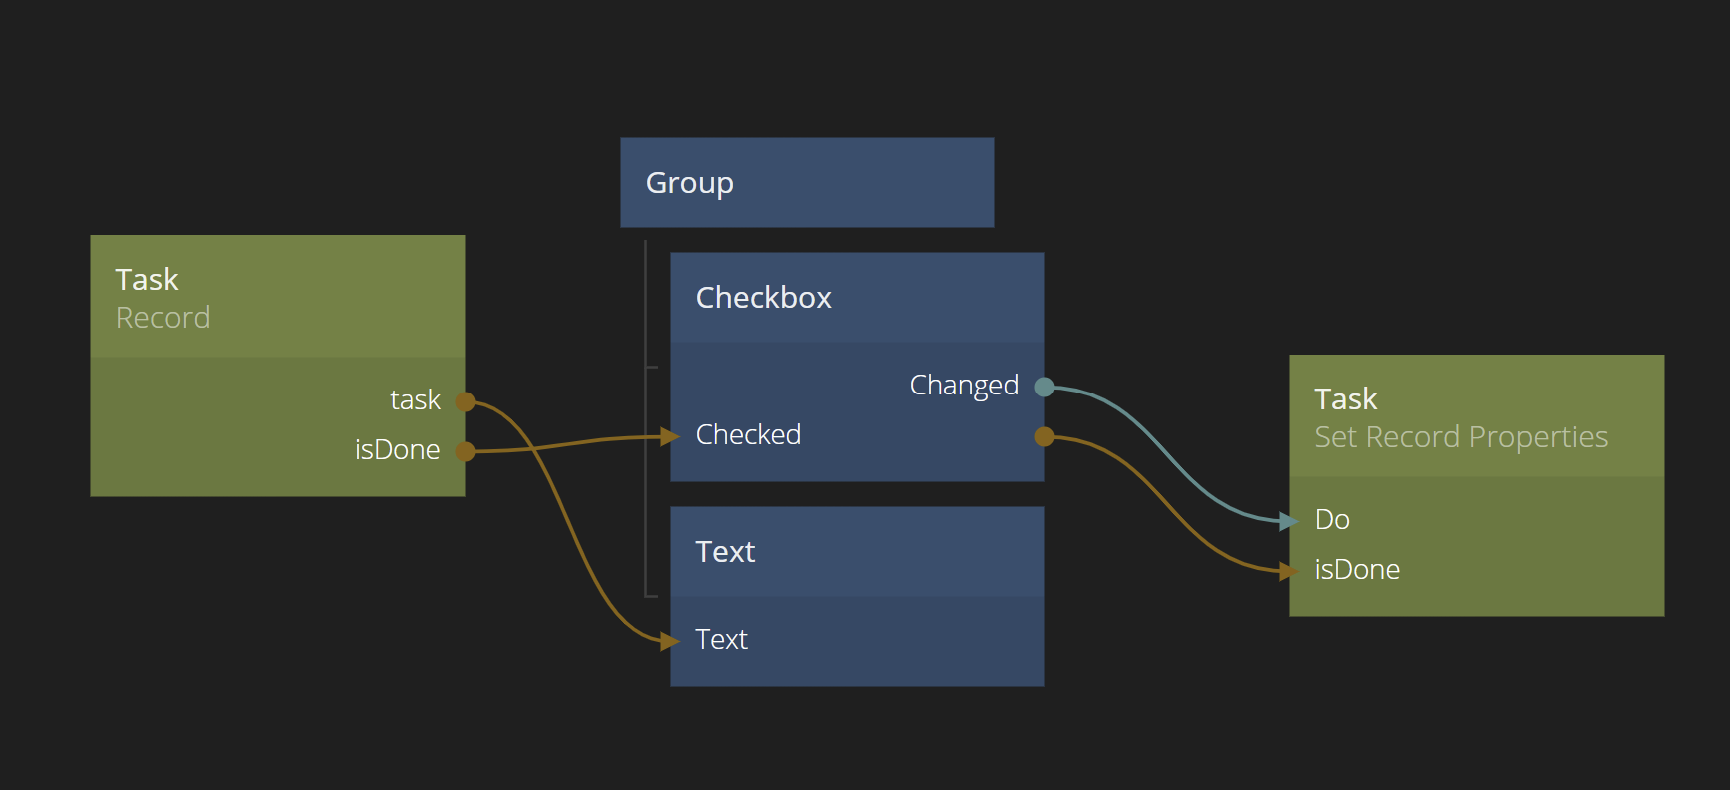
Now the only two things left to do is to connect the Checkbox to the isDone property and trigger the Do signal of the Set Record Properties. We want to save whenever the state of the Checkbox is updated, so lets connect the Changed signal coming out of the Checkbox to Do.
We're done! Click on your different tasks and double check that they are correctly saved by bringing up your Dashboard inspect the isDone properties. Don't forget to press Refresh in the Dashboard to update the view.