Querying records from database
What you will learn in this guide
In this guide you will learn how to use the Query Records node to create powerful database queries to retrieve Records from a database. You will also learn how to use the Repeater node in combination with a Record node to visualize the results of a query.
Overview
We will go through the following steps in this guide
- Create a simple query
- List results as list items using a Repeater node
- Connecting data properties to visual nodes
To get most out of this guide, it's best that you are already familiar with how to set up a cloud backend, create Classes and Records. You can quickly learn that by going through the following guides:
What is a "Query"?
In the database world a Query is how you ask a database for a specific subset of itemsbased on some conditions. In the case of Noodl, you ask your Backend for all Records in a Class that fullfills one or many conditions. An example of a query, in words, would be "Give me all Records in the Class Task where the property isDone is false".
Making a Query
First make sure you have started a project with an active Backend with some data available in one or more Classes. Following the previous cloud data guides, we will use a Class called Task, with a bunch of items with the properties task - a description of a task, and isDone - a boolean value that is either true (the task ha been completed) or true (the task is not completed yet).
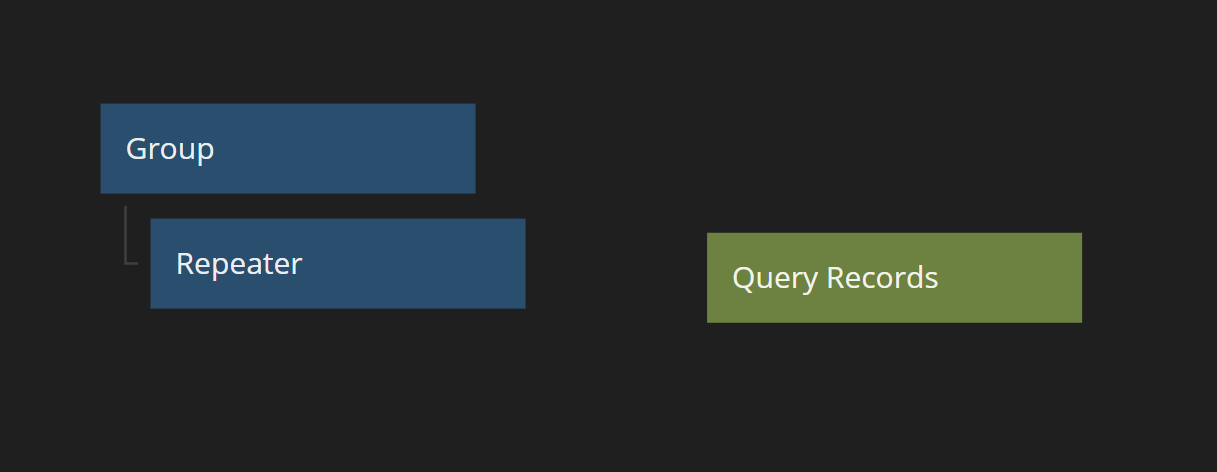
Lets start with an empty project. You can for example use the "Hello World" template and remove the text node. Add a Repeater node as a child to the main Group. We will need the Repeater later to visualize the results of our query.
Then create a Query Records node.
First we need to select which Class this Query Records node should be applied to. You do that by clicking the node and select a Class from the Class dropdown. You should expect to see all Classes you created in this dropdown. If you for some reason don't see them, you probably havent connected to the right backend.
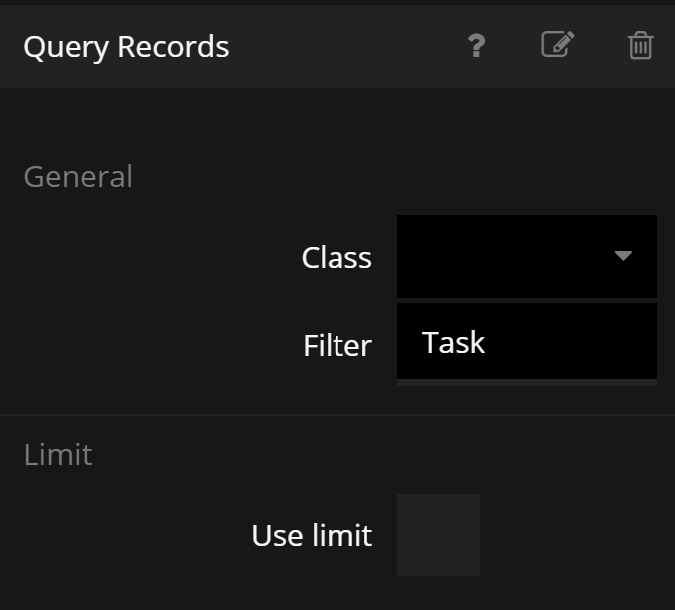
Leave the other settings for now. Since we don't add any conditions ("filters" as they are called in Noodl) this query will return all Records in the Task Class. Or actually not always all, since Noodl will have a default limit on 100 Records for a Query, to avoid flooding the network if the Class contains a large amount of items. You can change the limit, by checking the Use Limit checkbox, but we will not touch that right now.
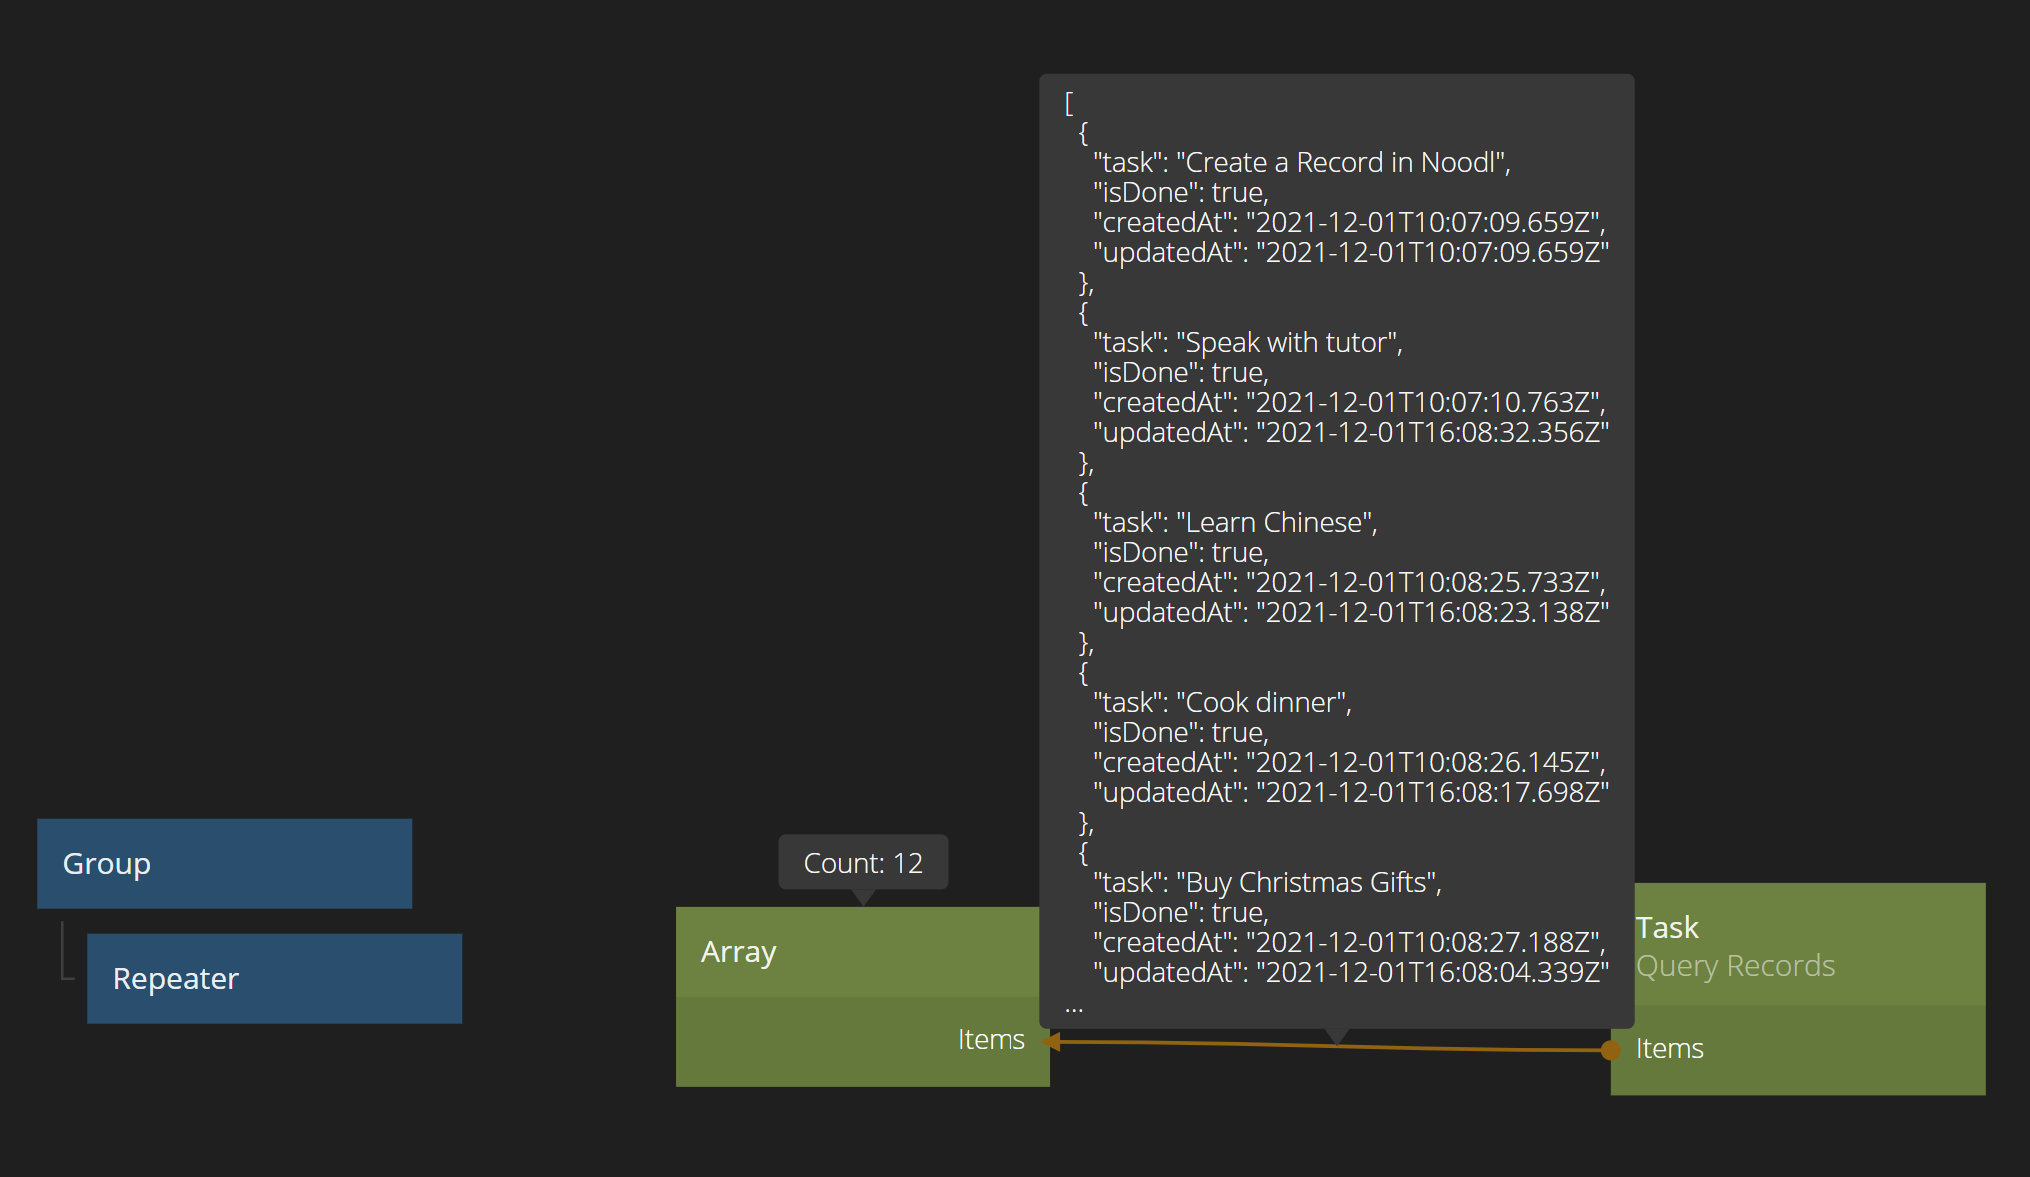
To get a first look at we get back from the Query, create an Array node to store the results in. Then connect Items from the Query Records node to the Items input on the Array. You should immediately see the result of the query if you hover over the connection between the two nodes to see the debug info.
Noodl automatically runs Query Records as soon as they are created unless the input signal Do is connected. Since queries and the result of queries are sent over network its sometimes important to control exactly when the query should be performed. In those cases connecting the Do signal to control when the query is performed is important. However, in this simple example we don't care about that so leaving it unconnected is fine.
Visualising the query results using a Repeater node
To visualize the results we need to do a little bit of Noodling. We need to create a simple list item that can represent each Record.
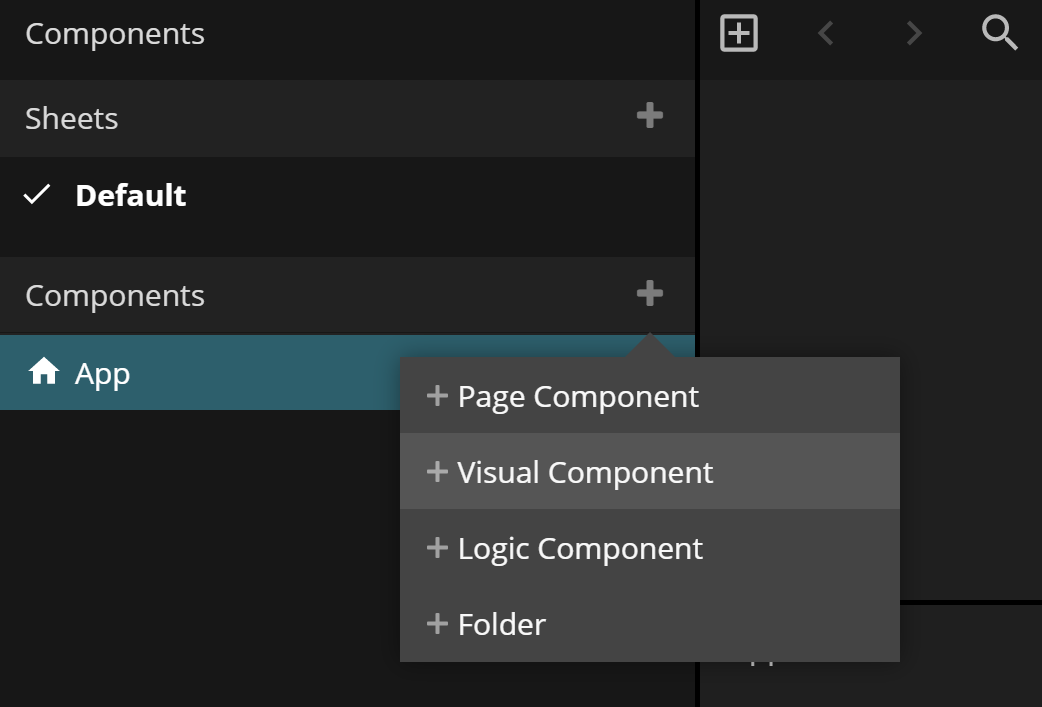
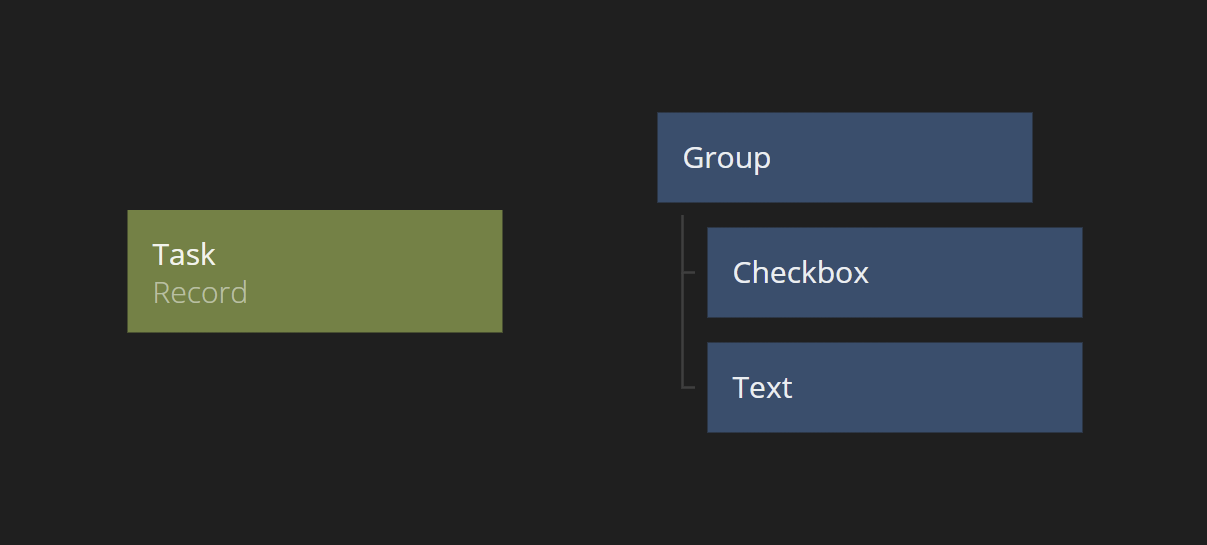
Create a new visual component by clicking the "+" icon under components and then selecting Visual Component. Give the new component a good name, we will call our item "Task Item" as it will represent one task.
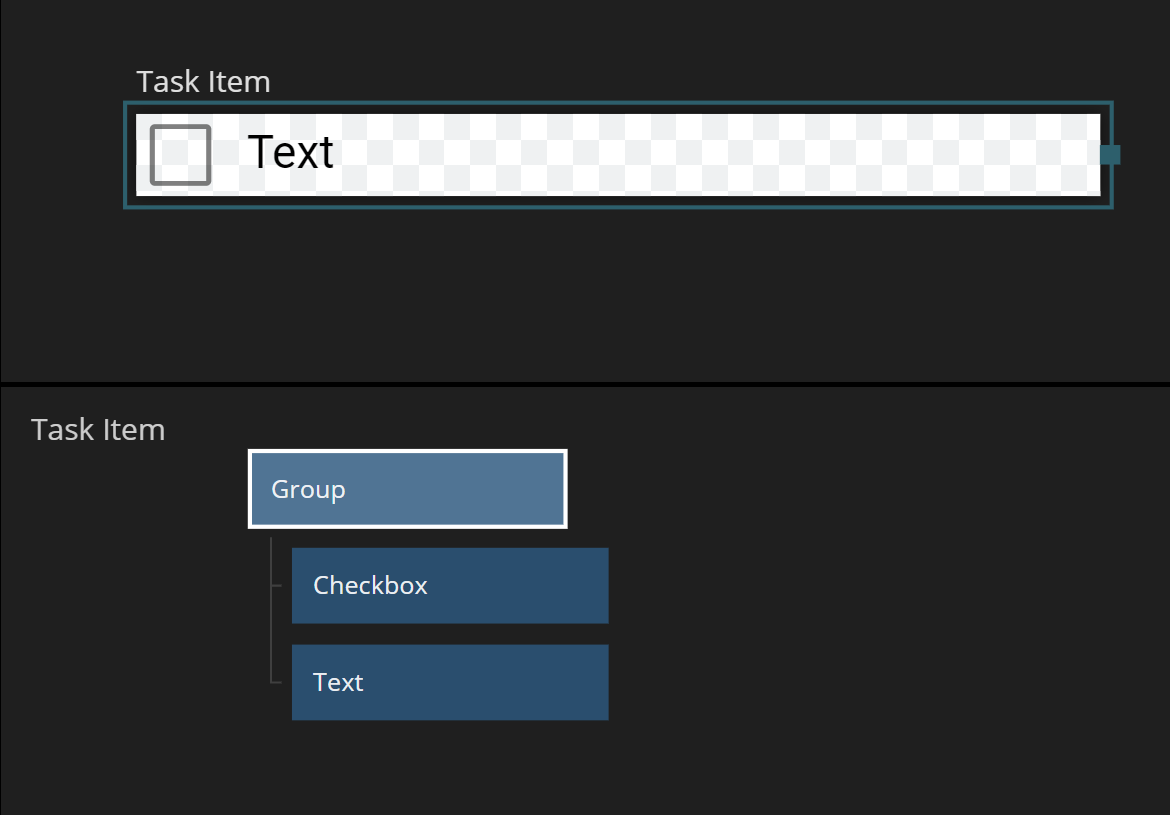
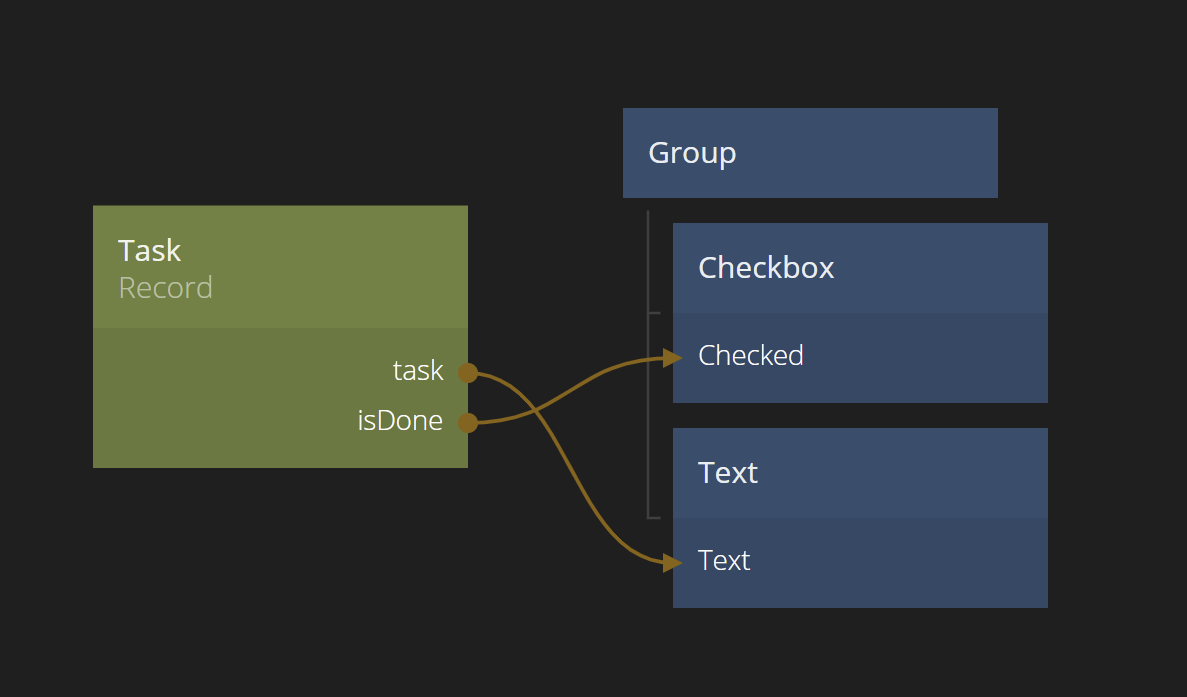
In the visual component add two nodes under the existing Group node, one Checkbox and one Text node. The Checkbox will represent the isDone property, while the Text node holds the description of the task. Also clean up the layout by setting the layout of the Group to Horizontal and add som padding and margins. Also the label of the Checkbox was removed.
The looks don't matter right now and if you work with different kind of data your list item will look a little different.
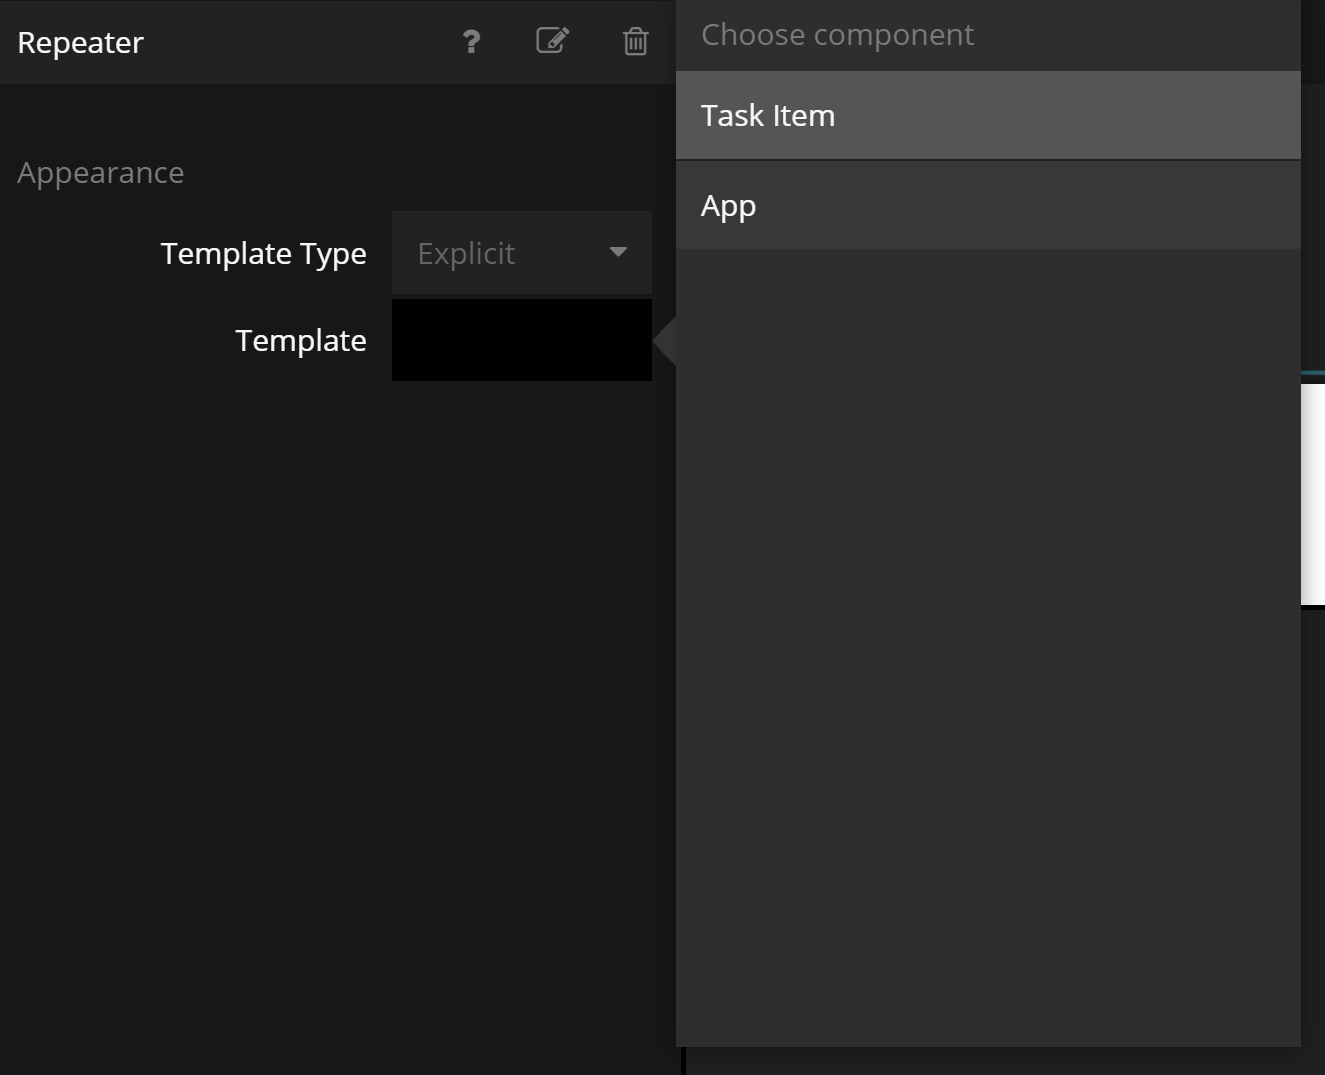
Next we go back to our main App and set the Template of the Repeater node to use our newly created Task Item.
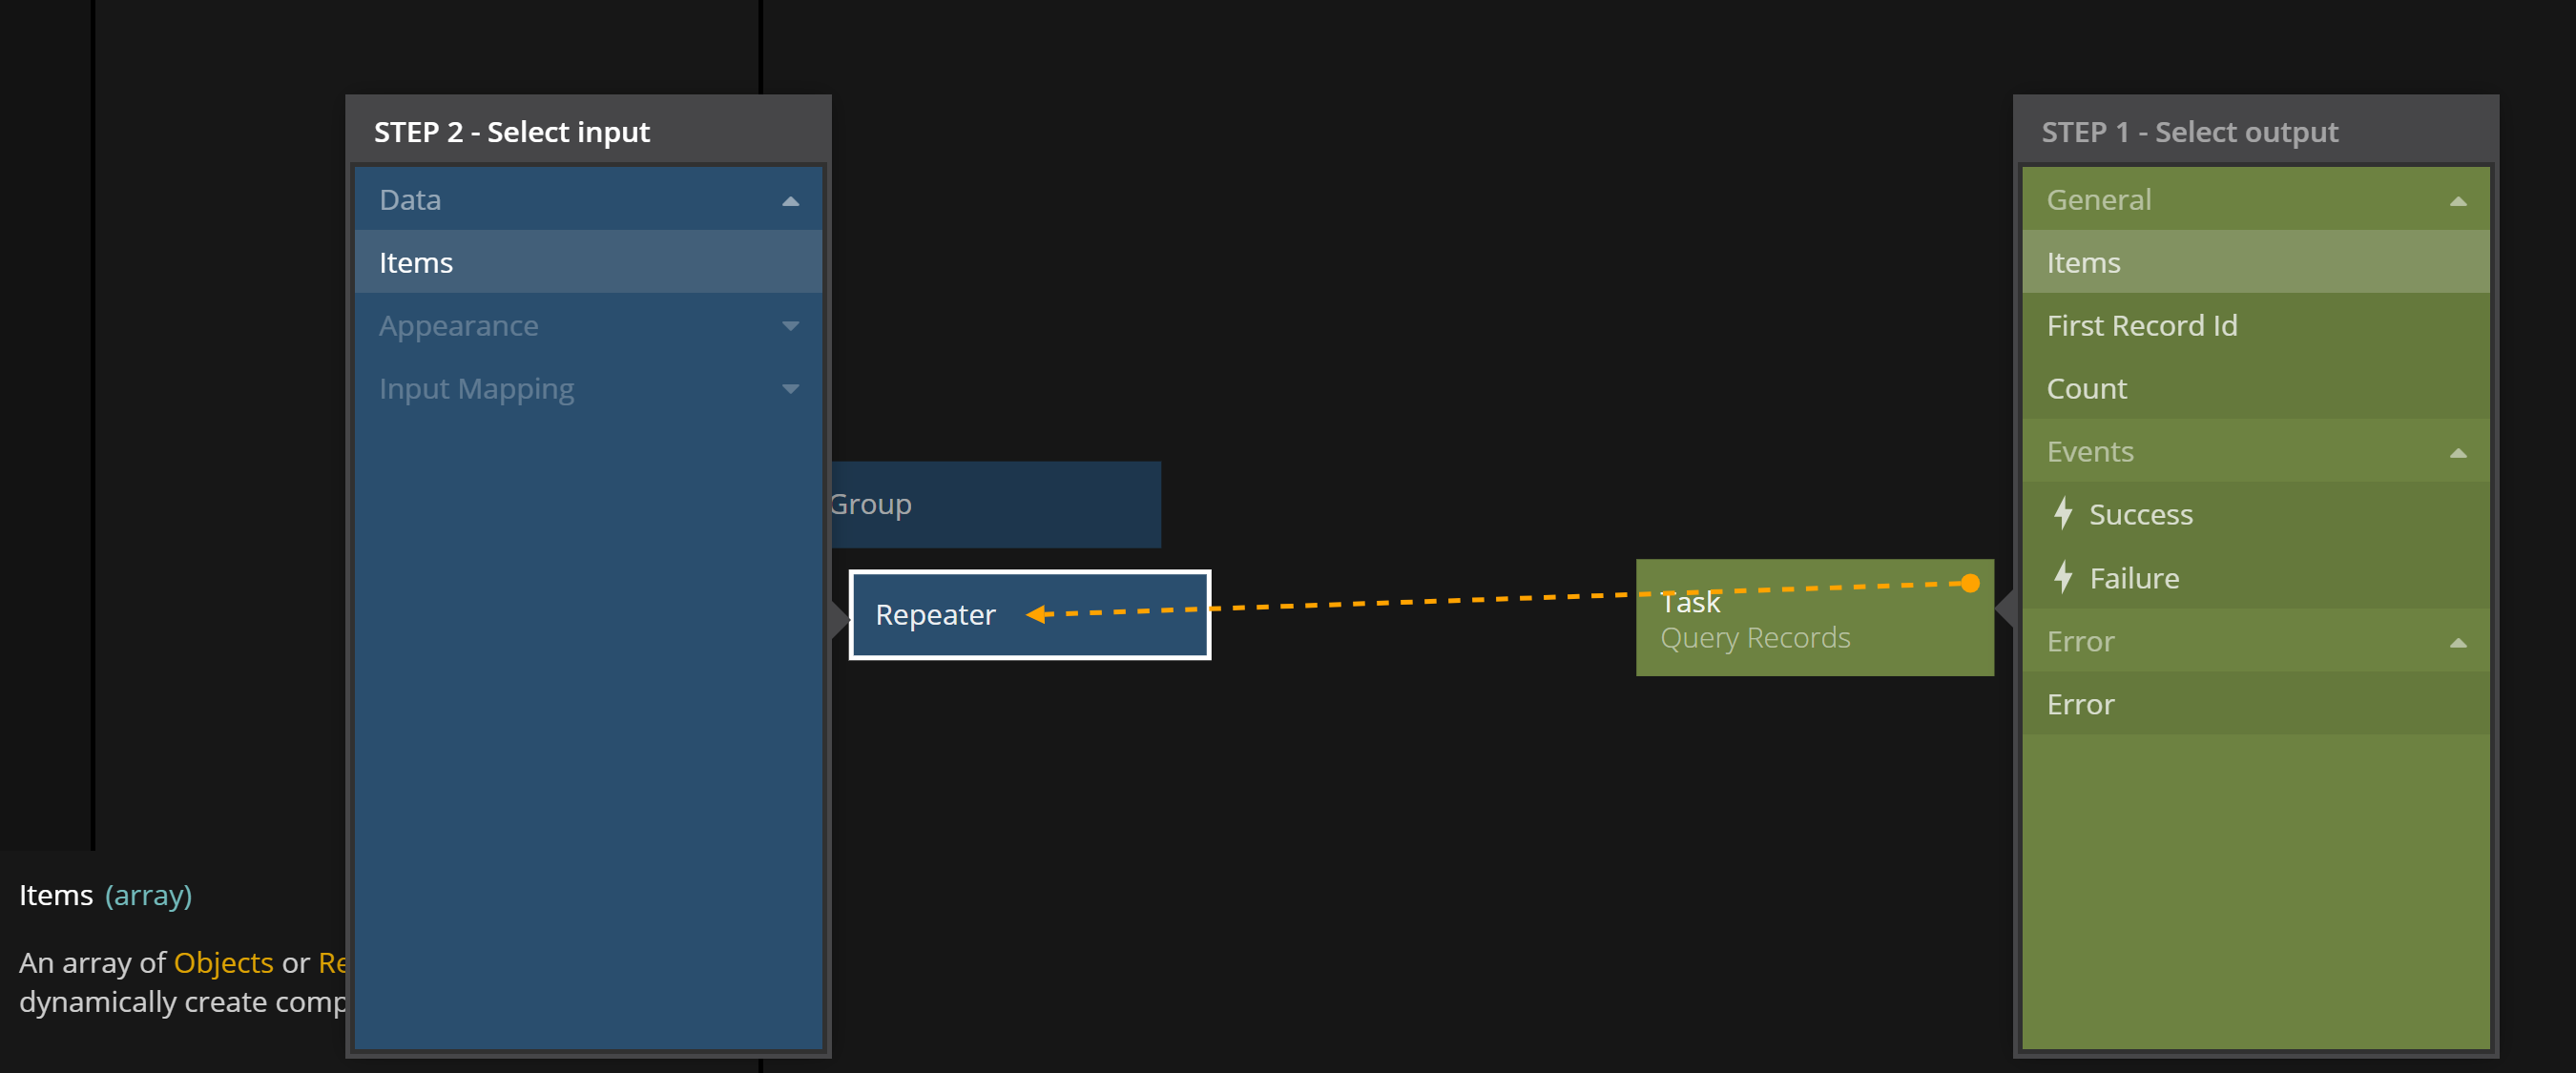
Finally, we delete the Array node we created earlier and feed the result of the query results directly into the Repeater node by connecting Items in the Query Records node to the Items input in the Repeater.
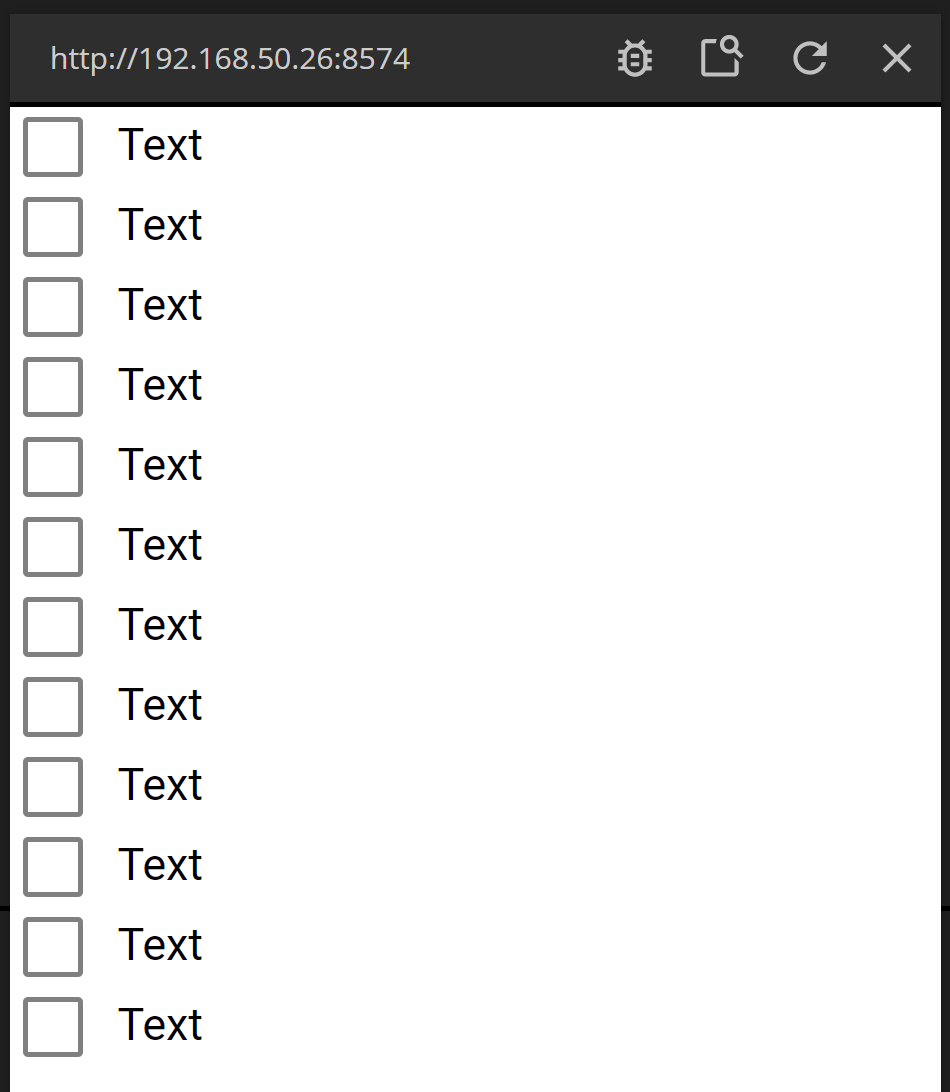
After the connection is done you should see that your list now contains a bunch of items, in fact, it should contain as many items as your Class has.
The Repeater node has created one instance of the list item per Record.
The only problem is that the items does not show the content of the Record. To fix that we need to understand how the Repeater node deals with an Array of Records.
Repeater and Records
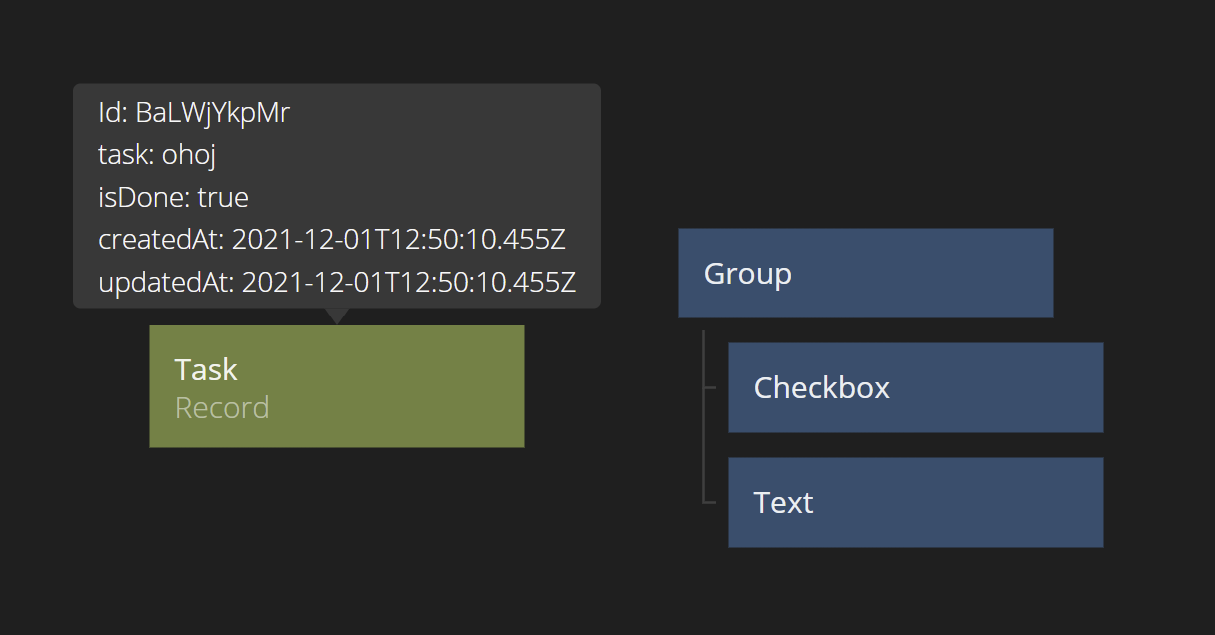
To get the items to show the right data, we need to get hold of the Record holding the right data. We do this by using the Record node. Add a Record node to the previously created list item. Click the node and make sure its Class is set to the class you want to display, in this guide we will point it to the Task Class.
Now the Id of the Record comes into play - we need to set it to the Id corresponding to the Record that the list item represent. It will obviously be different for each list item. Luckily, the Repeater node solves this. It will assign the right Id to the right list item. See image below.
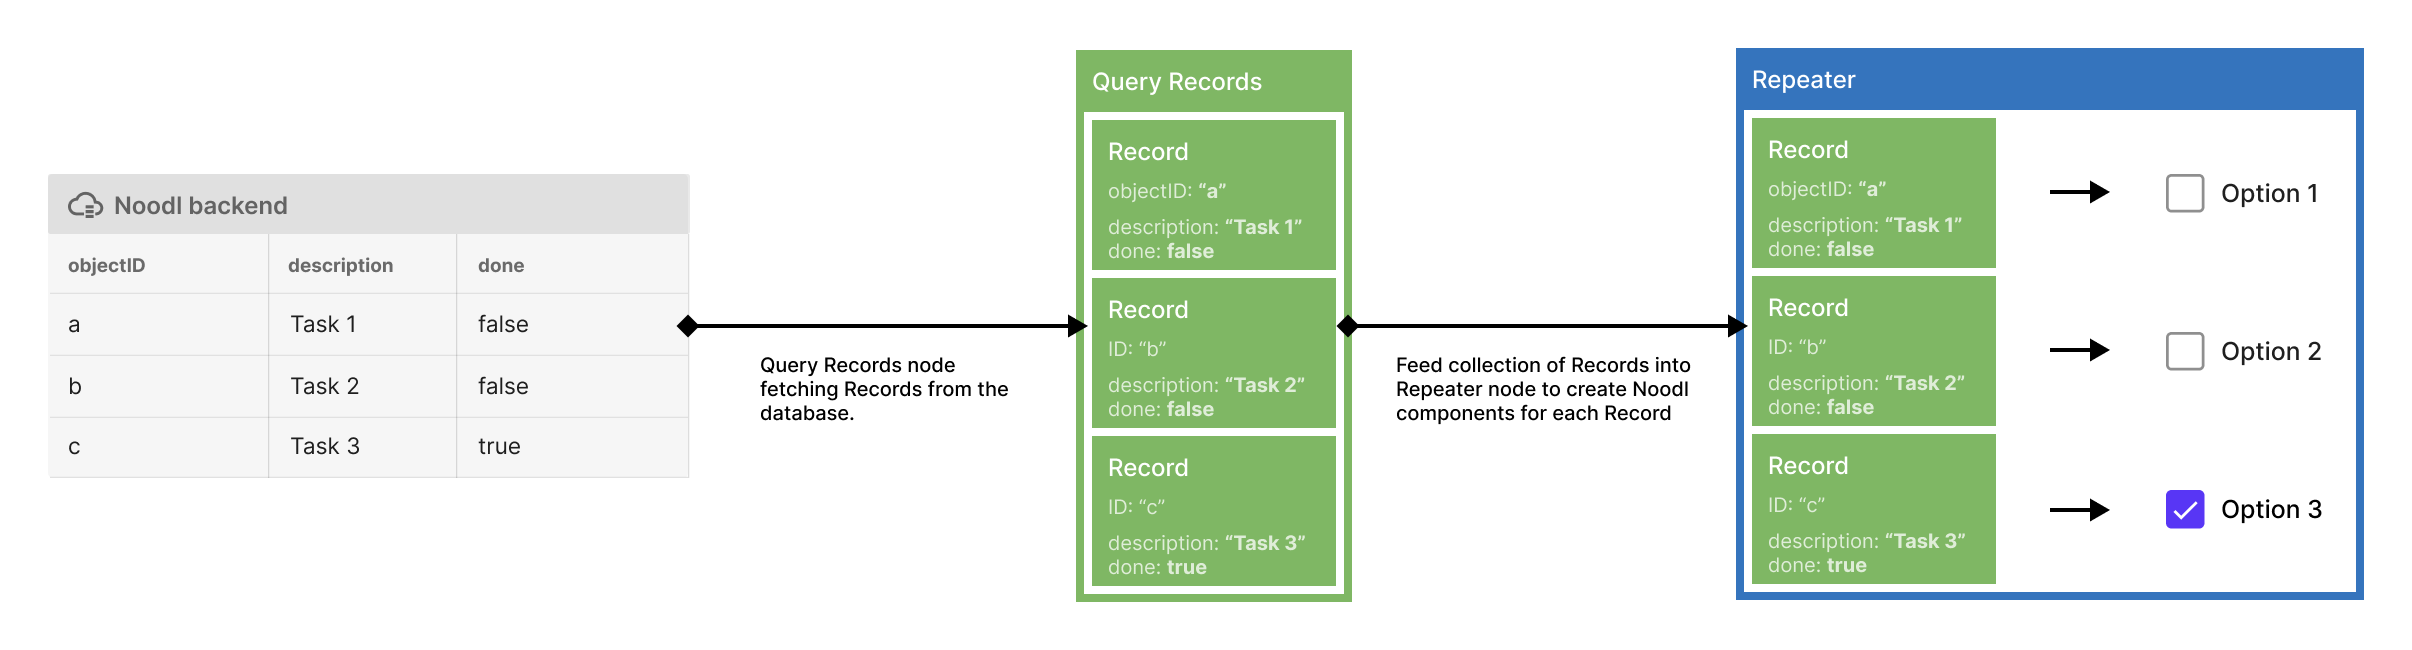
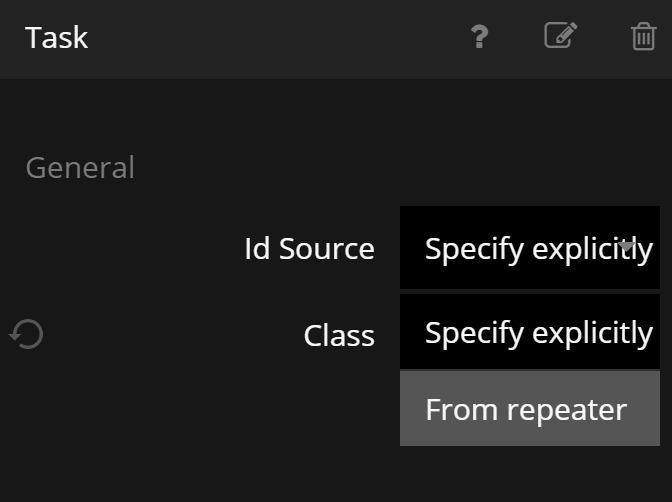
The only thing we need to do is to tell the Record node to pick up its Id from the right place. Click the Record node again and change the Id Source to From repeater.
Now if you hover on the Repeater you should see that its filled with data for one of the list items.
Finally, lets connect the data of the record - its properties - to our Text node and Checkbox.
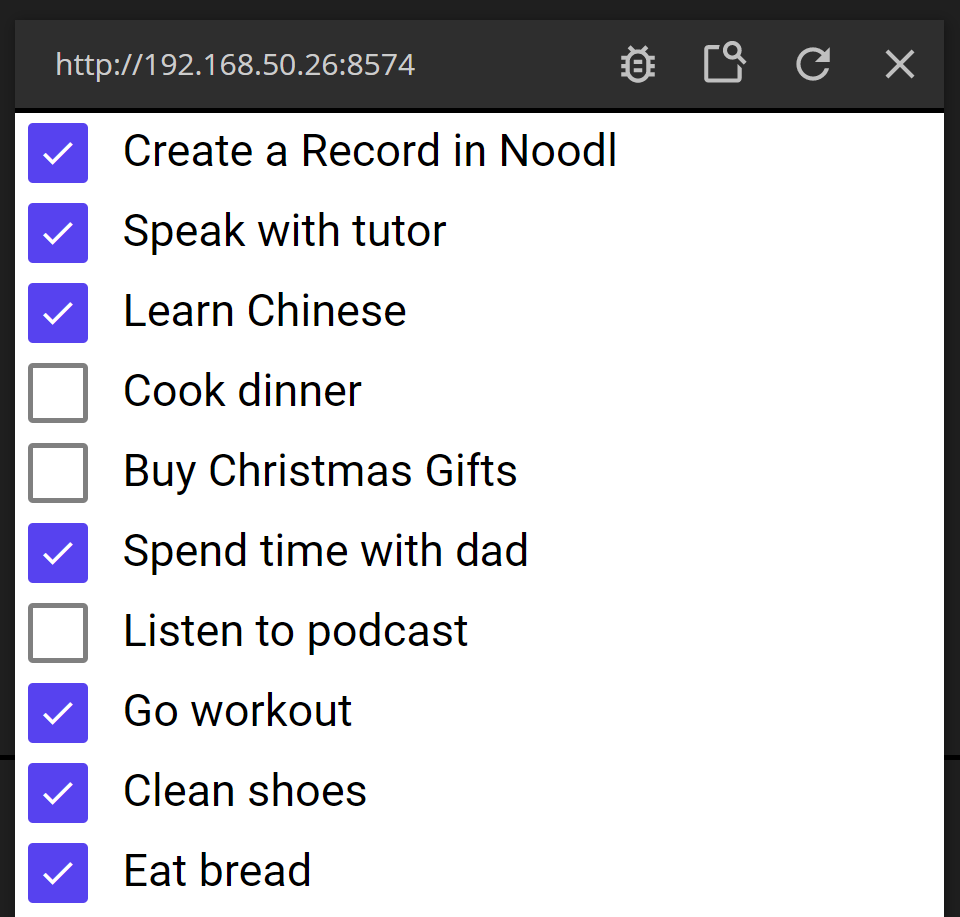
You should now be able to see your Records in your app.